Nightmare in Vegas - Atrium with Golden Sculpture - Upper Level
"The Motherland Calls" Achievement/Trophy
NOTES: The main walkthrough includes an overview of this area including a note on a possible game-breaking bug that may be triggered if you explore in ways the developers didn't intend.
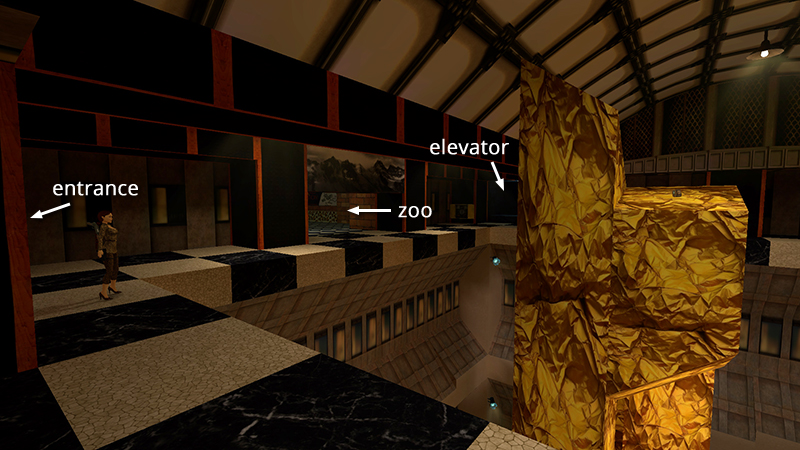
In the first section you rescued Winston from the mob, collected a HOTEL KEY, and used it to enter this new area. Here on the top level of this very tall room you'll find, clockwise from the entrance, a ZOO, a BROKEN ELEVATOR (it's missing a part, which you'll find shortly)...
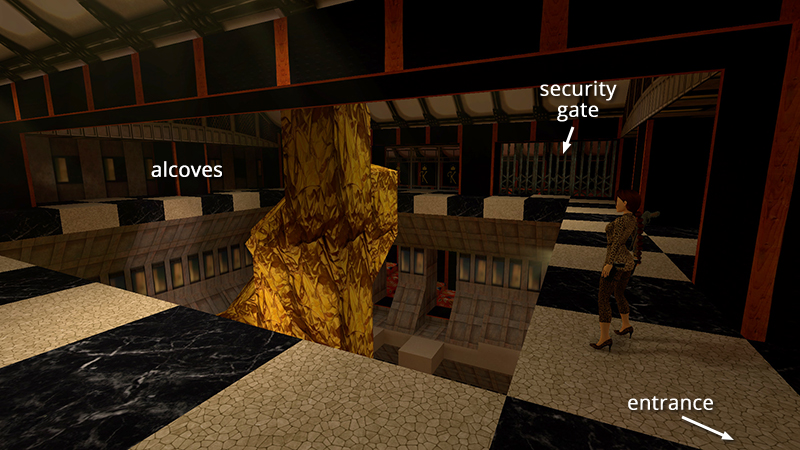
...a couple of empty alcoves, and a GLASSED-IN HALLWAY WITH A GARISH CARPET (barred by a metal gate at the moment). There is no single correct order to cover this area. Here I present one possible route that includes all kills and pickups.
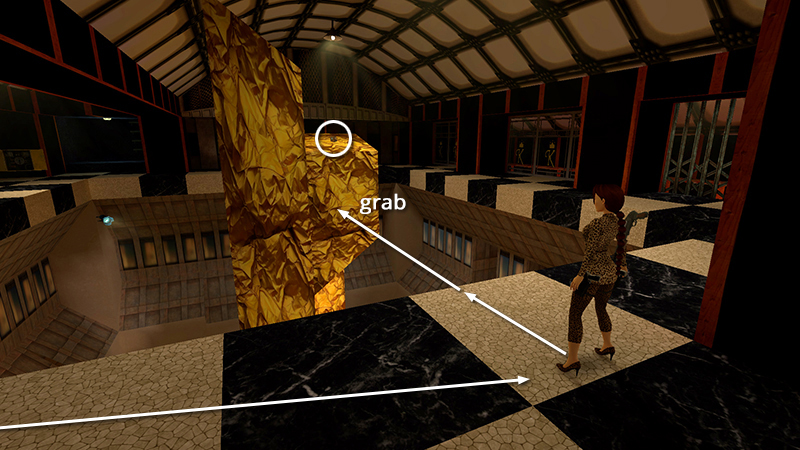
Starting in the doorway where you enter the ATRIUM from the hallway near the HOTEL ROOMS, turn right and follow the black-and-white tiled walkway about halfway across this side of the room. Turn left to face the huge, golden sculpture. Then take a running jump to grab the side of the sculpture just below the large medi pack (18). (Many, though not all, of the sculpture's textured surfaces are climbable.)
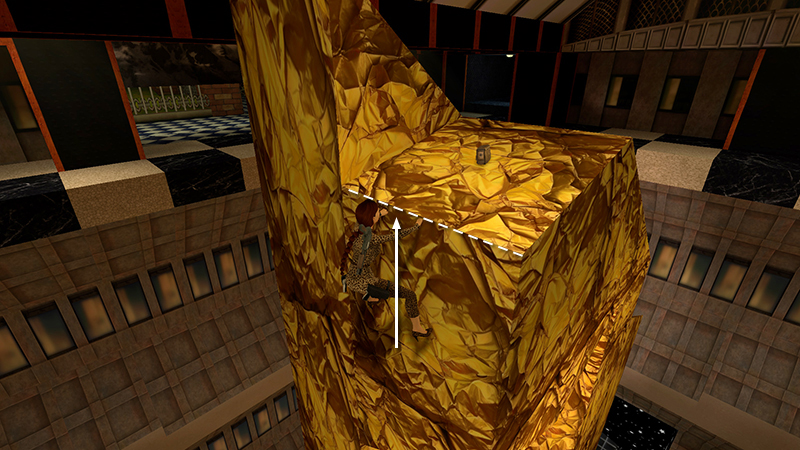
To unlock the achievement/trophy "The Motherland Calls," you must "do a handstand on the top of the sculpture." So, climb up just until Lara's hands are hanging onto the top edge.
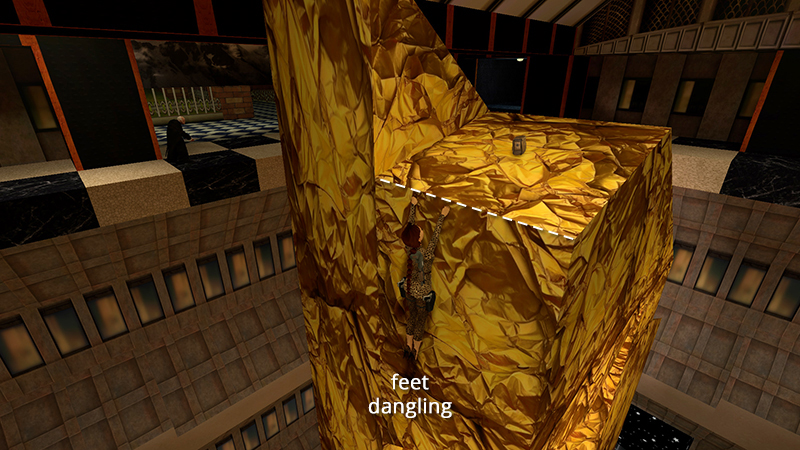
Briefly release and re-press Action, so her feet dangle free...
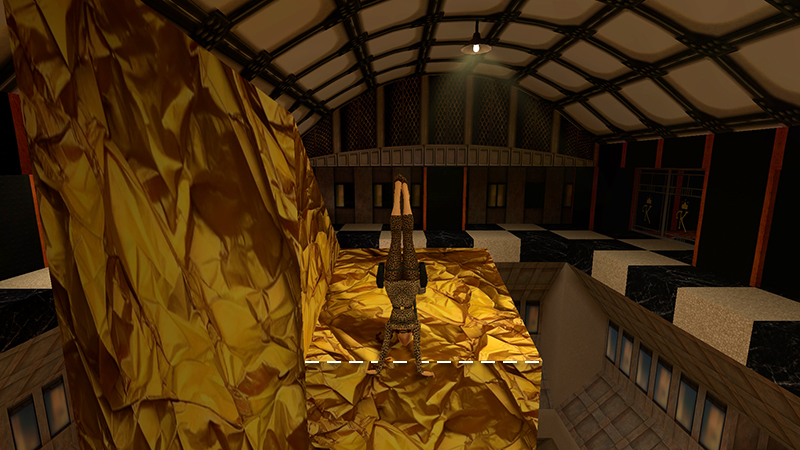
...then quickly press Walk + Forward/Up to pull up into a handstand walkover.
Or, if the timing is too tricky, instead pull up so Lara is standing near the medi pack. Then hop back, grab the edge, and before her feet can come up onto the climbable surface, press Walk + Forward/Up to do the handstand.
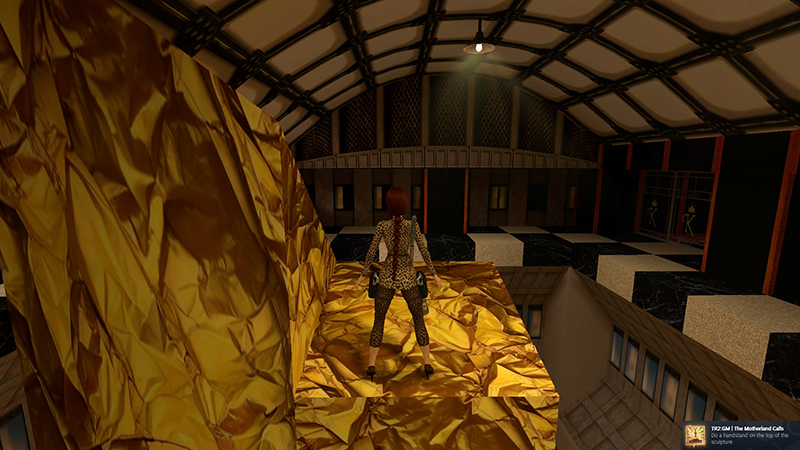 Good job! Now, don't forget to take the medi pack. ;)
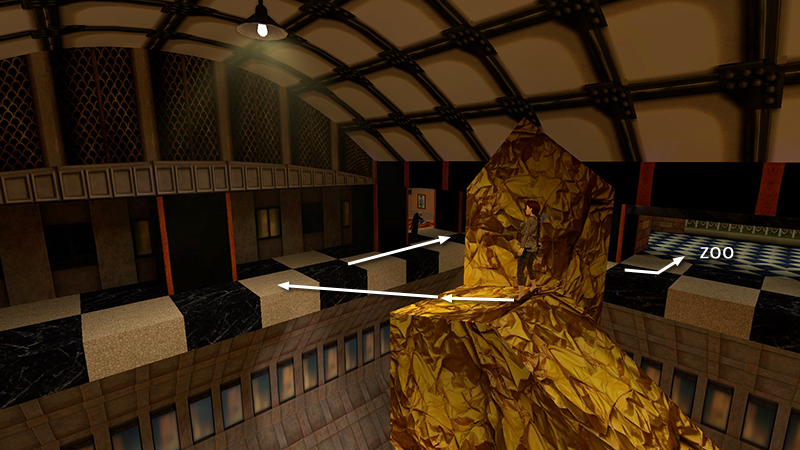
Turn around and take a running jump back to the black-and-white walkway. Follow it around to the right and enter the ZOO.
DARK MODE: I plan to add optional dark mode for these pages, but my current priority is updating the walkthroughs. Meanwhile, may I suggest a reputable dark mode browser extension, such as Dark Reader? (Download only from trusted sites, like darkreader.org or your browser's official add-on/extension site.)
Walkthrough text and diagrams copyright © Stellalune (email ). Feel free to copy or print this walkthrough for personal use. By all means, share it with friends, but please include this credit line so people can send me their feedback. No part of this walkthrough may be reproduced on another site without permission.