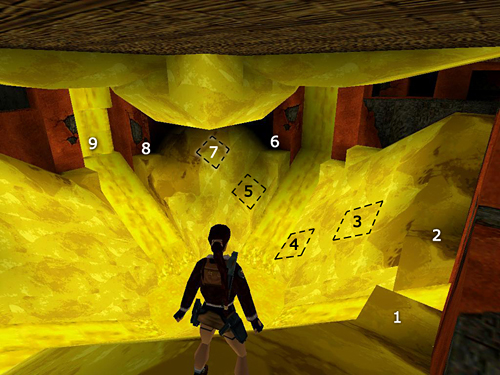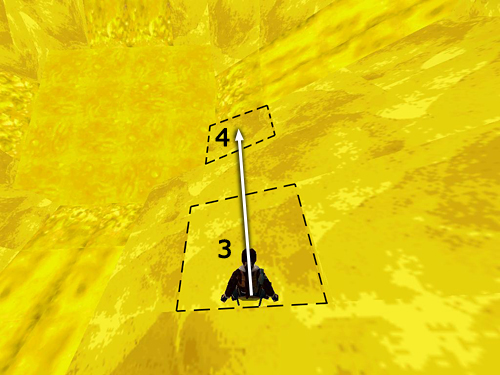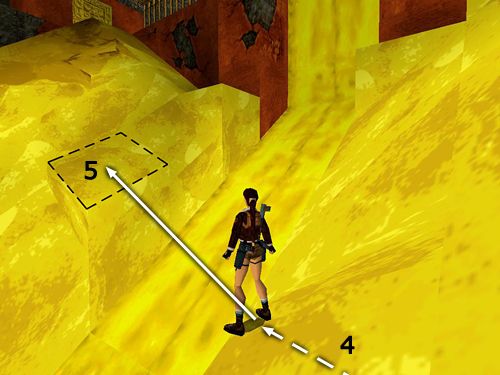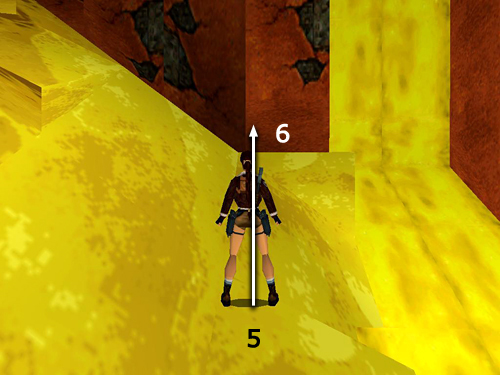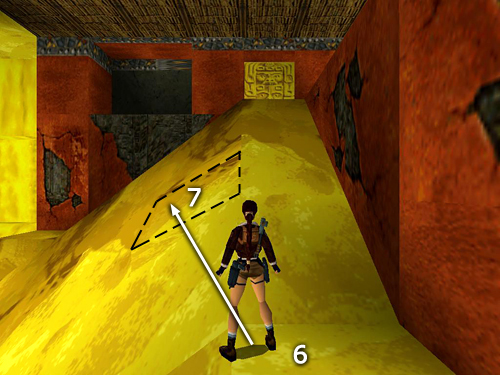
This first screenshot shows an overview of the route across the golden slopes. Each step is detailed in the screenshots below.

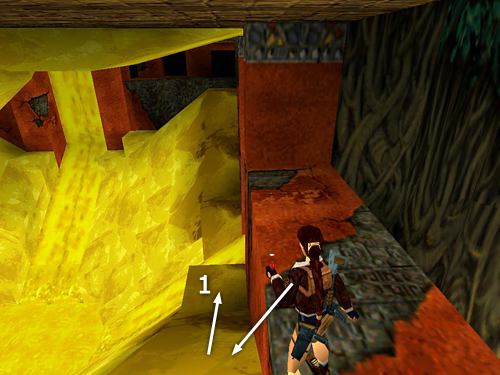
Step off the orange ledge and slide down the slope to land on a flat spot below on the right (1).

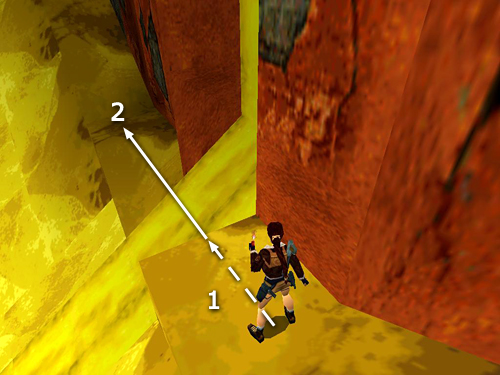
Take a running jump across the flowing stream of gold to the next flat square (1 to 2).

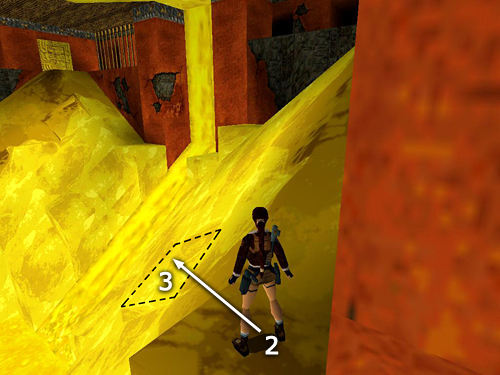
Position Lara at the CENTER of this square and turn about 45 degrees to the left. Take a standing jump to the more or less flat spot in the lower middle of the golden slope (2 to 3).

Turn so the pool of molten gold is ahead and to Lara's left. Take a standing jump from the BACK of the flat square to another flattish spot two squares ahead, at the bottom corner of the slope (3 to 4).

Turn just a little to the right. Then set up and take a running jump to the flat block on the other side of the golden stream, one square higher and to the right (4 to 5). Do not press Action while in the air or Lara will fall short.

Turn right to face uphill. Walk to the top corner of this block and take a standing jump up to the flat ledge between the slope and the golden waterfall (5 to 6).

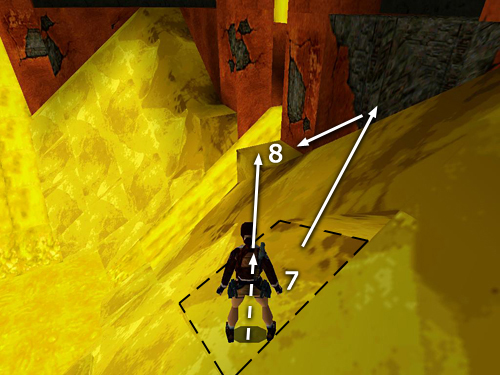
Turn left so the gold door at the top of the slope is straight ahead. Then turn just a little bit farther to the left. Walk forward to the corner of this ledge and take a standing jump to the flattish spot just to the left of the slope (6 to 7).

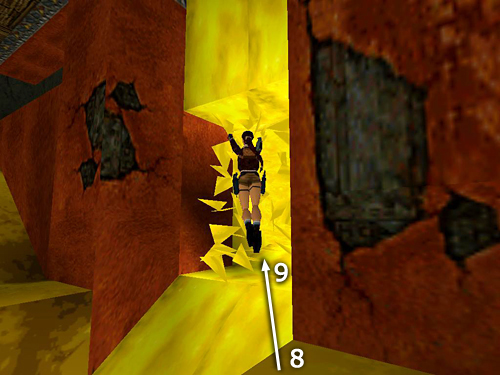
Take a running jump from there down to the flat ledge to the right of the gold wall panel (7 to 8). (Or, instead walk to the top of the flat spot, jump forward to land on the slope near the wall, and slide down onto the flat ledge.)

Move to the edge near the wall and take a standing jump onto the ledge in front of the gold panel, which shatters as you approach.
[Part 2 | Return to the Kingdom Walkthrough]
Copyright © 1999- - Stellalune (). All rights reserved. The screenshots and videos included here were made using Fraps. Feel free to copy or print this walkthrough for personal use. By all means, share it with friends, but please include this credit line so people can send me their feedback. No part of this walkthrough may be reproduced on another site without permission. Follow this link for details about this site's advertising and privacy policy.
|
