Kingdom - Gold Walkway with Trapdoors (Again)
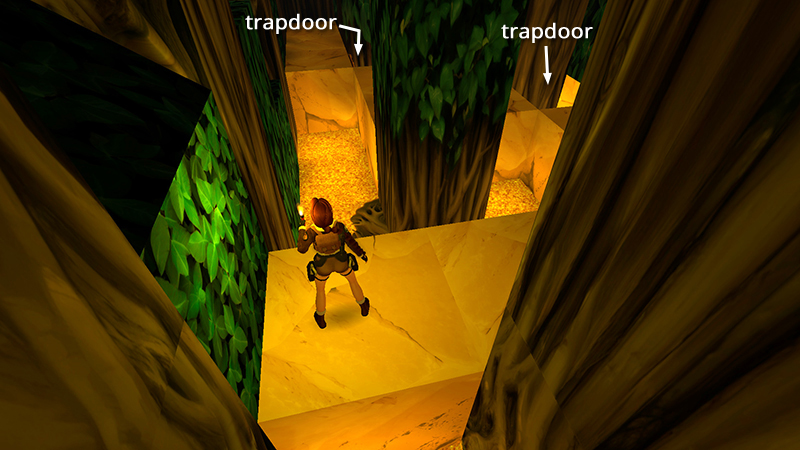
After exploring the side area with the third secret (or not), you're now back on the GOLD WALKWAY. As noted earlier, walking or jumping over certain tiles on this walkway triggers the opening or closing of various trapdoors.
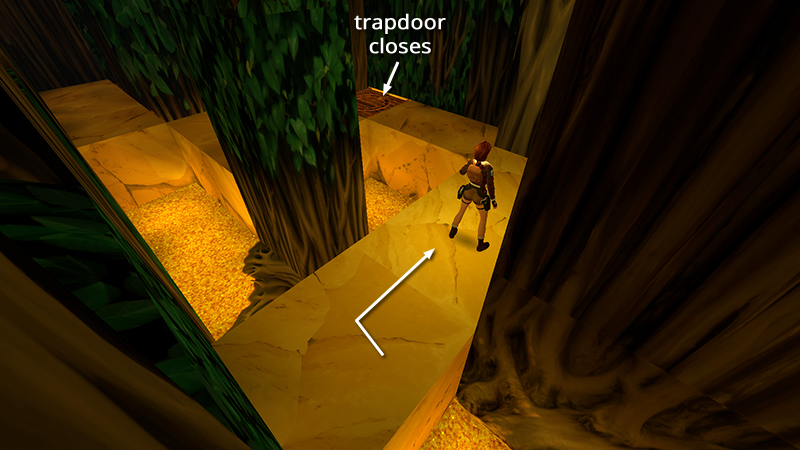
Move onto the second tile in the walkway to close the first trapdoor.
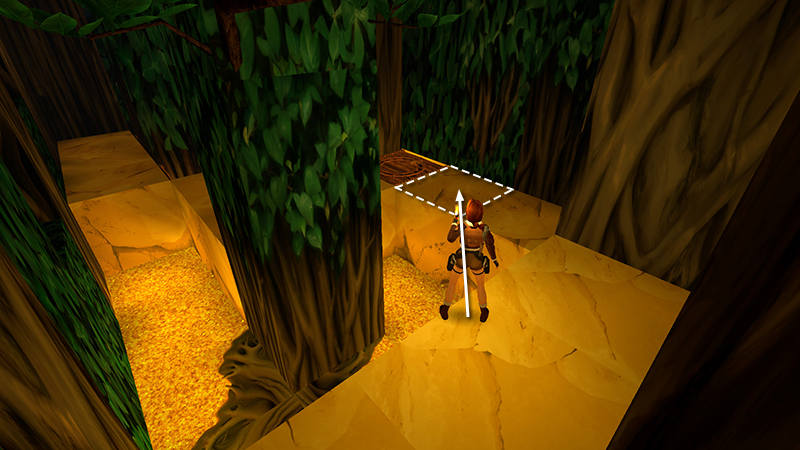
Then avoid the third and fourth tiles by jumping diagonally onto the fifth tile, just before the first trapdoor.
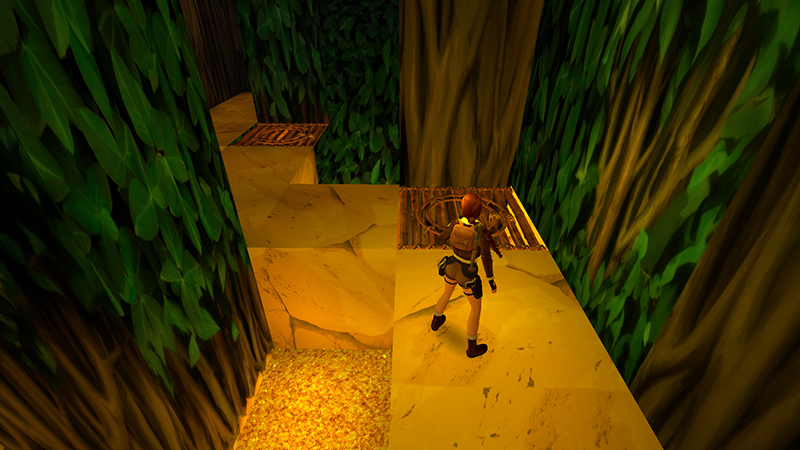
This way the trapdoor will remain closed. (The second trapdoor also closes, but that doesn't matter right now.)
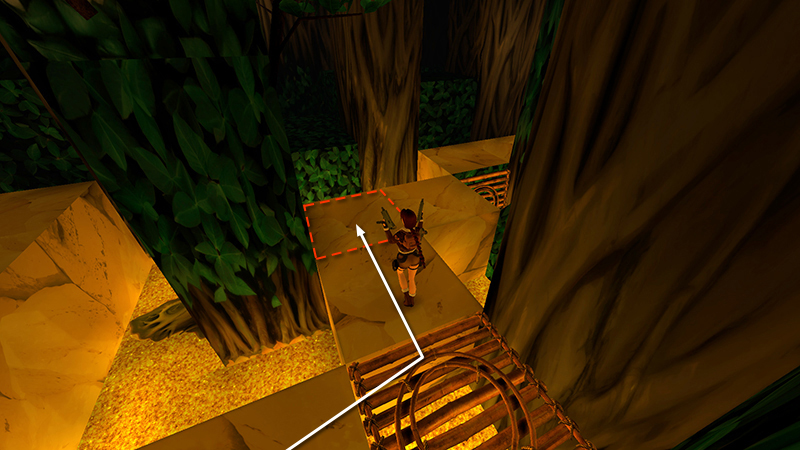
Walk onto the first trapdoor, turn left, draw weapons, and move two tiles forward.
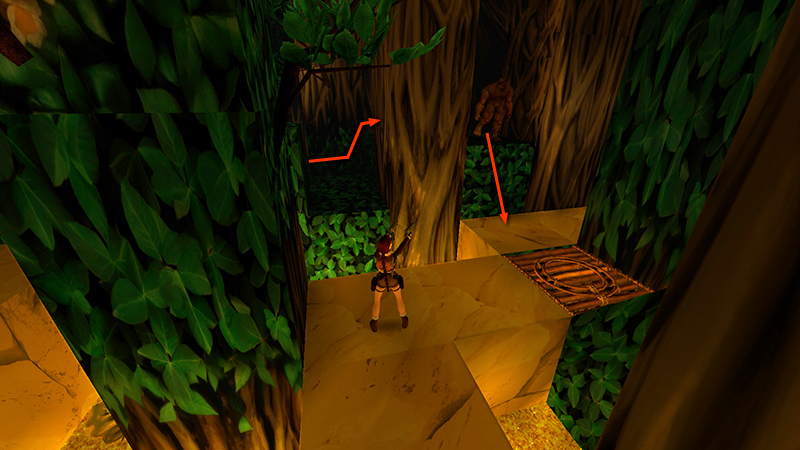
When you do, a sasquatch (17) emerges from the dark opening in the greenery ahead. Shoot it as it approaches.
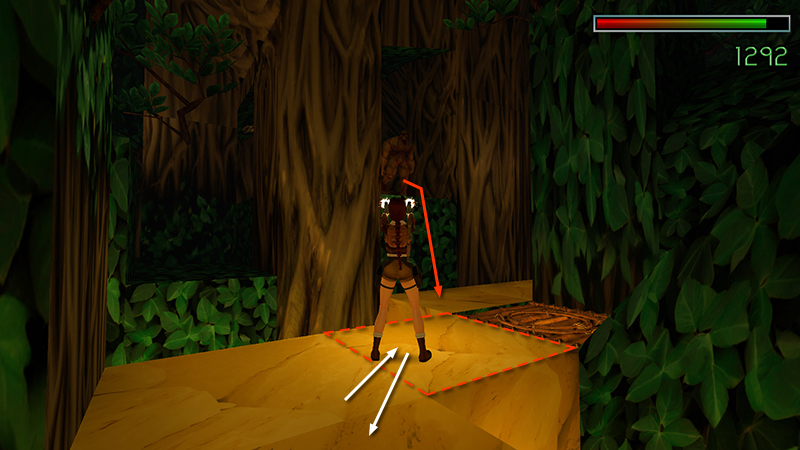
Then step onto the to the tile nearest the second trapdoor to draw out a second sasquatch (18). Back up carefully as you shoot it.
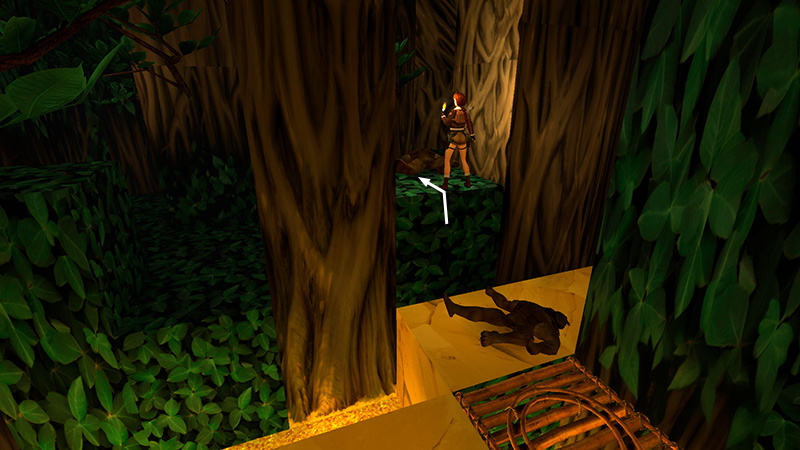
Continue along the walkway. (The second trapdoor opens then closes again as you go. There's nothing interesting below.) Climb into the opening the sasquatches came from.
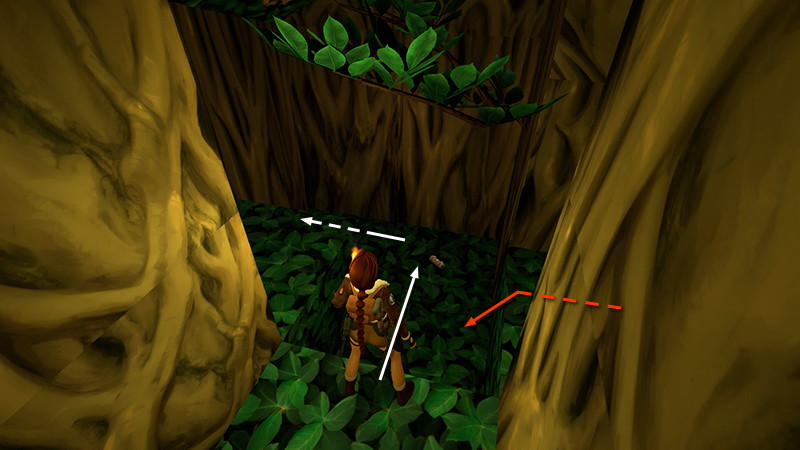
Approach the small medi pack (38) on the ground ahead, but don't pick it up yet. A third sasquatch (19) comes through the dark opening on the right. There isn't much room to maneuver here, so either roll on the spot and use a grenade, or run to the left...
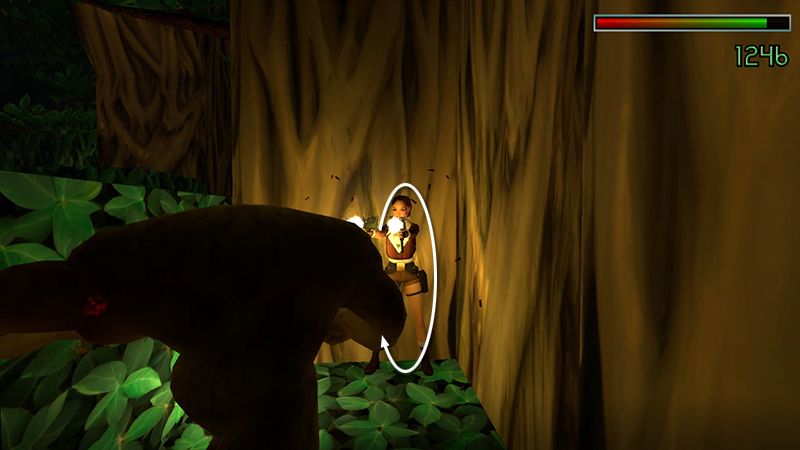
...roll, draw Uzis, and shoot the creature as it charges.
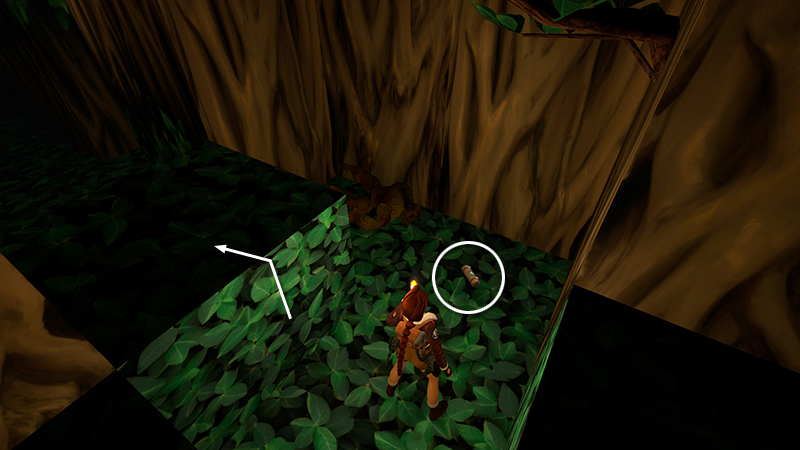
Then collect the health pack. There are two more pickups in this area: First, climb onto the leafy block to the left of the medi pack (i.e., left when Lara's back is toward the gold walkway).
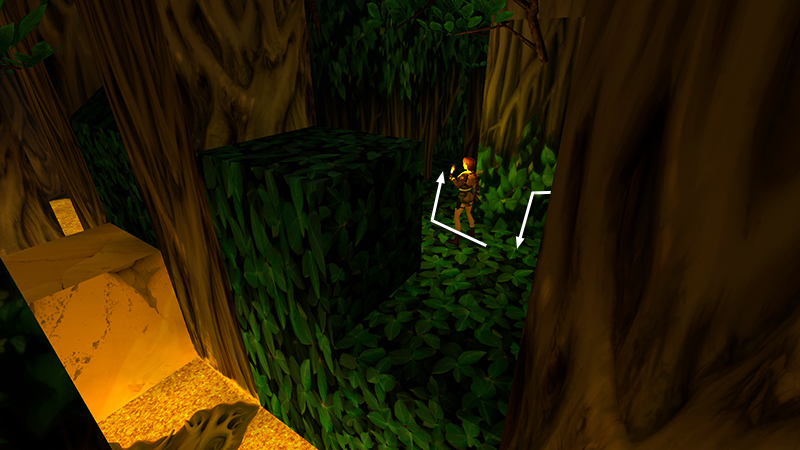
Hop down on the other side. Then head for the far right corner...
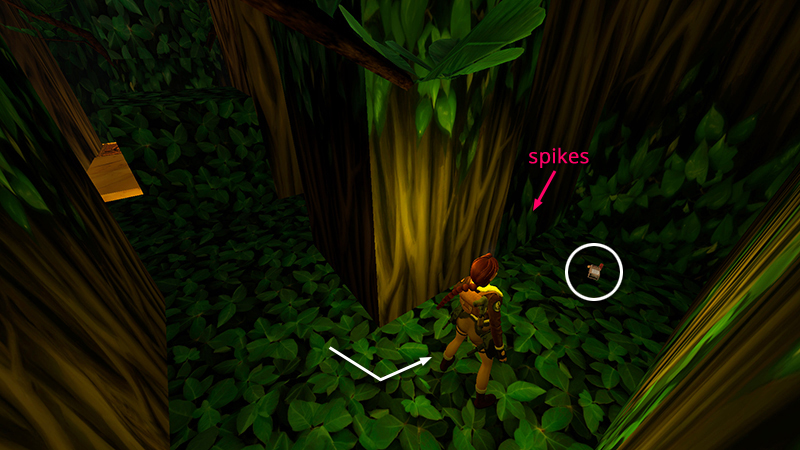
...to find some shotgun shells (39) sitting near a spike pit.
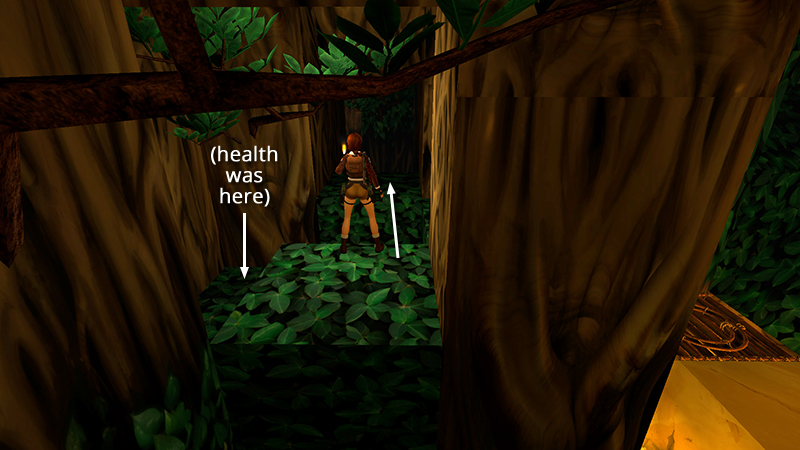
Return to the area where you found the medi pack. This time, continue forward into the other dark area.
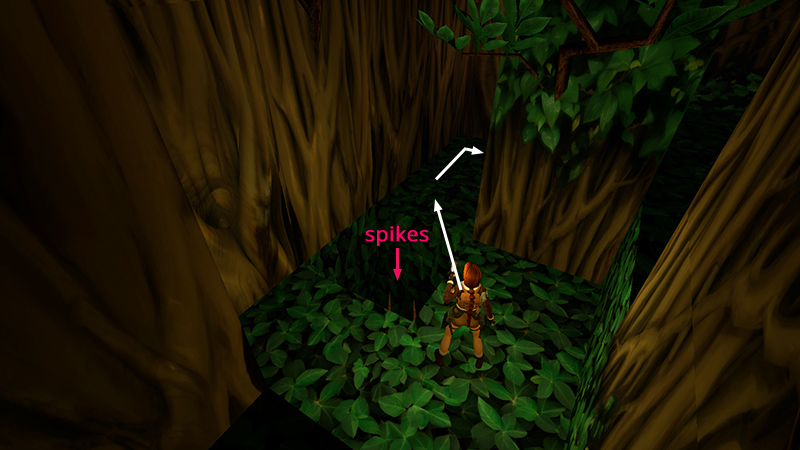
Carefully hop over another spike pit and continue around the corner...
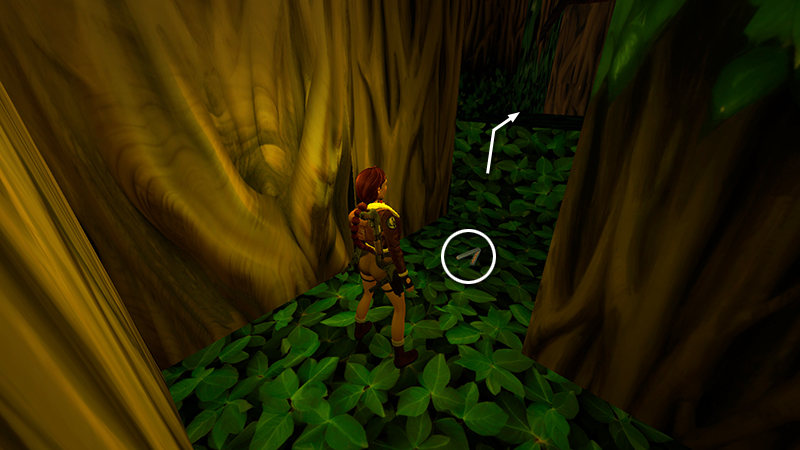
...to find some Uzi ammo (40). When you have it, vault onto the green ledge ahead...
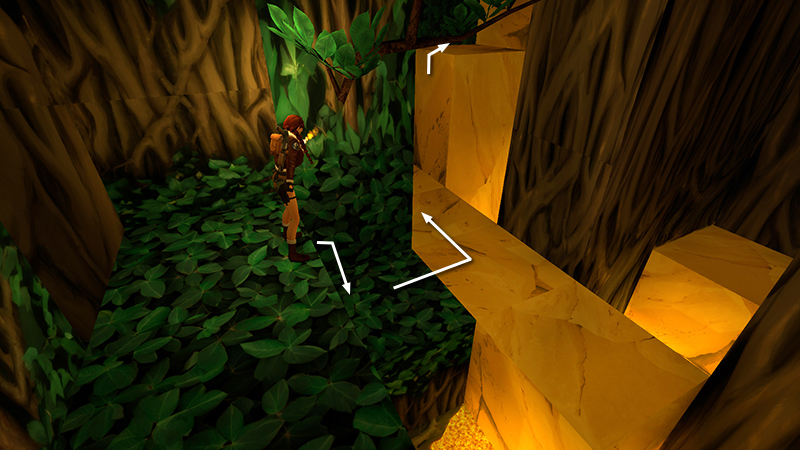
...then hop down onto the gold walkway. Turn left and follow the walkway to the end. Climb the tall, golden blocks...
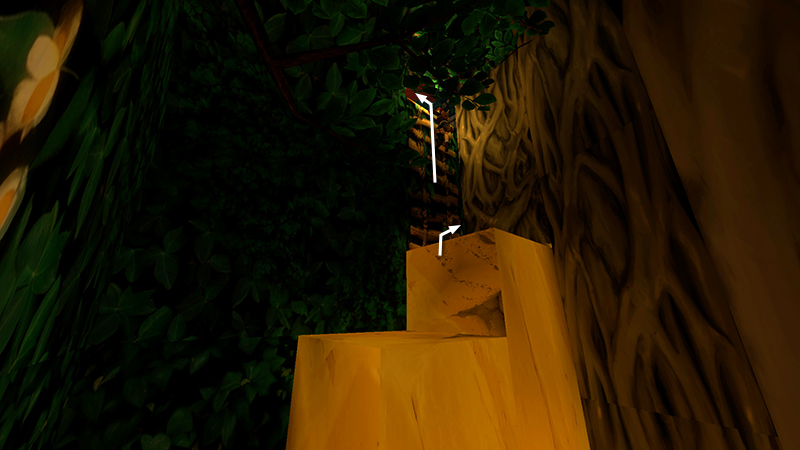
...then the short ladder.
NOTE: There are two more trapdoors on the walkway, but there's nothing but lava beneath, so you can safely ignore them.
[Previous | Next | Kingdom Walkthrough]
DARK MODE: I plan to add optional dark mode for these pages, but my current priority is updating the walkthroughs. Meanwhile, may I suggest a reputable dark mode browser extension, such as Dark Reader? (Download only from trusted sites, like darkreader.org or your browser's official add-on/extension site.)
Walkthrough text and diagrams copyright © Stellalune (email ). Feel free to copy or print this walkthrough for personal use. By all means, share it with friends, but please include this credit line so people can send me their feedback. No part of this walkthrough may be reproduced on another site without permission.