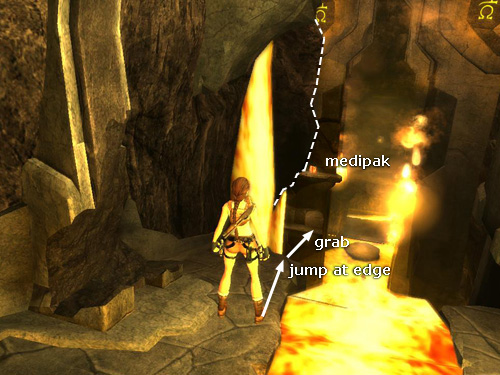
Stand on the left bank of the lava stream, looking downstream over the falls. Ahead on a ledge at about the same height as where Lara is standing now, there's a large medipack. It would be a straight shot except for the rough black rock that juts out of the left wall between you and the medipack (outlined in the screenshot above). But it's possible to make a carefully angled running jump past that rock to grab the handhold below the medipack. Try and stay toward the right side of the bank as you run forward and a little to the left and take off close to the edge. Lara may just nick the side of the jutting rock, but if you angle the jump correctly, she'll get past it and grab the lower handhold.

Once Lara has successfully grabbed the lower handhold, traverse to the left until her feet come up onto the wall, jump up to grab the ledge above and pull up to get the medipack.
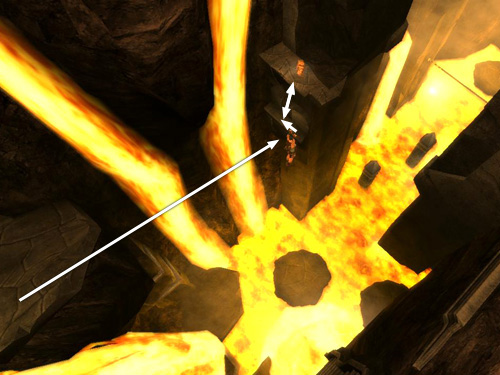
Be careful climbing back down to the lower handhold. Make sure you drop and hang from the middle of the ledge with the medipack, where the ledge is straight and even (at the spot indicated by the double-pointed arrow in the screenshot above); otherwise Lara can miss the grab and fall into the lava.

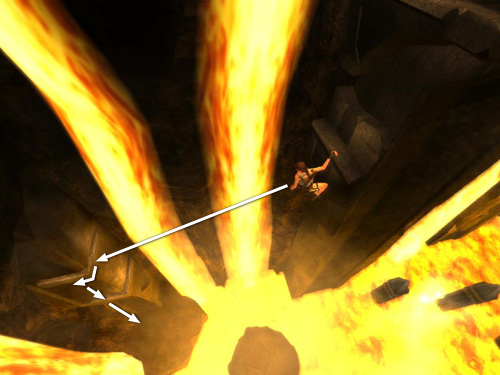
From there, jump back to grab one of the handholds on the square column beyond the double lava falls. Take care not to jump too close to the falls. The middle of this small ledge is a good take-off point. Climb around the corner to the right and drop down twice to reach the ledge below.
[Return to the Final Conflict Walkthrough]
Copyright © 2007- Stellalune (). All rights reserved. The TRA screenshots included here were made using Fraps. Feel free to copy or print this walkthrough for personal use. By all means, share it with friends, but please include this credit line so people can send me their feedback. No part of this walkthrough may be reproduced on another site without permission. Follow this link for details about this site's advertising and privacy policy.
|
