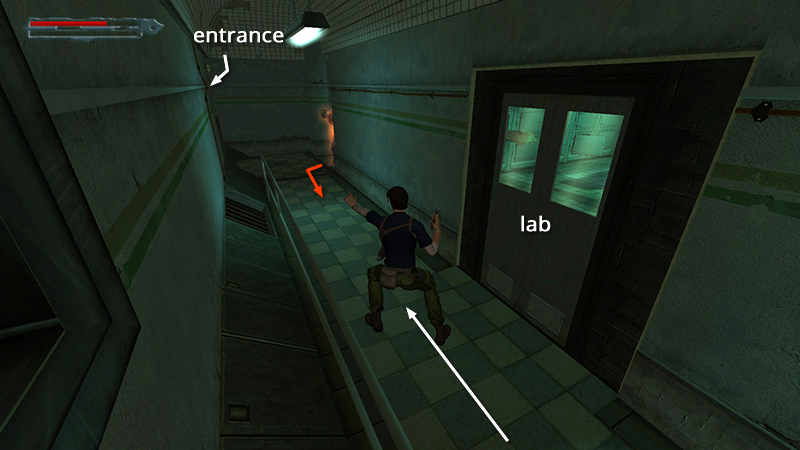
Maximum Containment Area - Laboratory to Proto Containment Area
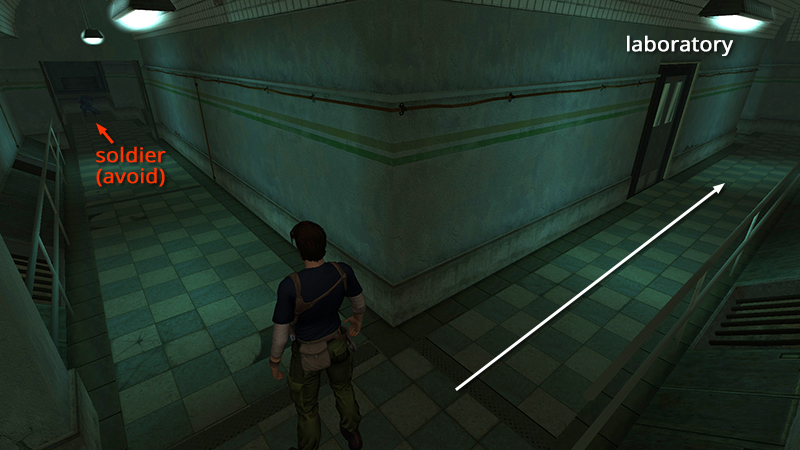
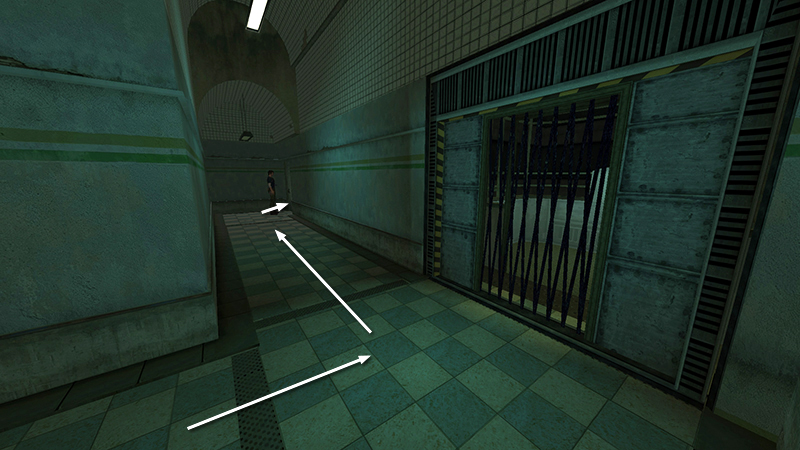
After using the SANITARIUM LOW ACCESS PASS to open the metal doors, as shown in the previous section, Kurtis arrives in a square hallway surrounding a laboratory. This hallway contains several enemies: 2 clawed mutants (6-7) that may approach from either side, and a soldier (not killed) in the duct at the end of the hall directly ahead. Don't approach the soldier, or you'll waste valuable health and ammo. Instead, head to the right, past the laboratory door.
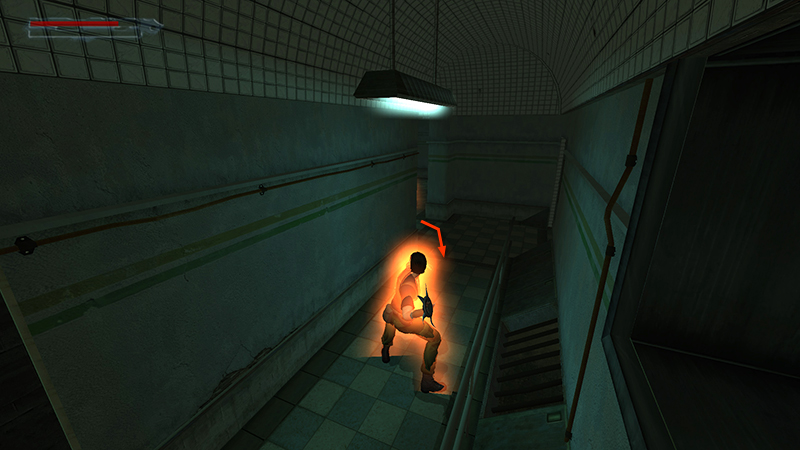
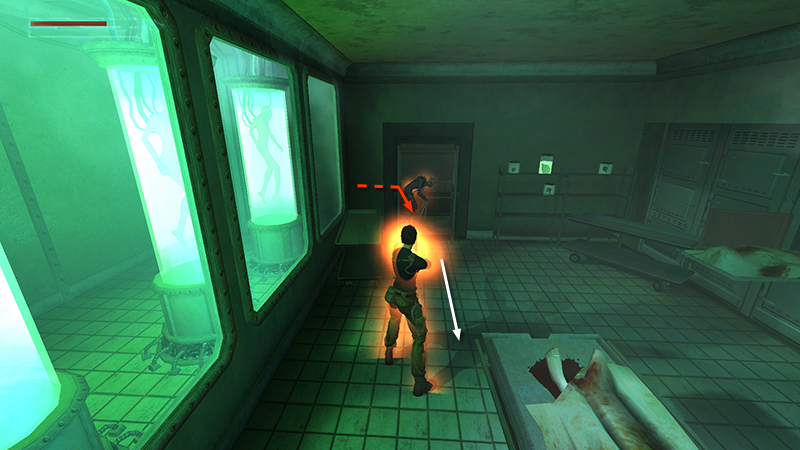
The first mutant should approach as you near the next corner. Again, draw the Chirugai and press Duck to activate the psychic shield as soon as you spot the mutant.
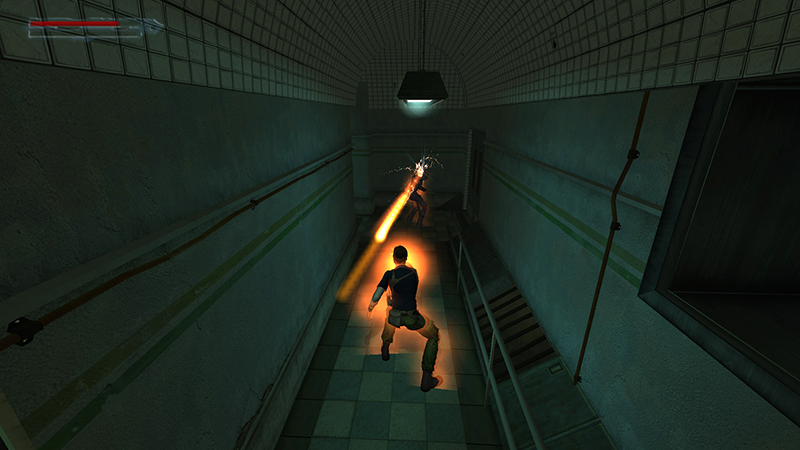
Then throw the Chirugai (Action) as it approaches.
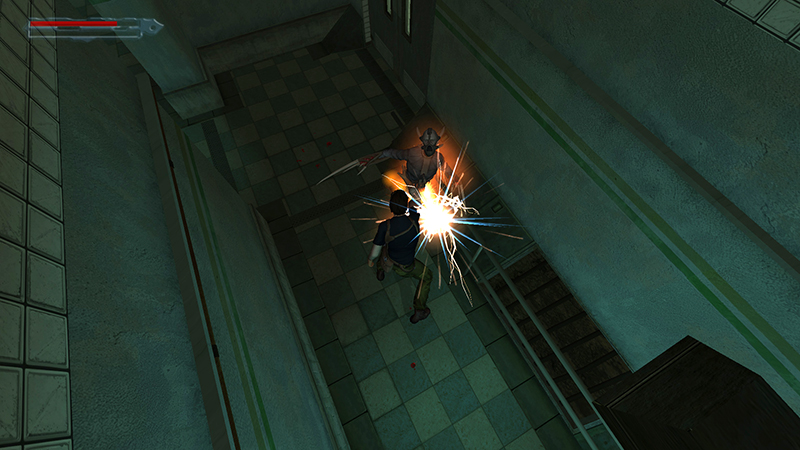
Then, if necessary, switch to slashing attacks (Jump) at close range to finish it.
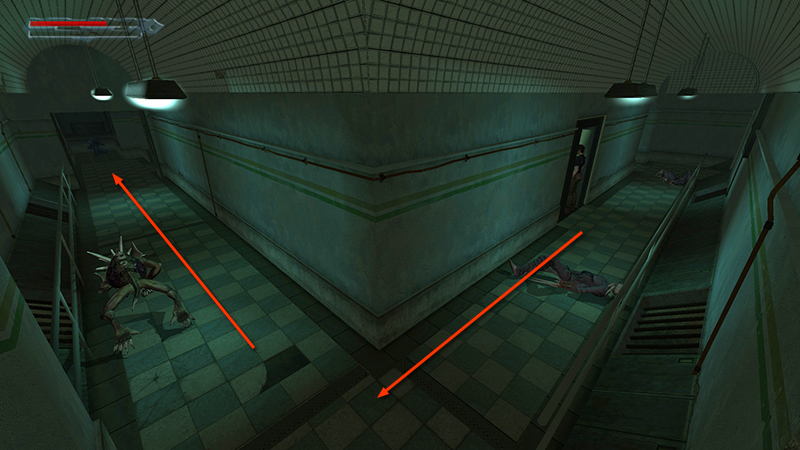
 When it falls, turn around and return past the lab. The next mutant should then approach around the corner to the right. Deal with it the same way.
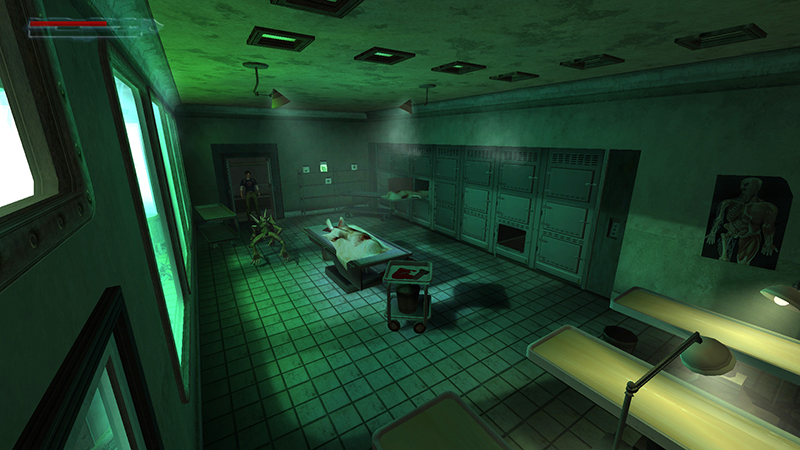
Now backtrack to the lab and open the door. In a short cutscene, the Proto-Nephilim runs out past Kurtis...
...and deals with the armed soldier in the duct.
NOTE: The game counts the soldier as an official kill, even though the Proto does the deed.
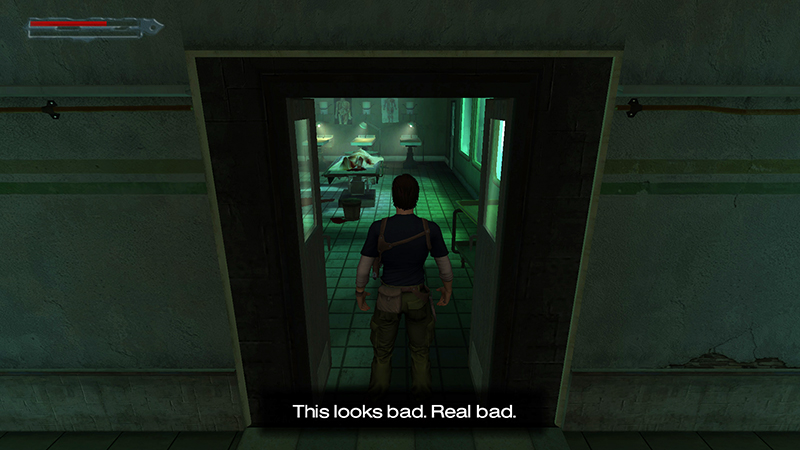
Unless you want all kills, do not enter the lab.
If you do, another clawed mutant (8) spawns in the hallway and follows you in. You may be able to subdue it with melee attacks, but you're probably better off running inside, turning around, and using the Chirugai, as you did with the other mutants.
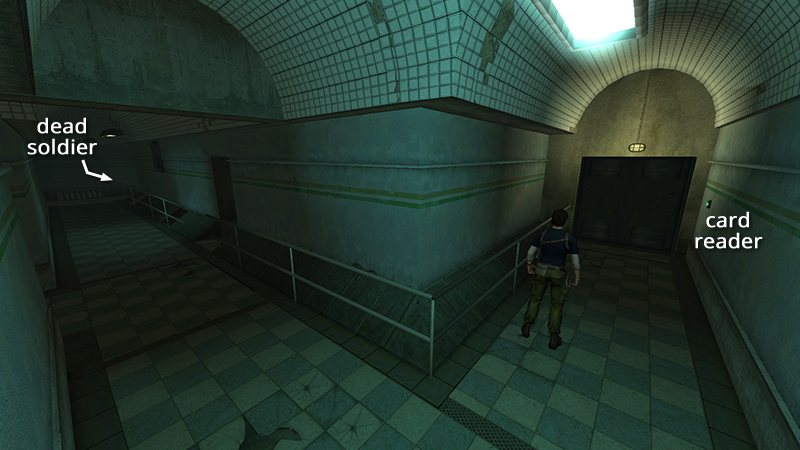
There are a few closed doors and side passages leading off the square hallway surrounding the lab. One door, at the far end of the hall, diagonally opposite from where you first came in, has a card reader. You'll need another keycard to open it.
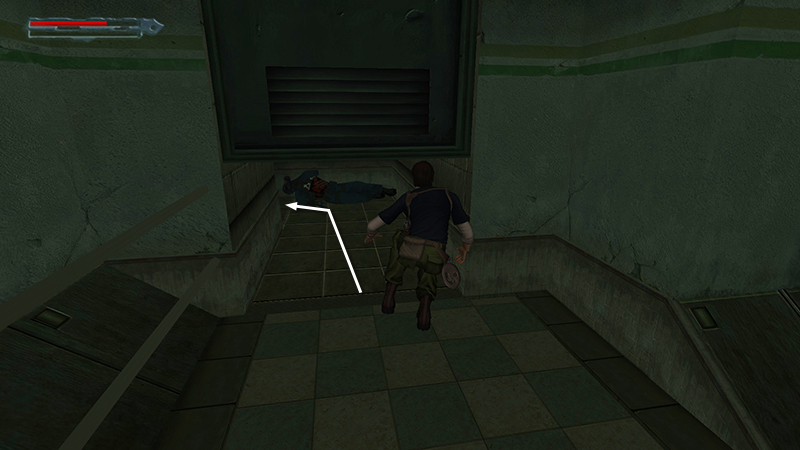
For now, head for the duct where the Proto killed the soldier. Crouch and go through.
At the end of the duct is a curved staircase. Here Kurtis muses, "I musta been real bad to deserve all this." The way up is blocked by debris, so head for the bottom of the stairs.
Then follow the corridor to a barred metal door. Open it and continue to the Proto containment area, which you saw in an earlier cutscene.
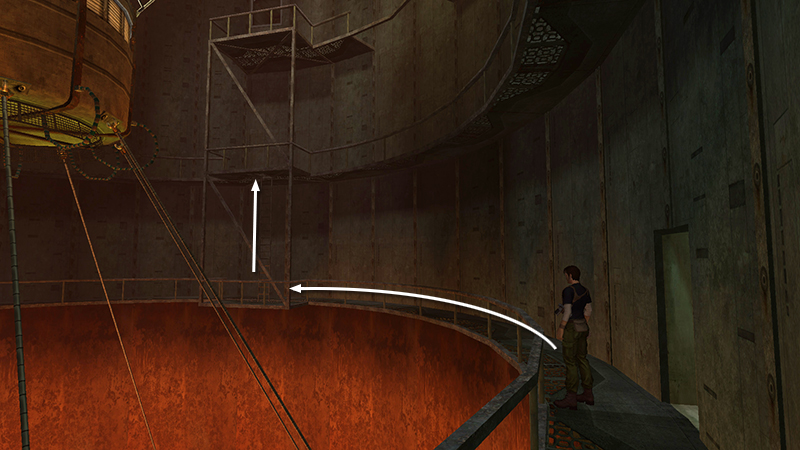
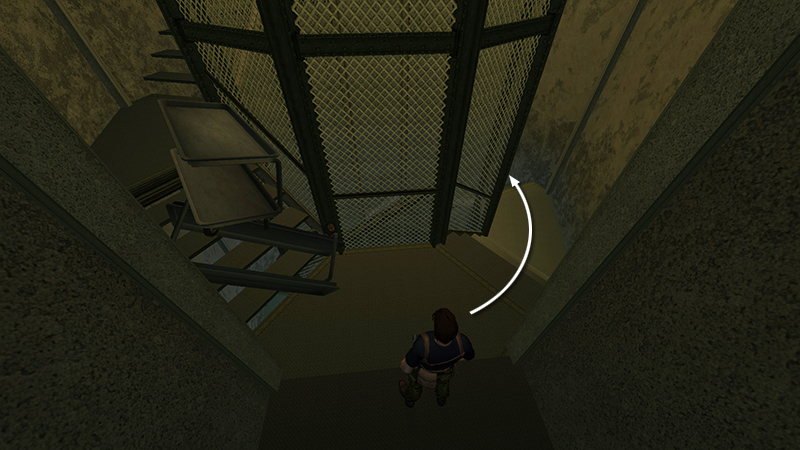
Follow the curved walkway around to the right. Climb the ladder.
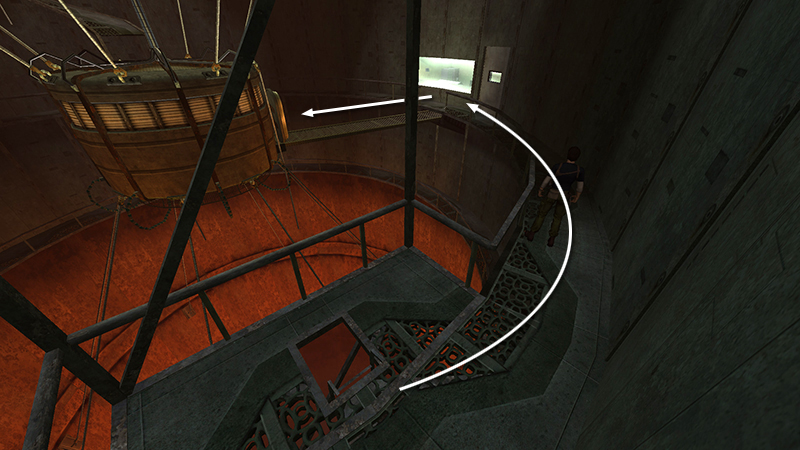
Then continue along the upper walkway toward the brightly lit window. You can't get in here, so approach the containment chamber at the center of the room. Here Kurtis will say one of several possible scripted lines. (Details are in the main walkthrough.)
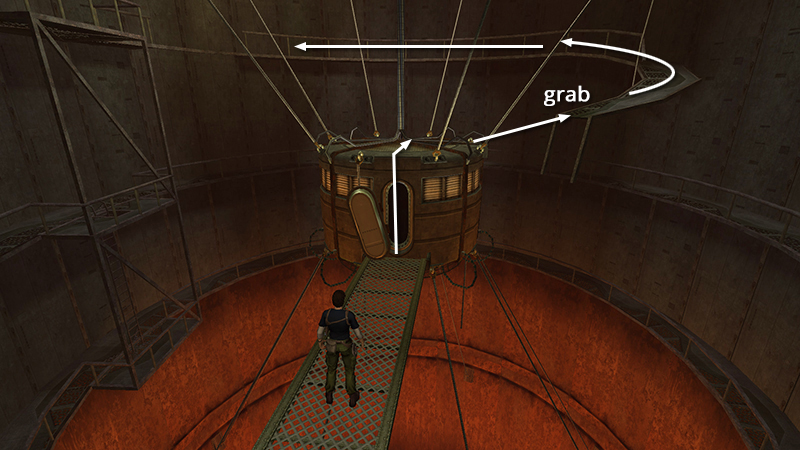
Climb on the roof of the chamber and then jump and grab the edge of the broken walkway on the right. Pull up and follow the walkway around to the left.
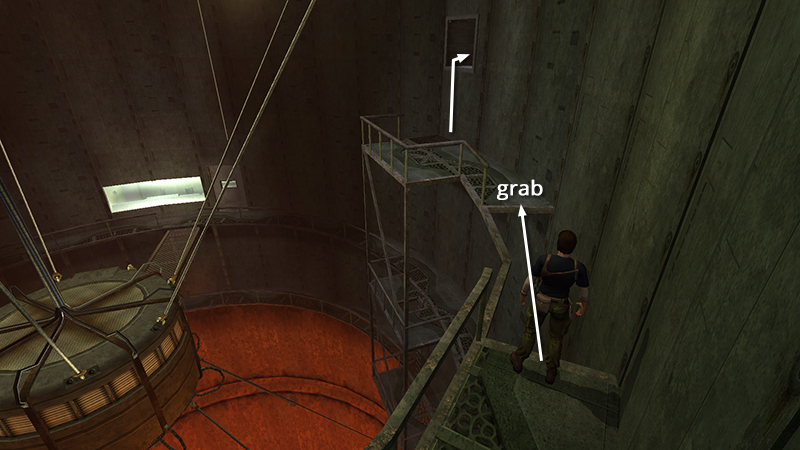
Jump the gap and grab the opposite edge, pull up, then climb into the square duct ahead on the right. Follow it through several twists and turns. (I haven't screncapped all of this, but there's no danger, and although there are a few dead-end side passages, you can't really get lost.)
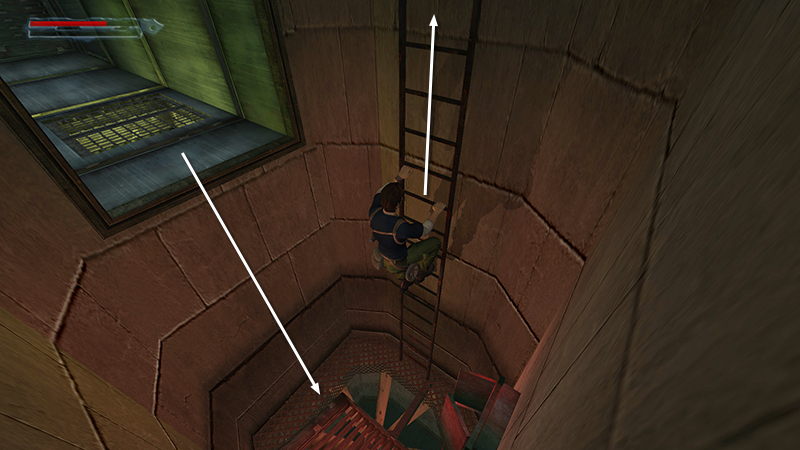
At the end of the ducts, somersault out into a cylindrical shaft with a broken fan below. Climb the ladder...
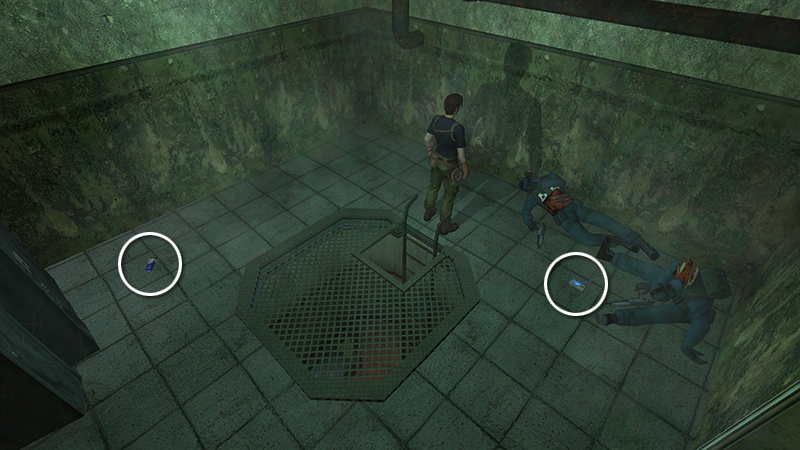
...to a room with 2 dead guards. Pick up a chocolate bar (6) and the SANITARIUM MEDIUM ACCESS PASS (7).
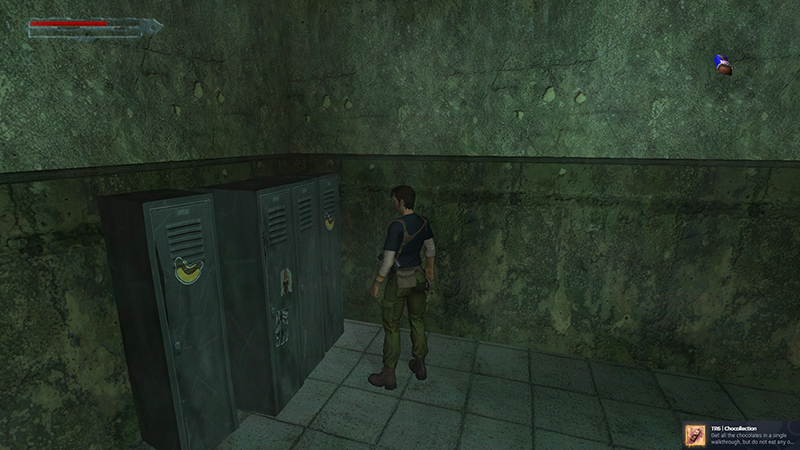
If you found all 20 chocolate bars and didn't eat any of them, the "Chocollection" achievement/trophy should pop here. Now, you can finally enjoy some of that that delicious sewer candy!
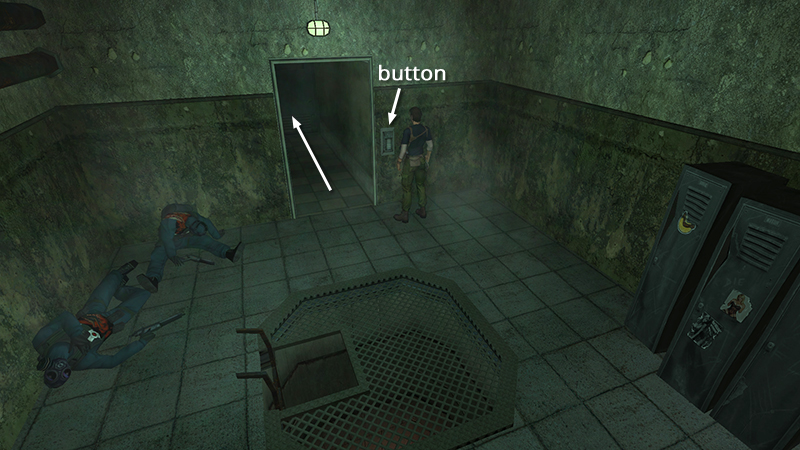
Press the button to open the door. Go through to the SQUARE HALLWAY where you were before.
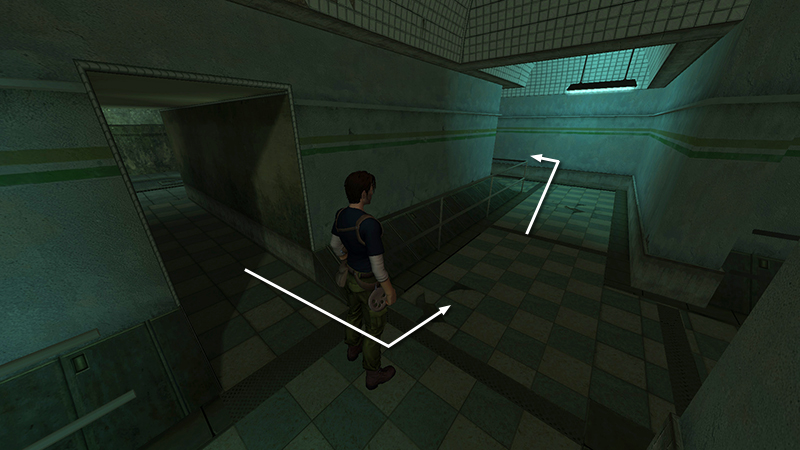
Turn left, then left again.
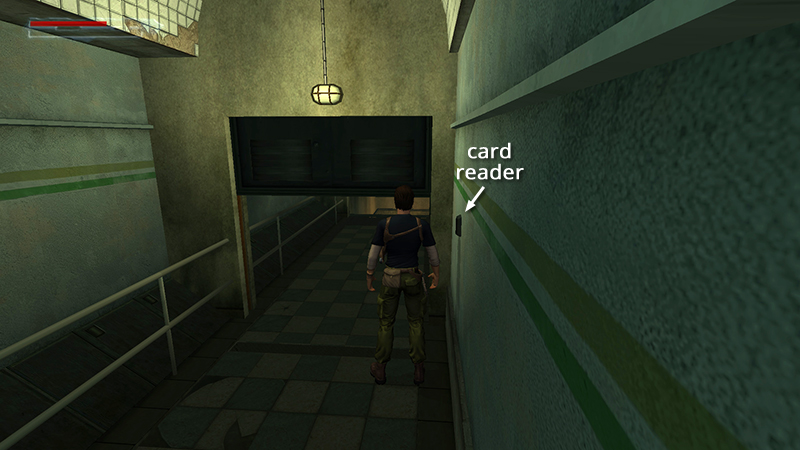
Use the MEDIUM ACCESS PASS in the card reader to open the nearby door. Check that you have everything you need in this area, then go through to confront the Proto-Nephilim.
DARK MODE: I plan to add optional dark mode for these pages, but my current priority is updating the walkthroughs. Meanwhile, may I suggest a reputable dark mode browser extension, such as Dark Reader? (Download only from trusted sites, like darkreader.org or your browser's official add-on/extension site.)
Walkthrough text and diagrams copyright © Stellalune (email ). Feel free to copy or print this walkthrough for personal use. By all means, share it with friends, but please include this credit line so people can send me their feedback. No part of this walkthrough may be reproduced on another site without permission.