Eckhardt's Lab - Defeating Eckhardt - First Phase
This page details one method for unlocking "Great Work," which requires you to defeat the boss without ducking/crawling or taking damage. In the process, you'll unlock "Shut Him Up" as well. If you're not after achievements, you can use the same tactics, but if Lara takes a little damage, don't stress. Just heal and continue. The main walkthrough includes a few additional notes.
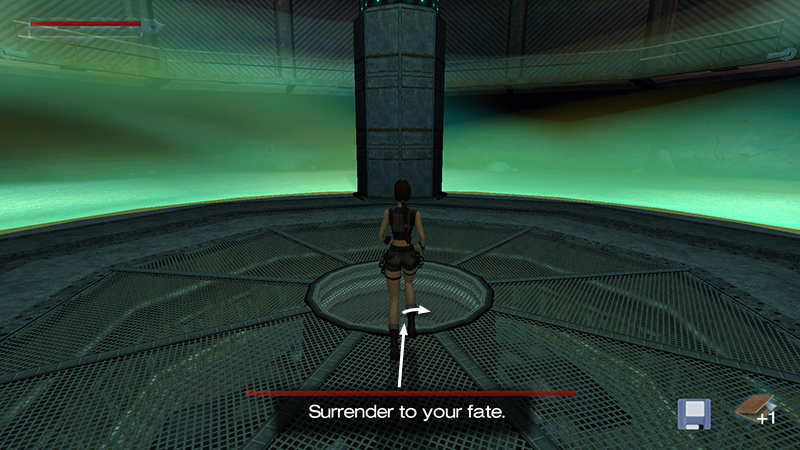
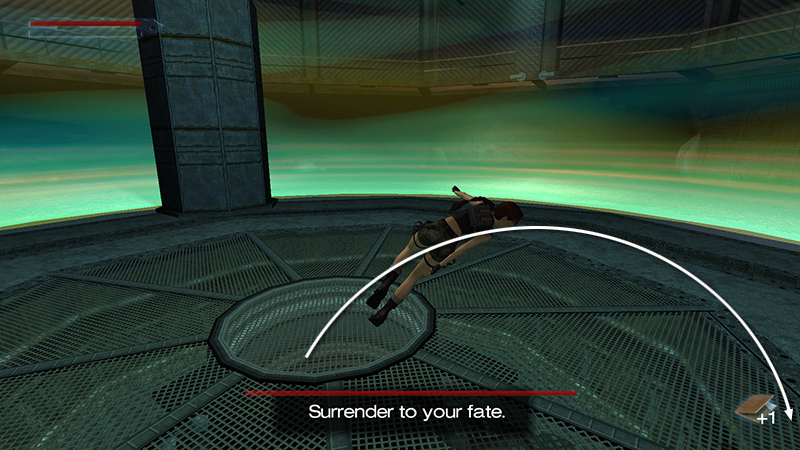
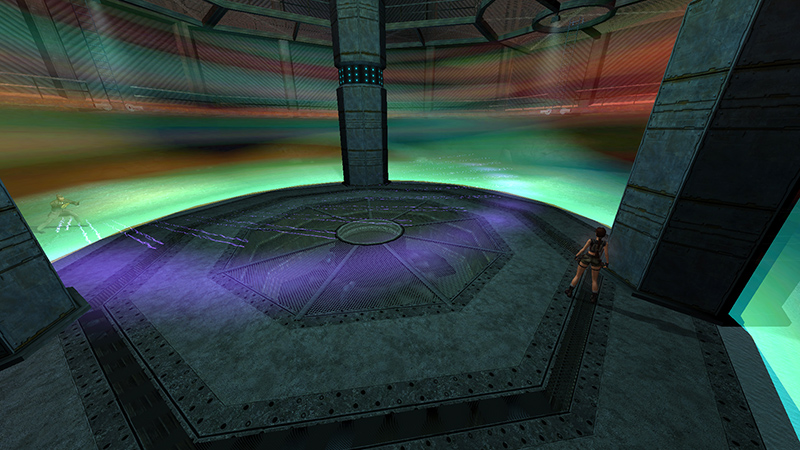
In the previous section, we used the 3 ALCHEMIC PHIALS to obtain the THIRD PERIAPT SHARD, then slid down a long tunnel to the boss arena. Save in a new slot. Then approach the center of the room for a cutscene.
Eckhardt begins the process of awakening The Sleeper. True to form, Lara essentially says, "No."
As soon as the cutscene ends, you'll see the notification for the penultimate notebook entry (61/62): "Use all three shards to destroy Eckhardt." Read it then return to the fight. (Again, all entries are tracked under Von Croy's Notebook.) Quick-save if you like, but do not overwrite your manual save before entering the arena. You may need it if things go sideways.
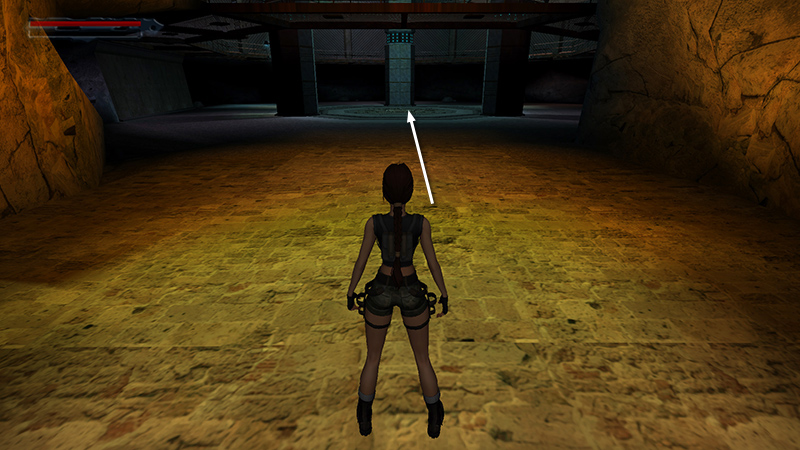
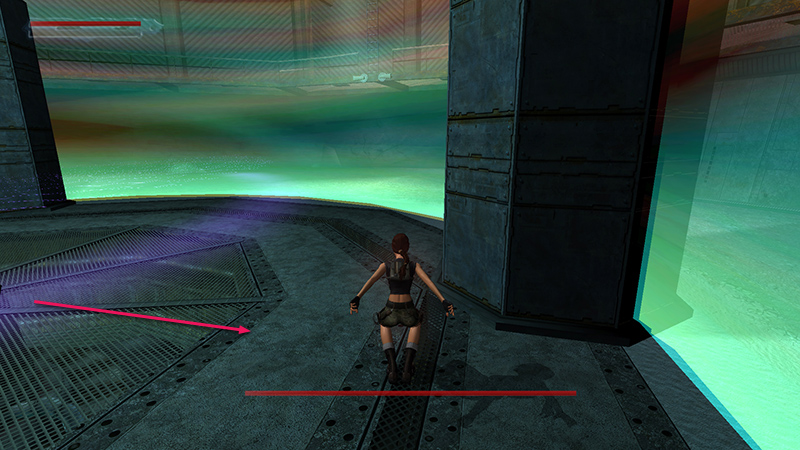
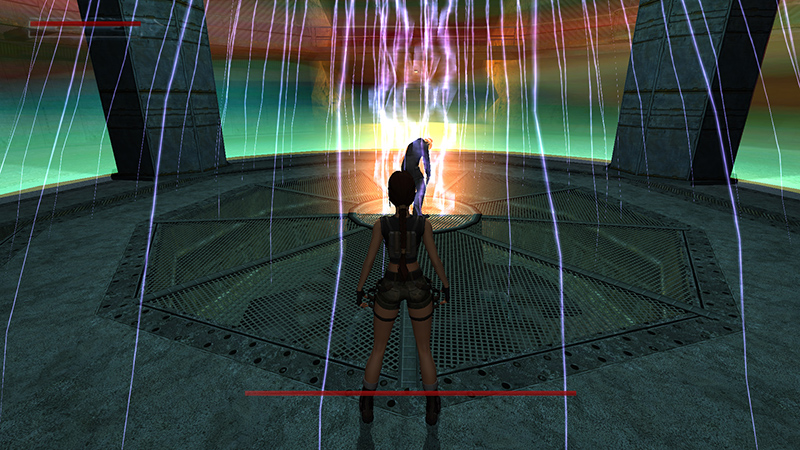
The arena is set up with Lara in the middle of a metal grate and Eckhardt outside the circle, beyond an impenetrable force field, which will zap Lara if she touches it. As soon as you regain control, run forward a step or two, so Lara is standing on the small central circle, pivot slightly to the right...
Then side flip to the right.
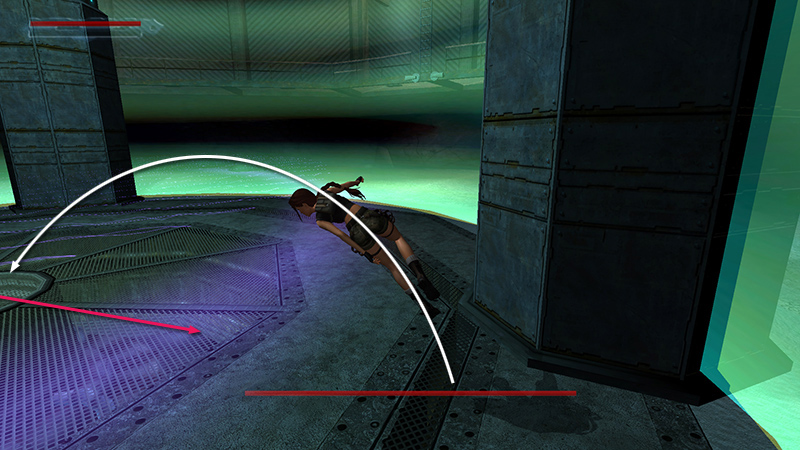
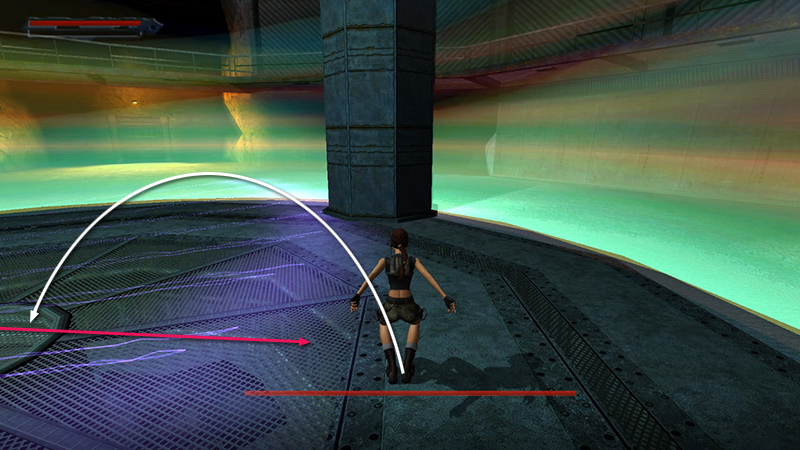
The goal is to position Lara near the outside of the arena, but not too close to the force field, with her left shoulder pointing toward Eckhardt. He'll now unleash 6 waves of blue electrical energy. The first two come immediately.
As the first wave approaches...
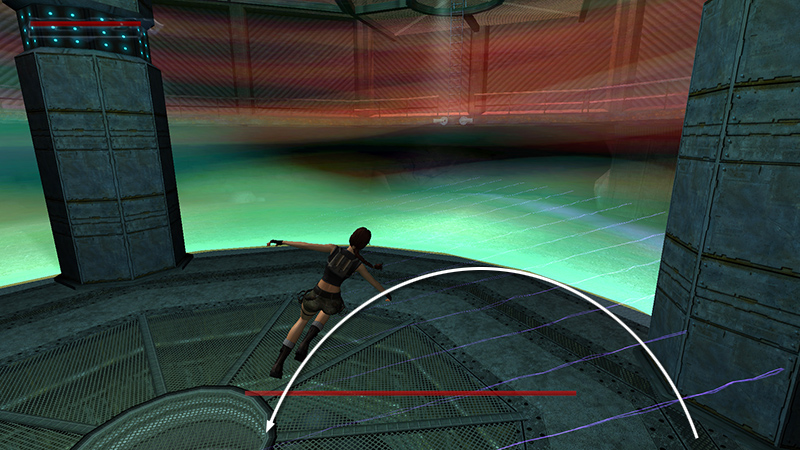
...side flip over it. You need to clear the wiggly tails of the bolts as well, or Lara will take damage.
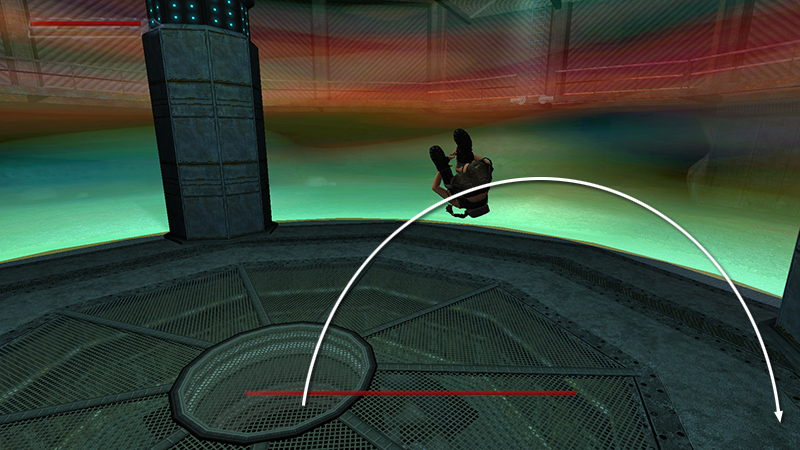
Immediately flip back to the right.
Wait for the second wave of energy and side flip over it just as you did for the first wave.
After the second wave, Eckhardt changes position. So, this time, instead of flipping back to the right, roll...
...and side flip to the right to position Lara for the next wave.
As you do this, Eckhardt moves behind the metal support pillar nearest to him and emerges on the other side. He'll then unleash 4 more electrical attacks.
Avoid the third wave just as you did the first two: Wait for the wave to approach. Side flip over it.
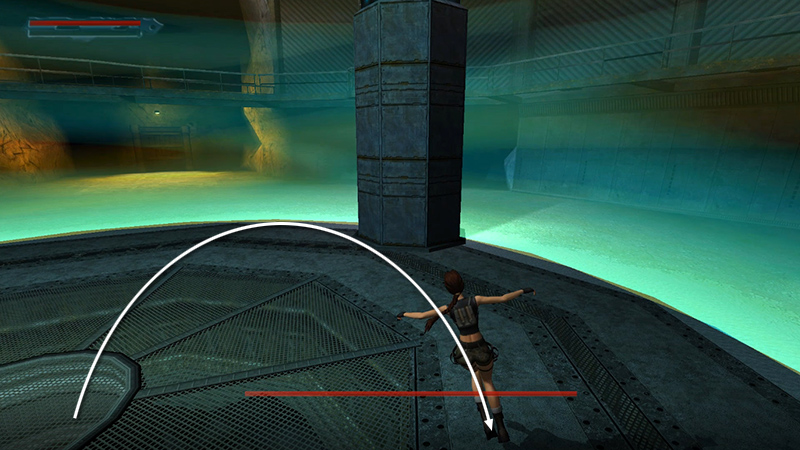
Then immediately side flip back to the right. Repeat this for the fourth, fifth, and sixth waves, which will come from the same direction.
NOTE: You may find that facing Eckhardt head-on and taking running (or sprinting) jumps over the shockwaves works better, especially if you're using modern controls. I'm partial to tank controls and the side-flip.
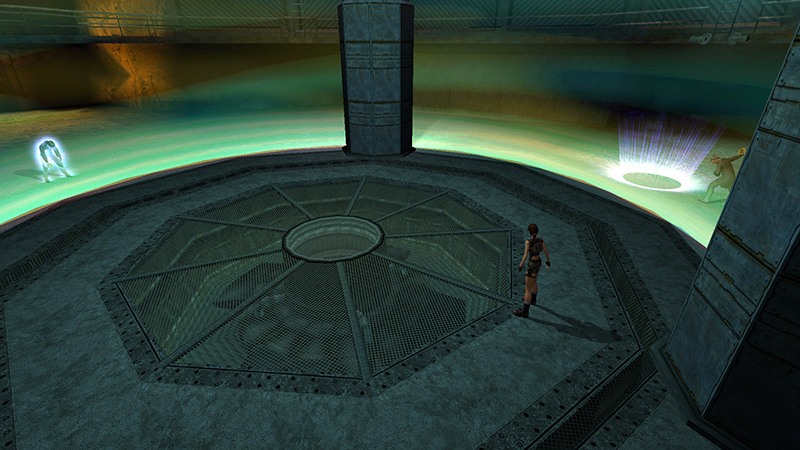
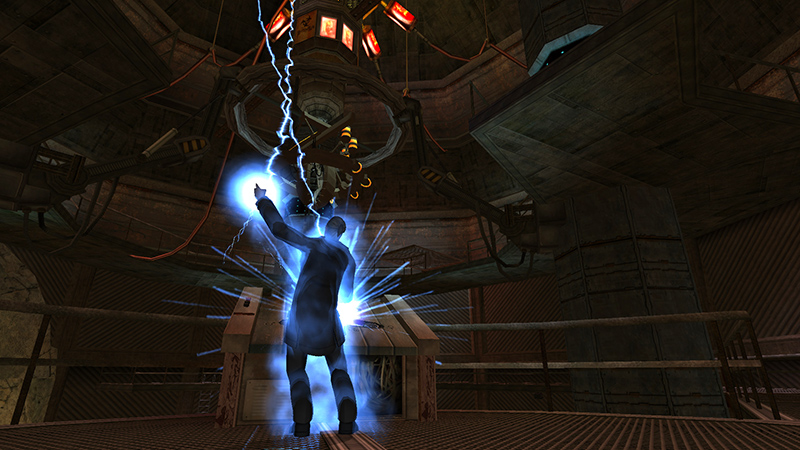
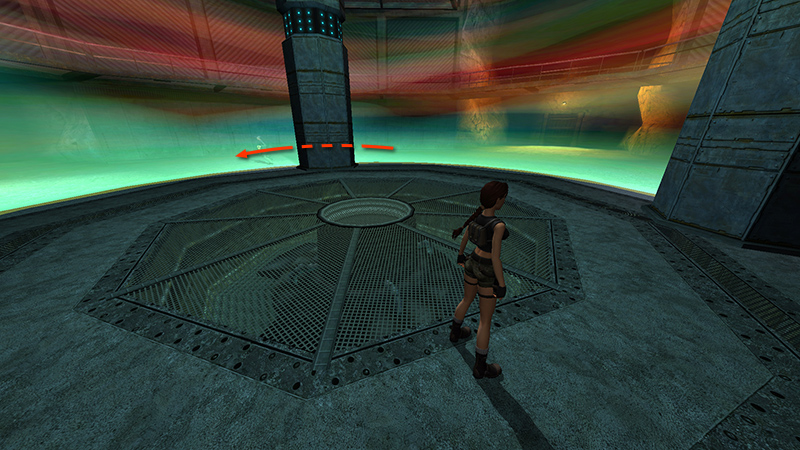
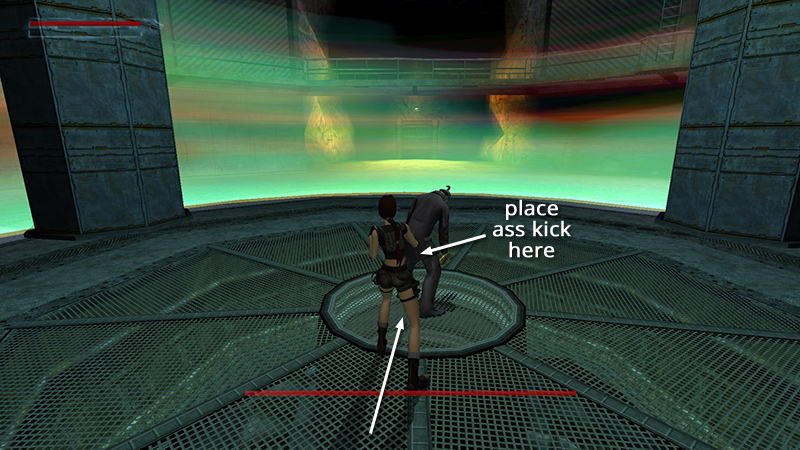
After the sixth wave, if Lara hasn't taken any damage, quick-save again. Then position her as shown above: on or just outside the wide metal band surrounding the grated part of the floor, facing the center, with her back toward one of the three metal support columns. Meanwhile, Eckhardt will fly up to the ceiling, then drop down and begin creating magical copies of himself.
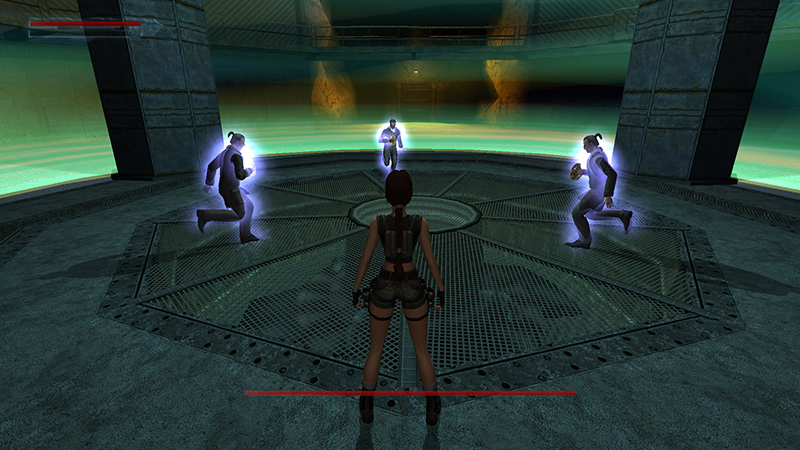
Once Eckhardt has created the third copy, the three will run to the center of the circle and fuse together. If any of the 3 doppelgängers touch her, Lara will take electrical damage. But as long as she's lined up with one of the support columns, she'll be fine.
Wait a few seconds for the Eckhardt in the circle to discharge a burst of energy. Some evil blue squiggles will rain down on the arena, but if Lara is standing on the wide border around the grated area, they won't hit her.
When the light show subsides, quickly run up to Eckhardt and punch or kick him. (Move in close and press Action.)
If you hit him too soon (before the energy burst) or too late, Eckhardt creates a shockwave that knocks Lara off her feet. Then he flies back to the edge of the arena and you'll have to try again. But, once you land that kick....
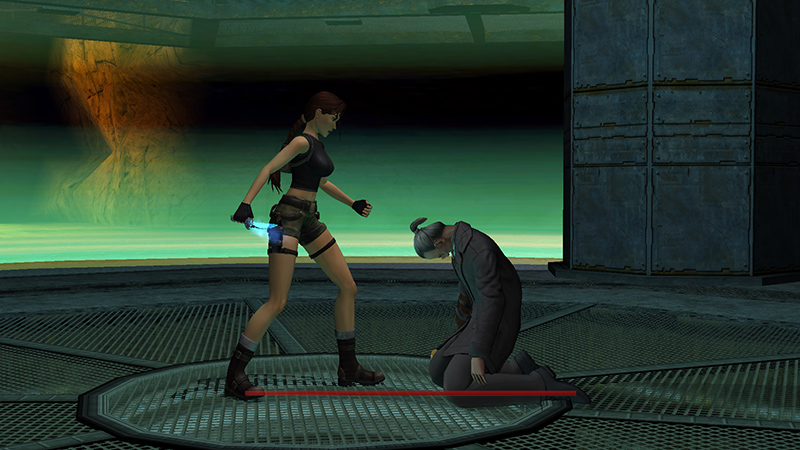
Cutscene: Eckhardt keels over, and Lara stabs him with one of the Periapt Shards, reducing his health by a third. The injured Eckhardt then flies up out of the arena, and the fight continues.
DARK MODE: I plan to add optional dark mode for these pages, but my current priority is updating the walkthroughs. Meanwhile, may I suggest a reputable dark mode browser extension, such as Dark Reader? (Download only from trusted sites, like darkreader.org or your browser's official add-on/extension site.)
Walkthrough text and diagrams copyright © Stellalune (email ). Feel free to copy or print this walkthrough for personal use. By all means, share it with friends, but please include this credit line so people can send me their feedback. No part of this walkthrough may be reproduced on another site without permission.