Eckhardt's Lab - Three Alchemic Phials
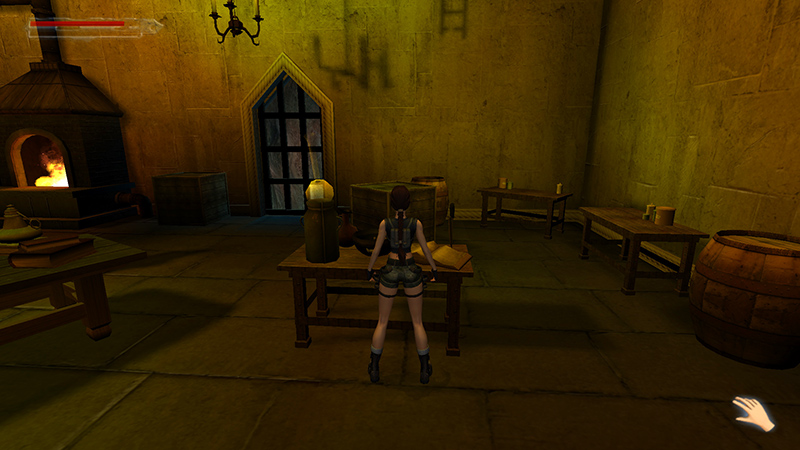
After pulling the lever and dealing with the 2 undead knights (1-2), as shown in the previous section, examine the open book on one of the worktables to unlock 5 more notebook entries (56-60/62), detailing Eckhardt's attempts to revive the Nephilim and defeat the Lux Veritatis. (See the separate page on Von Croy's Notebook for details.)
Then climb the stone steps to the dais above the lever. At the back of this raised area is a wooden platform. Go around to the right side of it.
Crawl underneath to get a small medipack (1). Then take ALCHEMIC PHIAL #1 (purified oxygen) (2) from the worktable in the corner.
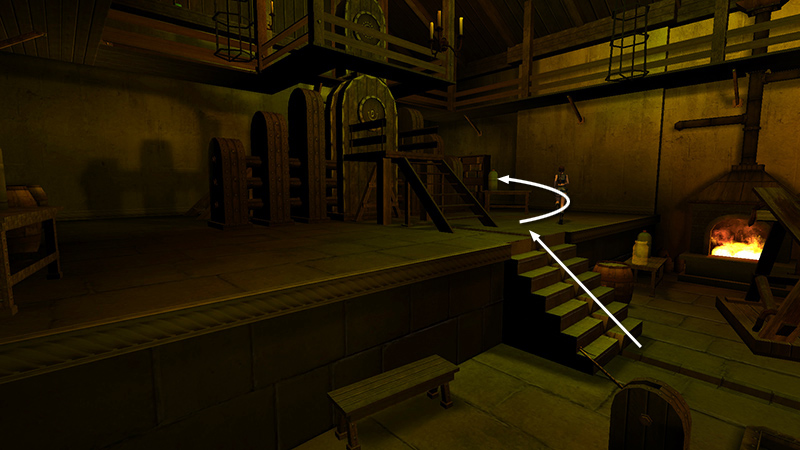
Climb the ladder near the entrance to reach the high walkway. Dismount on the right.
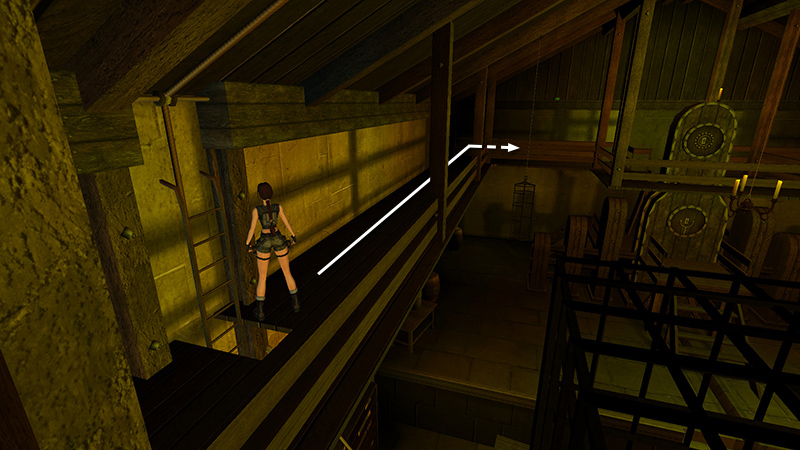
Follow the walkway to the end above the dais.
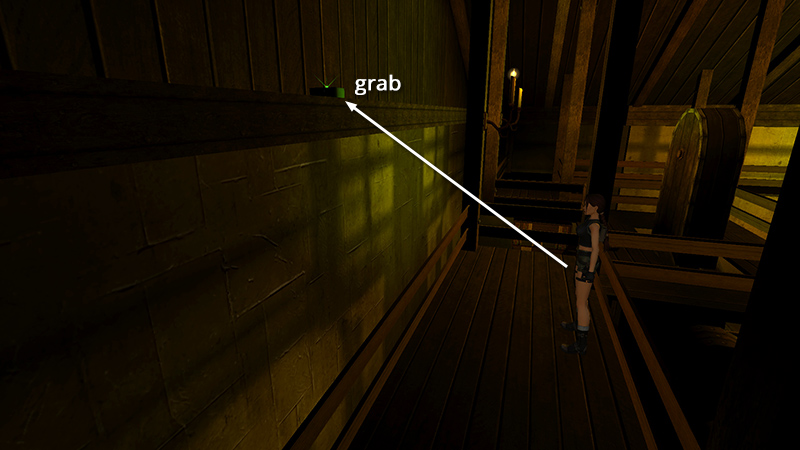
There's a large health pack (3) on the horizontal beam against the far wall. Stand facing it, take a few steps back from the railing, then jump forward to grab the beam. Pull up and take the health pack.
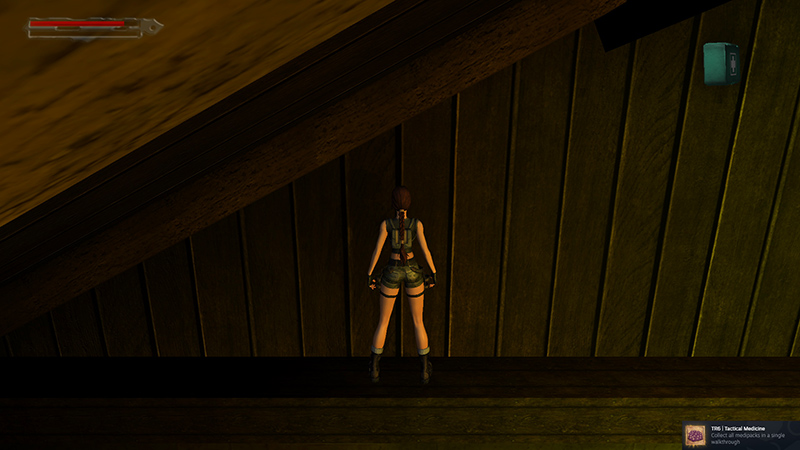
If you found all of the health items in the game, the "Tactical Medicine" achievement/trophy should pop when you take this one.
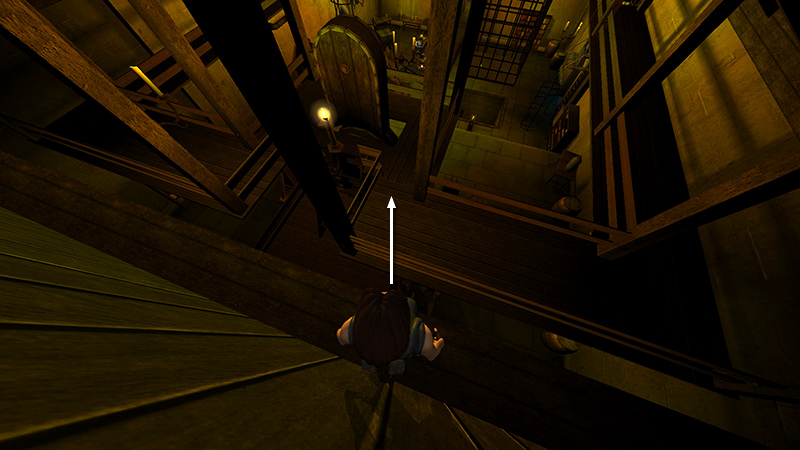
Turn around. Then angle Lara a bit to the left before taking a short hop down to the walkway. (If you jump straight forward from where you got the health pack, Lara will overshoot the walkway and fall to the floor.)
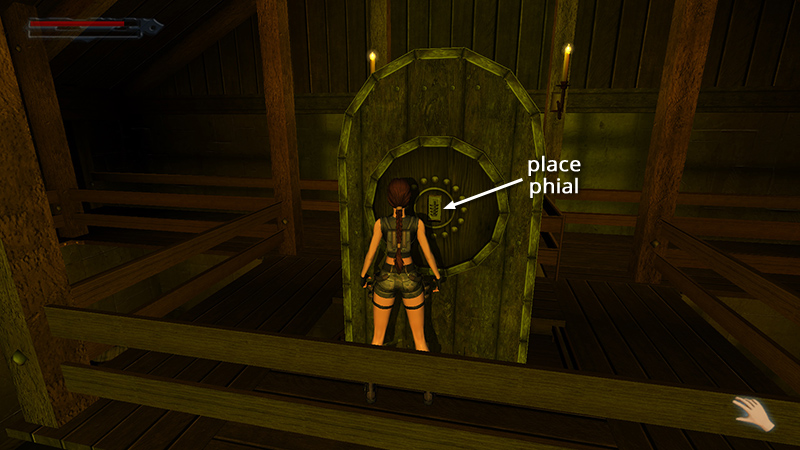
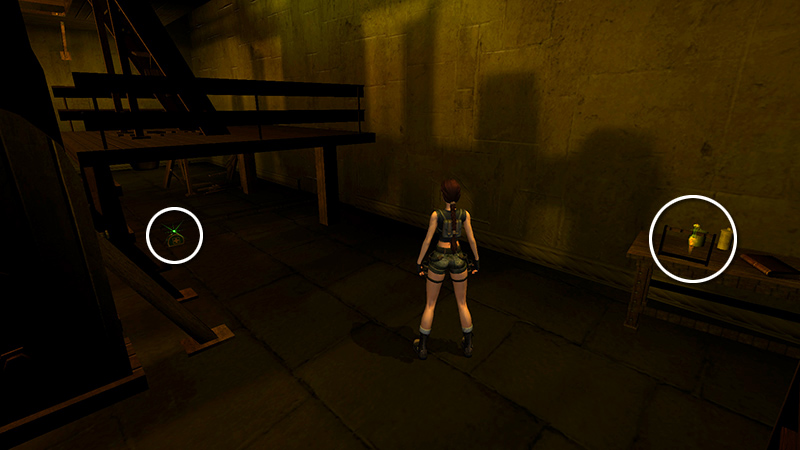
Move around to the front of the curved, wooden structure. Place ALCHEMIC PHIAL #1 in the receptacle.
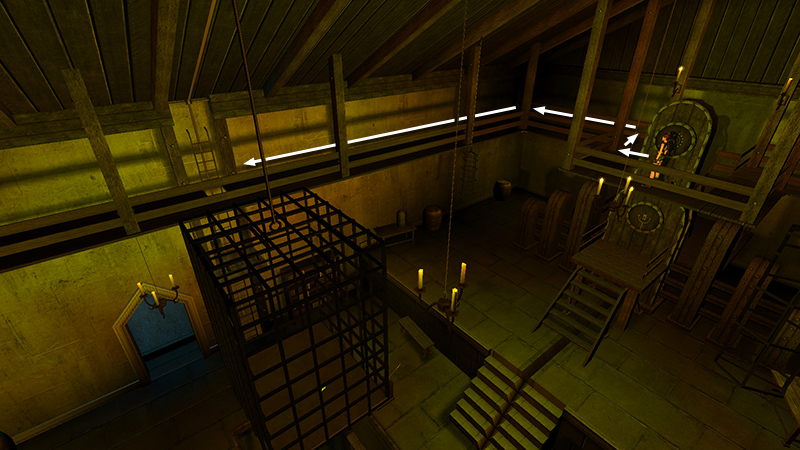
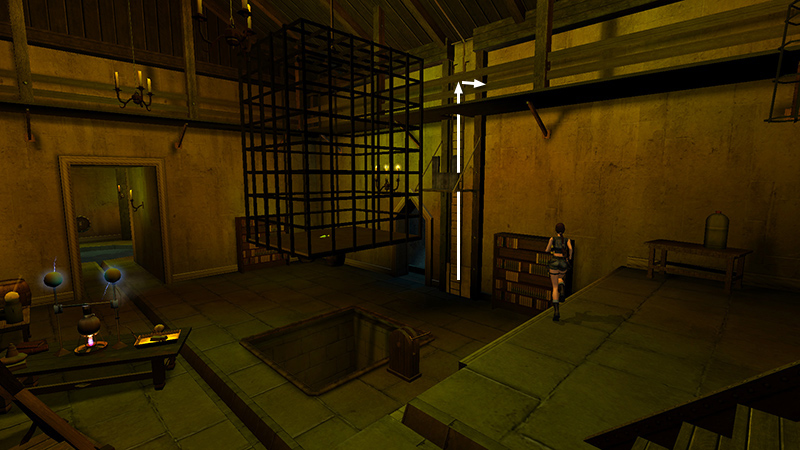
Then return to the top of the ladder.
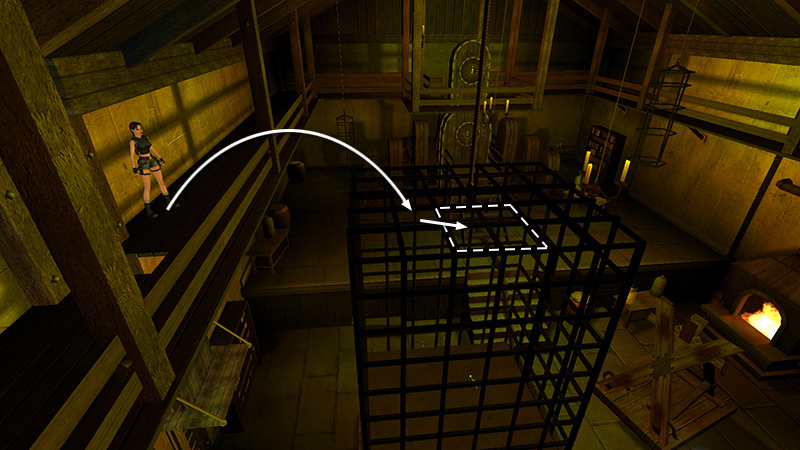
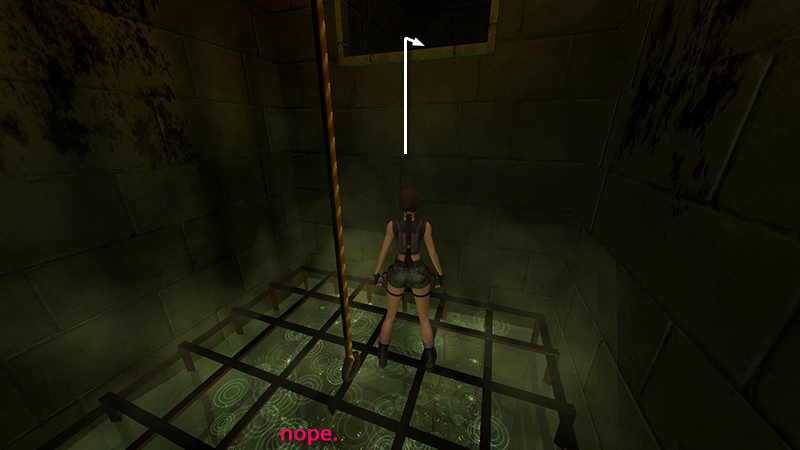
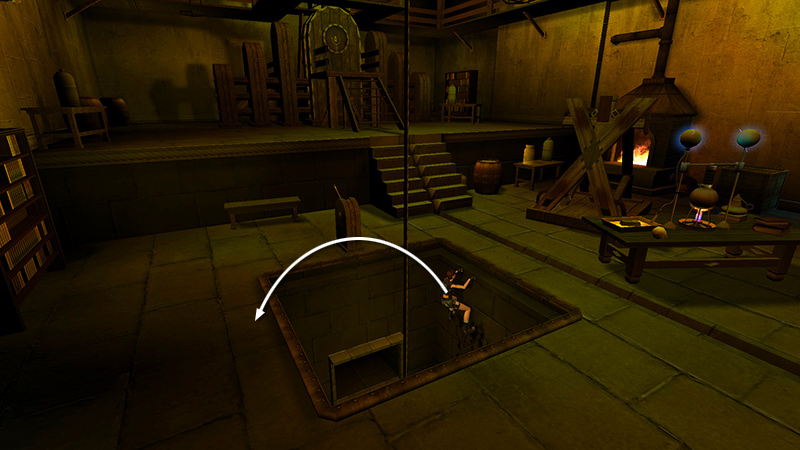
Take a few steps back from the railing and jump on top of the cage. Step on the trapdoor to the right of the rope...
...and fall through into the cage.
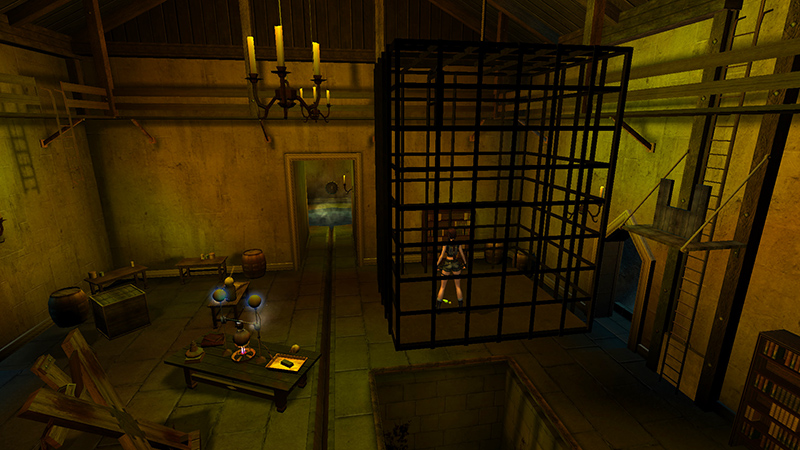
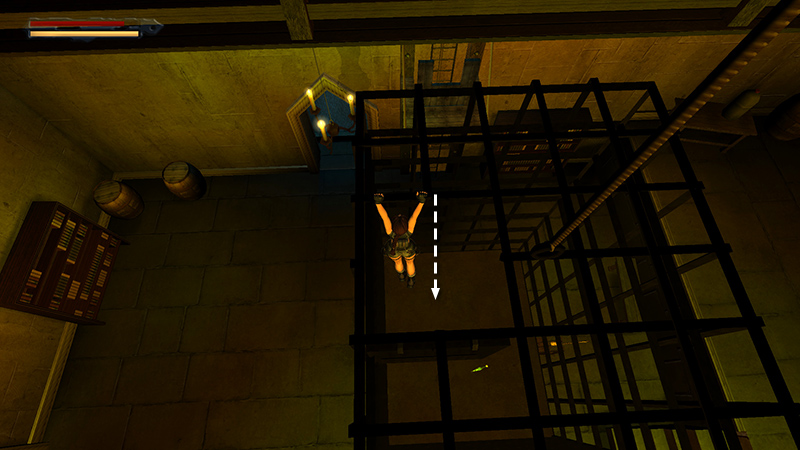
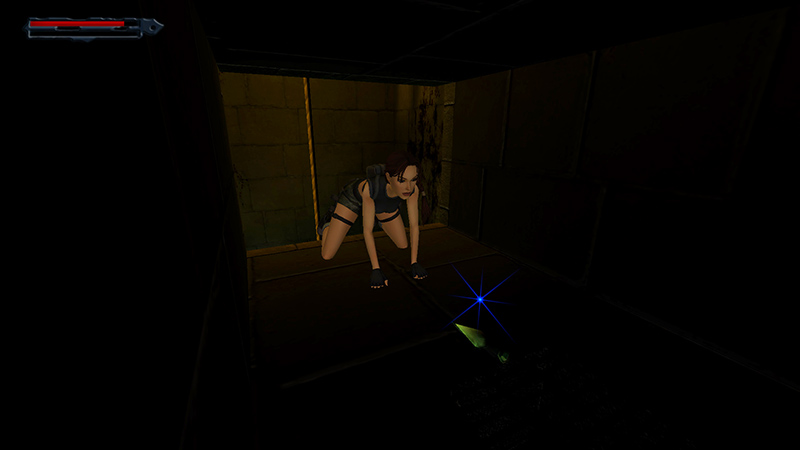
Before picking up ALCHEMIC PHIAL #2 (purified hydrogen) (4), position Lara so she's facing the wall of the cage below the trapdoor (i.e., entrance and ladder to her right).
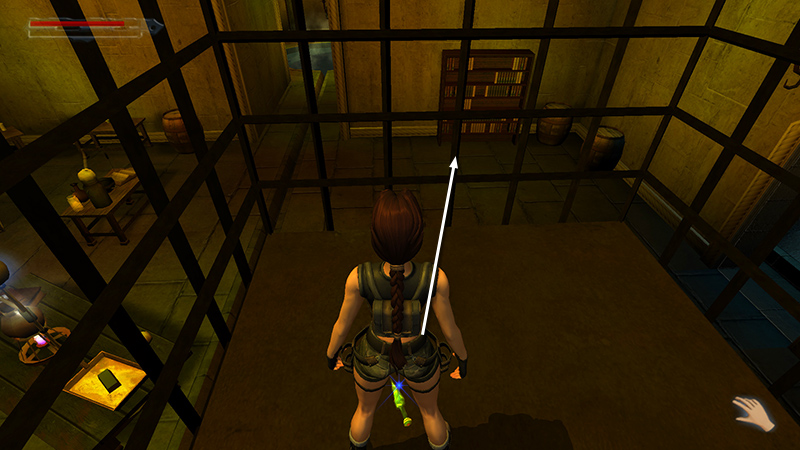
Save the game and then pick up the phial. When you do, the cage begins to sink into the boiling pool.

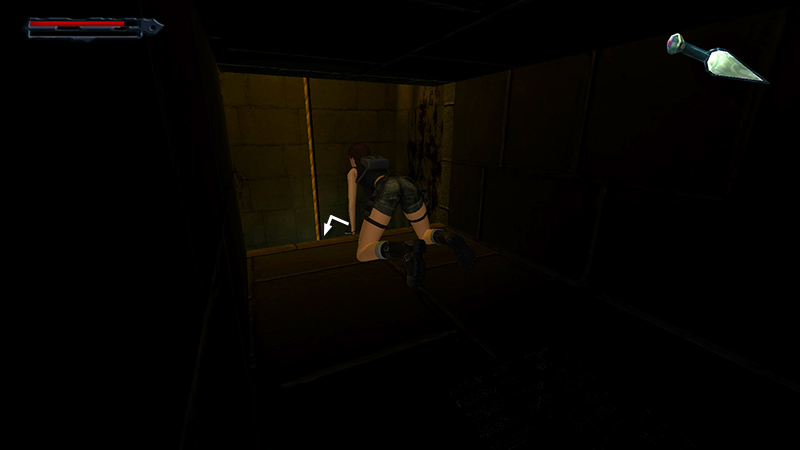
Quickly climb the cage wall. When Lara reaches the opening...
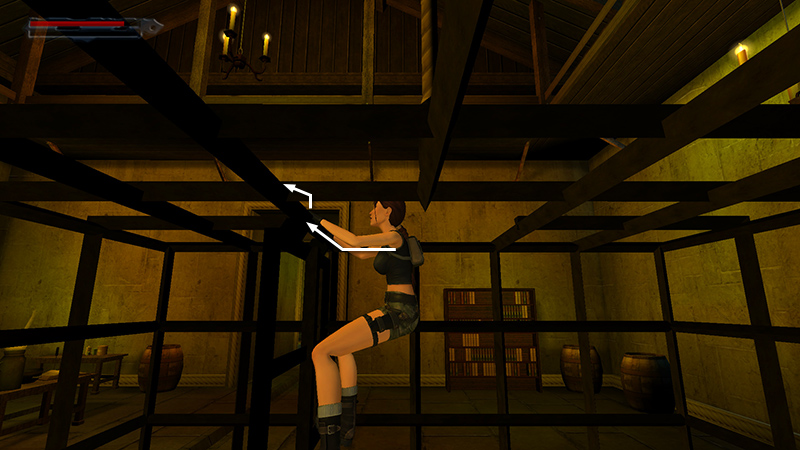
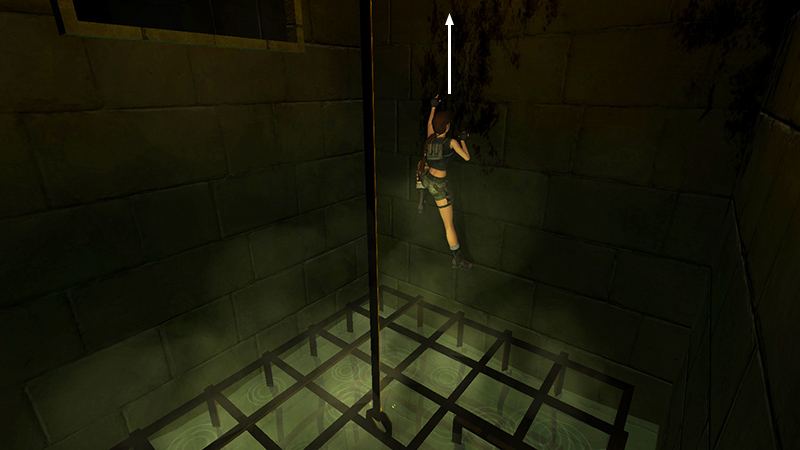
...climb to the left so her feet are on the dangling trapdoor. Then climb on top of the cage...
...before it submerges. If you're too slow, Lara will die.
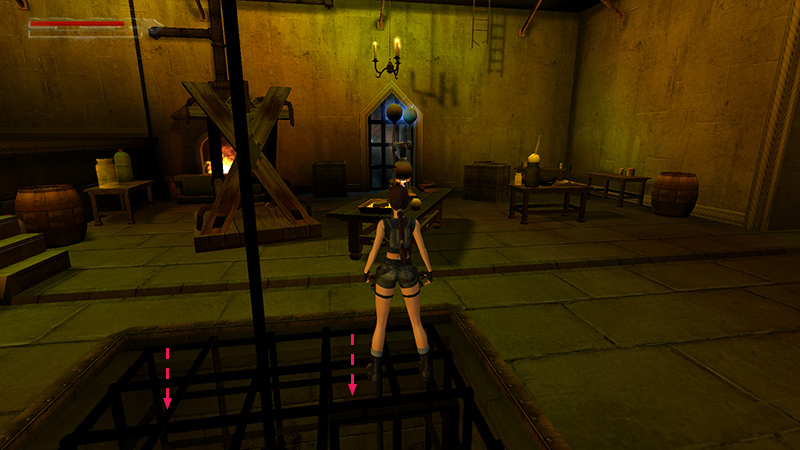
When the cage sinks to its lowest position, take care to avoid the open trapdoor as you climb into the small niche on the wall of the pit.
Pick up ALCHEMIC PHIAL #3 (purified salt) (5).
Turn around, crawl to the opening, and press Forward to somersault out onto the top of the cage.
Then climb any of the rough walls lining the pit.
Lara won't climb past the rim, so press Jump to backflip out of the hole.
DARK MODE: I plan to add optional dark mode for these pages, but my current priority is updating the walkthroughs. Meanwhile, may I suggest a reputable dark mode browser extension, such as Dark Reader? (Download only from trusted sites, like darkreader.org or your browser's official add-on/extension site.)
Walkthrough text and diagrams copyright © Stellalune (email ). Feel free to copy or print this walkthrough for personal use. By all means, share it with friends, but please include this credit line so people can send me their feedback. No part of this walkthrough may be reproduced on another site without permission.