Old Mill - Angled Pillars, Chalk, and Secret #1
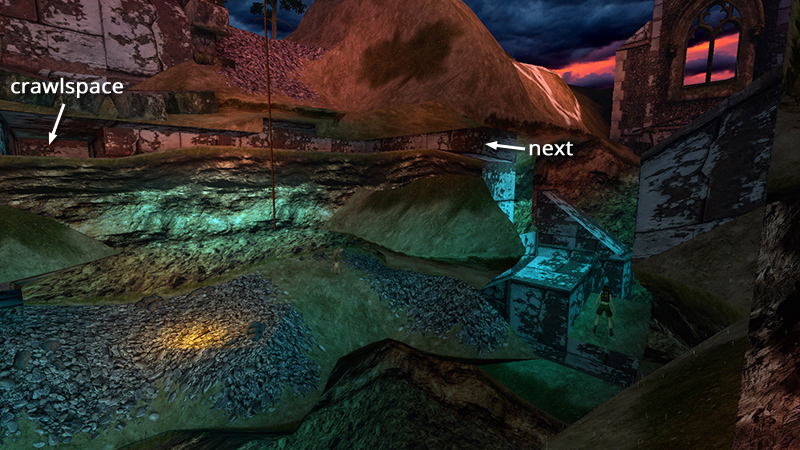
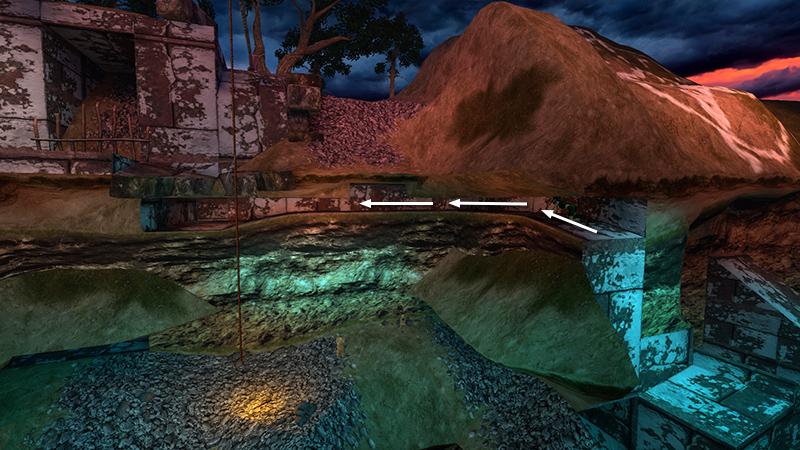
In the last section we swung across the chasm to the area with the whitewashed STONE PILLARS WITH ANGLED TOPS. Next, we're headed for the long, horizontal crevice connecting this area to the crawlspace above the changelings. You can't reach the crevice from the ledge below, so we'll need to do some tricky jumping.
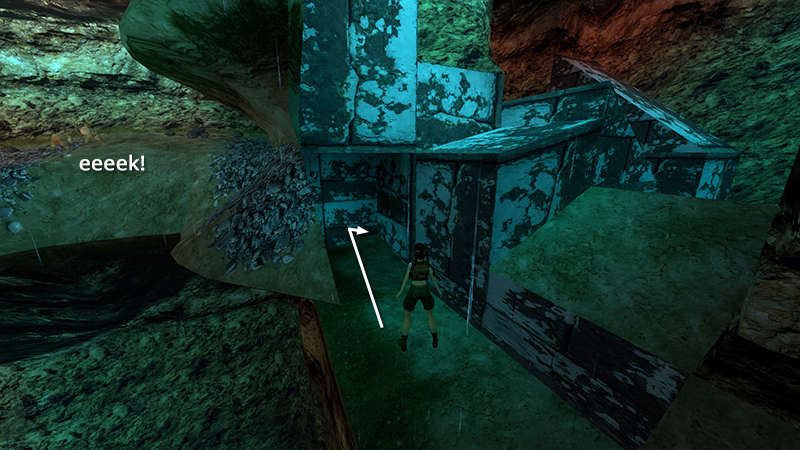
First, go into the passageway behind the angled pillars...
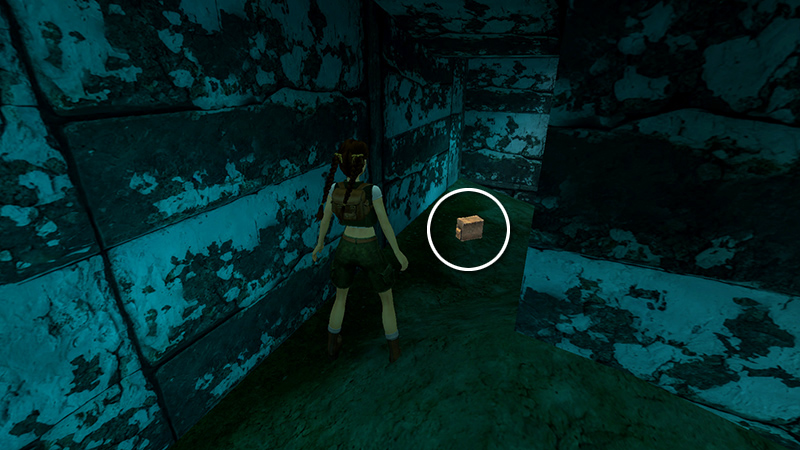
...to find a large medipack (3) (166/239).
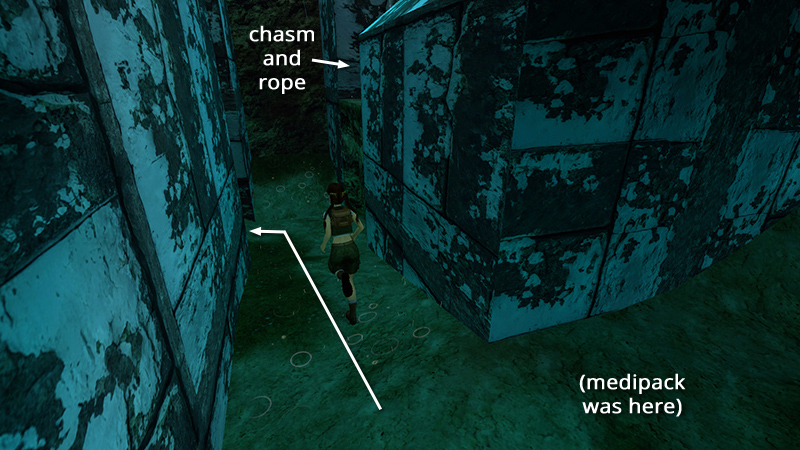
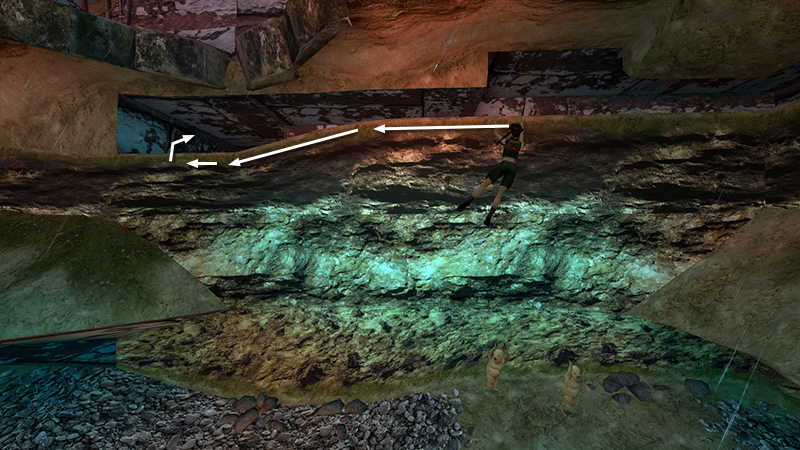
Move out into the open space between the angled pillars. Ignore the shortest pillar and step into the gap between the second and third pillars, on the left if the chasm is off to your right.
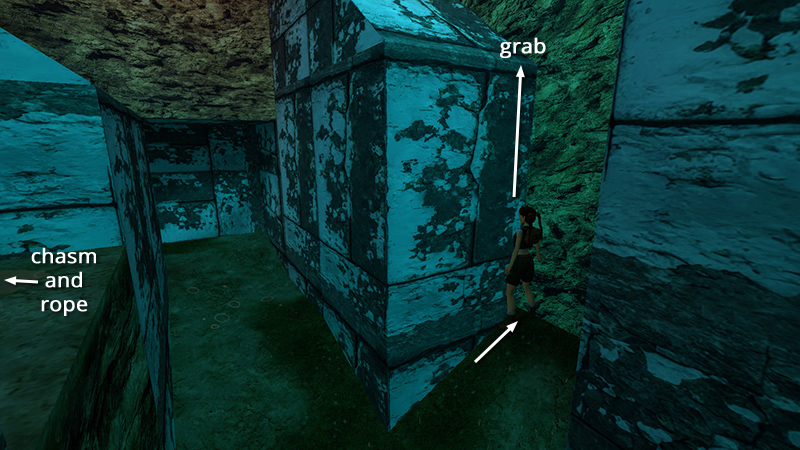
Stand facing the second pillar with the third behind you. Sidestep to the right, where the ground is a little higher. Jump up and grab the edge.

Traverse all the way to the left. Pull up...
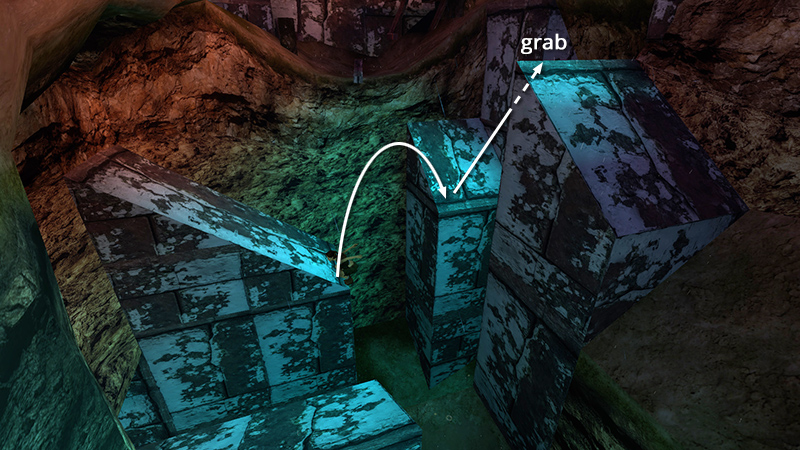
...then quickly press and hold Jump + Action to backflip off the second pillar, land on the third, spring off it, and grab the back of the fourth. No sliding, no tricky timing...

If you like, you can quick-save once Lara is hanging from the fourth block. Just remember to hold Action when you reload to keep hanging on.
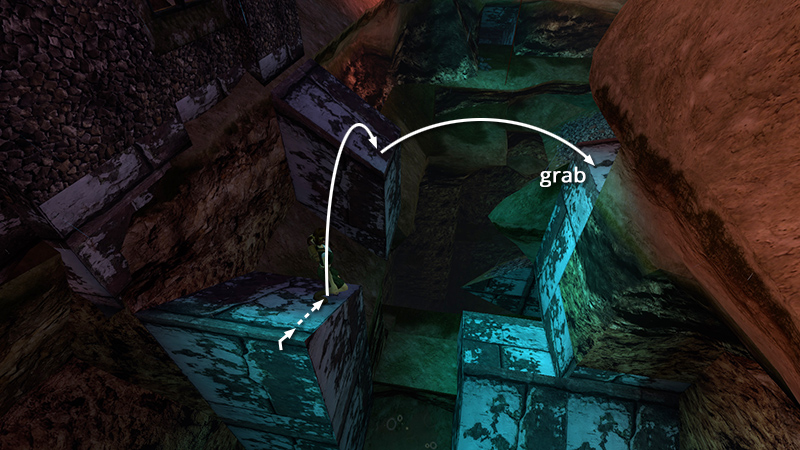
Pull up, let Lara slide a little, then press and hold Jump and Action again. She'll jump from the fourth pillar to the fifth, then spring forward and grab the edge of the crawlspace on the right.

Pull up.
Crawl along the crevice until you can't go any farther.
Hang from the edge above the changelings and traverse to the left until you can pull up again.
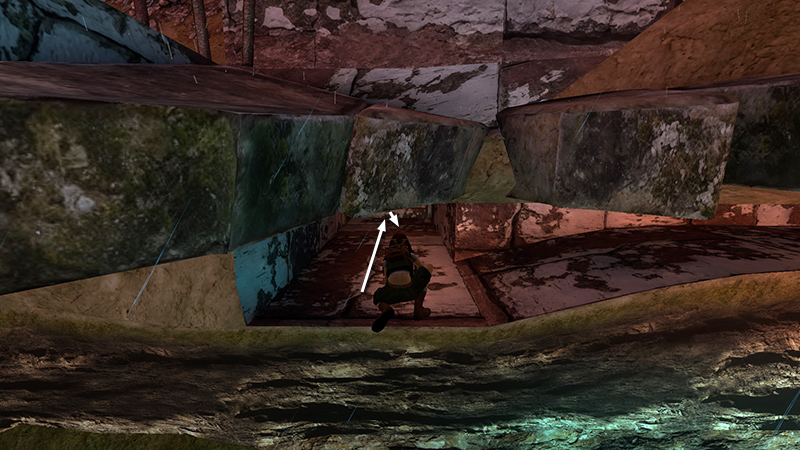
Crawl forward and roll out (Forward + Jump)...
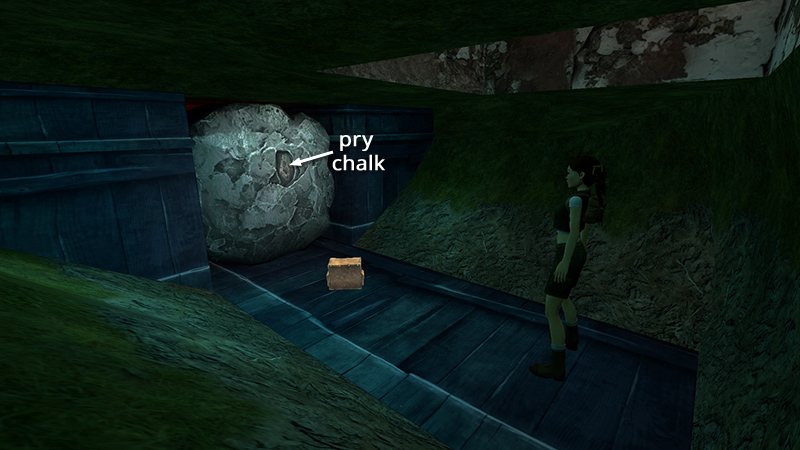
...into a small room containing a a large medipack (4) (167/239) and a large, whitish boulder. Use the CROWBAR to pry a piece of CHALK (5) (168/239) out of the boulder.
NOTE: If you missed the CROWBAR and can't get the CHALK, see the note on backtracking in the main walkthrough.
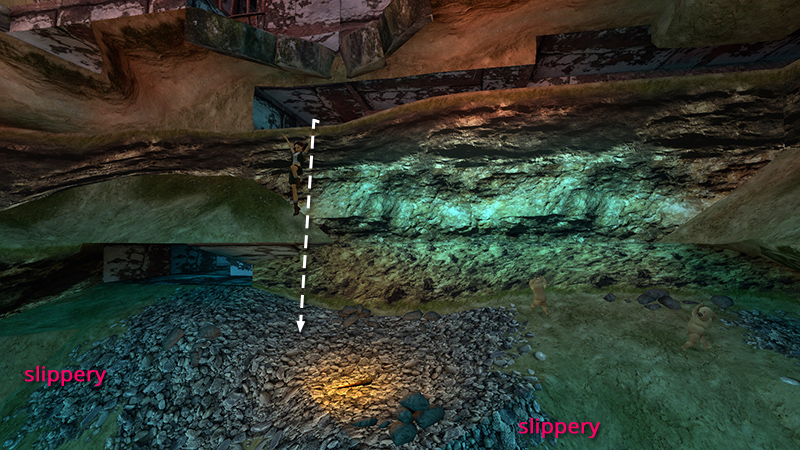
After retrieving the CHALK, return through the crawlspace and roll out onto the changelings' ledge. Move carefully here, since there are a few slippery slopes that will dump Lara into the pit.
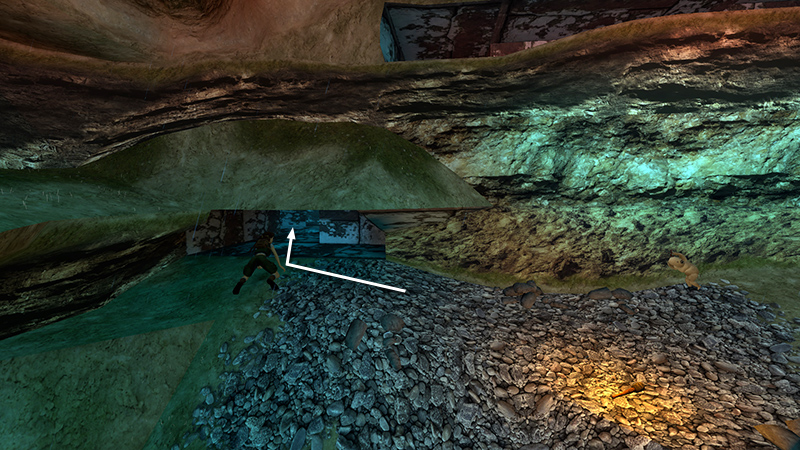
Crawl into the low tunnel underneath the green corner ledge...
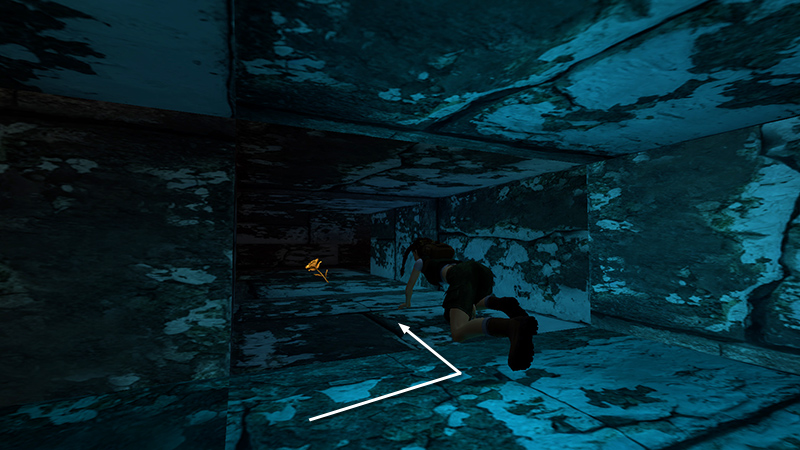
...to find a golden rose (6) (169/239) (SECRET #1, 25/36). Crawl back out.
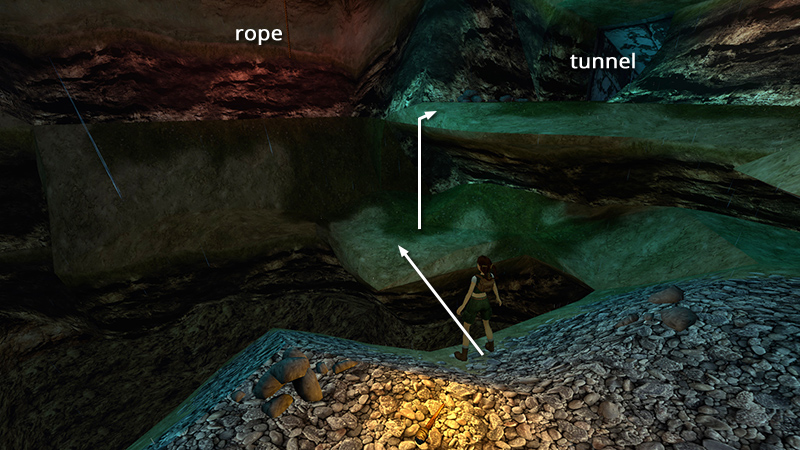
Walk carefully to the edge of the chasm and jump over to the squarish green ledge below and to the right of the dangling rope. Pull up onto the ledge above.

Return through the tunnel (down the entrance ramp, left, across the shallow pit, then onward) to the PATH where you began.
[Previous | Next | Old Mill Walkthrough]
DARK MODE: I plan to add optional dark mode for these pages, but my current priority is updating the walkthroughs. Meanwhile, may I suggest a reputable dark mode browser extension, such as Dark Reader? (Download only from trusted sites, like darkreader.org or your browser's web store.)
Walkthrough text and diagrams copyright © Stellalune (email ). Feel free to copy or print this walkthrough for personal use. By all means, share it with friends, but please include this credit line so people can send me their feedback. No part of this walkthrough may be reproduced on another site without permission.