Gallows Tree - Underground - Secret #3 and "Torchdown" Achievement/Trophy

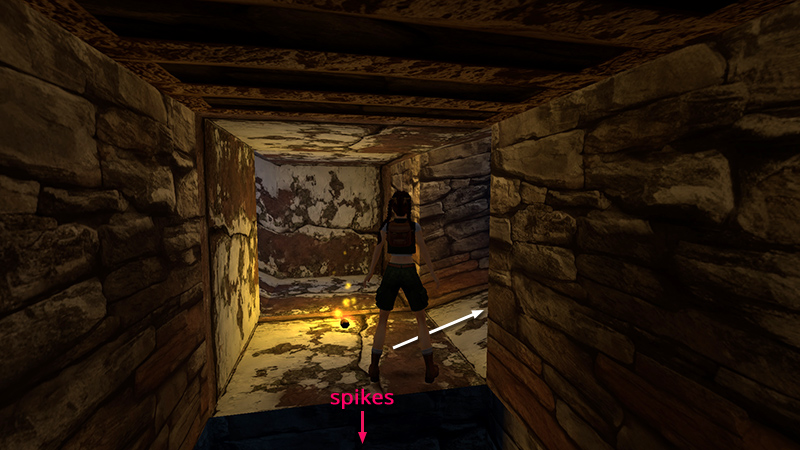
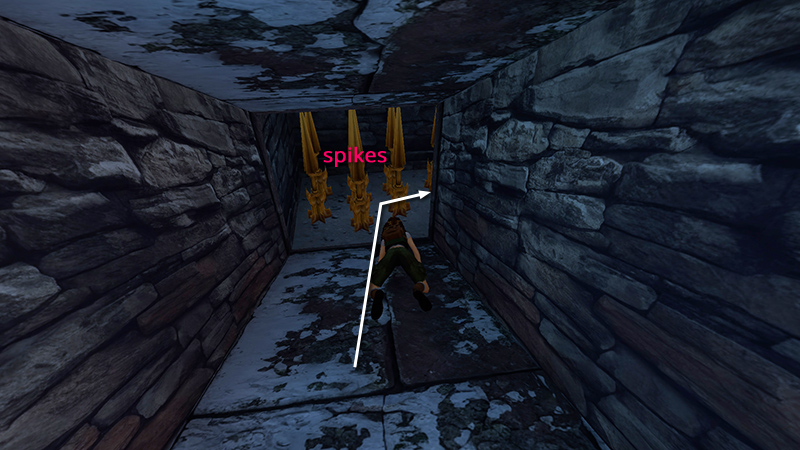
In the previous section, you found a WOODEN TORCH, lit it, threw it down a hole, then climbed down after it. Pick up the torch and follow the passageway to the first intersection. Ahead are some break-away tiles concealing a spike pit. Either run across quickly or detour around the spikes by going up the ramp to the right.
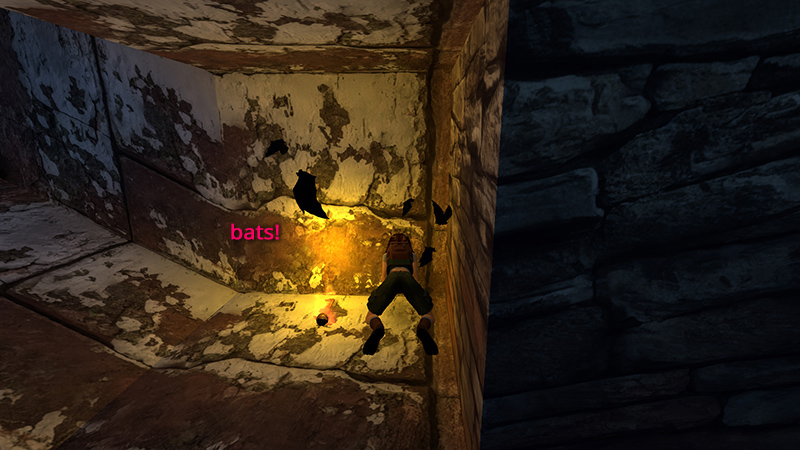
On the other side of the spike pit, a flock of bats appears. Toss the torch (not into the spike pit!) and crouch in the corner or just keep moving and suffer a few bat bites.
When the bats disperse, grab your torch and head up the ramp on the right (when Lara's back is toward the spike pit).
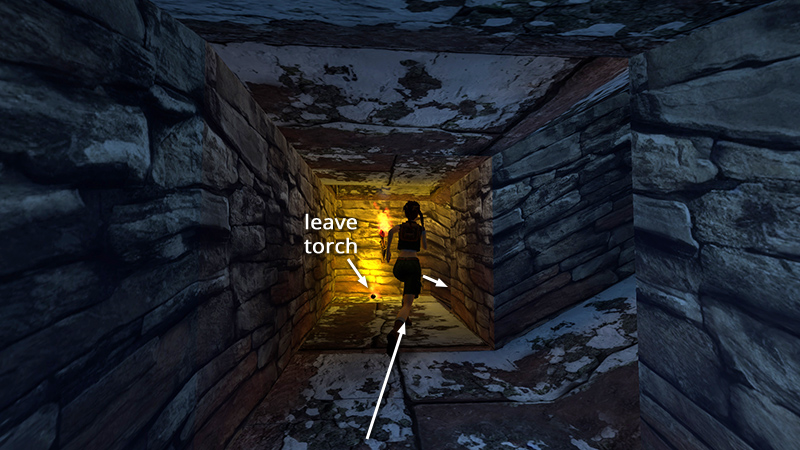
There's a lit torch on the wall at the top. Drop your wooden torch here, so you can find it easily later. Then head down the ramp to the right.
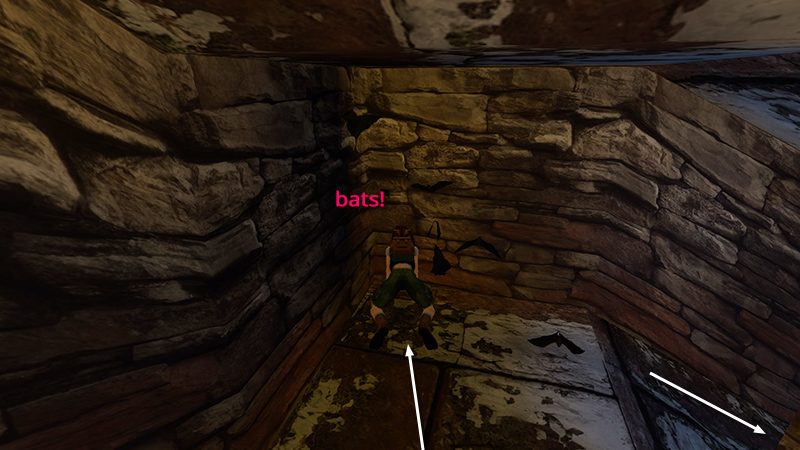
Another flock of bats emerges on the landing. Crouch in the corner again if you want to. Then continue down the ramp toward the spike pit.
Crouch near the bottom of the ramp and crawl through the spikes so Lara won't be injured.
NOTE: You can walk safely through the spikes, but Lara will take a little damage when you then have to crouch and stand to get in and out the crawlspace.
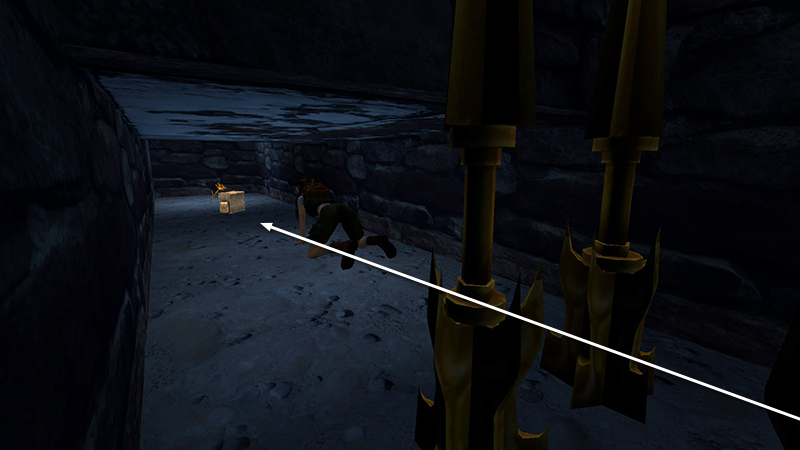
Crawl into the low opening beyond the spikes to find a large medipack (11) (147/239) and a golden rose (12) (148/239) (SECRET #3, 21/36). Crawl back out...
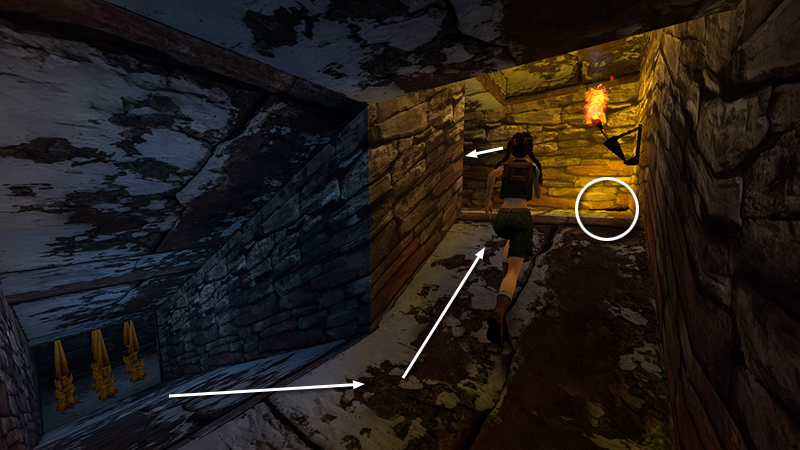
...and return up the ramp to the lit torch. Retrieve your WOODEN TORCH and follow the ramp down to the left.

Turn right at the spike pit. Then follow the long ramps to the ROOT ROOM at the top.
Stand on top of the mound and press Action to use the lit torch to burn the roots. The hanged man's HEART (13) (149/239) drops out onto the floor.
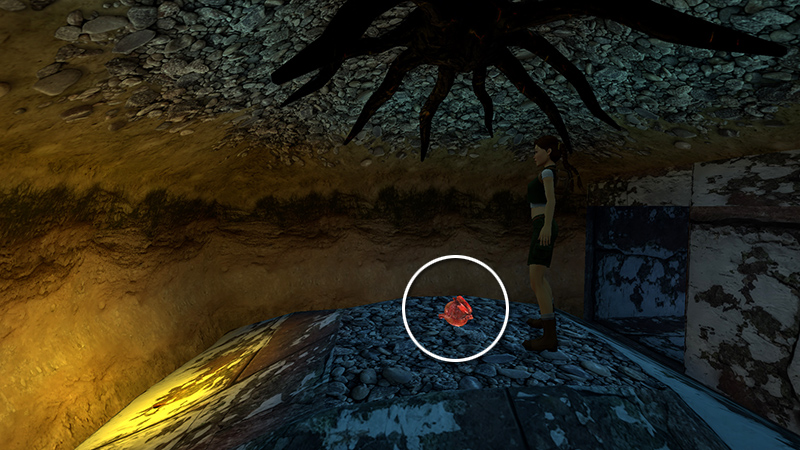
Toss your torch away then pick up the HEART.
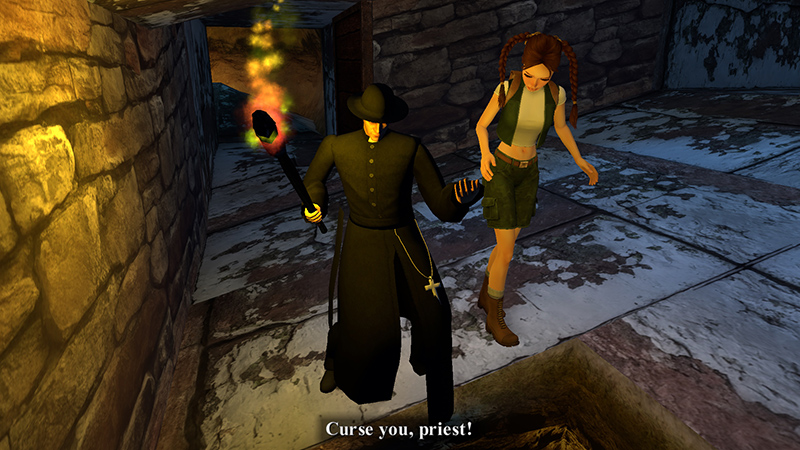
Cutscene: A nearby door opens and Lara enters to find Father Dunstan arguing with a mysterious voice emanating from a dark pit. The good father tells Lara to meet him on the other side of the bridge, which we'll come to shortly, and use iron to ward off any evil creatures she may encounter.
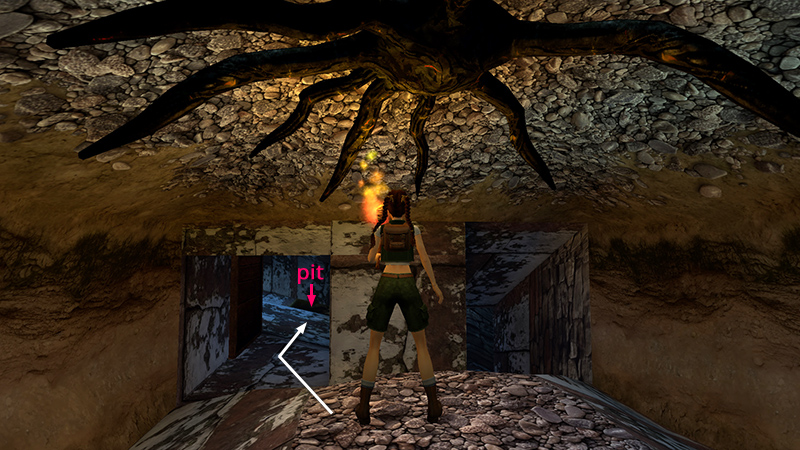
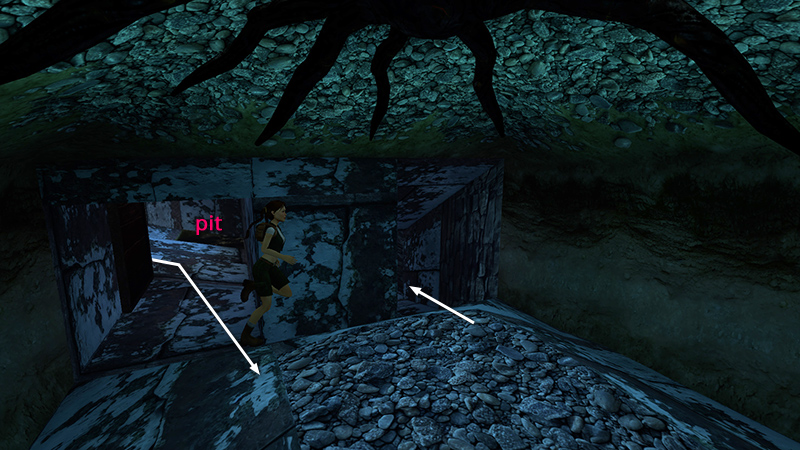
Get your wooden torch from the ROOT ROOM. Then return through the doorway on the left to the room with the pit.
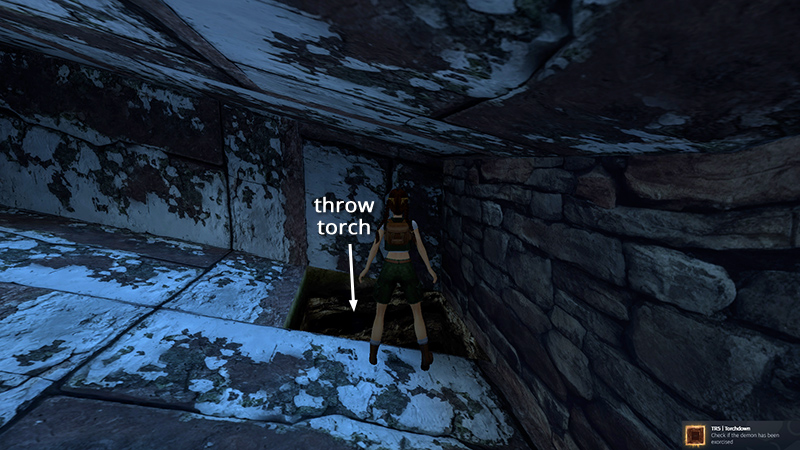
Throw the torch into the pit to unlock the "Torchdown" achievement/trophy.
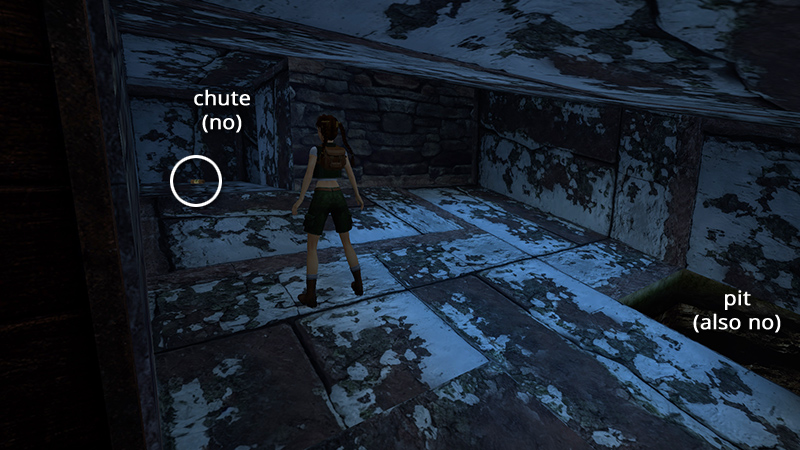
Pick up the small medipack (14) (150/239) in the other doorway leading out of the room with the pit, but don't slide down the chute there. This chute leads back down to the GALLOWS TREE AND COVERED WELL. It's quicker to return through the tunnels the way you came.
NOTE: Check the footnotes in the main walkthrough for the route back if you accidentally slide down the chute or just prefer to take the longer but brighter path.
Go back into the ROOT ROOM. Then exit through the other door.
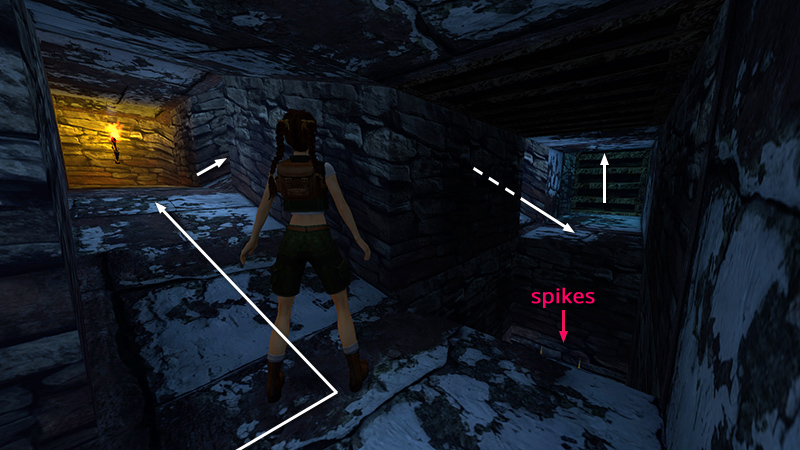
Follow the ramps back down to the spike pit. Skirt the pit by going up the ramp to the left, up the next ramp to the right, then down the other side. Continue left to the ladder and climb out of the tunnels.
DARK MODE: I plan to add optional dark mode for these pages, but my current priority is updating the walkthroughs. Meanwhile, may I suggest a reputable dark mode browser extension, such as Dark Reader? (Download only from trusted sites, like darkreader.org or your browser's web store.)
Walkthrough text and diagrams copyright © Stellalune (email ). Feel free to copy or print this walkthrough for personal use. By all means, share it with friends, but please include this credit line so people can send me their feedback. No part of this walkthrough may be reproduced on another site without permission.