Gallows Tree - Bell Tower
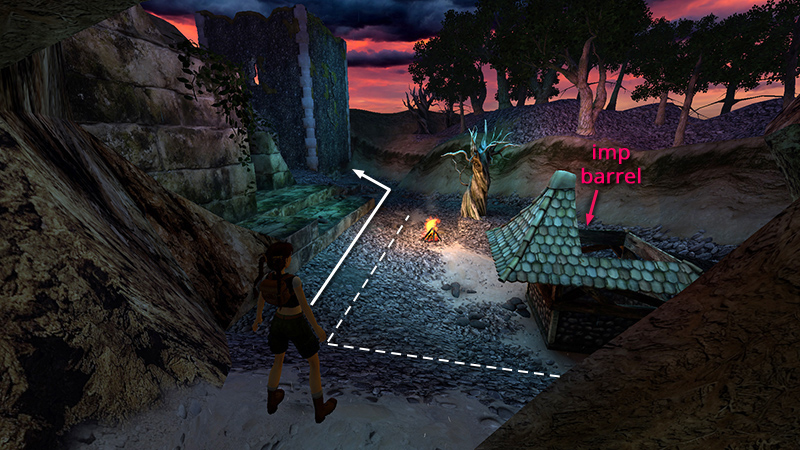 After locating a RUBBER TUBE and avoiding some rats, detailed in the previous section, you return briefly to the area with the GALLOWS TREE AND COVERED WELL. Cross to the blocky tower in the far left corner, staying close to the stone steps on the left so you don't trigger the changeling/imp in the barrel next to the well.

Crawl through the low opening at the base of the tower.
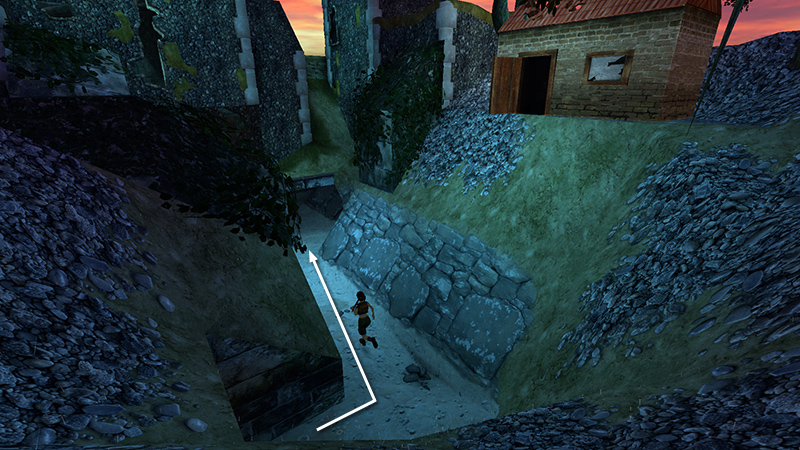
When you emerge in the next area, a CHALKY TRENCH NEAR A BOARDED-UP BELL TOWER, follow the path to the left.

Ahead is a ruined building with hollowed-out areas below. Move into the hollow on the right...

...and pick up a broken PITCHFORK (9) (145/239). (If you can't spot it using classic graphics, try toggling to modern: F1 on keyboard Start/Options/+ on Xbox/PS/Switch controller.)
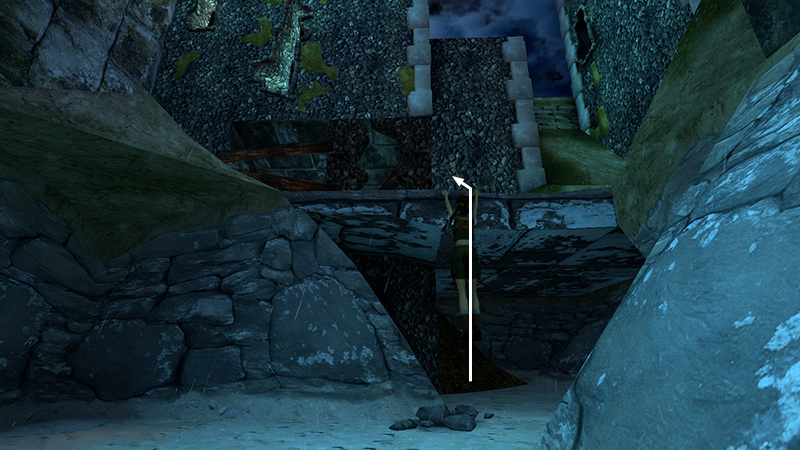
Climb onto the ledge above the hollow.
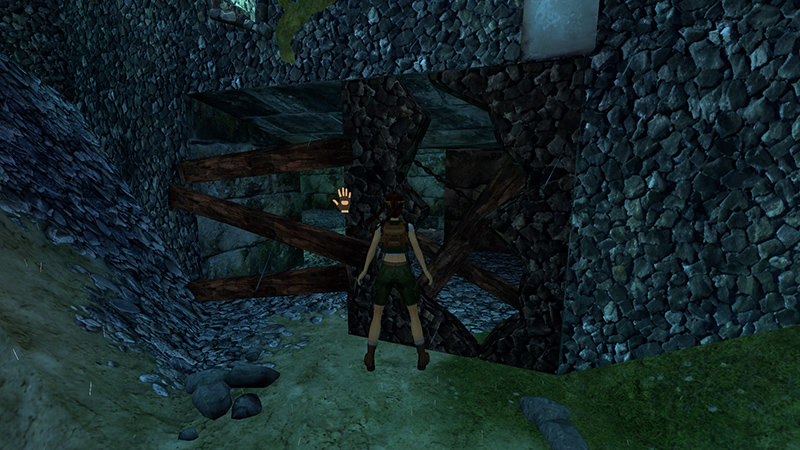
Stand close to the boarded-up openings so you can see the hand icon (assuming Action Indicators are enabled in the Options menu). Combine the PITCHFORK and RUBBER TUBE in your inventory to make a CATAPULT (more like a slingshot, really, but maybe that's a dialect thing) and use it here.
NOTE: If you missed the RUBBER TUBE, you'll need to go get it now. See the footnote in the main walkthrough for details.

Cutscene: Lara assembles her slingshot and uses it to send one of the bells crashing to the ground. She jumps aside to avoid the falling debris.
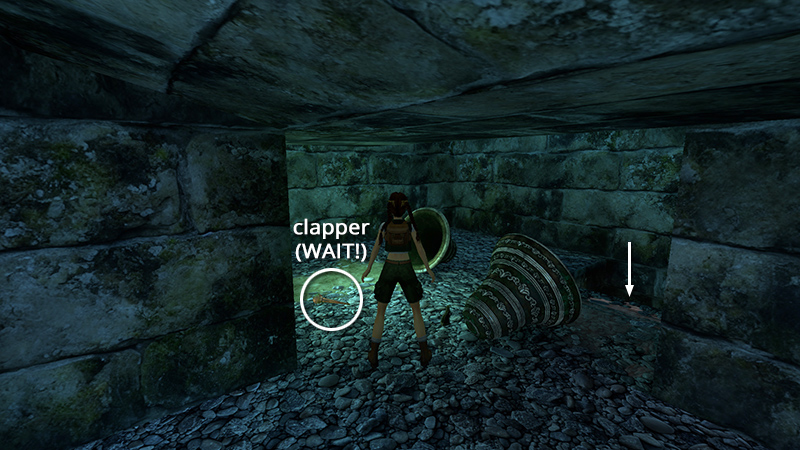
IMPORTANT: If you want the "Fail Compilation" achievement/trophy, do not pick up the CLAPPER in the BELL TOWER. This achievement requires you to watch three cutscenes in which Lara makes a mistake and pays the price. The first is coming up shortly.
If you don't care about achievements, take the CLAPPER now and just continue following the guide. You'll have one extra pickup for a while.
DARK MODE: I plan to add optional dark mode for these pages, but my current priority is updating the walkthroughs. Meanwhile, may I suggest a reputable dark mode browser extension, such as Dark Reader? (Download only from trusted sites, like darkreader.org or your browser's web store.)
Walkthrough text and diagrams copyright © Stellalune (email ). Feel free to copy or print this walkthrough for personal use. By all means, share it with friends, but please include this credit line so people can send me their feedback. No part of this walkthrough may be reproduced on another site without permission.