Gallows Tree - From the Chasm to the Hanged Man
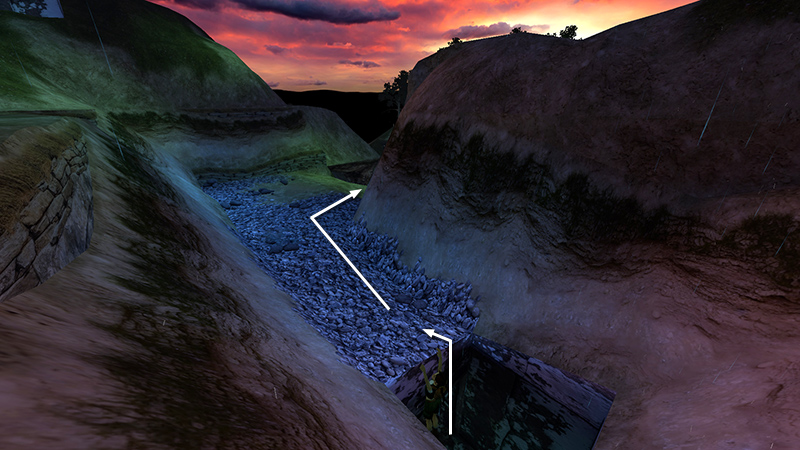
In the last section we got the first secret and climbed back up to the start of the level. Again follow the path around to the rim of the CHASM.

Repeat the running jump to the first whitewashed ledge, traverse along the crevice, and drop onto the second ledge.
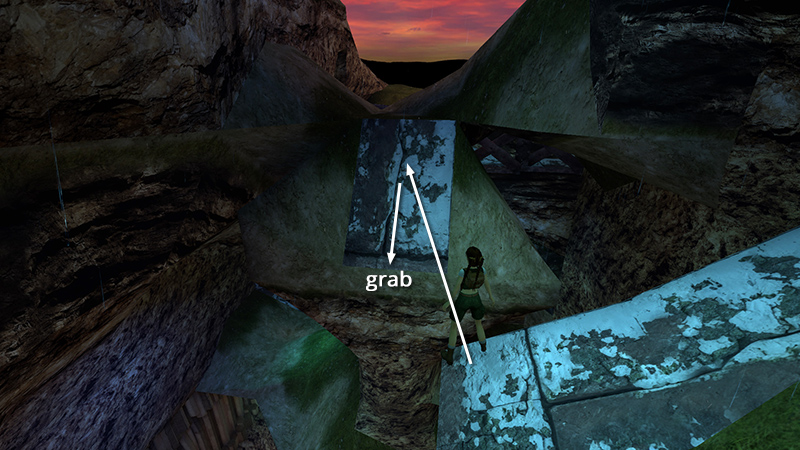
Turn to face the whitewashed slope across the gap. Jump onto the slope, slide back, and grab the edge like you did before. Only this time don't let go.
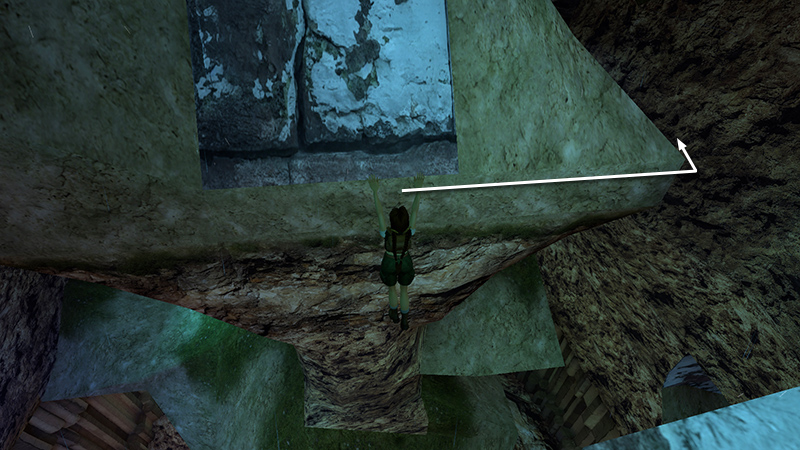
Instead, traverse to the right and around the corner...
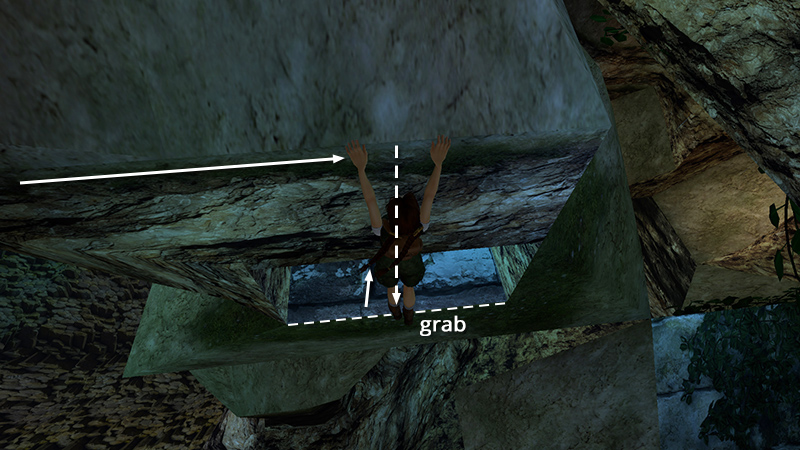
...until Lara is hanging above a small, rectangular opening. Let go then immediately press and hold Action to grab the edge of the small opening. Pull up and crawl through.
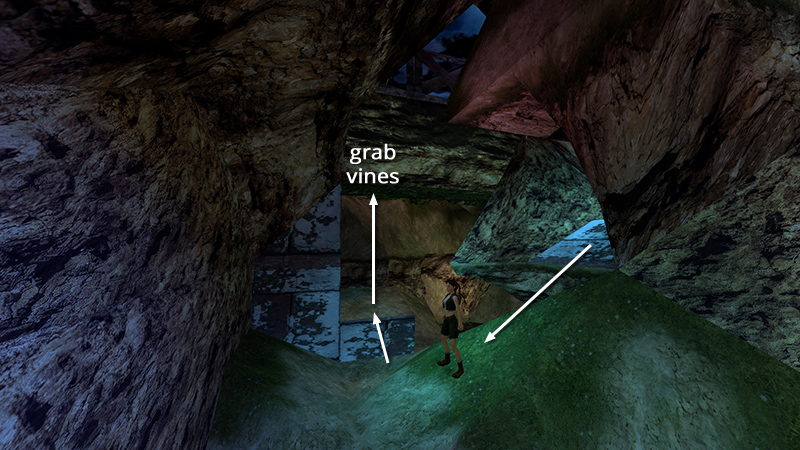
Turn right and climb onto the small, flattish block underneath the stone bridge. Jump straight up and grab the vines growing on the underside of the bridge.
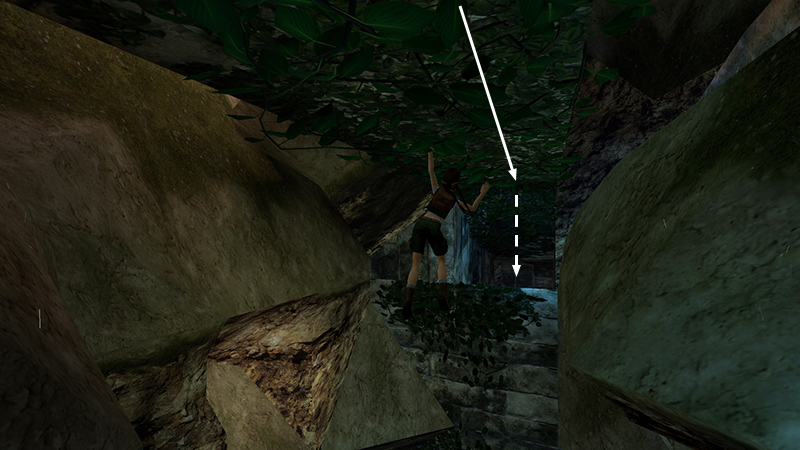
Monkey-swing forward until you can drop down in the dark passageway on the other side.
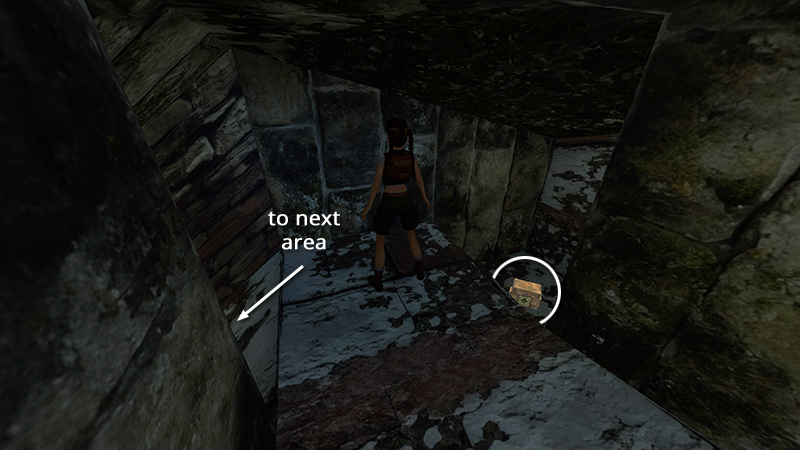
Pick up the large medipack (5) (141/239) in the depression on the right. Then slide down the chute. Step forward into an open area with a campfire and an ancient, gnarled tree.
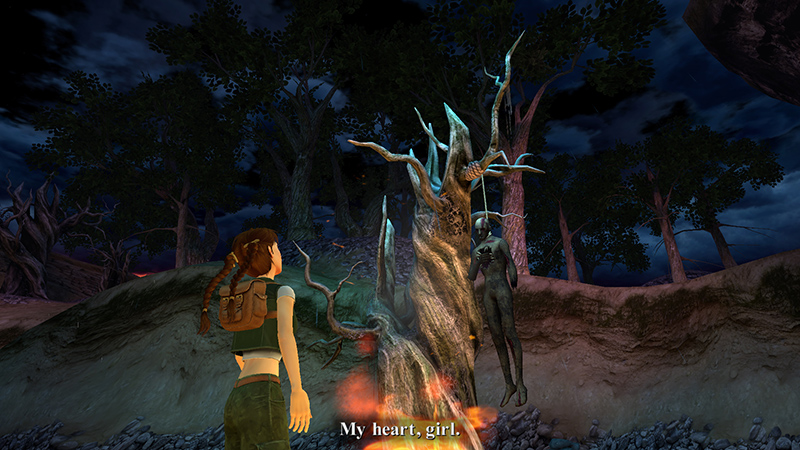
Cutscene: Lara is startled by a ringing bell and the sudden appearance of a rotting corpse swinging from the tree by a noose. He speaks to her, asking her to find his heart, hidden somewhere below.
DARK MODE: I plan to add optional dark mode for these pages, but my current priority is updating the walkthroughs. Meanwhile, may I suggest a reputable dark mode browser extension, such as Dark Reader? (Download only from trusted sites, like darkreader.org or your browser's web store.)
Walkthrough text and diagrams copyright © Stellalune (email ). Feel free to copy or print this walkthrough for personal use. By all means, share it with friends, but please include this credit line so people can send me their feedback. No part of this walkthrough may be reproduced on another site without permission.