Gallows Tree - Chasm and Secret #1
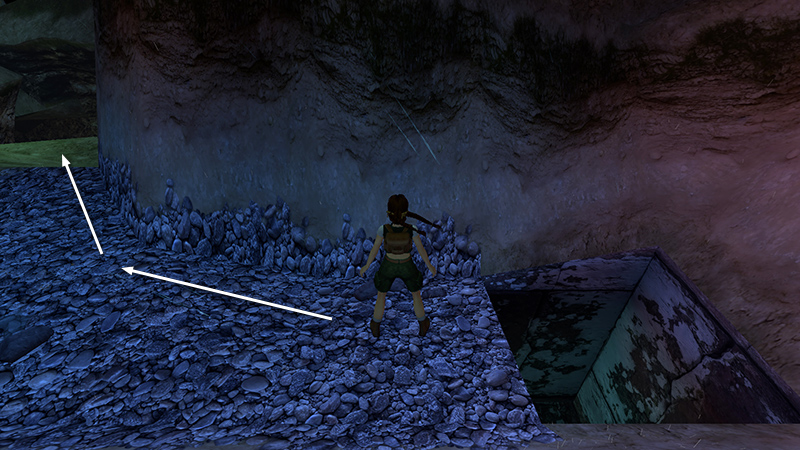
The hole on the right leads down into the area you'll be visiting shortly. Ignore it, since you'll be taking another route and snagging a secret on the way down. Instead, follow the path to the left and approach the edge of the chasm.
Note the two whitewashed ledges on the opposite side of the pit. Take a running jump down to the one on the right.
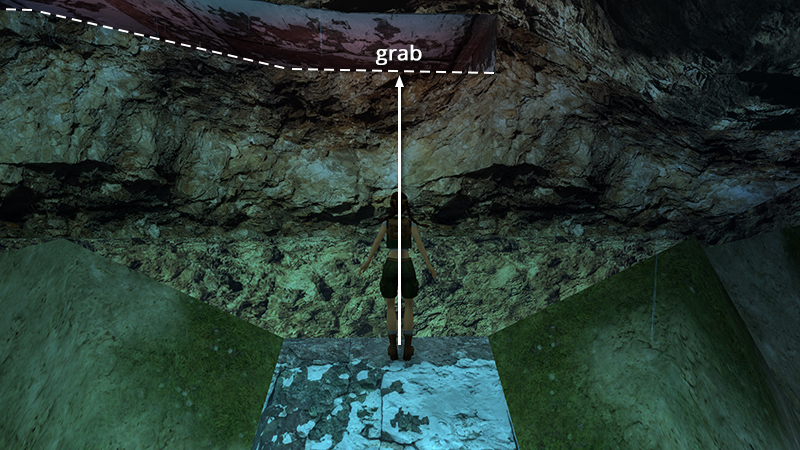
Stand facing the cliff wall and grab onto the horizontal crevice.
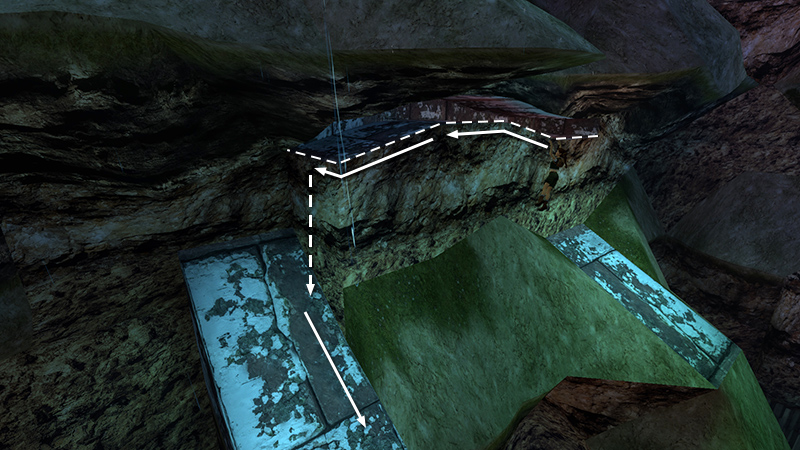
Traverse along this crevice to the left and around the corner. Let go and slide onto the flat part of the second whitewashed ledge.
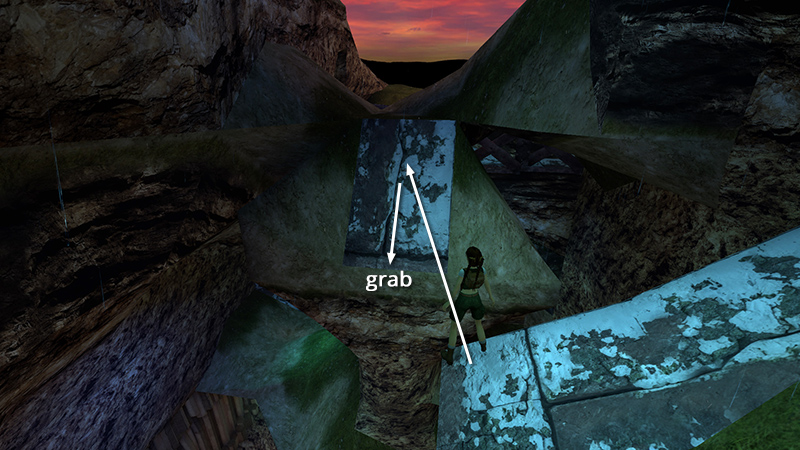
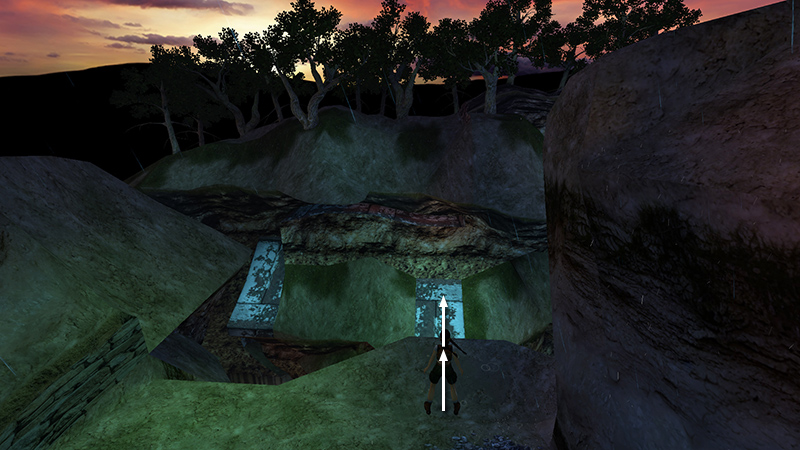
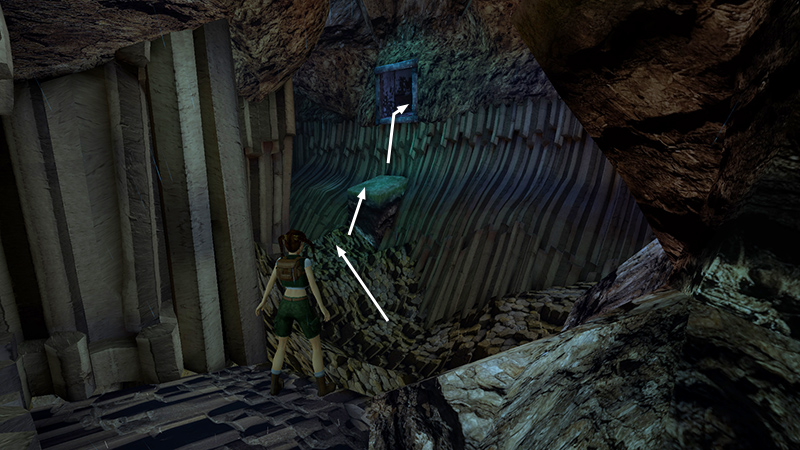
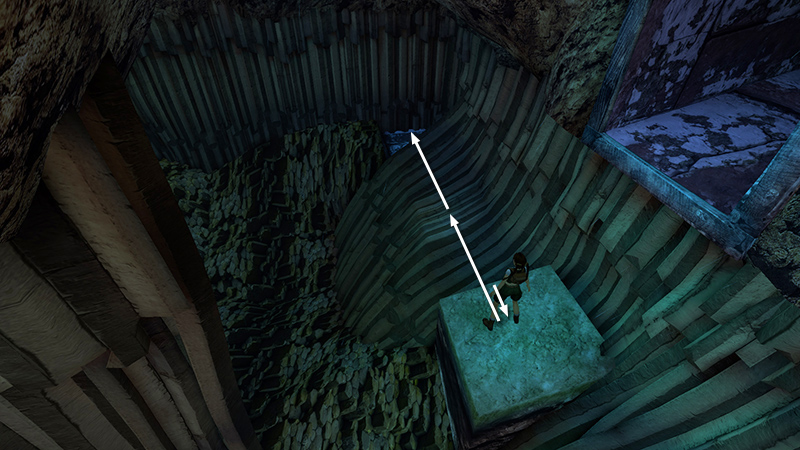
Turn to face the whitewashed slope across the gap. (There's a lovely sunset in the distance.) Take a standing jump onto the slope, slide backward and hold Action to grab the edge.
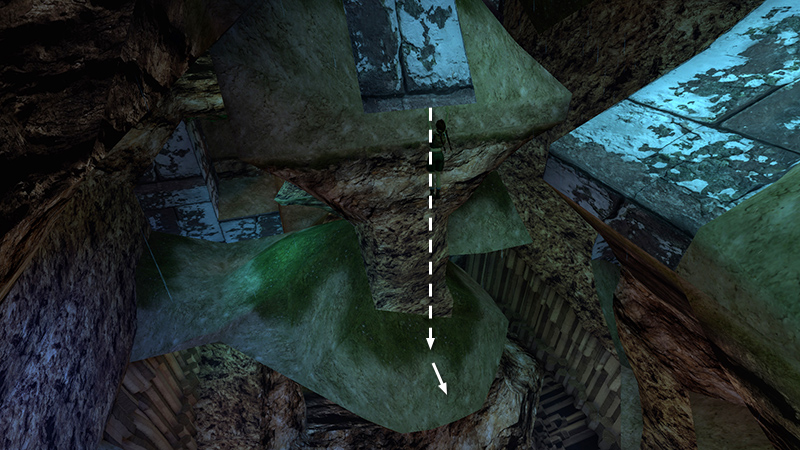
Let go to drop onto the greenish ledge below. Lara will slide back then stop just before the edge.
Turn right to face a SMALL MANMADE CAVE with a whitewashed interior. Walk carefully to the edge of the green ledge nearest the cave. Take a standing jump with Action to lower Lara's arc so she lands squarely inside the cave.

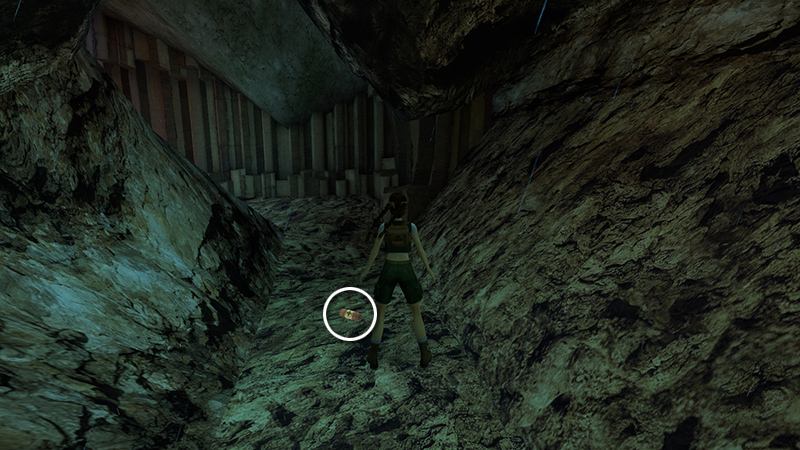
A flock of bats flies out. Don't jump around too much trying to avoid them or you may fall. Instead, try crawling forward toward the golden rose (1) (137/239) (SECRET #1, 19/36).
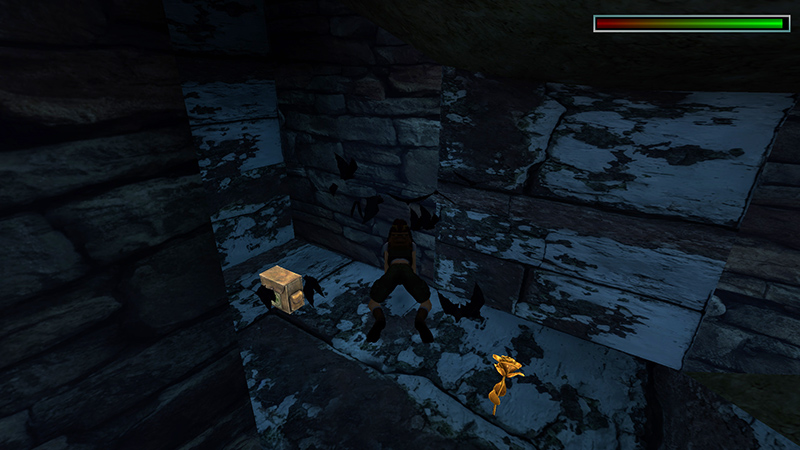
If you then stay crouched near the wall, Lara should take little or no damage. When the bats disperse, pick up the secret and a large medipack (2) (138/239).
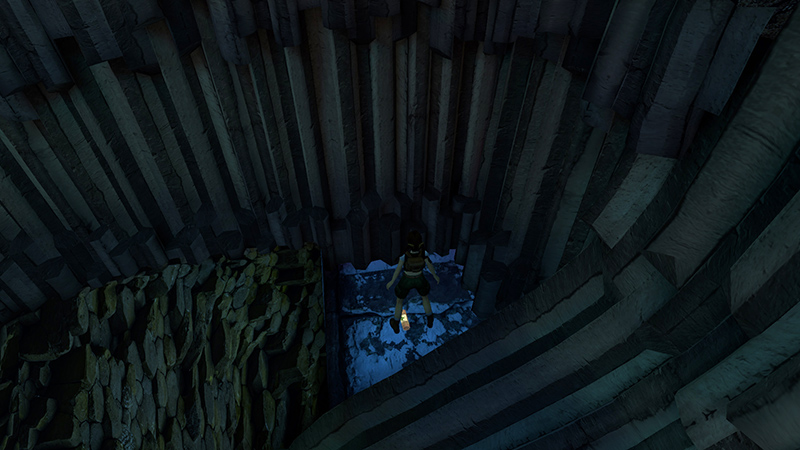
NOTES: If you miss a jump and end up at the bottom of the chasm, either reload or climb through the small, square opening in the cliff wall. This tunnel leads back up to the starting point. This area seems to have been inspired by the Giant's Causeway in County Antrim, Northern Ireland, a UNESCO World Heritage Site famous for its distinctive basalt columns.
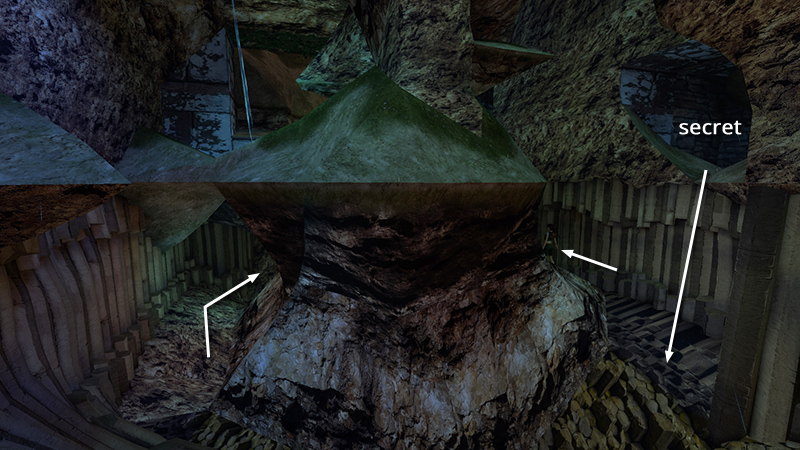
After getting the secret, drop down to the floor of the CHASM. Go behind the huge stone column with the uneven green ledges (i.e., to the right if Lara's back is to the cave where you found the secret).
Pick up a small medipack (3) (139/239).
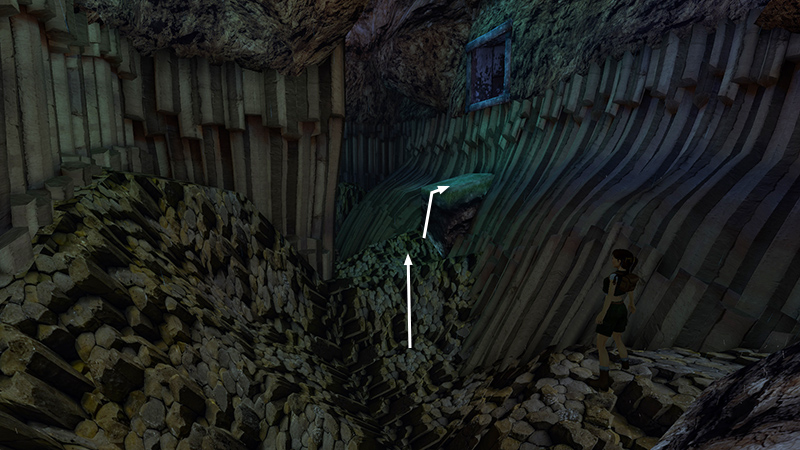
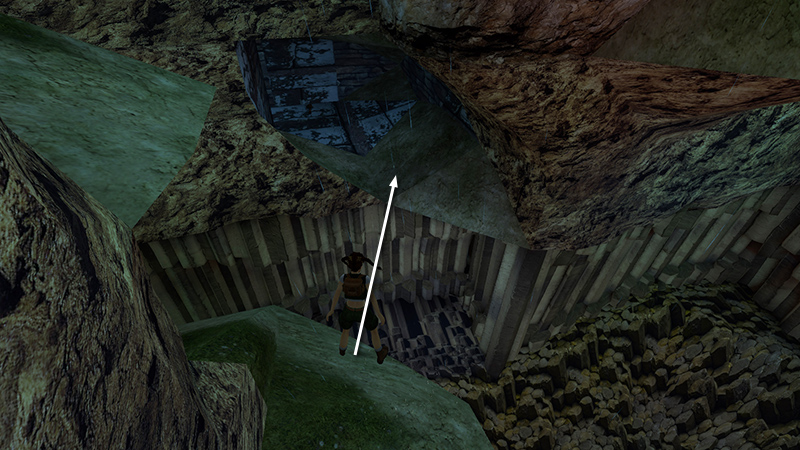
Then make your way to the other end of the chasm and climb onto the block ledge below the square opening in the wall. (This tunnel leads back to the start, as noted above.)
Turn left and walk to the edge of the block ledge. Walk one step back. Then take a standing jump to a flat area on the striped rocks, and another standing jump to the square corner ledge.
Here you'll find another small medipack (4) (140/239).
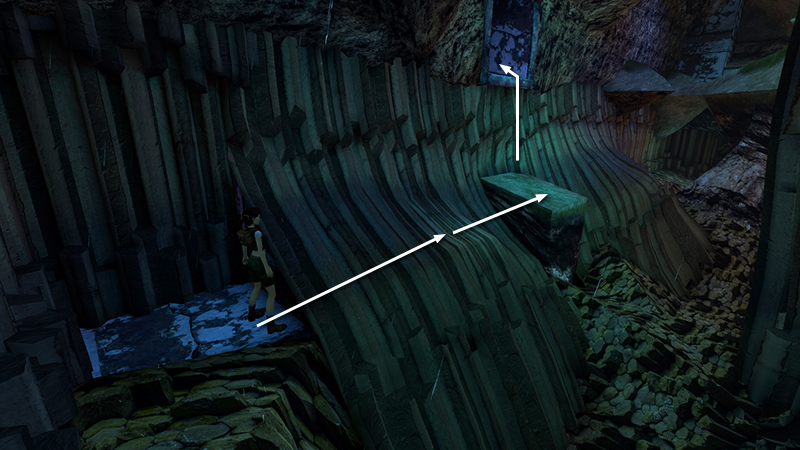
Return to the block ledge, pull up into the square opening, then climb through the manmade tunnel back to the start of the level.
DARK MODE: I plan to add optional dark mode for these pages, but my current priority is updating the walkthroughs. Meanwhile, may I suggest a reputable dark mode browser extension, such as Dark Reader? (Download only from trusted sites, like darkreader.org or your browser's web store.)
Walkthrough text and diagrams copyright © Stellalune (email ). Feel free to copy or print this walkthrough for personal use. By all means, share it with friends, but please include this credit line so people can send me their feedback. No part of this walkthrough may be reproduced on another site without permission.