Coastal Ruins - 'Egyptian Adventure' and Mirror Room
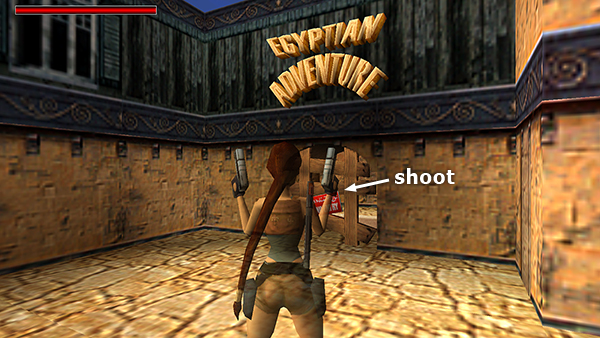
Shoot out the boarded-up doorway beneath a sign advertising an "Egyptian Adventure" and go inside.
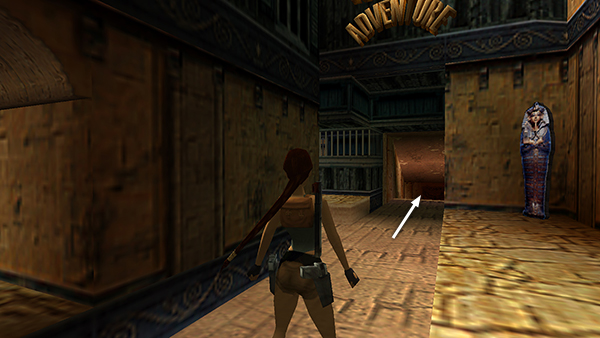
Enter, turn left, and go through the doorway between the cage and the painted sarcophagus.
If you peek into the cage, you'll see a key ring hanging on a hook. There's no way to get it yet, but you'll be back.
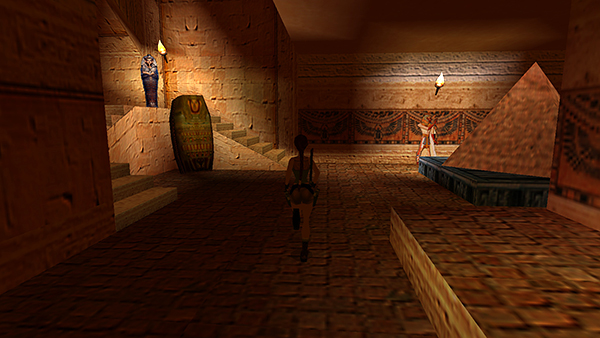
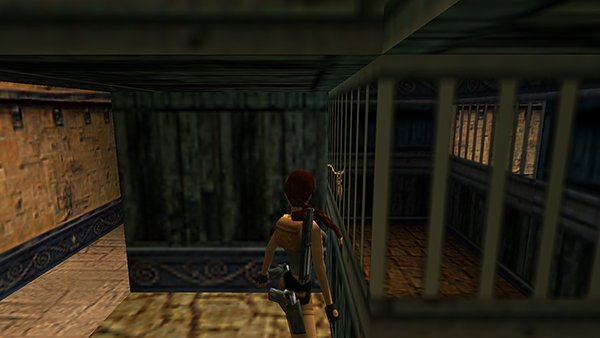
Proceed downstairs to a room with a model pyramid and other decorations.
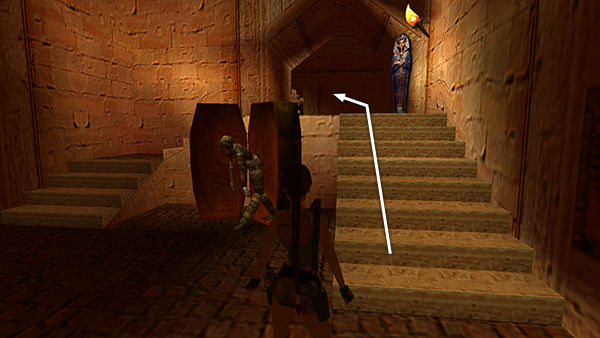
When you approach the hinged sarcophagus, it opens and a mechanical mummy lurches out. There's no danger, just a not-so-scary jump scare. Go up the stairs behind the fake mummy.
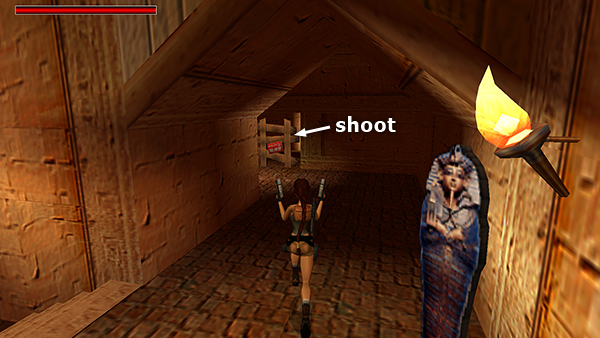
Follow the hall to another boarded-up doorway. Shoot it out and enter carefully.
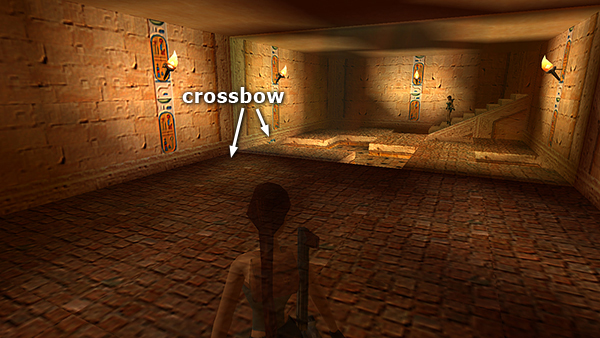
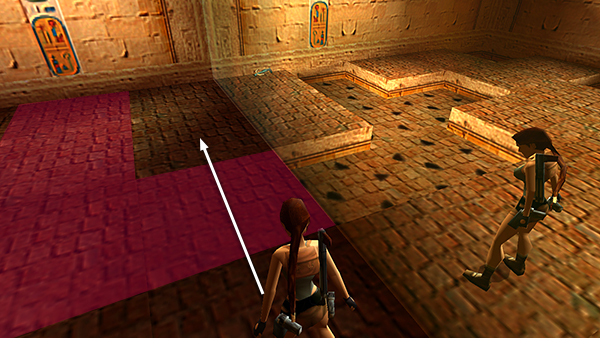
The floor is laced with concealed spikes. (An Egyptian adventure indeed!) As you enter, Lara looks to the right: a mirror. Like the tricky mirror in the SACRED LAKE level, this one reveals the location of the spikes, as well as the CROSSBOW sitting on the floor in the far corner.
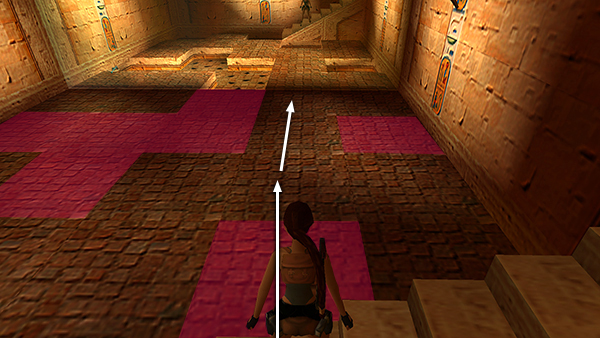
Walk down to the lower part of the staircase, turn right, and Jump over one set of spikes onto the clear floor ahead. Then move forward to the mirror.
Turn left and take a standing jump over the spiked tile nearest the mirror.
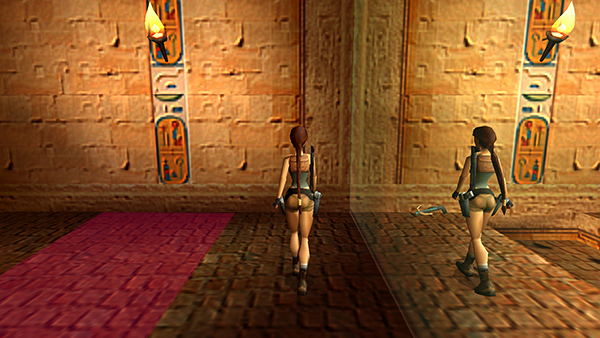
Walk forward and pick up the CROSSBOW.
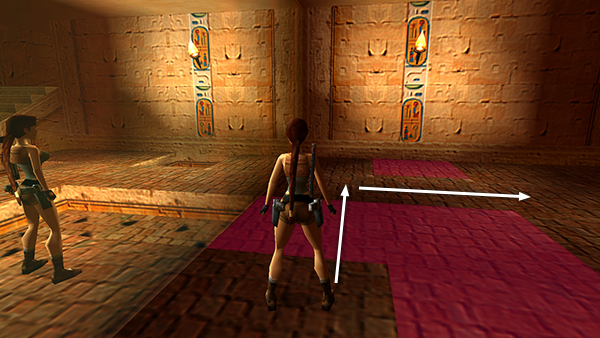
Turn around and walk back the way you came, stopping before the spiked tile nearest the mirror. Take a standing jump over them. Then turn right and walk forward.
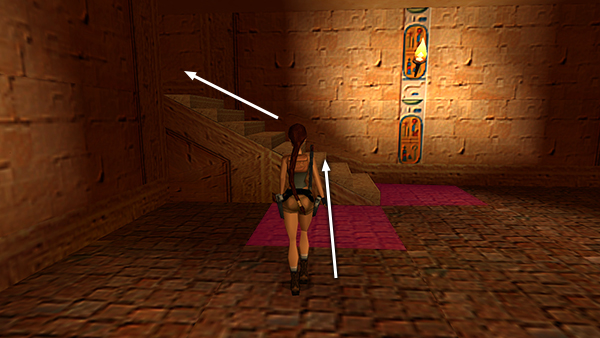
Watch out for the spikes surrounding the bottom of the stairs. Jump over them to land on the stairs. Now proceed to the exit.
Copyright © 1999- - Stellalune ( ). All rights reserved. Feel free to copy or print this walkthrough for personal use. By all means, share it with friends, but please include this credit line so people can send me their feedback. No part of this walkthrough may be reproduced on another site without permission. Follow this link for details about this site's advertising and privacy policy.