Using the Trigger Bug in Cleopatra's Palaces
If you accidentally break the mechanical scarab by using it too many times before you are able to complete the level, there are several possible solutions. If you're playing the PC or Macintosh game, you can download a savegame file in which Lara has the scarab or has already completed this section. Or, use the corner bug to trigger the spikes, making the passageways safe to pass. Do not use the level-skip cheat because you will miss several critical items.
If you aren't familiar with the basic mechanics of the corner bug and crawling corner bug, check out my Useful Bugs page. You'll probably want to practice these moves in a safer location first before attempting them here.
In addition to the screenshots below, check out Czech raider Ewil's YouTube video showing a speed run through this level, which incorporates the corner bug to save time. He doesn't explore the level fully, so he misses the secret, but the video clearly shows how to use the bugs.
IMPORTANT: do not take the RIGHT GAUNTLET before attempting to bypass the second set of spikes using normal jumping corner bug otherwise the spikes won't retract. Instead, you must first activate the second set of spikes using the bug. Then you can safely return for gauntlet and continue further. There is no apparent connection between the gauntlet and the spikes, but for some reason taking it prevents the bug from working. As long as you don't take the gauntlet, you can trigger every set of spikes in the level and explore freely. (Thanks to Ewil himself for this tip. This path is shown in his speedrun video, linked above.)
To get past a set of spikes where the floor near the entrance is flat, use the crawling corner bug, as shown below. (It is also explained in detail on my Useful Bugs page.)
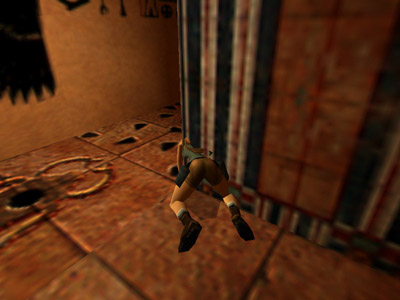
Use the crawling corner bug at the convex corner near the tile with the beetle carving on it. Crouch and stand only once or twice, so Lara does not creep too far forward. You don't want her to trigger the spikes while she's standing in them.
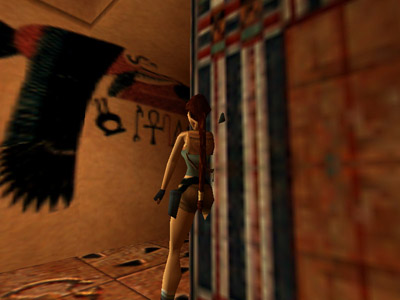
Once Lara is well embedded in the corner block (as shown above), jump in place several times. When you're in the correct position, you'll see Lara get hung up inside the corner and sort of "hover" for a moment each time you jump. At this point, you'll hear the telltale "ching", indicating that one set of spikes has been triggered. (Apologies to the hearing impaired. I'm not sure how you'd do this except with assistance from a hearing person or by trial and error.)

Upon triggering the nearest set of spikes, Lara may take a small amount of damage, but if you do it correctly, she won't be killed. When all three sets of spikes have been triggered, it's safe to pass through the hallway.
To get past a set of spikes where there is a drop-off near the corner (i.e, the one near the small L-shaped pool) use the basic corner bug, as shown here:
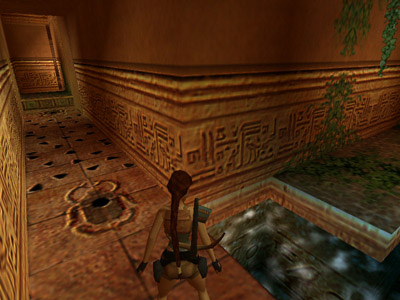
Use the basic corner bug at the convex corner near the tile with the beetle carving on it.
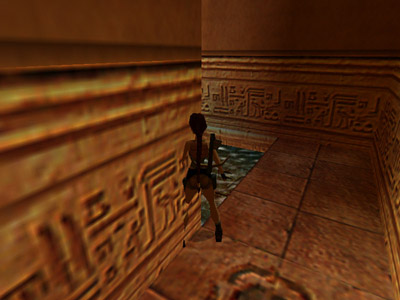
This time you don't have to worry about jumping into the spikes. Just work Lara into the wall as you would for a normal corner bug jump.
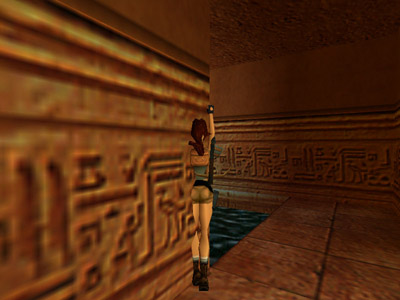
You can't see the spikes because they're behind Lara, but as she jumps, you'll see her get hung up inside the corner and sort of "hover" for a moment (as shown above). At this point, you'll hear the telltale "ching", indicating that a set of spikes has been triggered. When you've set off all three sets, the hallway is safe to pass.
Huge thanks to Ewil and to rr_carroll, Tomb Raider Tourist webmaster, for alerting me to this particular use of the corner bugs.
Copyright © 1999- - Stellalune ( ). All rights reserved. Feel free to copy or print this walkthrough for personal use. By all means, share it with friends, but please include this credit line so people can send me their feedback. No part of this walkthrough may be reproduced on another site without permission. Follow this link for details about this site's advertising and privacy policy.