Temple of Xian - Second Dragon Column to Level Exit
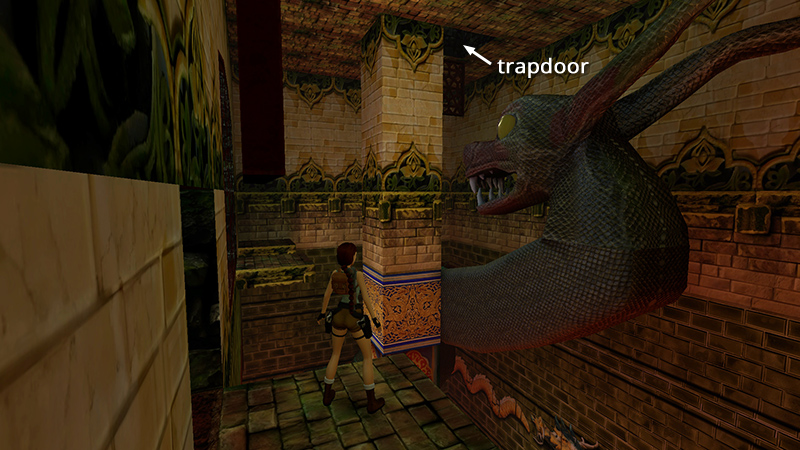
In the last section, you used the MAIN CHAMBER KEY to open various doors then climbed back to the upper level. Step out onto a ledge overlooking another square column with a dragon statue twined around it. (In case you get disoriented, you want the dragon with the column extending all the way to the ceiling. The other has the shorter column where you found the key.)
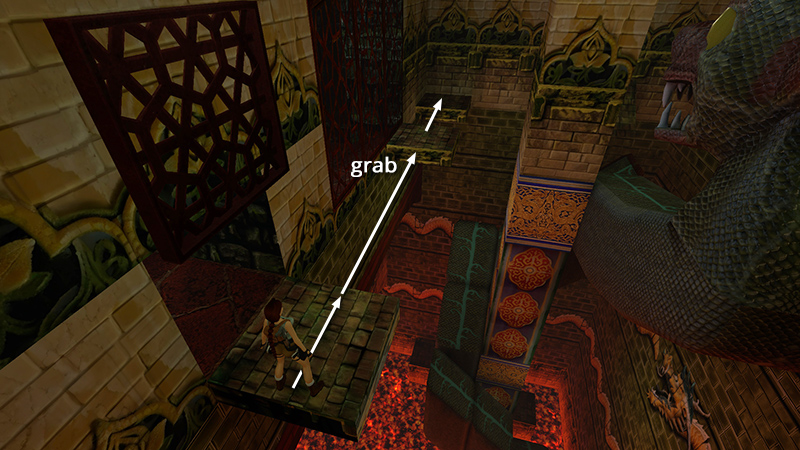
Turn left and take a running jump to grab the next ledge; pull up. Take a standing jump to the corner ledge.
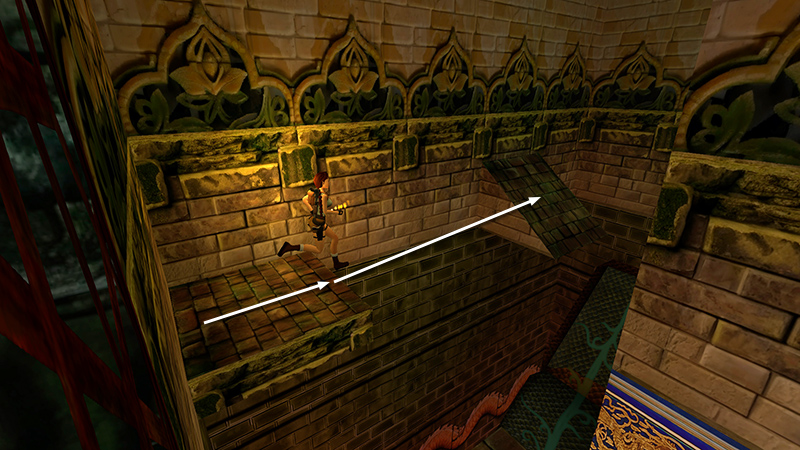
Then turn right to face a ledge that slopes down toward the dragon. Take a running jump onto it...
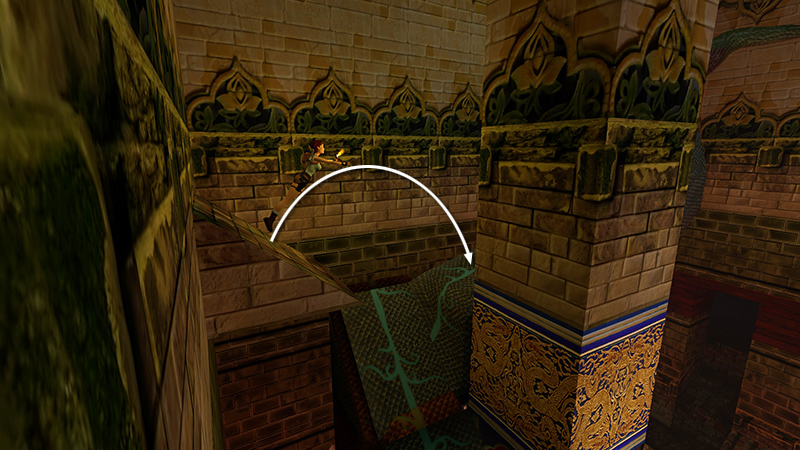
...and immediately jump again to land on the flat area on the dragon's neck.
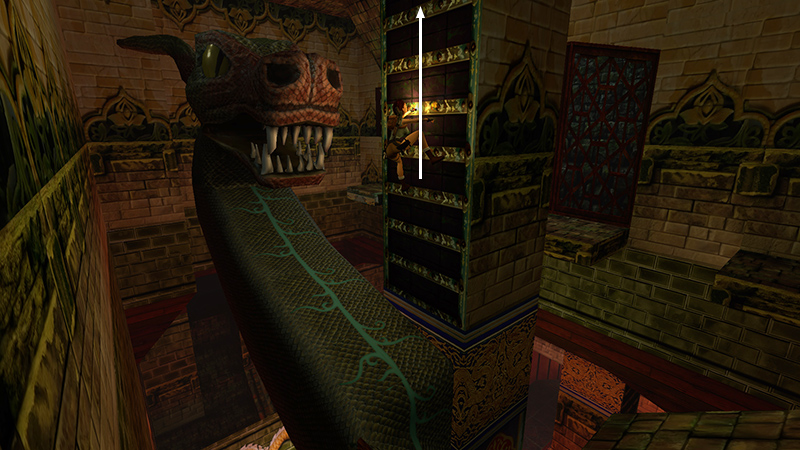
Climb the ladder on the square column, up through the open trapdoor...
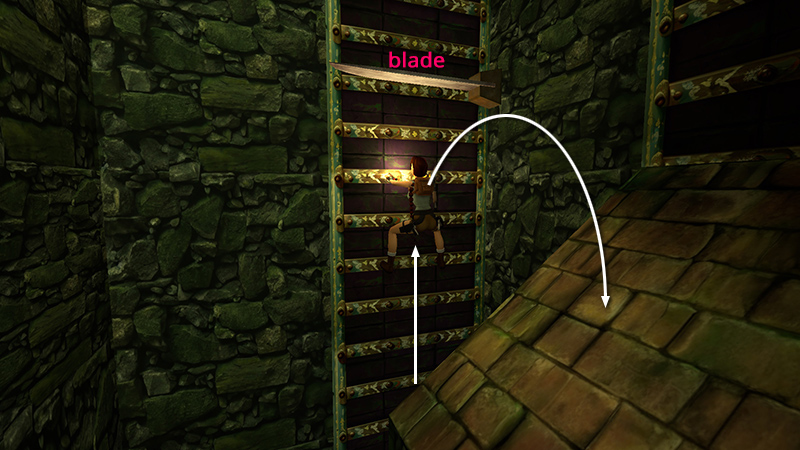
...until you come to a horizontal blade. Position Lara's hands two rungs below the blade, then backflip onto the angled block behind. Before Lara can slide off...
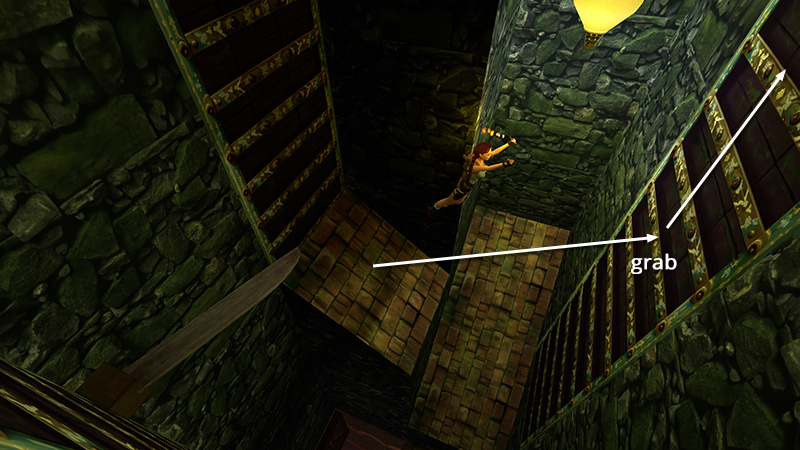
...immediately jump and grab the ladder on the opposite wall.
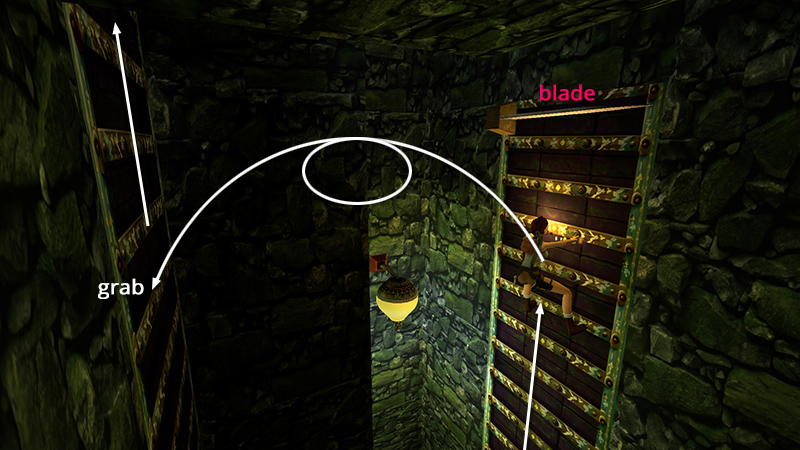
Climb to the next blade, position Lara's hands two rungs below it, and press Jump + Roll, then hold Action to make Lara leap from the ladder, twist in the air, and grab the ladder behind.
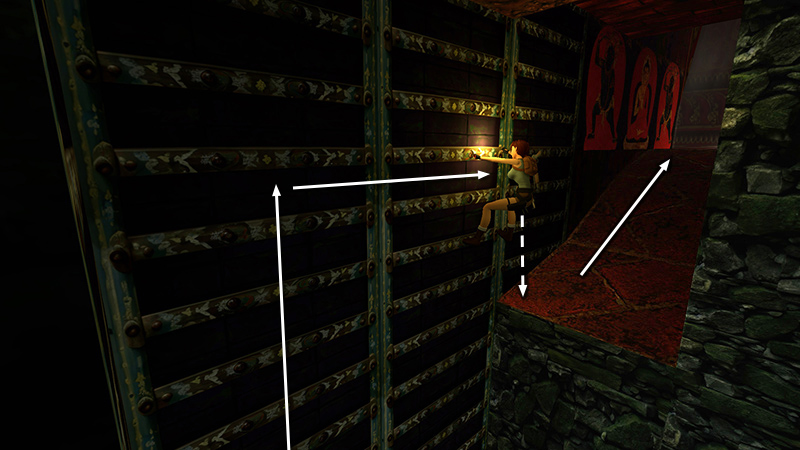
Continue climbing nearly to the ceiling. Dismount in the red hallway on the right and approach the doorway to finish the level.
DARK MODE: I plan to add optional dark mode for these pages, but my current priority is updating the walkthroughs. Meanwhile, may I suggest a reputable dark mode browser extension, such as Dark Reader? (Download only from trusted sites, like darkreader.org or your browser's official add-on/extension site.)
Walkthrough text and diagrams copyright © Stellalune (email ). Feel free to copy or print this walkthrough for personal use. By all means, share it with friends, but please include this credit line so people can send me their feedback. No part of this walkthrough may be reproduced on another site without permission.