Opera House - Major Shortcut
IMPORTANT: Do not use this shortcut unless you've already beaten the level once by the usual route or don't care about getting all kills, items and secrets. If you take it you'll, bypass most of the rest of the level and you will miss all three secrets.
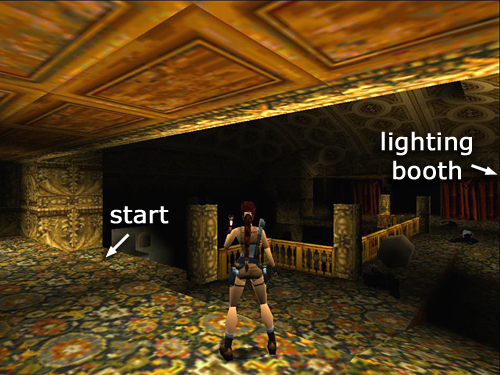
After dropping down from the LIGHTING BOOTH and killing the first enemy inside the opera house, go to the far left end of the balcony (i.e., left when facing the stage), to the spot marked 'start' in the screenshot above.
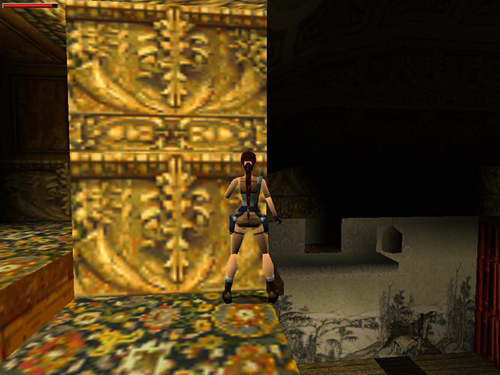
Position Lara as shown above, facing the carved panel with the stage ahead on her right. Sidestep all the way to the right.
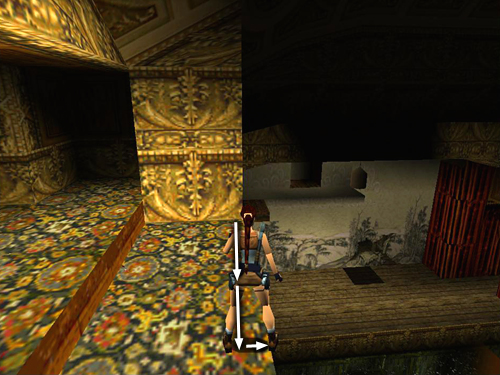
Hop back twice and then sidestep to the right again to make sure Lara's right foot is still at the edge. Pivot on this spot as needed so Lara is facing just a tiny bit to the right of the carved panel.
The newel post behind Lara may obstruct your view as you set up this jump. So press the Look button and check the angle by moving the camera up and down. Then adjust Lara's position a bit if necessary and use Look to check the angle again.
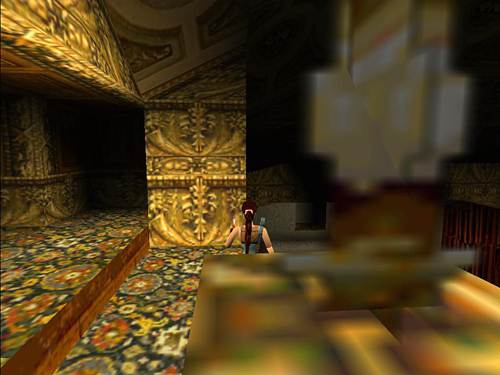
When you're all set up, save the game. Then, if the next tricky jump doesn't work the first time, you can reload and try again.
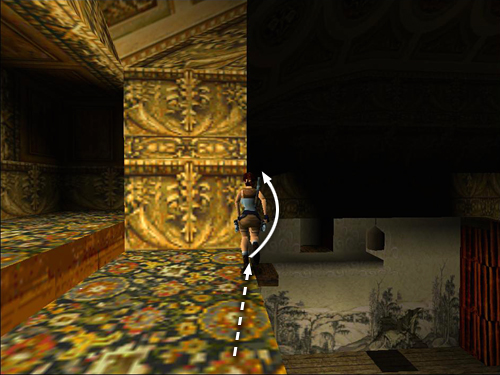
Now take a running jump. If you've lined it up correctly, Lara will run forward and take off at the edge of the ledge, just to the right of where it meets the carved panel. As Lara sails through the air, steer her a little to the left. (Yes, she can defy the laws of physics; she's Lara Croft, damn it!)
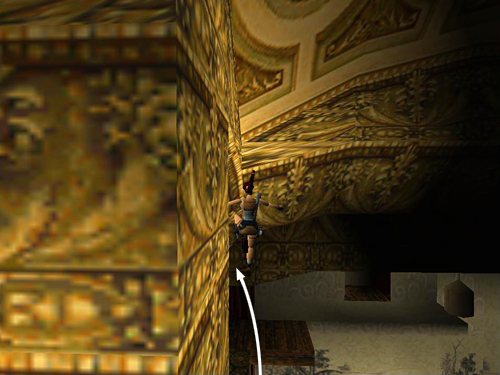
Doing this causes Lara to curve around the wall. . .

. . . and land on the balcony below on the left.
This balcony is on LEVEL 3. It is connected to the WHITE LEDGE ABOVE THE STAGE described near the end of the main walkthrough.
Copyright © 1998- - Stellalune (). Feel free to copy or print this walkthrough for personal use. By all means, share it with friends, but please include this credit line so people can send me their feedback. No part of this walkthrough may be reproduced on another site without permission. Follow this link for details about this site's advertising and privacy policy.
Stella's Tomb Raider Site: tombraiders.net.