Opera House - "Like Father, Like Son" Achievement/Trophy and Ornate Key
CONSERVING FLARES: This level is DARK. Consequently, I use more flares in these screenshots than you'll probably need. For tips on conserving flares, see the note in the main walkthrough.
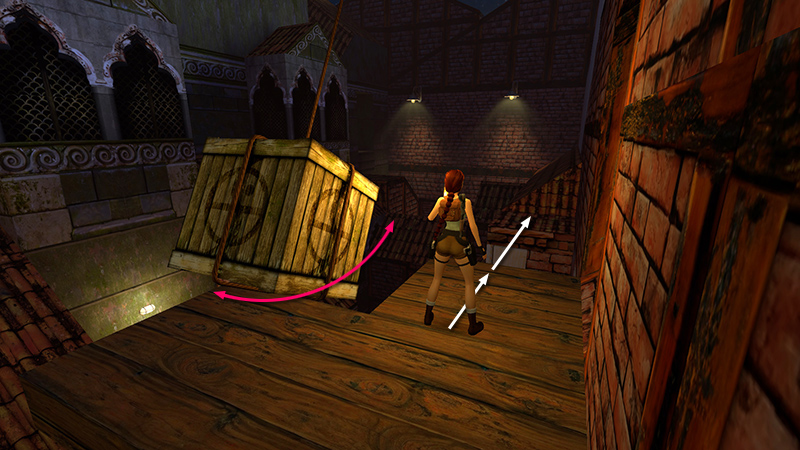
You begin on a ledge behind a wooden crate swinging back and forth on a rope. Don't stand too close to it, or Lara will get clobbered. There's an armed goon (1) patrolling the dock directly below. It's hard to target him from here, though. So take a running jump over to the small, flat ledge on the tiled roof to the right...
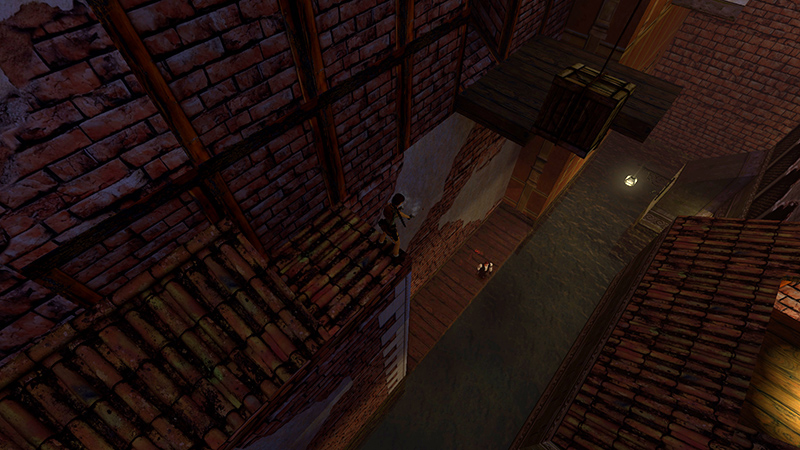
...and shoot him from there, backing away from the edge if he returns fire. (Or, wait until you get to the other side of the canal. Or, backflip off the ledge into the canal, draw weapons, and shoot him on the way down.)
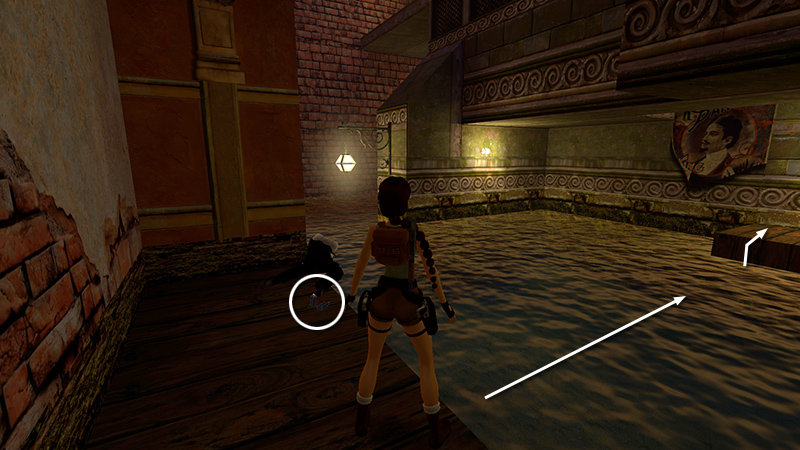
He's carrying automatic pistol clips (1) (or the AUTOMATIC PISTOLS if you don't already have them). Swim to the ledge on the other side of the canal.
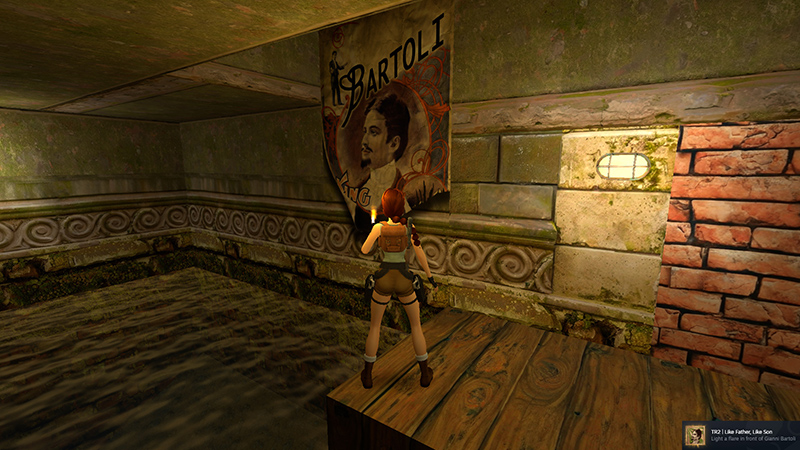
There you'll find a poster of Gianni Bartoli—famous magician/occultist and father of our villain, Marco Bartoli. Save the game. Then light a flare to get a better look and unlock the "Like Father, Like Son" achievement/trophy. Reload to get that flare back; you'll need it.
LORE NOTE: For more about the Bartolis, check out the Tomb Raider Wiki.
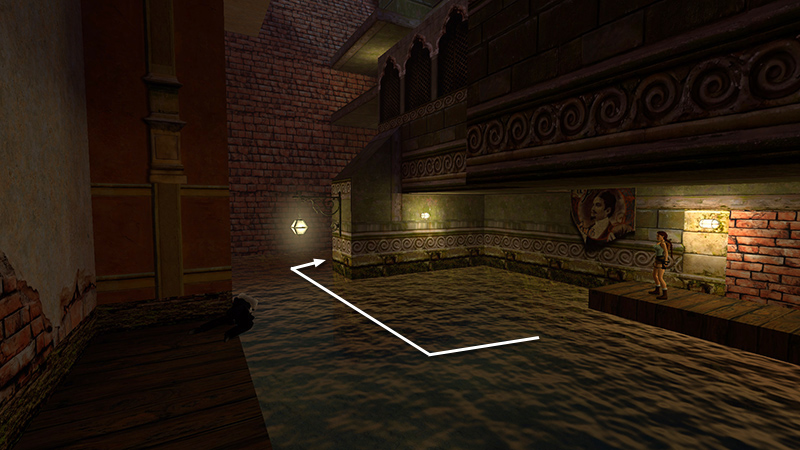
Face away from the poster, dive into the canal, and swim around the corner to the right.
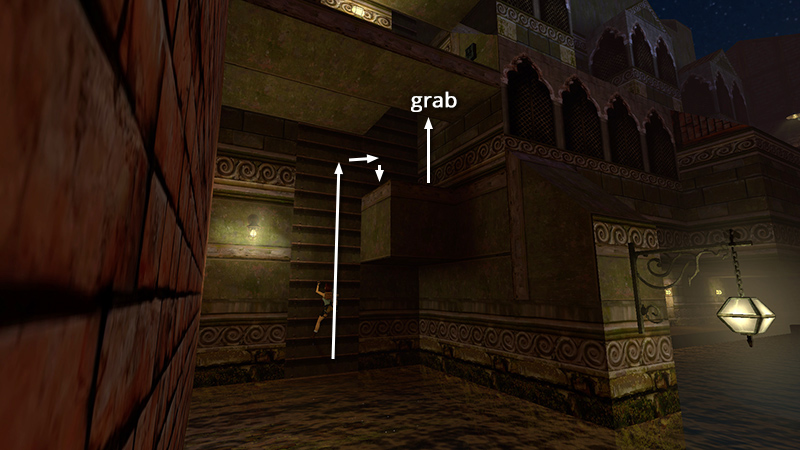
Climb the ladder to the first ledge on the right. Turn around and pull up through the hole in the ceiling onto the ledge above.
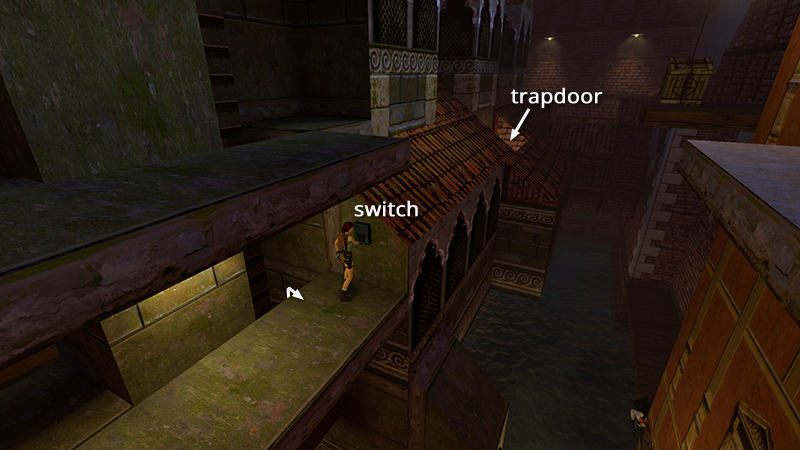
Throw the switch to open a trapdoor not far away.
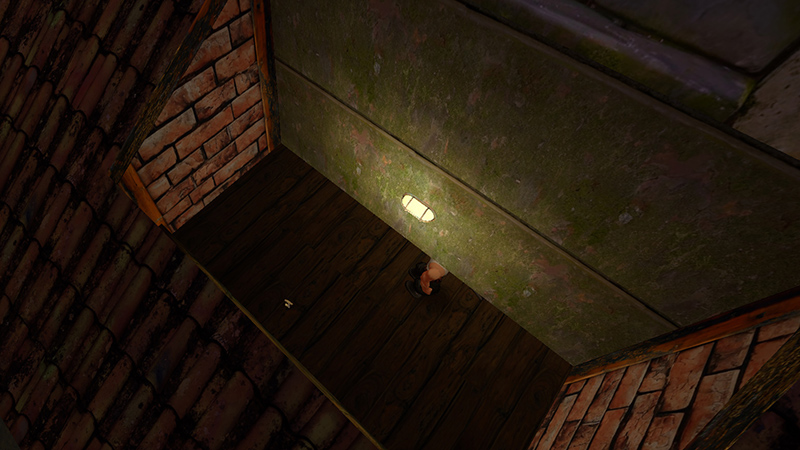
A brief cutscene shows a golden key sitting on the floor in a the room below.
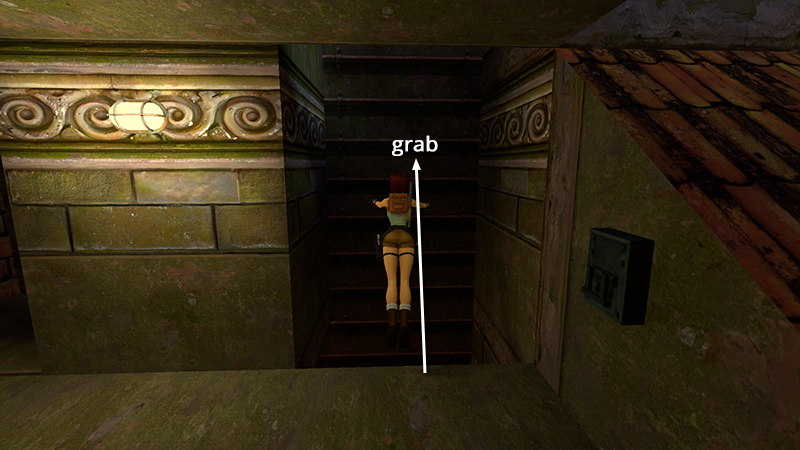
Jump back to the ladder.
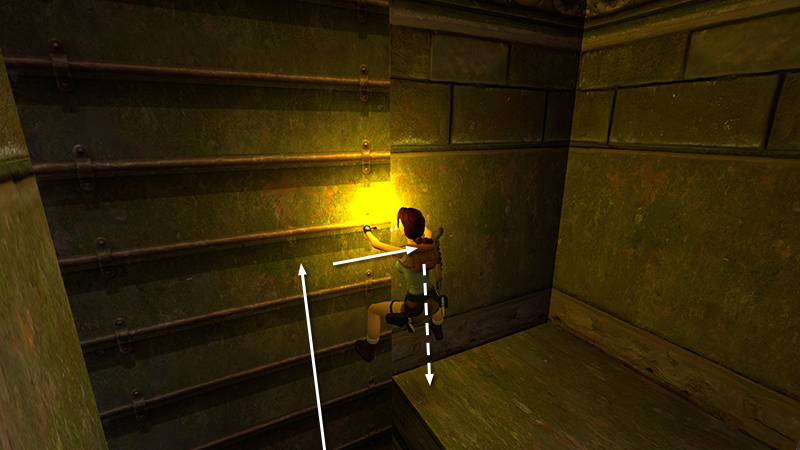
Climb to the level above and dismount on the right. (Do not backflip off the ladder. Lara will overshoot the ledge and and fall into the canal. Then you'll have to climb all the way back up.)
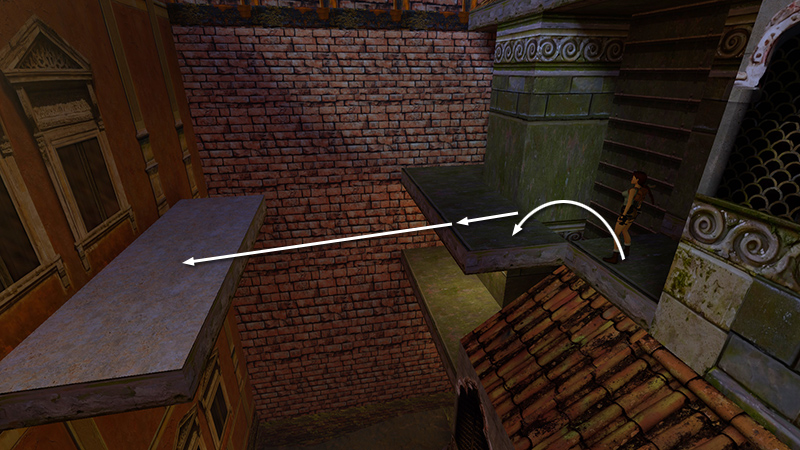
Carefully jump over the hole in the floor to the other side of this ledge. Then take a running jump to the light-colored ledge across the canal.
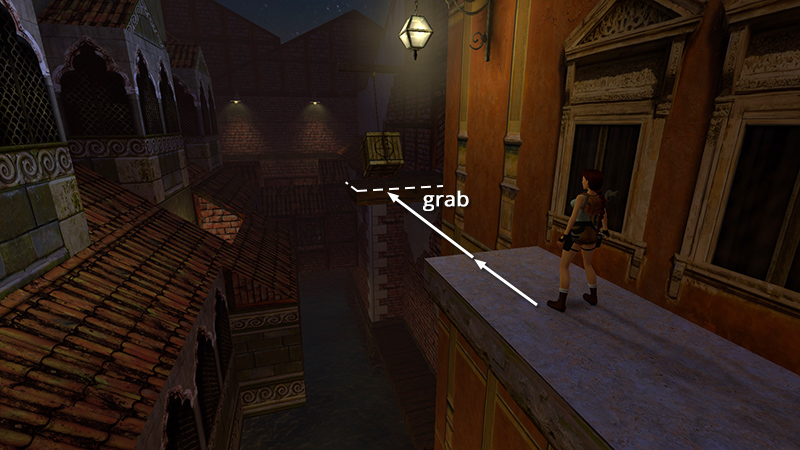
Turn left and take another running jump to grab the edge of the wooden ledge where you started the level.
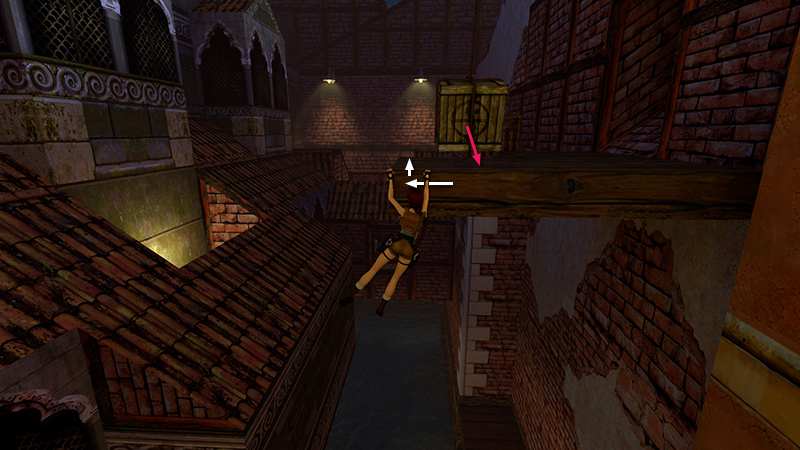
Traverse to the left corner and pull up, carefully avoiding the swinging crate.
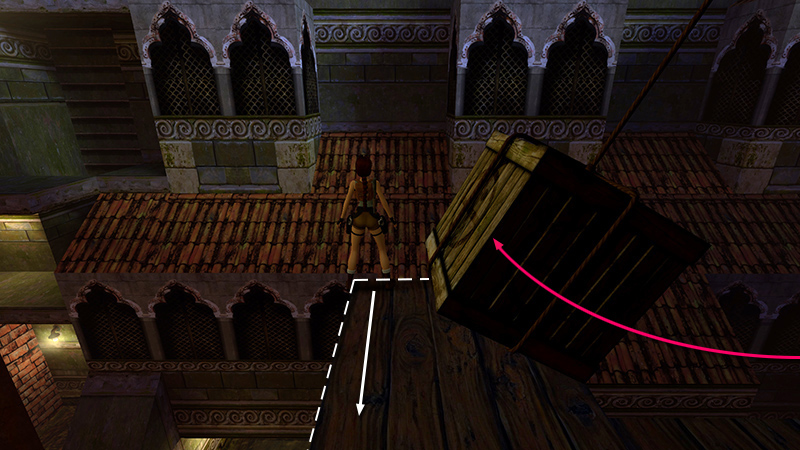
Turn left so Lara is facing across the canal, and the swinging crate is on her right. As long as you stay close to the left edge, the crate won't touch her. Hop back once.
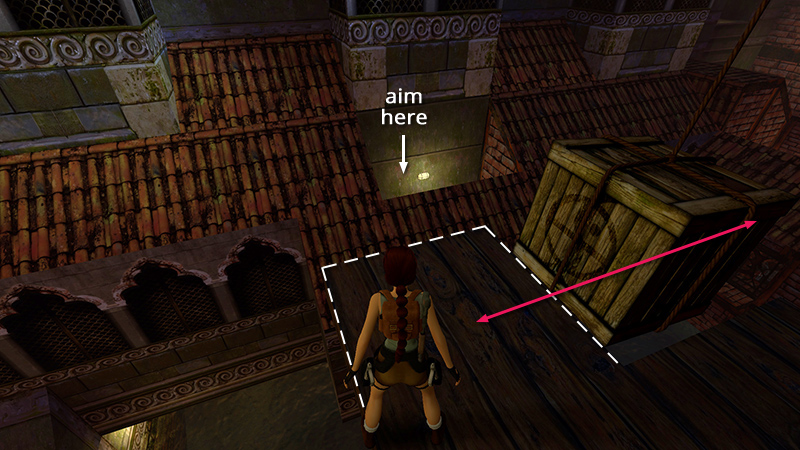
Then pivot slightly to the right to face the open trapdoor. Press Look check your angle.
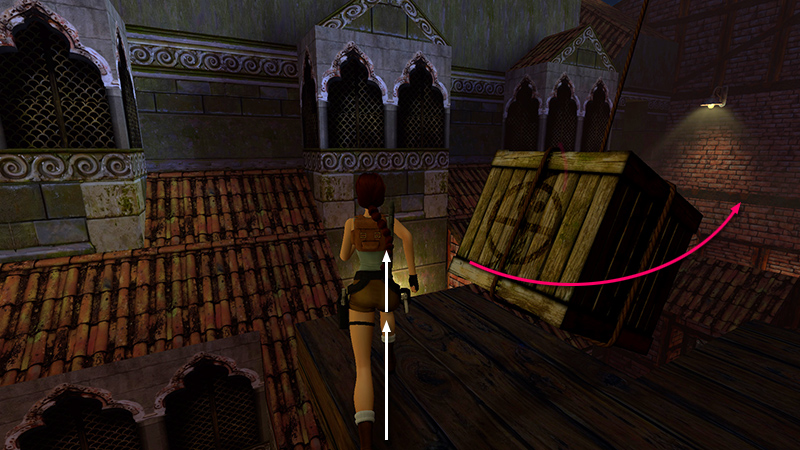
Now wait for the crate to swing to the right, then take a running jump across the canal...
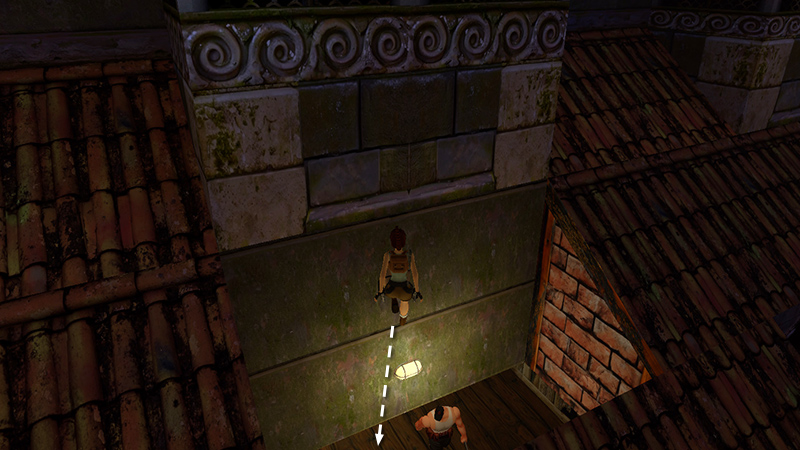
...into the open trapdoor.
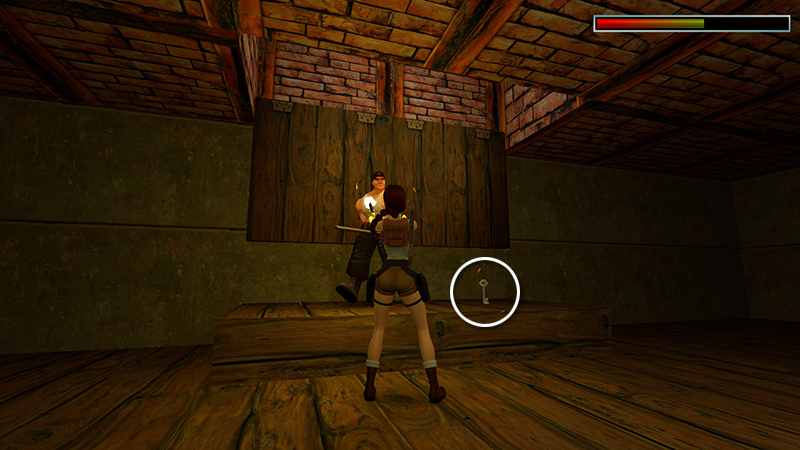
A burly guy with a club (2) attacks as soon as Lara hits the floor. Deal with him. Then pick up the ORNATE KEY (2).
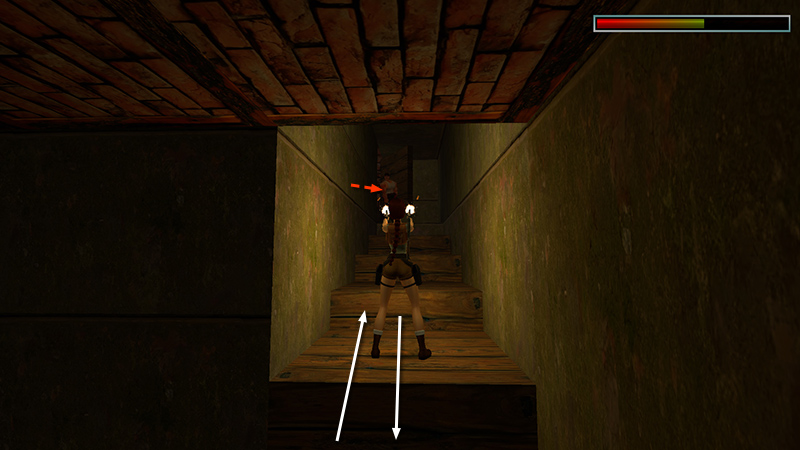
When you start up the stairs toward the exit, a second enemy (3) enters through that door. If you run up the stairs, get a lock on him and back away shooting, you can kill him before he does any damage.
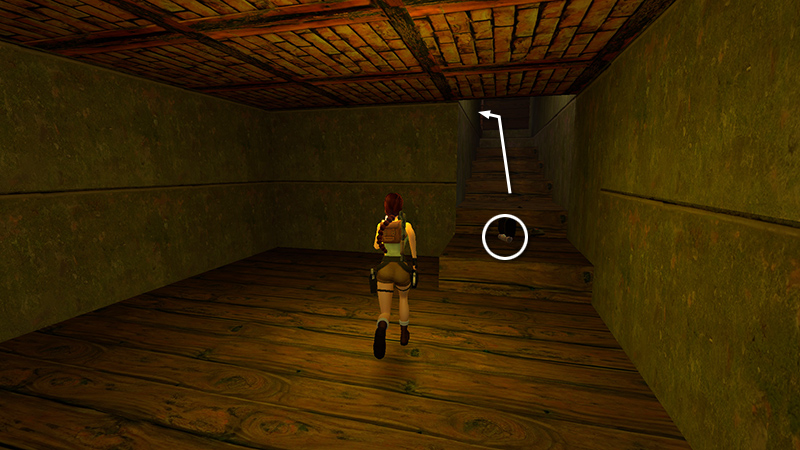
Steal his small medi pack (3) and continue to the top of the stairs...
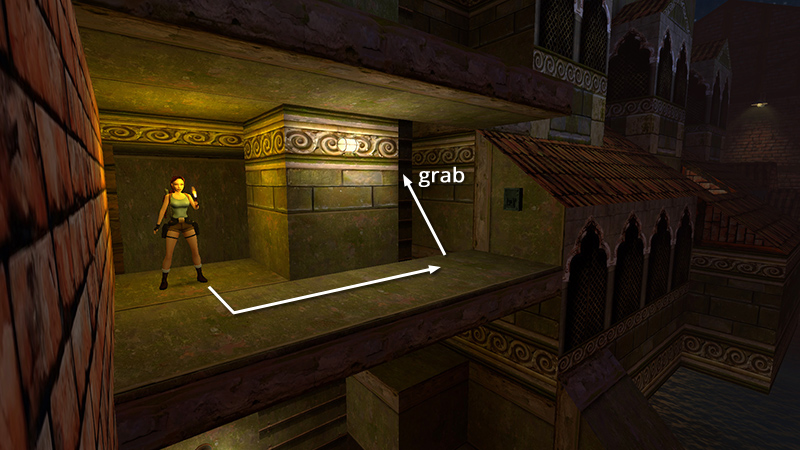
...to emerge on the concrete ledge near the trapdoor switch. Once again, jump across the hole in the floor to grab the ladder and climb to the level above.
Hop over to the adjacent ledge. Then take a running jump back across the canal to the long, light-colored ledge.
From there, take a running jump and grab the wooden ledge with the swinging box near the entrance.
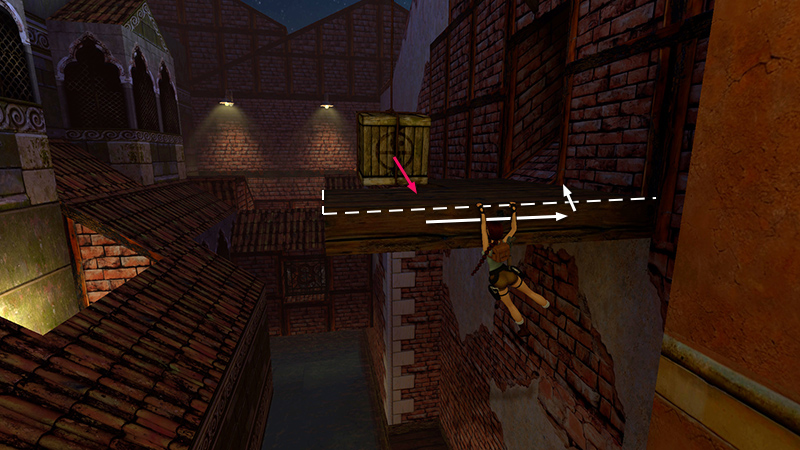
This time, traverse to the right and pull up.
DARK MODE: I plan to add optional dark mode for these pages, but my current priority is updating the walkthroughs. Meanwhile, may I suggest a reputable dark mode browser extension, such as Dark Reader? (Download only from trusted sites, like darkreader.org or your browser's official add-on/extension site.)
Walkthrough text and diagrams copyright © Stellalune (email ). Feel free to copy or print this walkthrough for personal use. By all means, share it with friends, but please include this credit line so people can send me their feedback. No part of this walkthrough may be reproduced on another site without permission.