Opera House - Dressing Room and Ventilation Ducts
Ornate Key and Secret #2 (Jade Dragon)
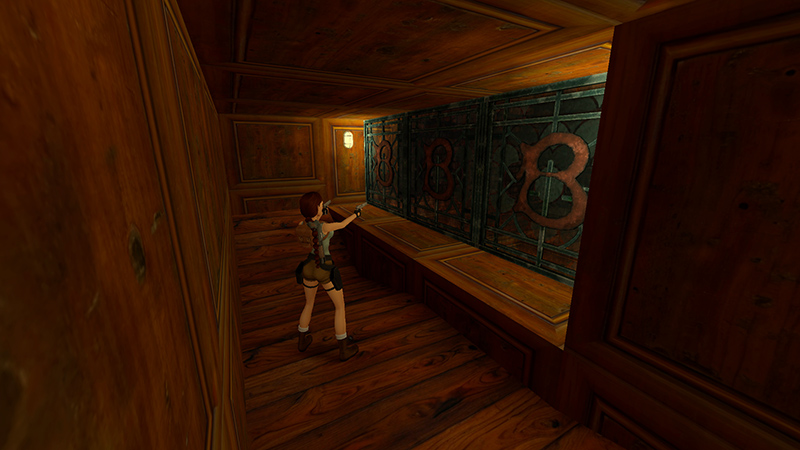
After dropping into a small pool and making your way through a rat- and cultist-infested area, shown in the last section, you come to a dead end with 3 more windows (4-6/9) with the 'B' monogram. Shatter all three.
NOTE: If you haven't already unlocked the "Emergency Exit" achievement/trophy, you can get it here. Just jump through one of the windows instead of shooting it. This will count toward both achievements.
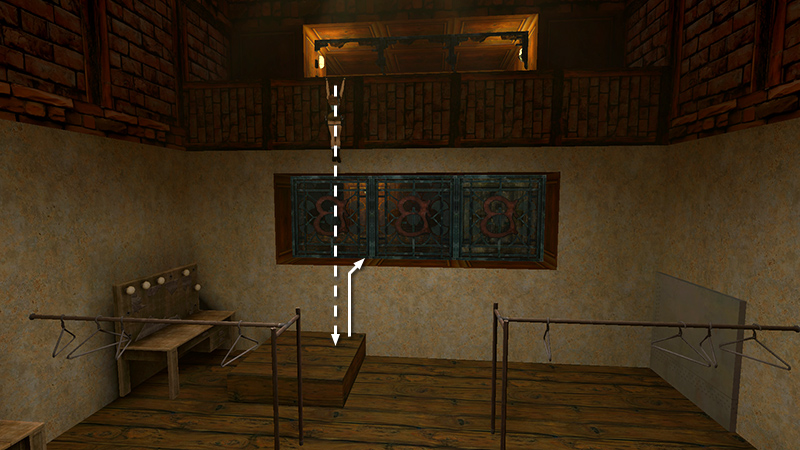
Then safety drop into the dressing room below. Climb onto the sill...
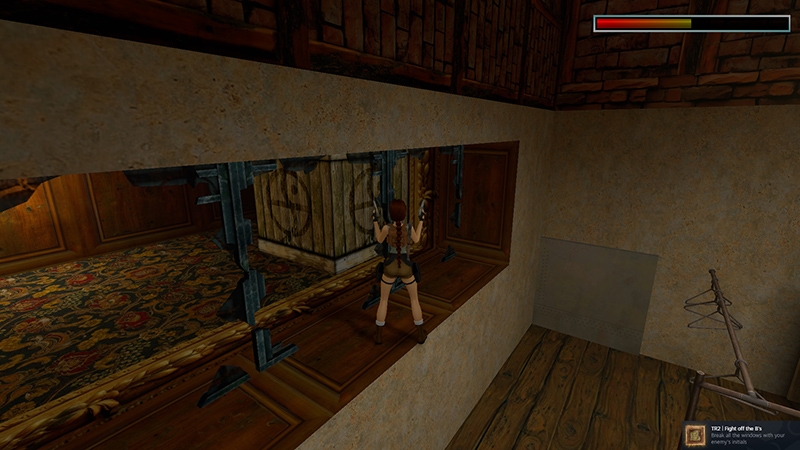
...and shoot out the last 3 windows (7-9/9) to unlock the "Fight Off the B's" achievement/trophy begun earlier. Ignore the movable crate for now.
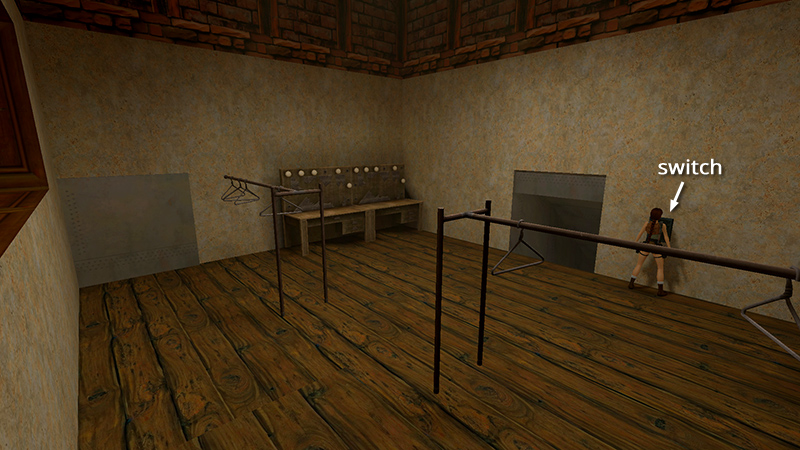
Throw the switch on one wall of the DRESSING ROOM to open the nearby door.
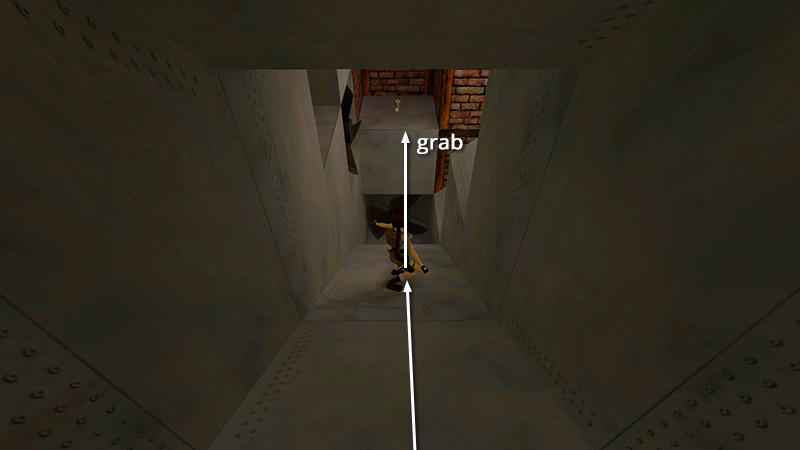
Slide down the ventilation duct, facing forward, and jump near the end to grab the ledge ahead and avoid being chopped to bits by the huge fan.
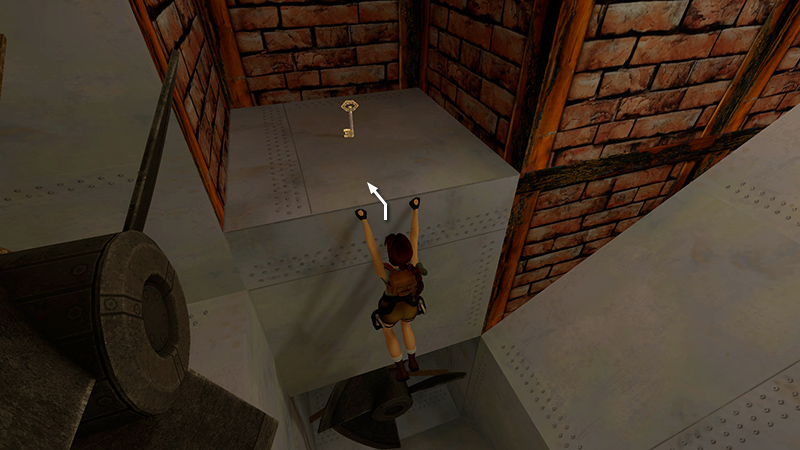
Pull up to find a second ORNATE KEY (14), similar to the one you found and used at the beginning of the level.
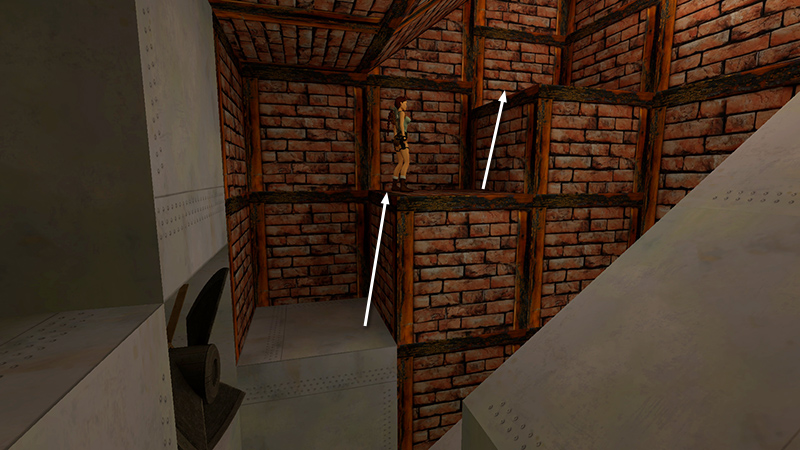
Climb the two brick ledges on the right.
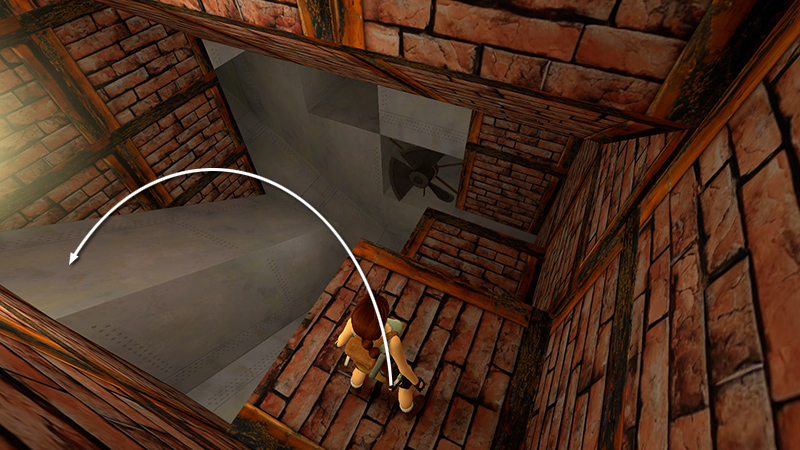
Then turn around so the sloping duct is on Lara's left and the ledge where you found the key is directly ahead and below. Position Lara in the middle of the brick ledge. Side flip to the left onto the slope.
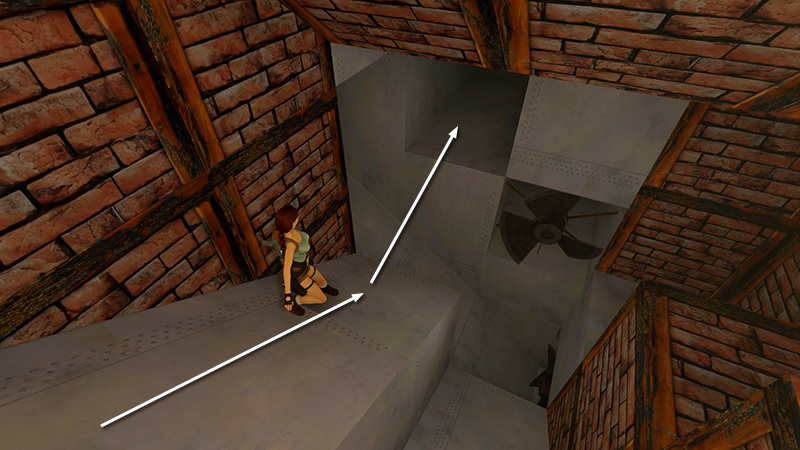
Slide almost to the end of the duct, then jump forward to land in (or grab the edge of) the opening ahead. If you miss and fall onto the slope below, quickly jump and grab the ledge where you found the key. Then climb back up and try again.
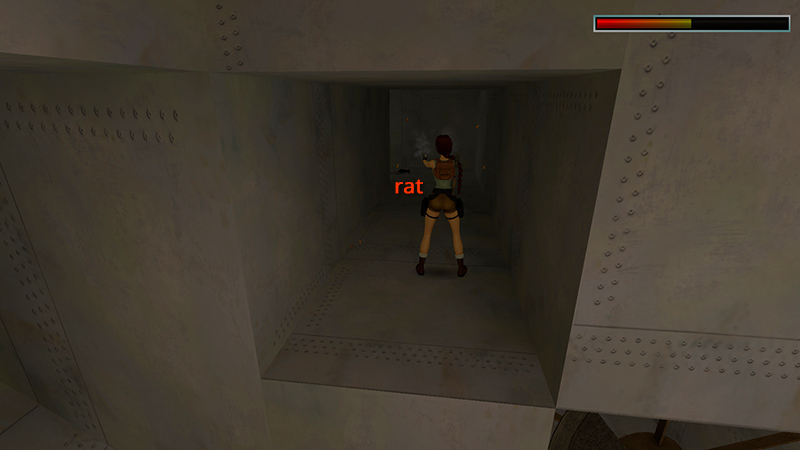
Kill another rat (26) just ahead.
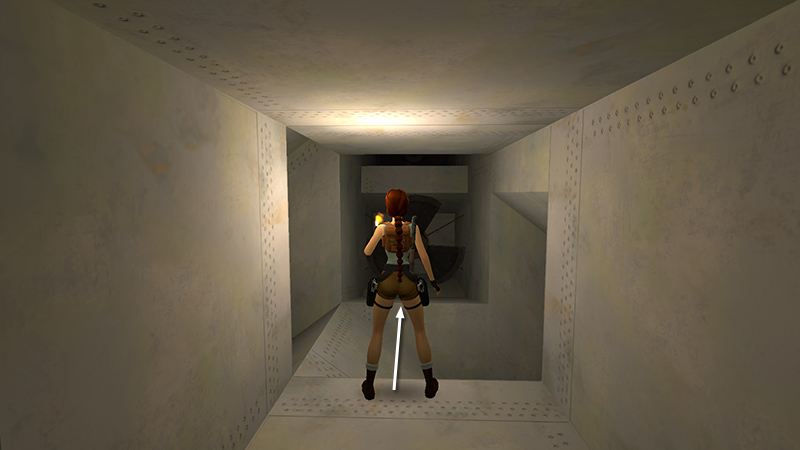
Proceed through the duct to an intersection. Walk to the edge. Then take a standing jump across the slope without pressing Action.
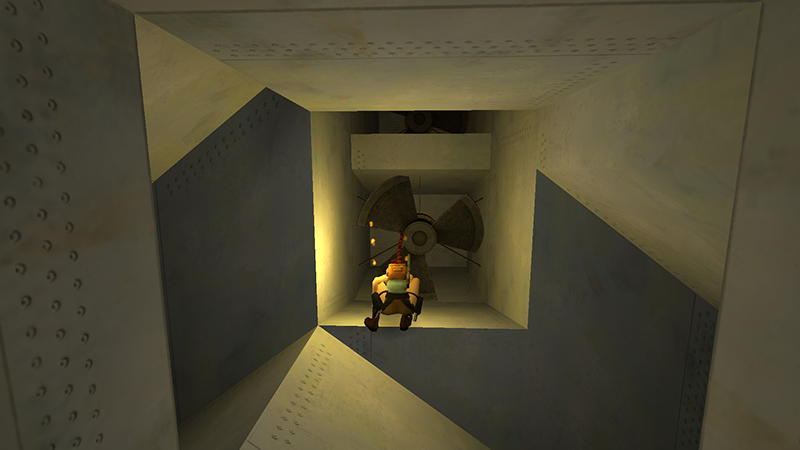
Lara's head will bump the ceiling, but she'll land safely on the other side. Be sure to release Forward so she doesn't run on into the moving fan.
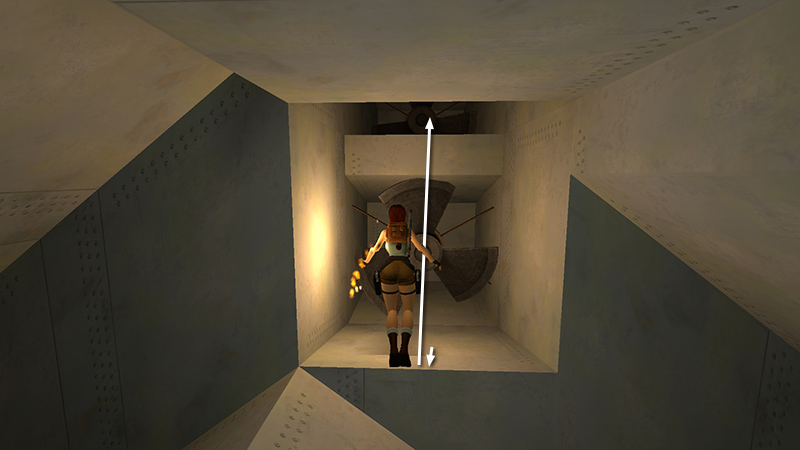
If you moved forward at all after landing on this ledge, step back to the edge. Then take another standing jump forward without pressing Action to land on the ledge above the fan.
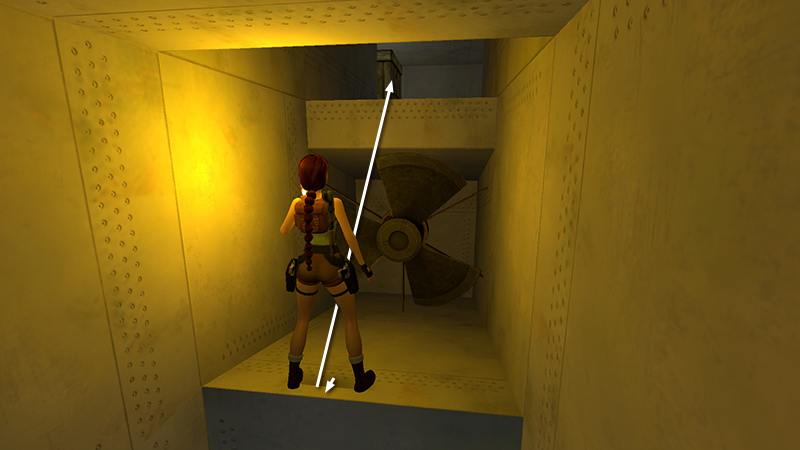
Again, step back to the edge if necessary, then take another standing jump to clear the second fan and land on the ledge above it.
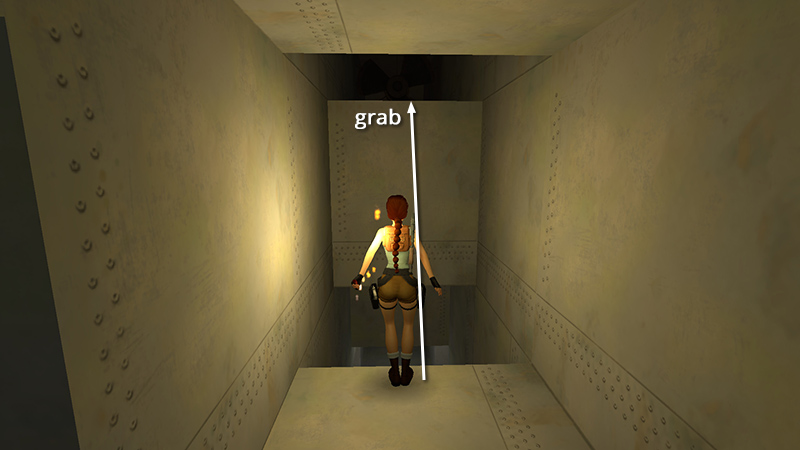
Turn around and take a standing jump to grab the edge of the dark alcove above.
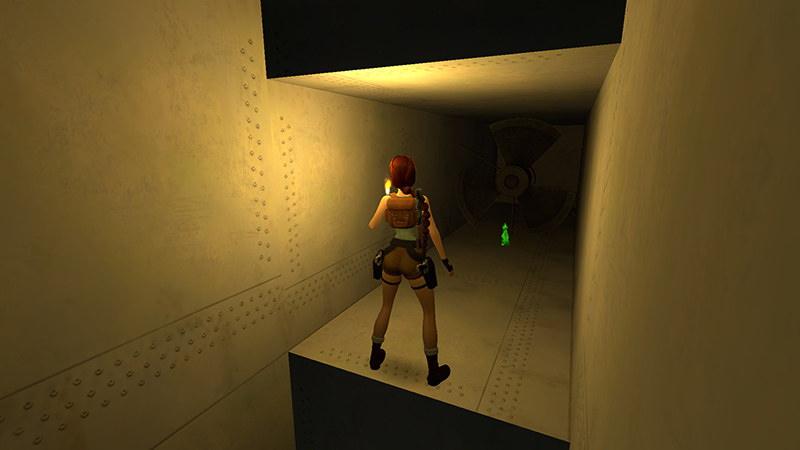
Pull up, walk carefully toward the next fan, and retrieve SECRET #2, the Jade Dragon (15).
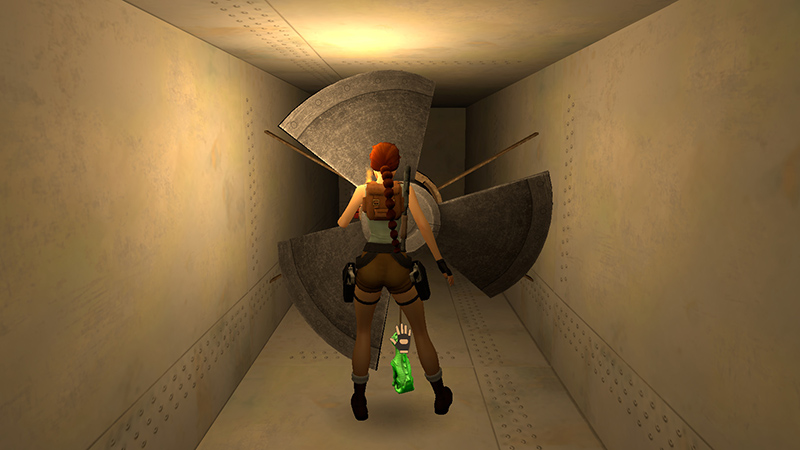
NOTE: If you enable Action Indicators in the Controls menu, you'll see the hand icon as soon as Lara is close enough to pick up the dragon. See the note in the GREAT WALL walkthrough for more info.
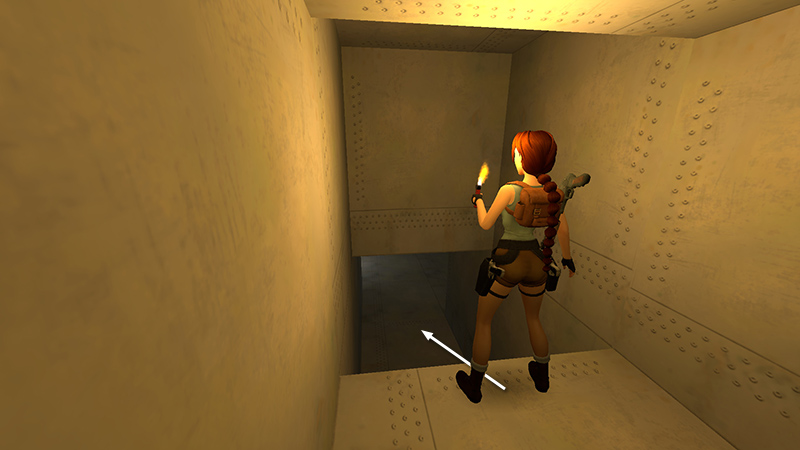
Return to the edge where you pulled up and take a standing jump down. This time you do want to press Action so Lara lands safely on the ledge below.
DARK MODE: I plan to add optional dark mode for these pages, but my current priority is updating the walkthroughs. Meanwhile, may I suggest a reputable dark mode browser extension, such as Dark Reader? (Download only from trusted sites, like darkreader.org or your browser's official add-on/extension site.)
Walkthrough text and diagrams copyright © Stellalune (email ). Feel free to copy or print this walkthrough for personal use. By all means, share it with friends, but please include this credit line so people can send me their feedback. No part of this walkthrough may be reproduced on another site without permission.