Floating Islands - Backtracking for the Jade and Silver Dragon Secrets
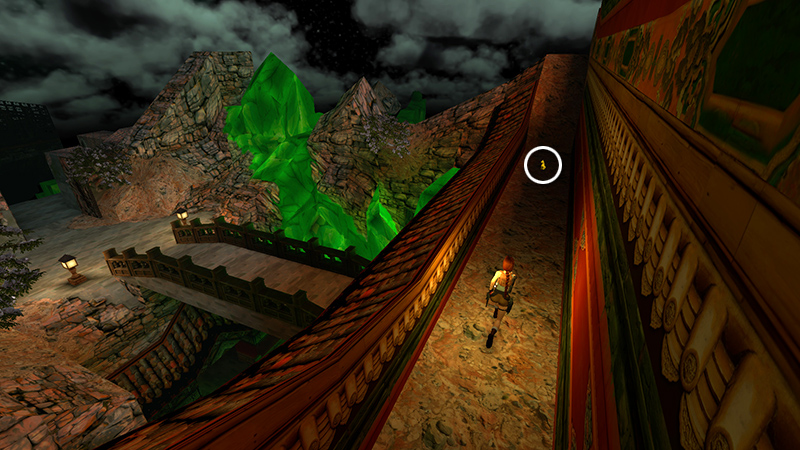
If you reach the end of the level and realize you missed the Silver and/or Jade Dragon, it's not too late to go back, though it is a bit of a trek. Starting from the rooftop ledge where you found the Gold Dragon, look over the edge and you'll see the garden near the MYSTIC PLAQUE GATE.
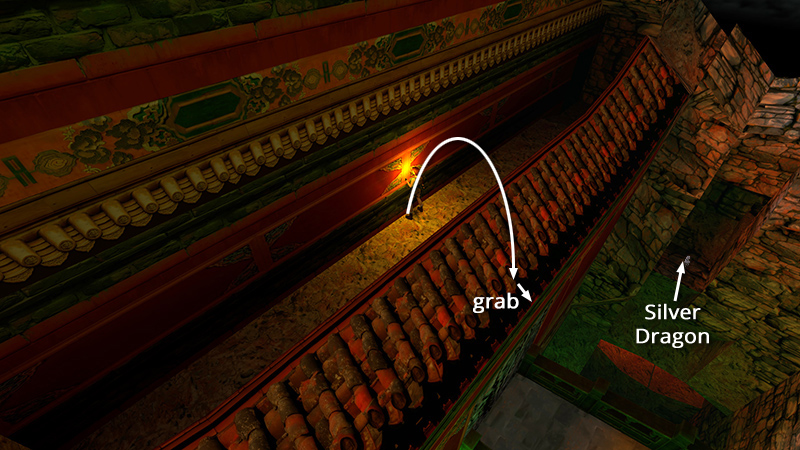
To get down, position Lara with her chest against the wall of the building and backflip over the wall onto the slanted roof. Slide briefly and grab the edge.
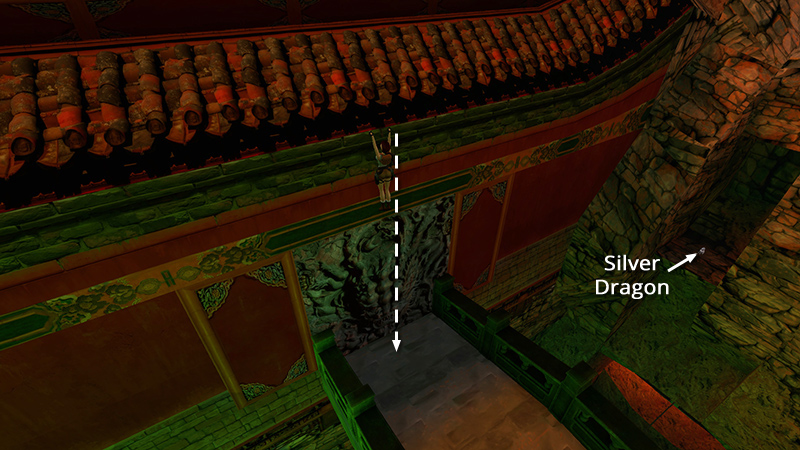
Then drop onto the bridge.
The Silver Dragon is sitting in an alcove to the right of the bridge. Follow this section of the main walkthrough to get it. If you already have the Jade Dragon, skip the next section and continue below.
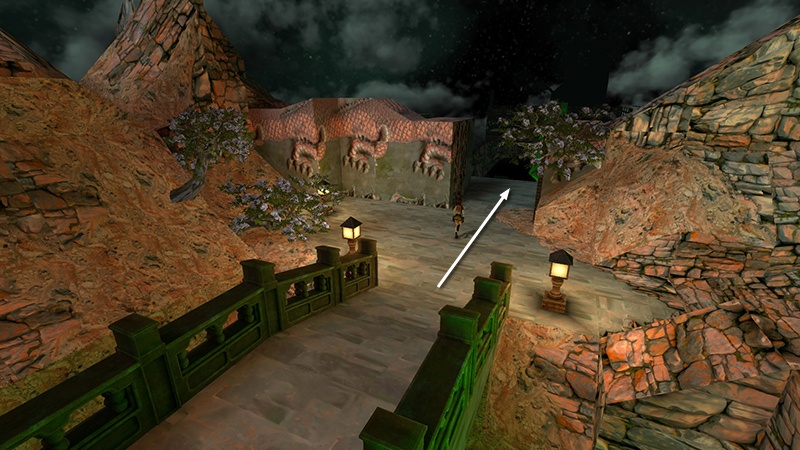
If you still need the Jade Dragon, return through the MYSTIC PLAQUE GATE...
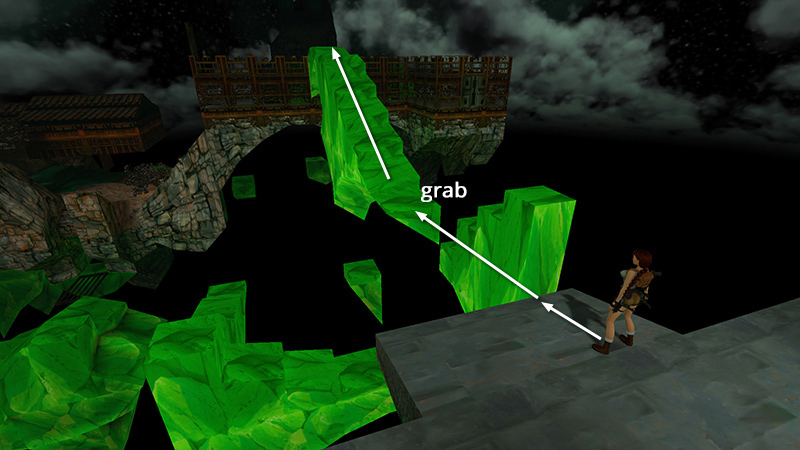
Jump back over to the long, green walkway, and return to the top of the GOLD LATTICE BUILDING.
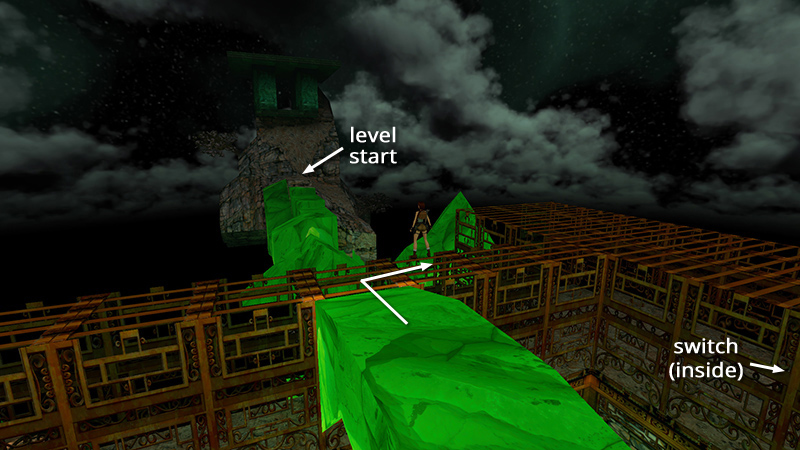
Follow the gold roof a little to the right.
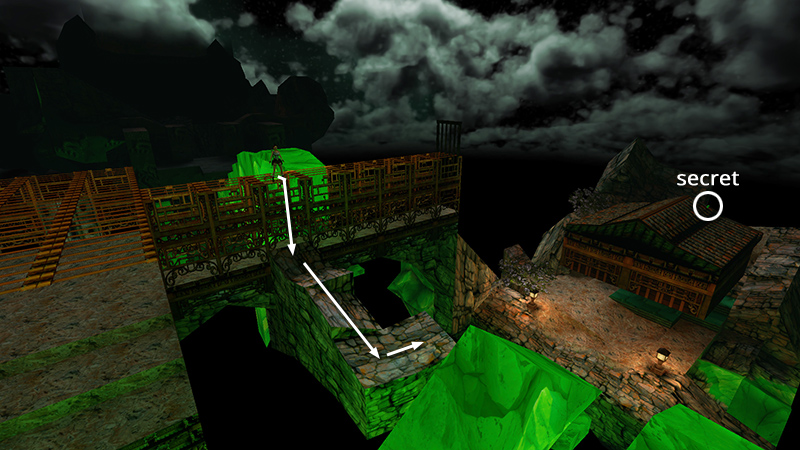
Then drop down onto the stone ledge between here and the path where you started the level. Walk out to the end this ledge.
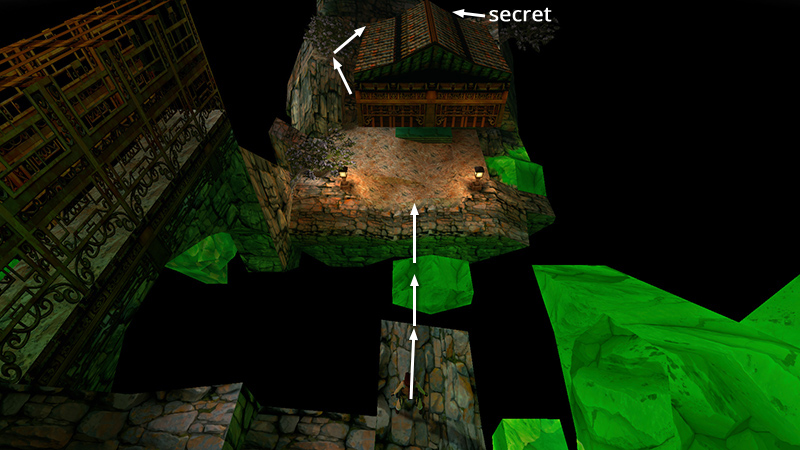
The Jade Dragon is on the roof of the building with the trapdoor, where you found the SECOND MYSTIC PLAQUE. Take a running jump down to the little green island between here and the big island. Then jump over there.
Follow this section of the main walkthrough if you need help reaching the secret.
When you have it, climb back up to the MYSTIC PLAQUE GATE, following the same route as in the main walkthrough (i.e., the sections titled "LARGER ISLAND - LOWER LEVEL" and "STEPPED GREEN ISLANDS LEADING UP TO MYSTIC PLAQUE GATE."
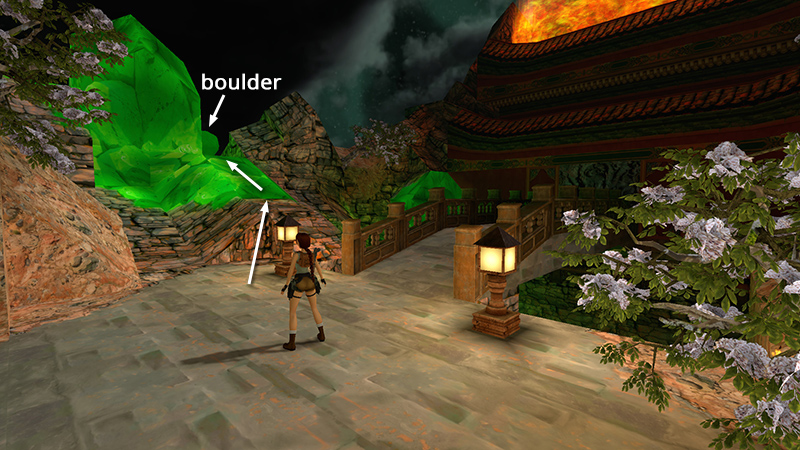
To get back to the end of the level, you'll need to reset the first zip line and ride it to the end once more. Start by jumping up onto the sloping ledge near the green boulder. From there, follow the guide for RESETTING THE FIRST ZIP LINE, beginning here. (Or, refer to the video guide, starting at the 1:10 mark.)
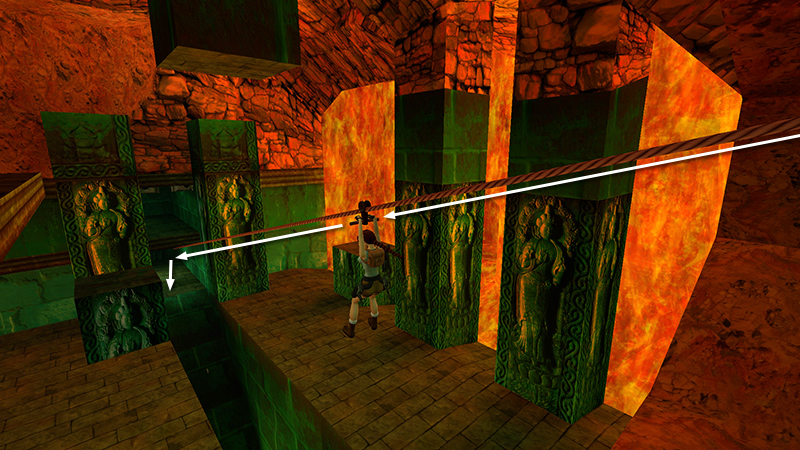
When you reach the top of the zip line, ride it all the way to the end.
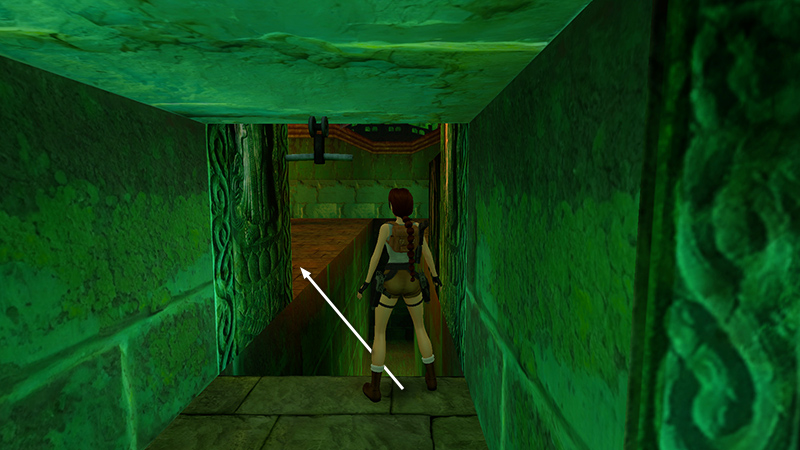
Turn around and jump across the danger pit to the open floor on the left.
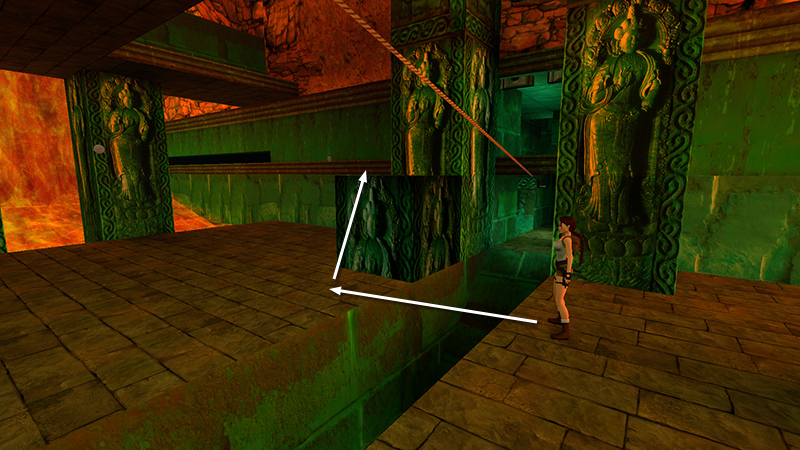
Jump back across the pit and climb onto the movable block, which should still be sitting near the doorway where the zip line ends.
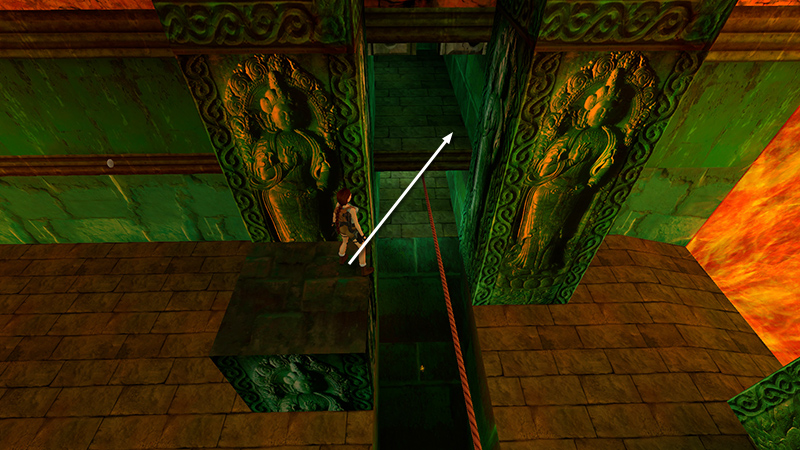
Take a carefully angled standing jump with Action to land on the ledge above the zip line handle, just like you did before.
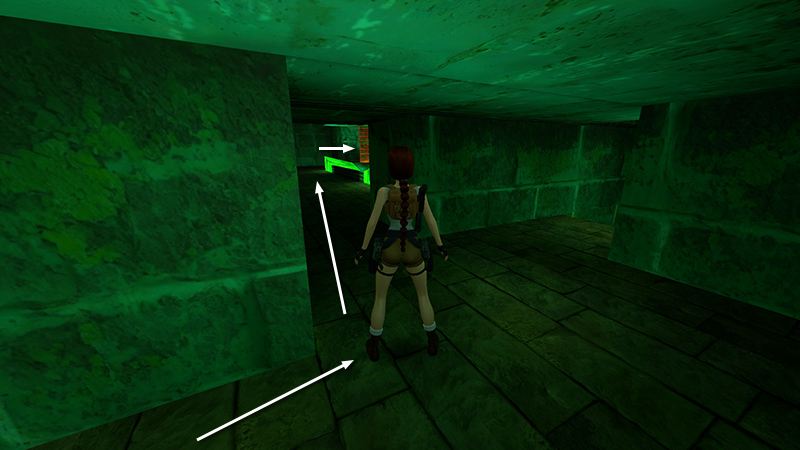
Follow the passageway forward then left into the ROOM WITH THE LARGE, SQUARE HOLE IN THE FLOOR and out the other side into the room with the LATTICE WALLS ABOVE SPIKES AND LAVA.
Climb to the top once more. (Refer to the main walkthrough if you need a refresher.)
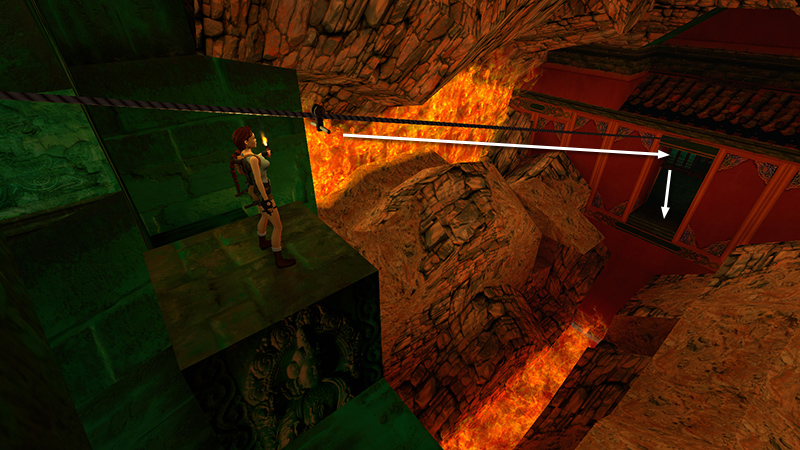
When you come to the ledge overlooking the lava stream, pull the movable block under the zip line handle, climb up, and ride it down to the exit.
- OR -
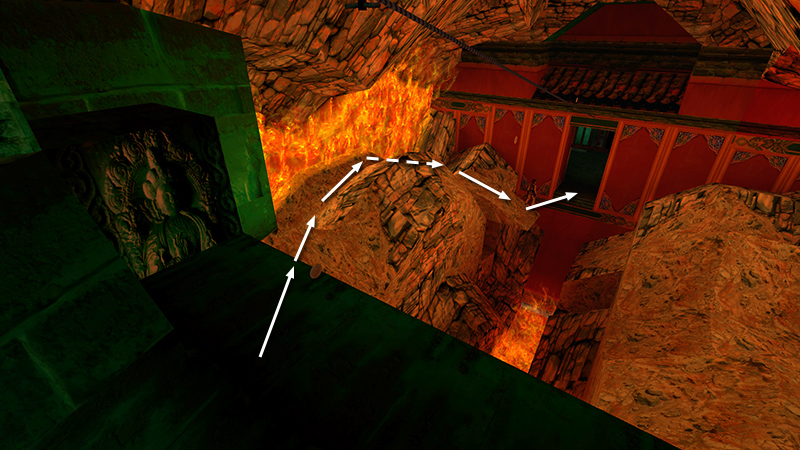
Instead take a running jump down to the rocks on the left, make your way forward to the jutting stone ledge, and jump from there into the doorway. Good job getting all those secrets!
DARK MODE: I plan to add optional dark mode for these pages, but my current priority is updating the walkthroughs. Meanwhile, may I suggest a reputable dark mode browser extension, such as Dark Reader? (Download only from trusted sites, like darkreader.org or your browser's official add-on/extension site.)
Walkthrough text and diagrams copyright © Stellalune (email ). Feel free to copy or print this walkthrough for personal use. By all means, share it with friends, but please include this credit line so people can send me their feedback. No part of this walkthrough may be reproduced on another site without permission.