Catacombs of the Talion - Timed Doors and Spikes - Secret #3 (Gold Dragon)
This section is also shown in a diagram in the main walkthrough.
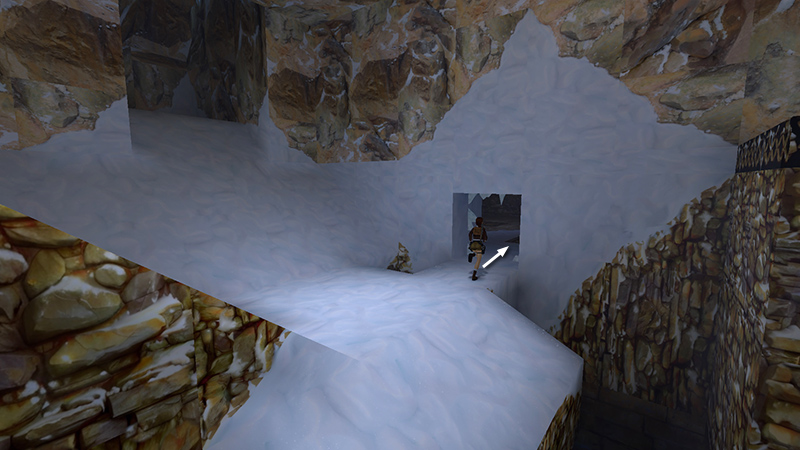
After using the rolling snowballs to break through the ice window, as shown in the last section, go inside.
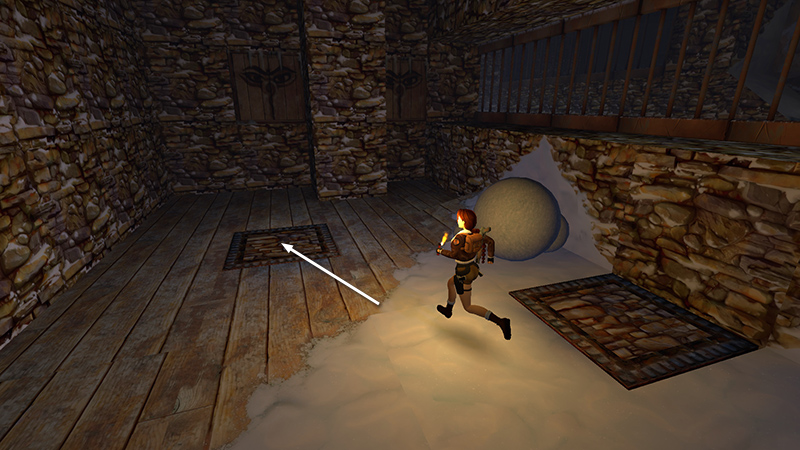
Here you'll see two floor tiles that don't match the others. These are pressure pads. Step on the pad on the left to open the wooden door directly in front of it. This door is on a timer, but it's not particularly fast.
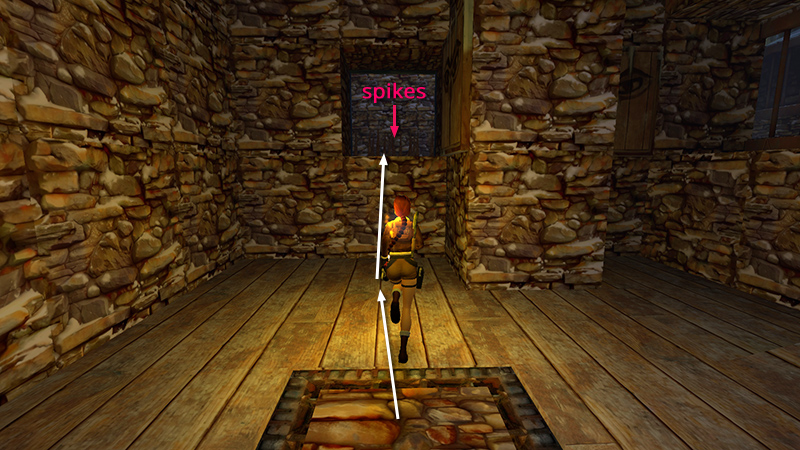
Climb/jump into the doorway before it closes. Then stop so you don't run into the spikes.
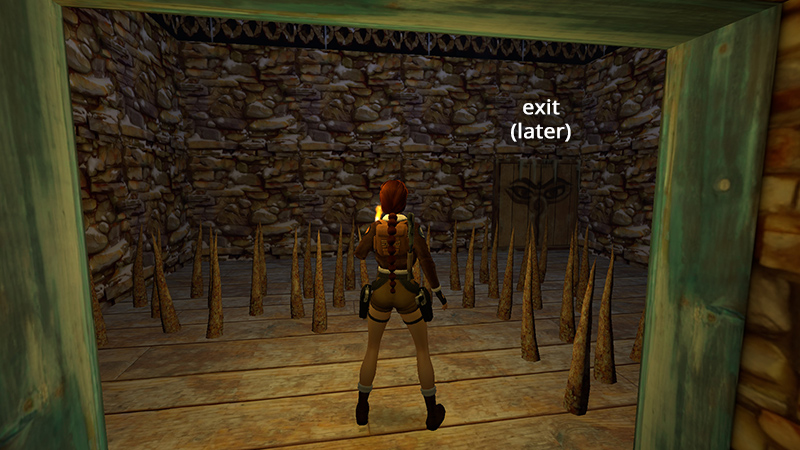
The exit, just beyond the spikes, is not open yet.
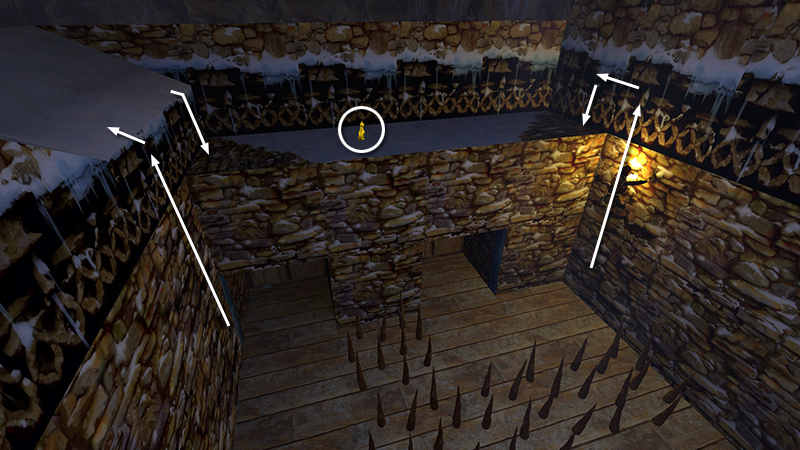
There are two climbable areas on the side walls.
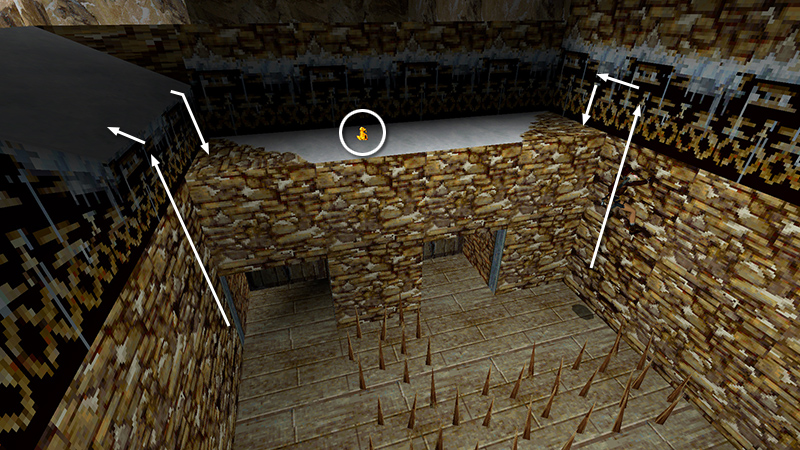
They're a little easier to spot using classic graphics. Use either one to reach the ledge above the two doors. There you'll find SECRET #3, the Gold Dragon (35), and a bonus of 2 pairs of grenades and 2 sets of M16 clips (36-39) if this is your third secret. (The path to and from the secret is indicated by the blue arrows in the diagram.)
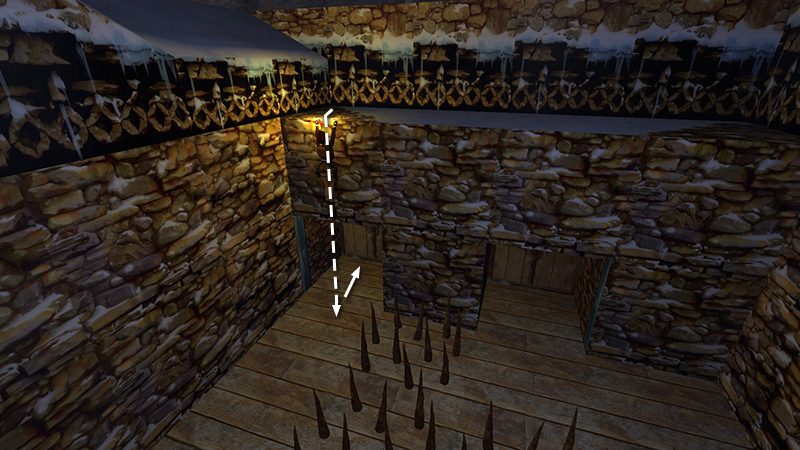
Drop down on the left side of the ledge (right side when facing out over the spikes). Approach the left door, which opens automatically, but don't hop down into the room with the pressure pads yet.
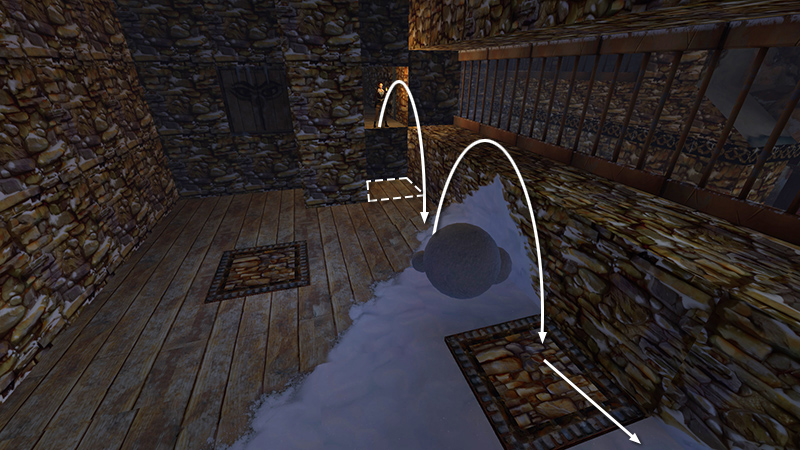
The floor tile just below the doorway contains an invisible pressure pad that closes the door if Lara steps on it. To keep the door from closing, walk to the edge of the doorway and jump forward to land near the snowballs. Then jump over the snowballs or go around them to the doorway beyond.
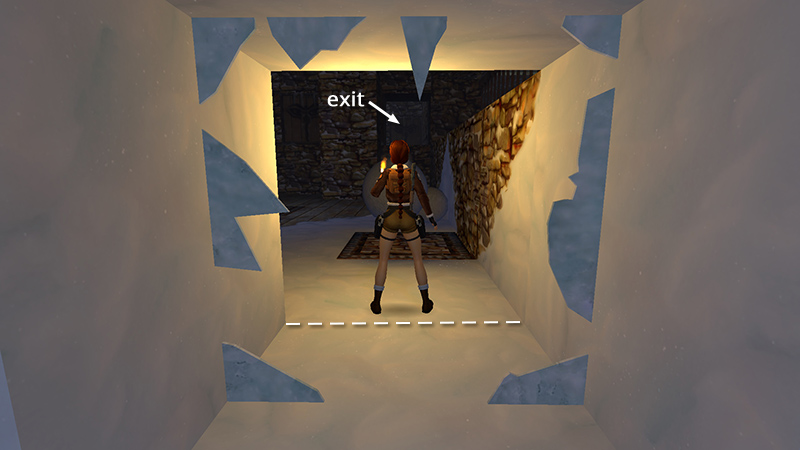
Turn around to face the snowballs and the door on the right, which should still be open. The pressure pad near the snowballs opens the exit, directly ahead, on the far side of the spike room. It is timed to close after about 8 seconds. To get through, position Lara just inside the doorway facing the snowballs (i.e., on the spot marked with a red "X" in the diagram).
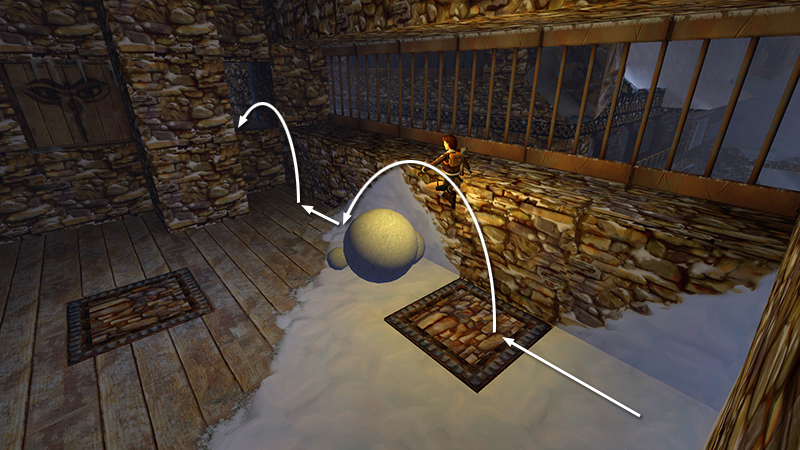
Now press and hold Forward and almost immediately press and hold Jump to take two continuous running jumps (indicated by the red arrows in the diagram). The first jump will take Lara over the pressure pad and snowballs, opening the exit in the process. The second will land her in the doorway. (Pulling up is too slow.)
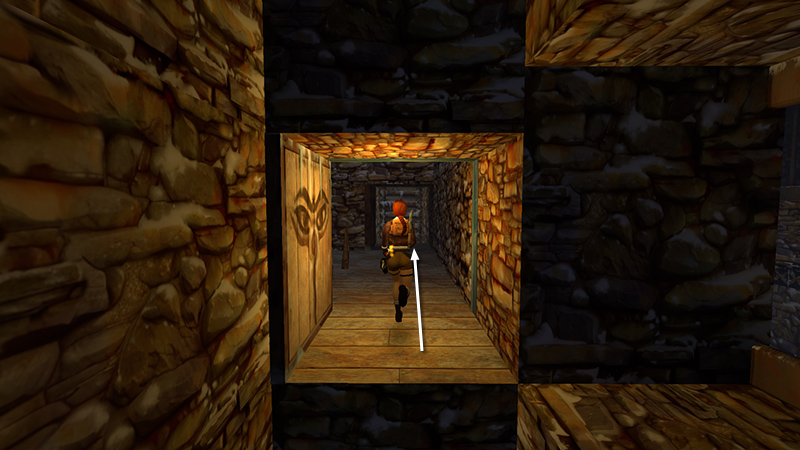
Then you can run straight on through the exit before it closes.
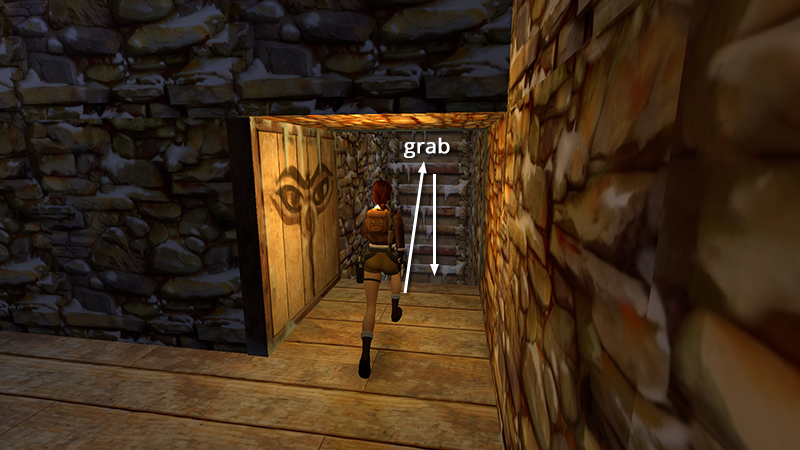
Once you've cleared the timed door, jump and grab the ladder, climb down, and follow the passage to the end of the level.
NOTE: If you don't reach the exit in time, just turn around and return to the doorway overlooking the room with the pressure pads. Walk to the edge, hop over the tile that closes the door and try again. If you accidentally step on the invisible pressure pad and close the door leading back into the spike room, use the pressure pad on the left (when facing the two doors) to open the left door. Enter the spike room that way. Walk through the spikes and around to the other door.
DARK MODE: I plan to add optional dark mode for these pages, but my current priority is updating the walkthroughs. Meanwhile, may I suggest a reputable dark mode browser extension, such as Dark Reader? (Download only from trusted sites, like darkreader.org or your browser's official add-on/extension site.)
Walkthrough text and diagrams copyright © Stellalune (email ). Feel free to copy or print this walkthrough for personal use. By all means, share it with friends, but please include this credit line so people can send me their feedback. No part of this walkthrough may be reproduced on another site without permission.