Bartoli's Hideout - The Ballroom (Part 1)
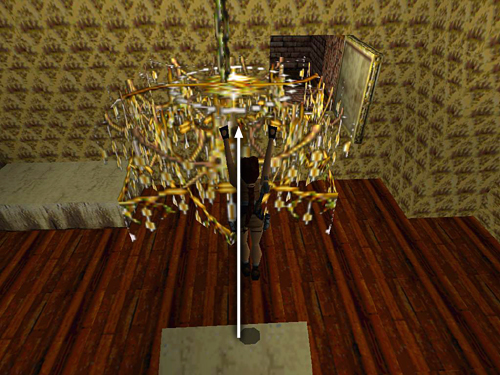
Climb onto the first angled block. Stand at the higher edge (i.e., the edge nearest the entrance), jump straight up and grab the chandelier above. Pull up.
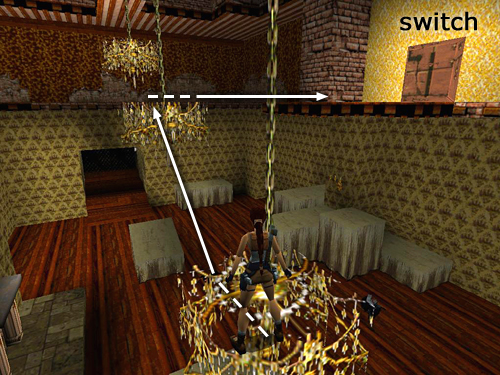
Turn around and take a running jump to grab the middle chandelier; pull up. Turn right and take a running jump to the wooden ledge against the wall. Throw the switch to open a secret alcove on the opposite side of the room.
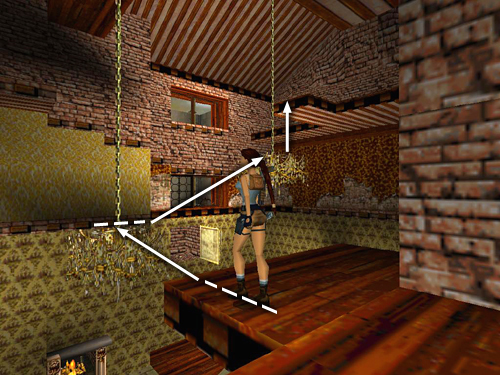
Do another running jump back to the middle chandelier, then another to grab the highest of the three chandeliers. Pull up, walk to the far edge of the chandelier, jump straight up to grab the wooden ledge above and pull up onto it.
Draw pistols and head to the right. It's difficult to see the 2 rats lurking near the square, brick pillar, but Lara can spot them. When they're dead, go around behind the pillar and walk out onto the brick ledge.
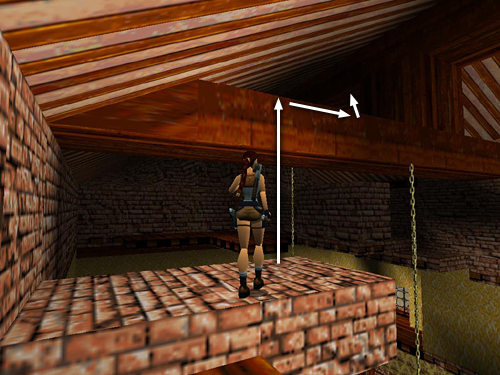
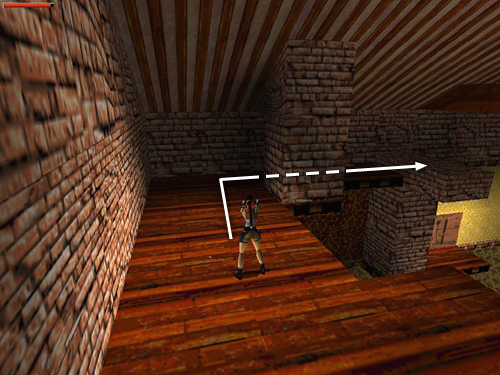
Step to the edge and jump straight up to grab the big, wooden rafter. Traverse to the right until Lara can pull up.
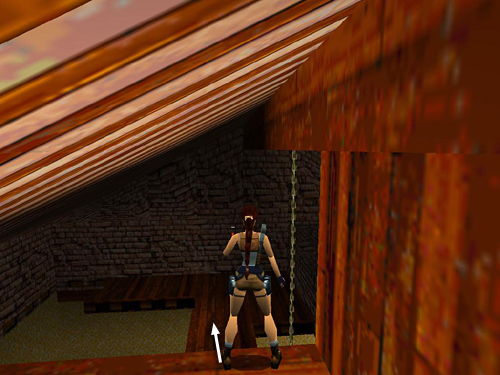
Stand with the thick, vertical support on Lara's right, walk to the edge and jump across the gap to land on the wooden ledge below.
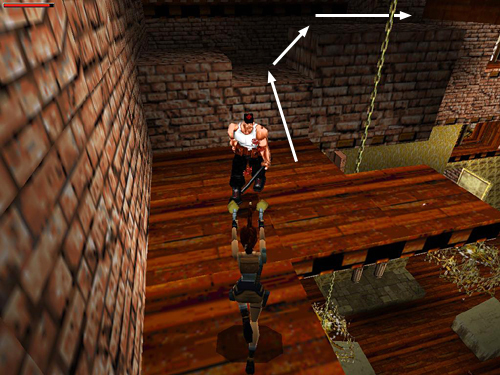
A thug with a club jumps out from behind the low brick wall, so be ready for him. Watch out for the edges and don't jump around too much as you fight. Afterward, grab the thug's small medi pack. Climb onto the brick wall and walk to the right end.
Copyright © 1998- - Stellalune (). Feel free to copy or print this walkthrough for personal use. By all means, share it with friends, but please include this credit line so people can send me their feedback. No part of this walkthrough may be reproduced on another site without permission. Follow this link for details about this site's advertising and privacy policy.
Stella's Tomb Raider Site: tombraiders.net.