Obelisk of Khamoon - Room with Mummies and Sarcophagi
Secret #1 and Scarab Bridge Switch
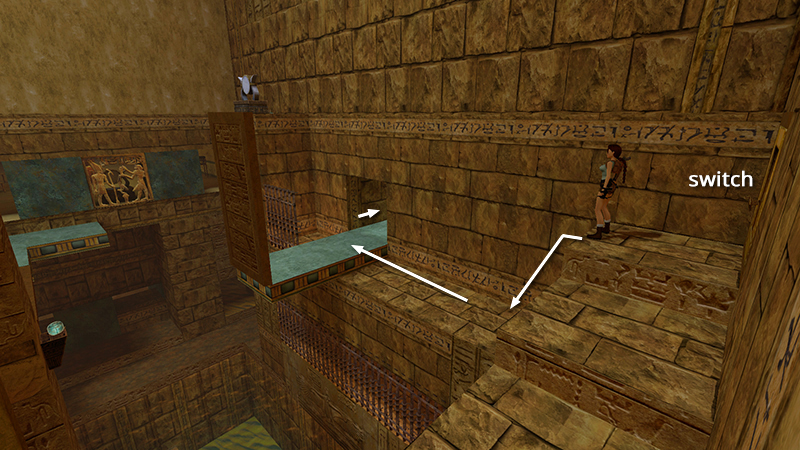
After making your way from the bottom to the middle level of the SLIDES-INTO-STEPS ROOM, then using the switch in the northeast corner of the OBELISK AREA, as shown in the previous section, enter the room opposite the SCARAB artifact. (At this point, the bridge to the artifact is still raised.)
NOTE: If you're going for fast completion, it's possible to get through this room in about a minute, by incorporating a couple of useful bugs. However, you will miss 2 kills, 3 pick-ups, and secret #1. This page with screenshots shows how.

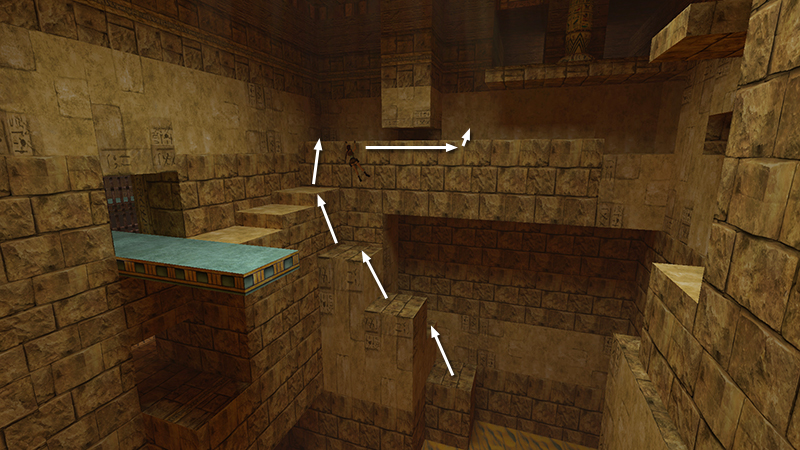
If you're after 100% completion, turn left, climb the two low steps, then hop down onto the block ledge on the right.
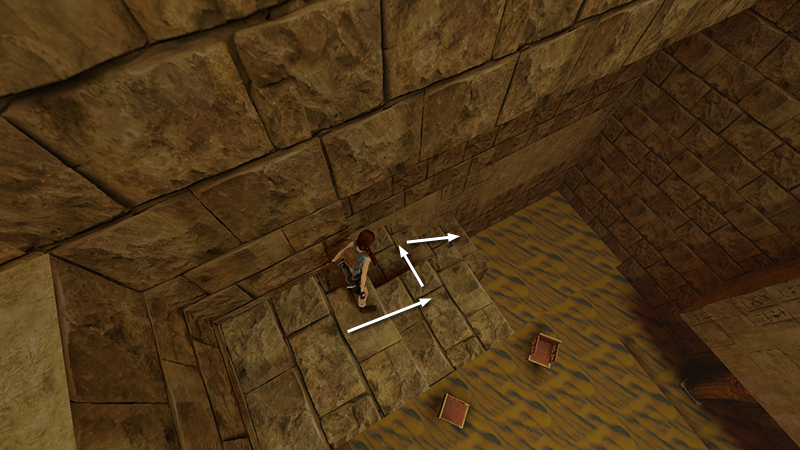
Climb down the stepped blocks toward the floor. When you reach the lowest block...
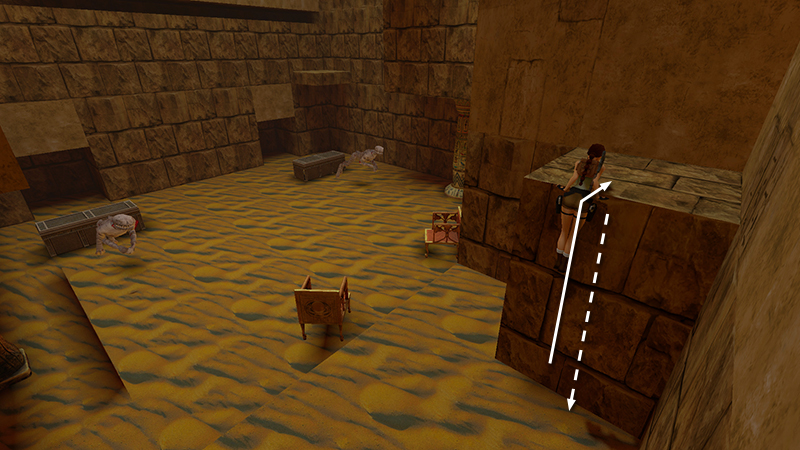
...hang from the edge, let go to drop to the floor, then immediately pull up. You will have awakened 2 mummies (12-13)...
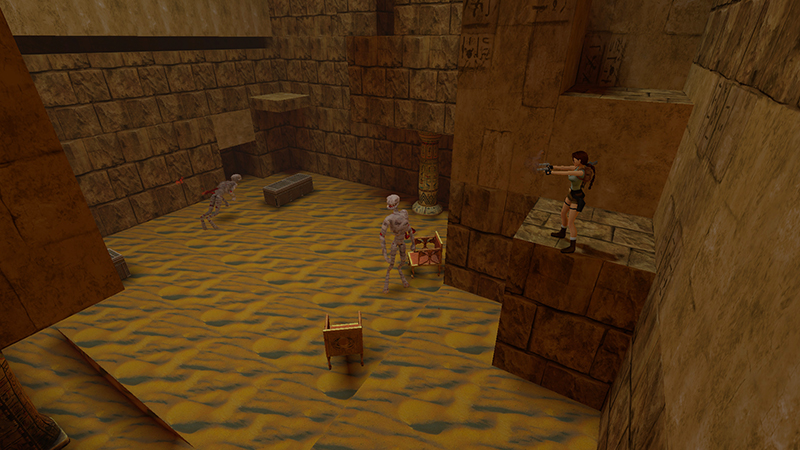
...which you can then kill from atop this block. (It helps to do this ahead of time, since you'll need to drop down on the other side of this room in a few minutes.)
Climb back up the blocks. Then hang from the long ledge on the west wall and traverse to the right, under the tan block, until you can pull up.
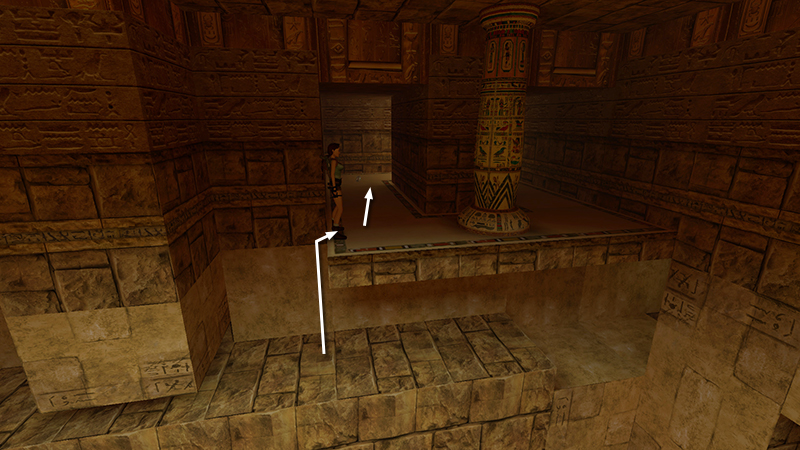
Climb onto the ledge with the ornate column. In the short passageway to the left is SECRET #1...
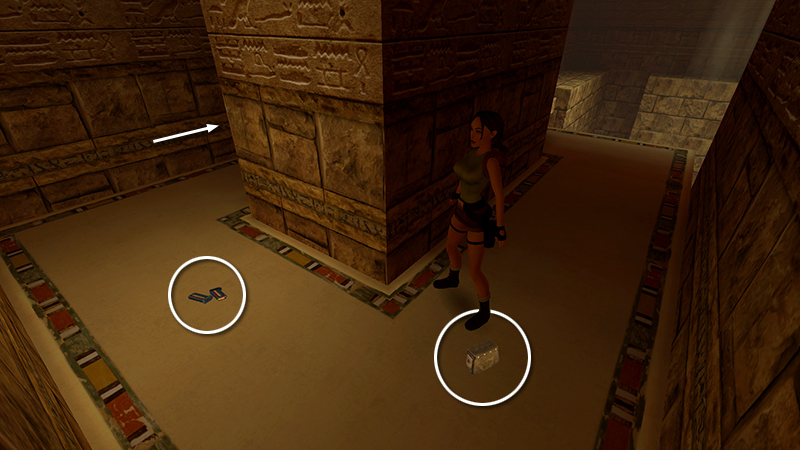
...a large medi pack and magnum clips (17-18). Exit on the other side of the pillar...
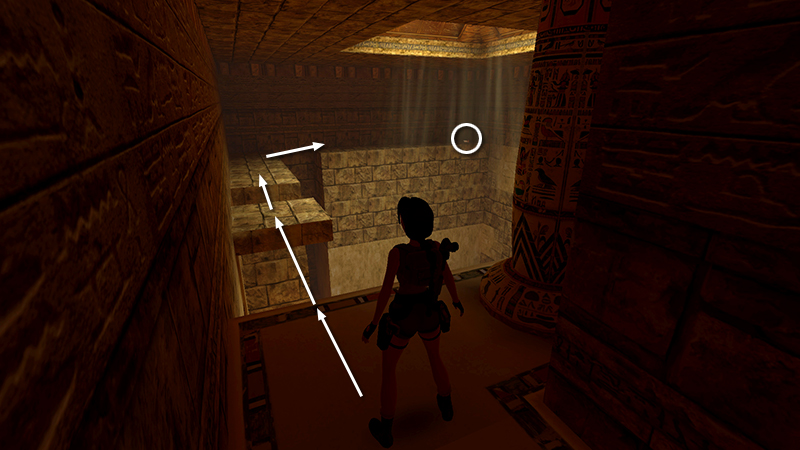
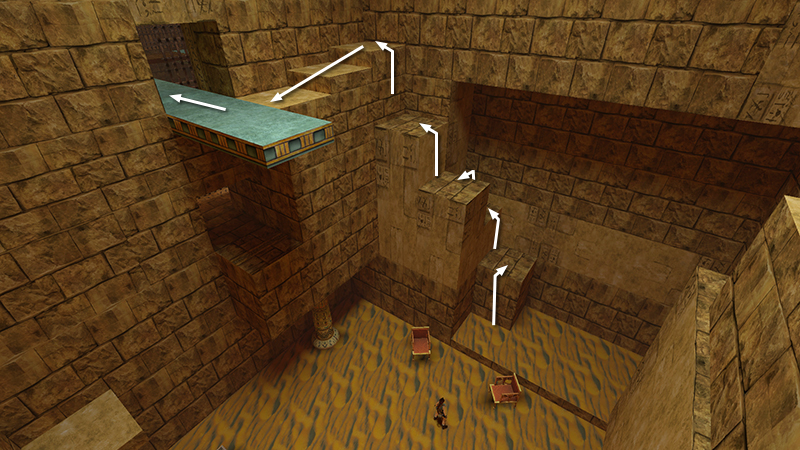
...and take a running jump to the small, square ledge ahead. From there, jump to the next ledge, go to the end, then jump to the long, perpendicular ledge on the right. Follow it to the end to get a box of shotgun shells (19).
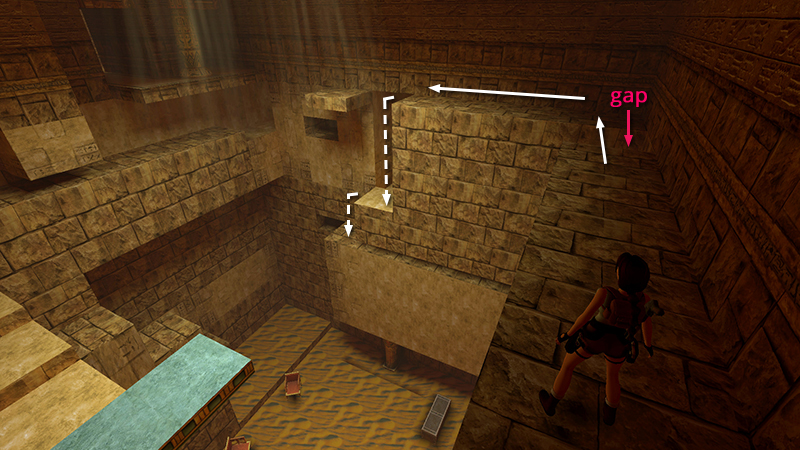
Jump back across the gap to the perpendicular ledge along the north wall. Turn left and follow this ledge to the end. Drop down to the flat spot below. (Ignore the corridor with stairs leading up. This takes you back to the ledge below the secret.) Drop down again to the block below.
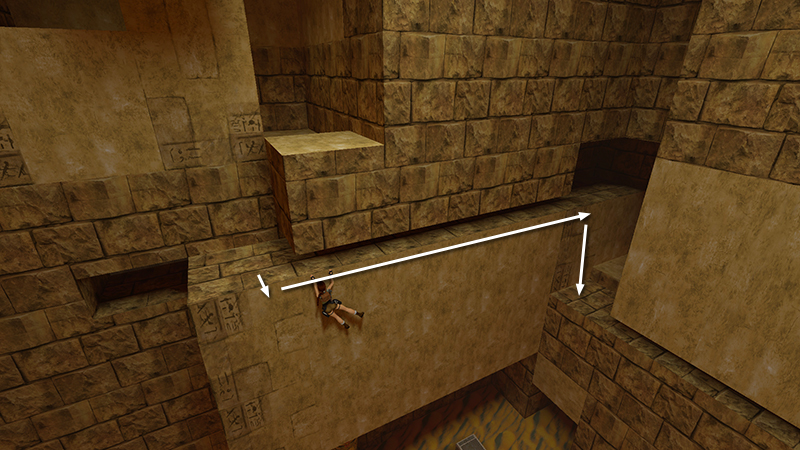
Turn so Lara's back is toward the open room. Then hang from the edge and traverse to the right along the horizontal crevice until you can drop onto the northeast corner ledge.
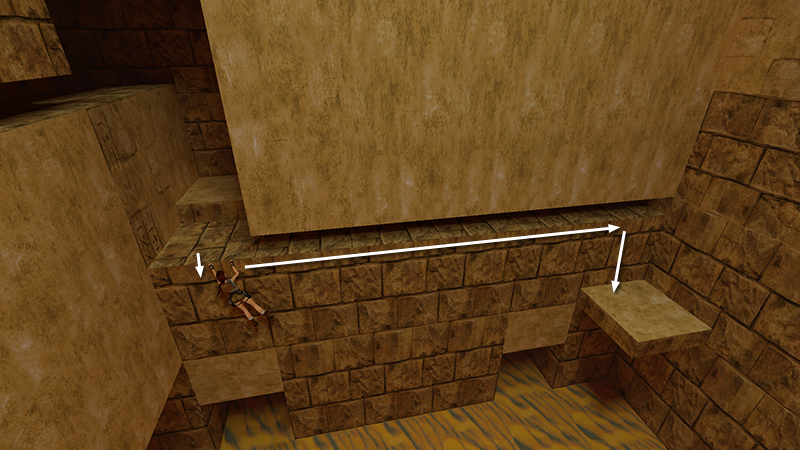
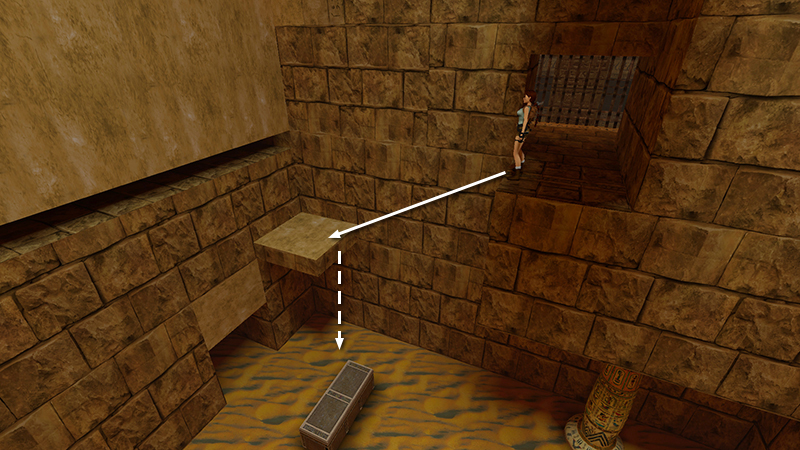
Now drop and hang from this ledge. Traverse to the right again until you reach the next corner. Drop to the square ledge below.
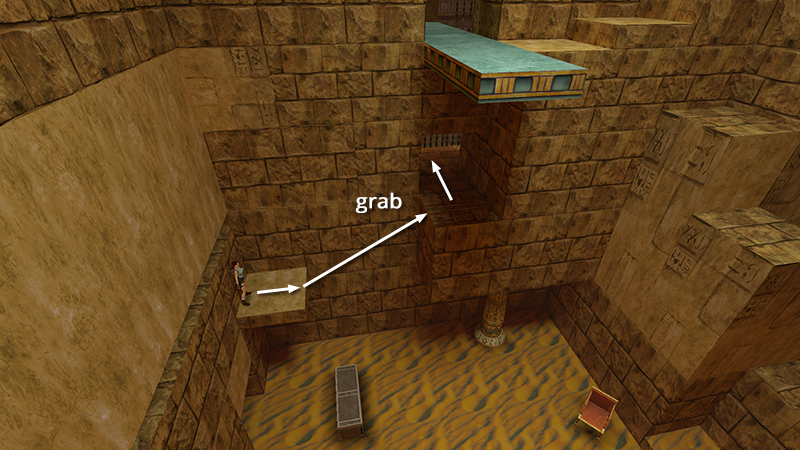
Turn around and take a running jump to grab the ledge ahead (i.e., the one just below the entrance). Pull up and go through the doorway on the left, to a fenced ledge overlooking the OBELISK WITH FOUR DRAWBRIDGES.
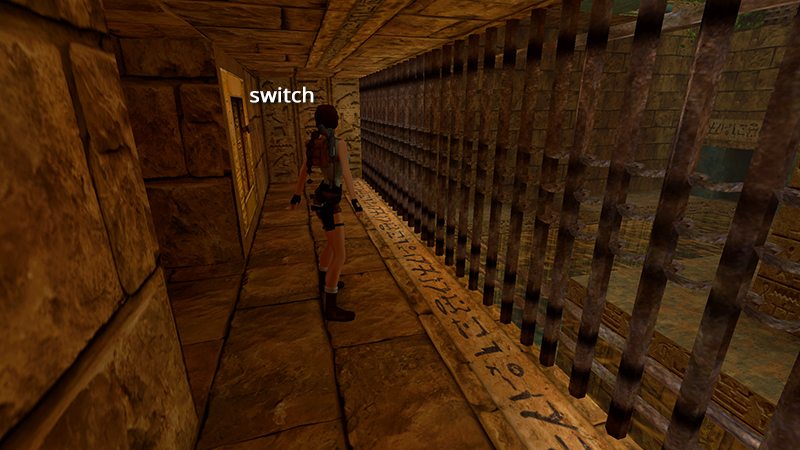
Use the switch to lower the BRIDGE TO THE SCARAB. (There's also a save crystal here in NG+).
Return through the doorway and take a standing jump back down to the corner ledge. Then drop down to the floor of the room with the sarcophagi. If you didn't destroy the 2 mummies (12-13) earlier, they'll awaken and attack now, and you'll need to destroy them.
NOTE: If you didn't kill the mummies earlier and don't want to chance fighting two at once, there are a few alternatives in the main walkthrough.
Climb the blocks behind the two chairs and exit where you came in.
DARK MODE: I plan to add optional dark mode for these pages, but my current priority is updating the walkthroughs. Meanwhile, may I suggest a reputable dark mode browser extension, such as Dark Reader? (Download only from trusted sites, like darkreader.org or your browser's web store.)
Walkthrough text and diagrams copyright © Stellalune (email ). Feel free to copy or print this walkthrough for personal use. By all means, share it with friends, but please include this credit line so people can send me their feedback. No part of this walkthrough may be reproduced on another site without permission.