Atlantis - Pool Below Exposed Pyramid - Secret #2
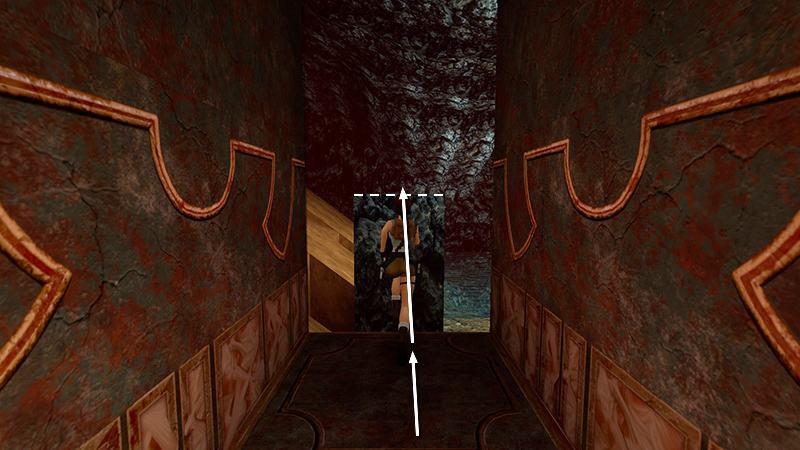
Take a running jump from the doorway onto the tall stone block ahead.
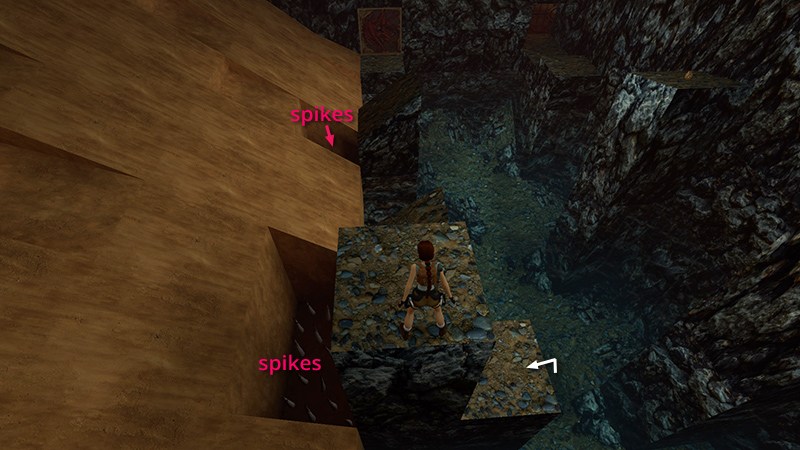
Note the square ledge below on the right. You can climb out of the water here if you fall in.
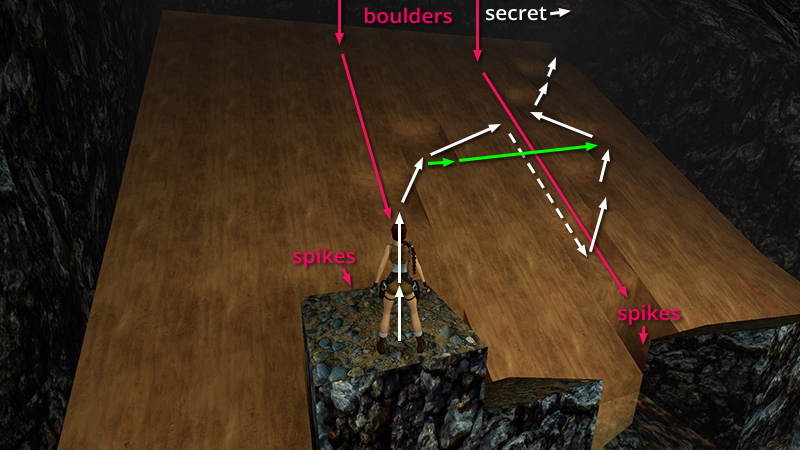
Now we'll be making our way up the side of the pyramid to the secret room at the top right. The screenshot above shows the path, and the hazards involved. We'll take it step by step below.
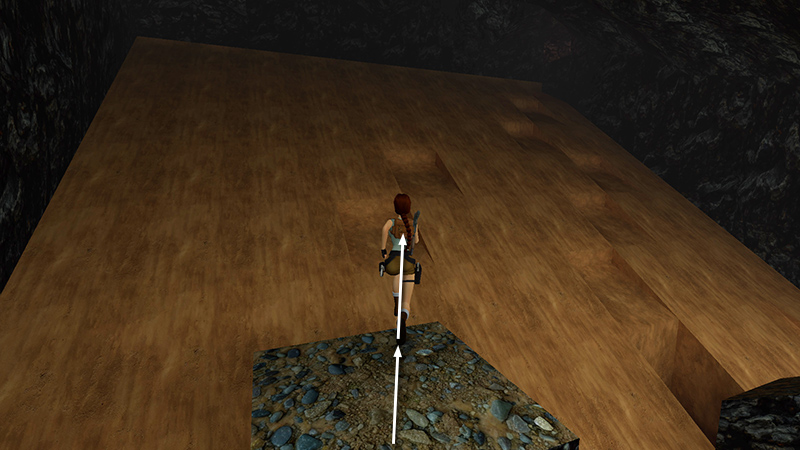
Take a running jump from the top of the tall block to the nearest flat spot on the pyramid.
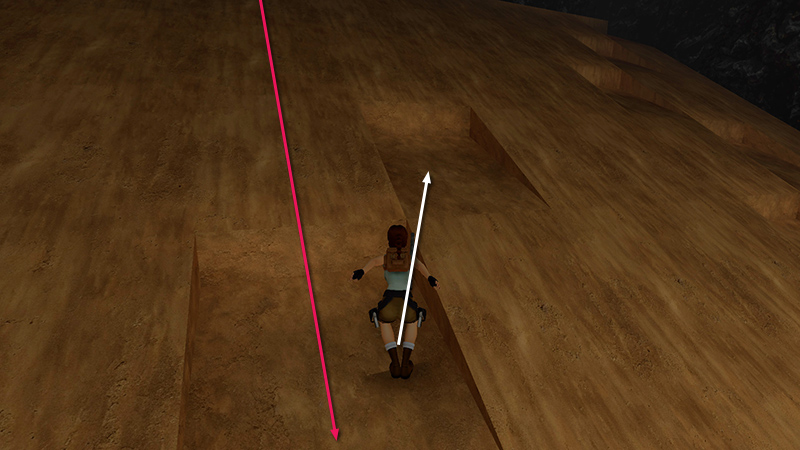
A boulder drops from the ceiling and rolls down the slope, so quickly take a standing jump to the next flat spot above and to the right. This spot is safe.
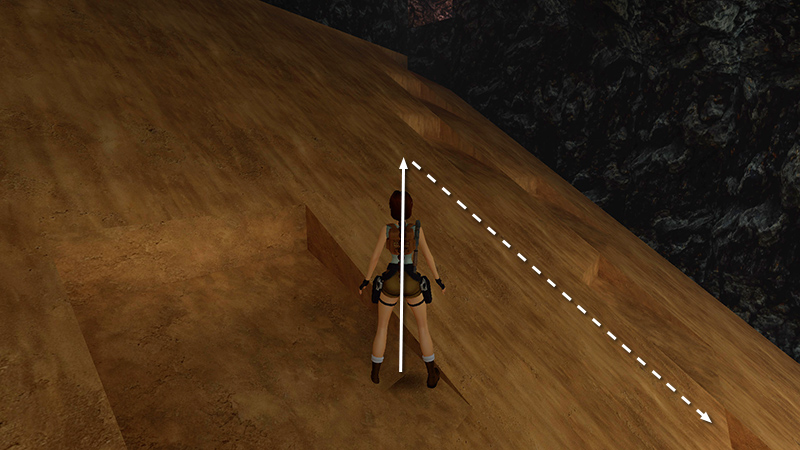
Move to the far side of the flat tile, angle Lara slightly uphill, and take a standing jump forward to land on the pyramid and slide down...
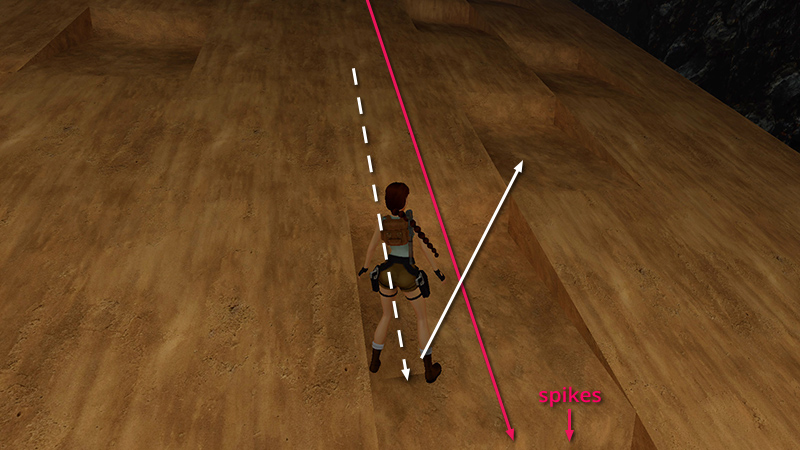
...to the flat spot just above the second spike pit. A second boulder rolls down. If Lara is facing uphill, you can immediately pivot a little to the right and take a standing jump up to the next safe spot.
NOTE: It's possible to avoid triggering the second boulder by taking a running jump straight across the pyramid from the second flat spot to the next one at the same level, as indicated by the green arrows in the overview screenshot above. However, I recommend triggering both boulders now so you don't have to worry about them later.
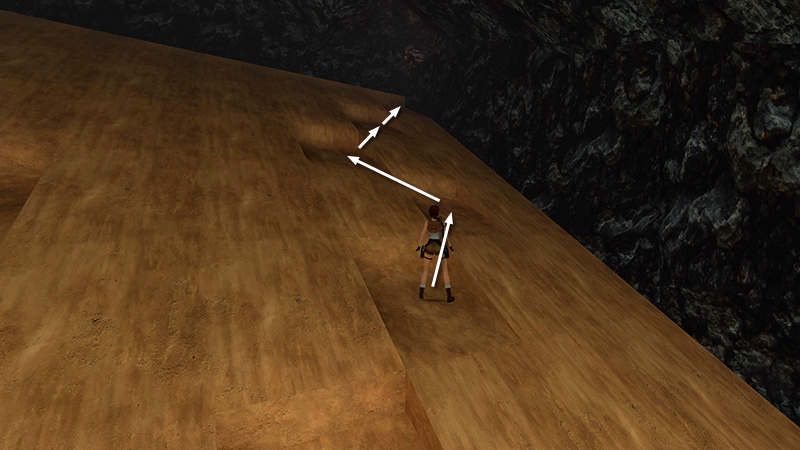
Now you can take your time. Take a series of standing jumps, from flat spot to flat spot, up the side of the pyramid to the top right corner.
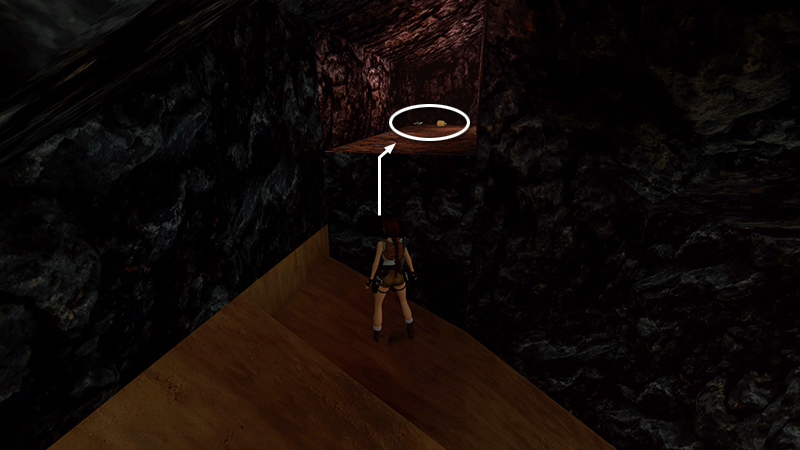
As you get closer, you'll be able to make out an opening in the rock wall. Climb into it for SECRET #2, magnum and Uzi clips (10-11), plus a large medi pack (12).
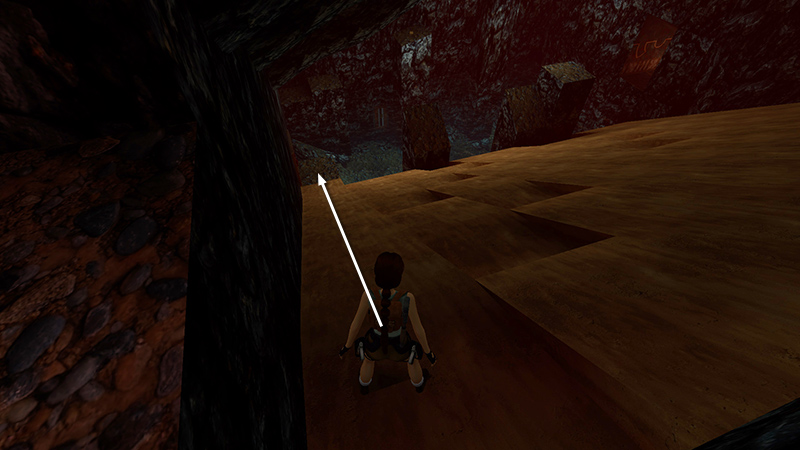
Grab the goodies. Then exit this room and slide down the pyramid to the flat spot near the red door.
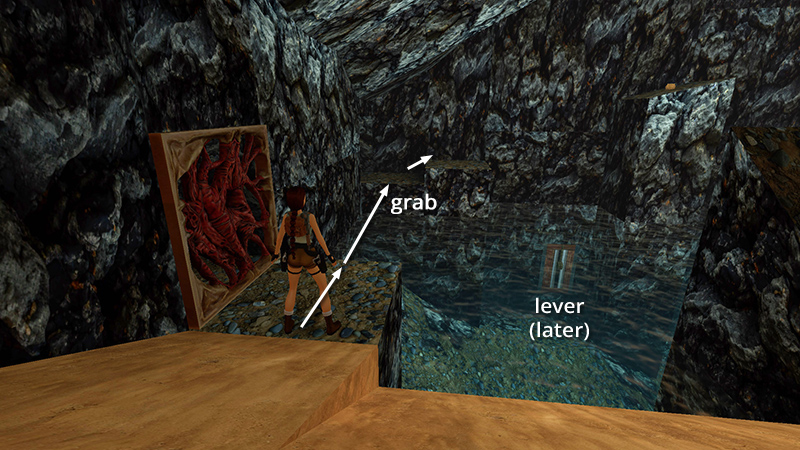
Take a running jump across the water to grab the lowest step on the other side. Pull up, turn right, and step up onto the higher part of this ledge.
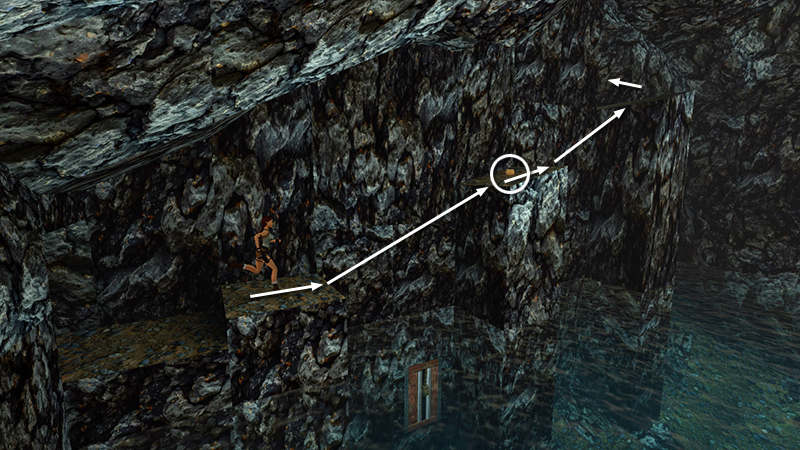
From there, take a running jump to grab the edge of the tall block ahead. Pull up and get the large medi pack (13). Take another running jump to grab the next higher block. Pull up and enter the room on the left.
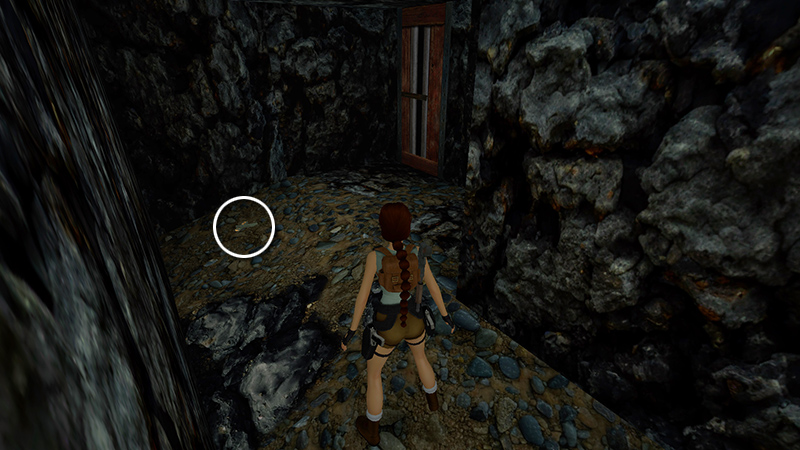
Pick up the 2 sets of Uzi clips (14-15) on the ground and pull the switch. This alters the terrain in the next room enabling you to exit.
DARK MODE: I plan to add optional dark mode for these pages, but my current priority is updating the walkthroughs. Meanwhile, may I suggest a reputable dark mode browser extension, such as Dark Reader? (Download only from trusted sites, like darkreader.org or your browser's web store.)
Walkthrough text and diagrams copyright © Stellalune (email ). Feel free to copy or print this walkthrough for personal use. By all means, share it with friends, but please include this credit line so people can send me their feedback. No part of this walkthrough may be reproduced on another site without permission.