Porvenir Oil Fields – Third Enemy Encounter
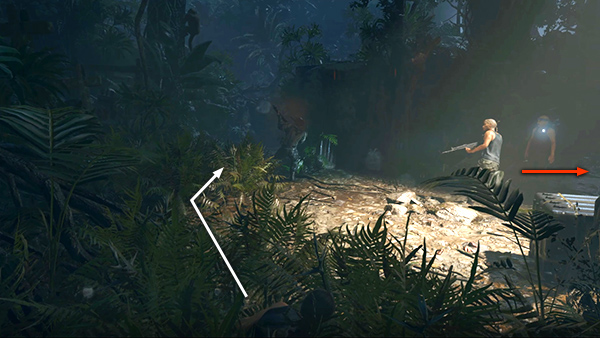
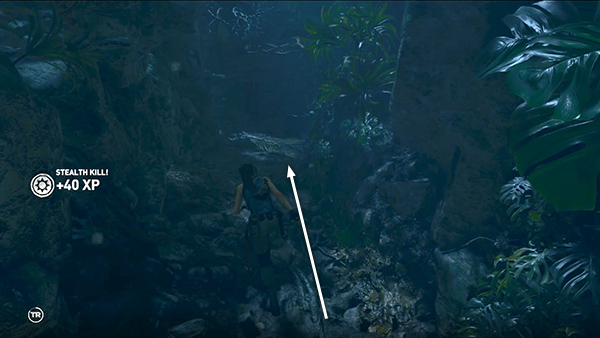
After the initial cutscene, stay where you are and watch your opponents. There are 5 enemies in all: 2 soldiers with armor and thermal goggles and 3 ordinary guys. Only 3 men are visible at first. The first soldier with thermal goggles moves off to the left. He thinks he's spotted something in the trees, but it's just a monkey. As soon as the other men head back to the right, leaving the goggle guy on his own, sneak through the bushes on the left...
...until you see the Melee icon above him.
Press the button for a stealth takedown.
Now you need to move quickly in order to take out the second thermal-goggles guy before he starts moving around. After the first stealth kill, Lara should be standing with her back to the tree where the monkey was. Run forward along the path between the vine-covered rock outcrop and the left (north) side of the clearing.
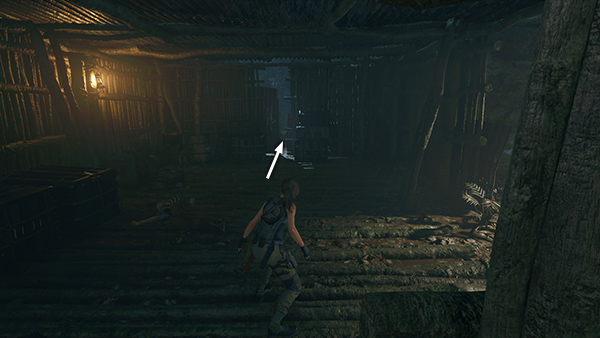
Pass by another section of vine-covered wall.
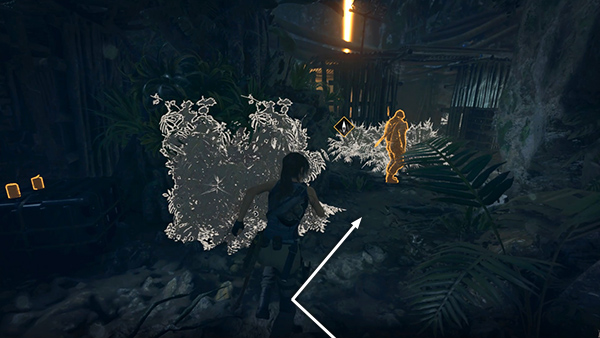
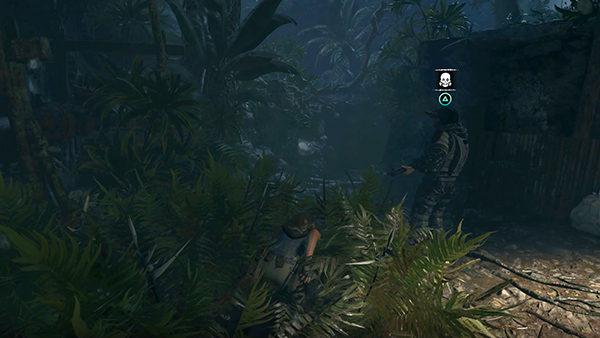
Then turn right just before the storage crate with the empty cans sitting on top. You should see the second soldier with thermal goggles just ahead. If he's still out of sight of the other men (yellow in survival instinct, not red)...

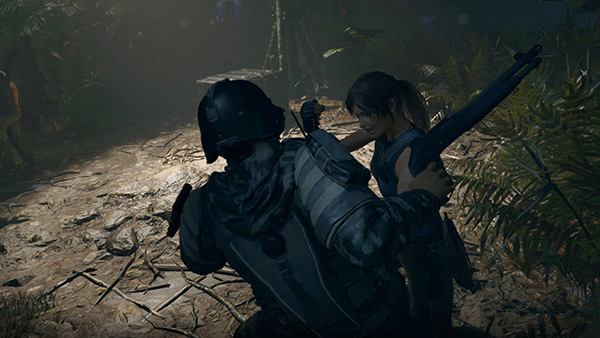
...rush in behind him...
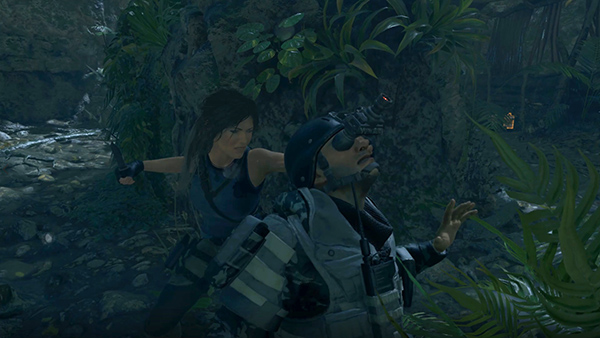
...and press Melee for another stealth kill. If he's red, or turns red as you approach, the other men will notice and attack. You can either reload the checkpoint and try again or just do your best to run, hide, and continue to fight.
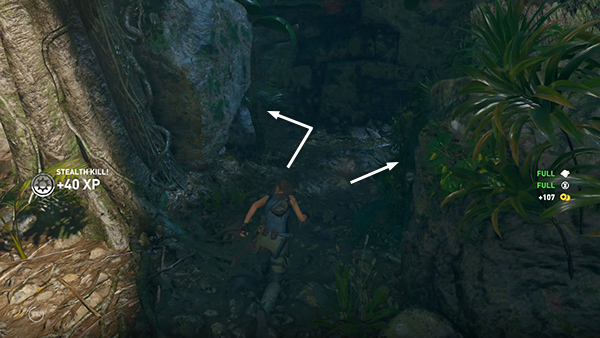
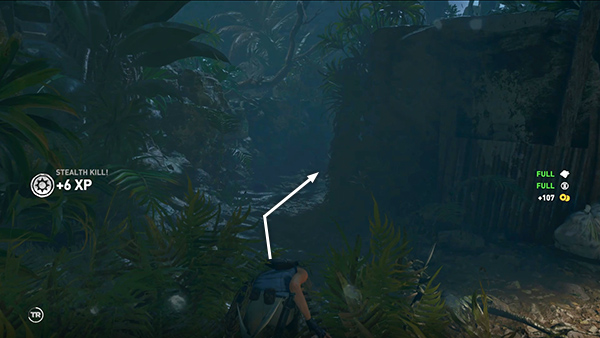
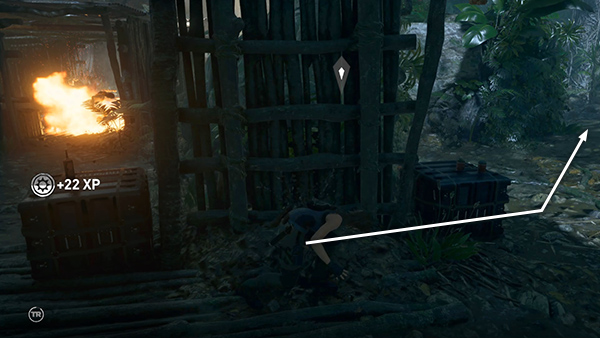
If you do manage to take down the second soldier without being seen, immediately run back the way you came (i.e., away from the other enemies) and move into the vines on either side of the path.
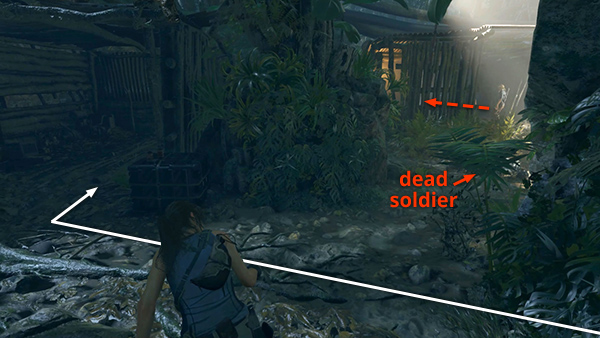
Wait in the cover of the vines for a moment just to make sure none of the other mercenaries have spotted Lara. Watch as 2 of the men enter the shack on the east side of the clearing. Move past the storage box with the tin cans and into the shack to the left of it.
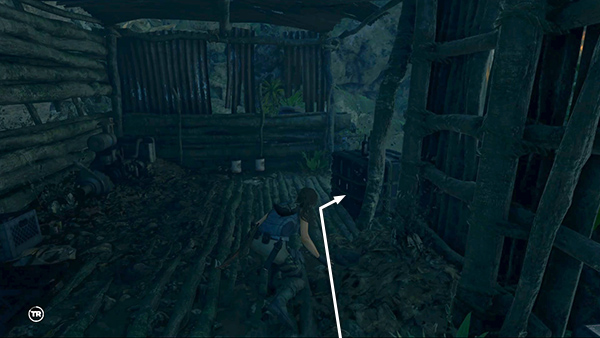
There's a second storage crate just ahead with some bottles on top. If you crouch behind this crate...
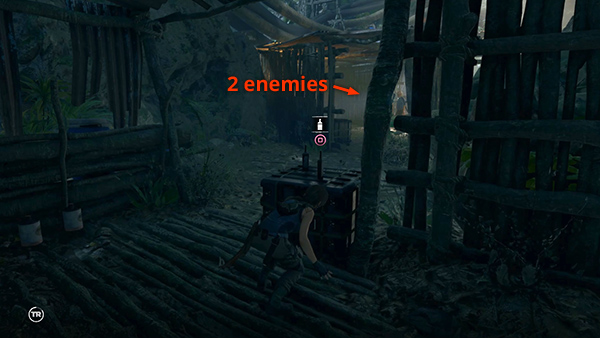
...the enemies in the shed just around the corner shouldn't notice Lara. You can then grab a bottle...
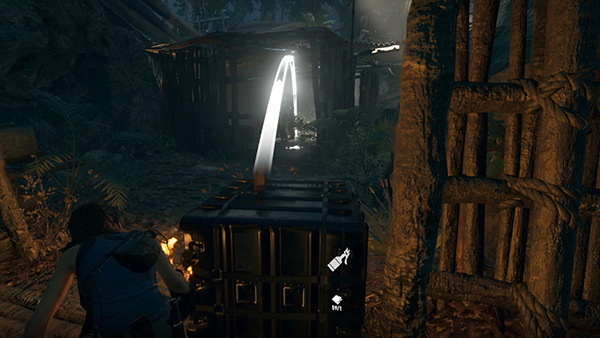
...craft a Molotov using cloth from your inventory, and throw it at the 2 enemies.
NOTE: If you don't have cloth but do have salvage, you can use a tin can from the crate you passed a moment ago to make a shrapnel grenade instead.
If your timing and aim are good, the fire should kill both of the enemies in the shed, leaving only one more. He'll definitely start looking for you now. Head back the way you came...
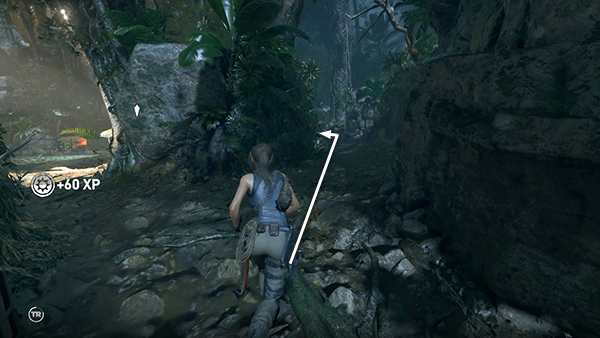
...following the path between the rock outcrop and the north wall, toward where you killed the first guy with the goggles.
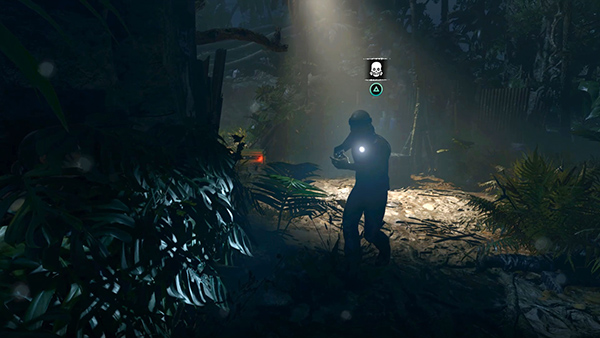
Hide among the vines at the end of the rock outcrop, and the fifth enemy should soon come looking for you. Wait for him to get close enough so you see the Melee icon...
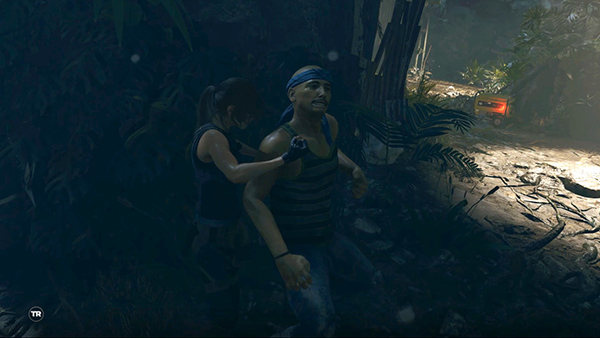
...then let him have it.
 Search the area for supplies and loot the bodies. Even if you have the Boa's Coil Skill, which allows Lara to automatically search enemies during a stealth kill, you'll still need to examine the men you killed with the Molotov. Then move through the gap at the back of the shed to enter the next area to the east.
[Porvenir Oil Fields Walkthrough]
Copyright © - Stellalune ( ). All rights reserved. Feel free to copy or print this walkthrough for personal use. By all means, share it with friends, but please include this credit line so people can send me their feedback. No part of this walkthrough may be reproduced on another site without permission. Follow this link for details about this site's advertising and privacy policy.