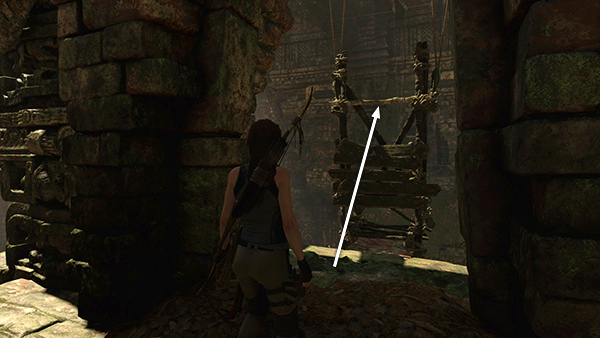
Peruvian Jungle – Judge's Gaze Challenge Tomb (part 2)
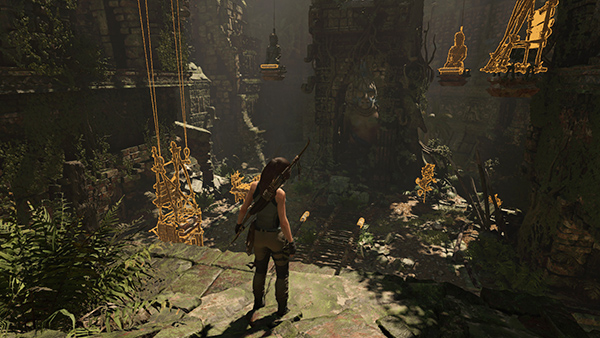
Examine the various moving parts of this puzzle: A wooden ladder with 2 rope-wrapped sections, 2 dangling statues connected to 2 counterweights, and 2 carts on tracks, one of which is currently attached to the left counterweight, holding it down. (If you're playing on one of the easier settings, Survival Instinct will illuminate everything you can interact with.)
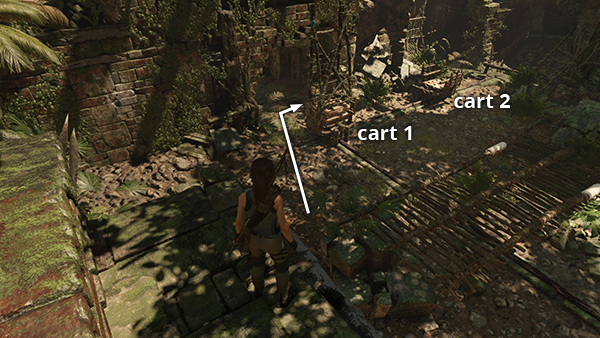
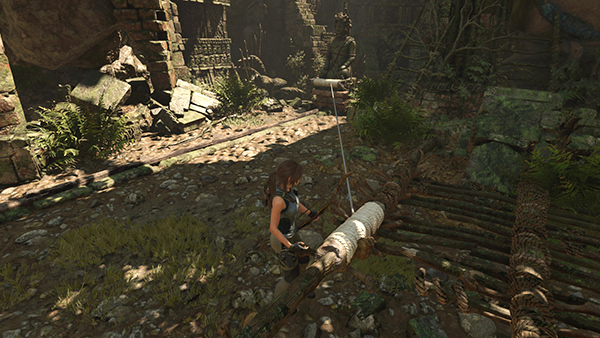
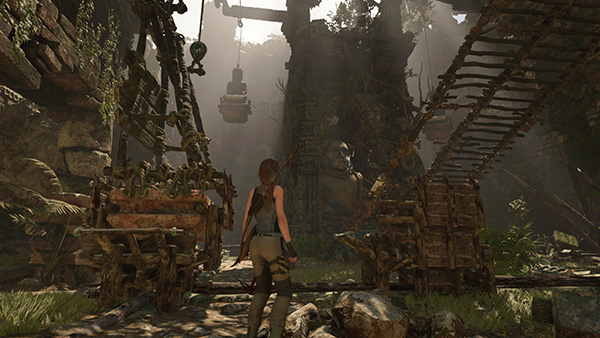
Hop down and go behind the first cart (i.e., the one attached to the left counterweight).
Grab the handle of the cart and pull it back, releasing the counterweight.
As soon as the left counterweight is no longer held in place by the cart, it rises up, allowing the left statue to fall.
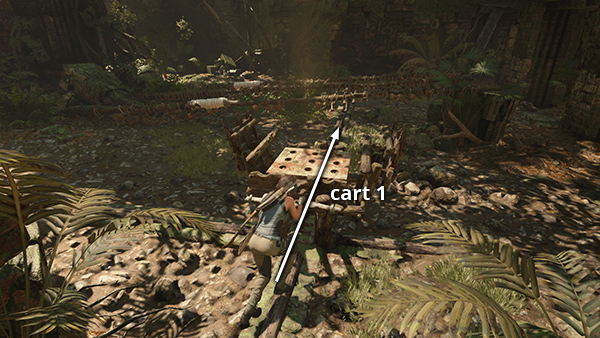
Push the first cart forward along the track until it runs into the ladder and won't go any farther. You'll need it again in a little while.
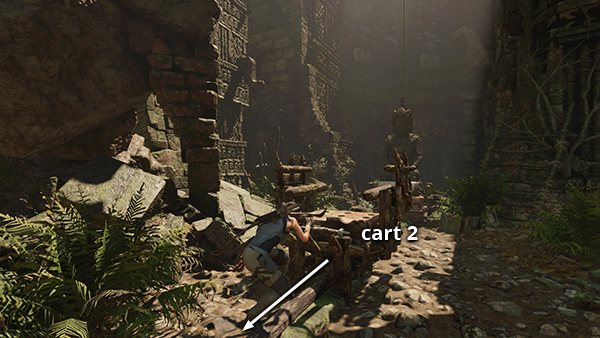
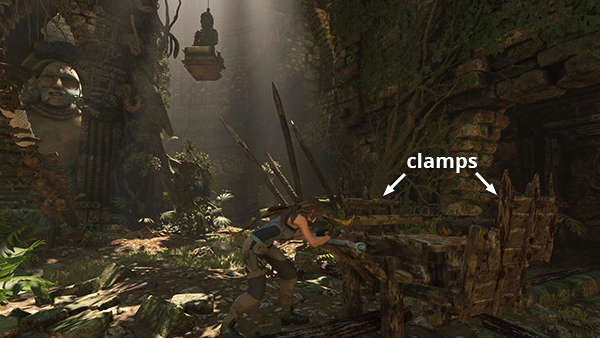
Now go to the second cart, near the left statue, and drag it back along the track to the intersection where the first cart started.
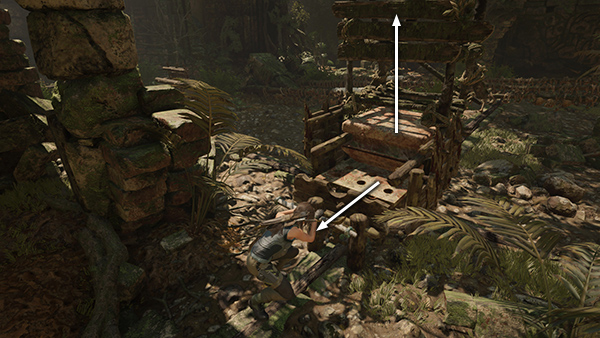
The clamps on the cart will fall open when you've positioned it correctly.
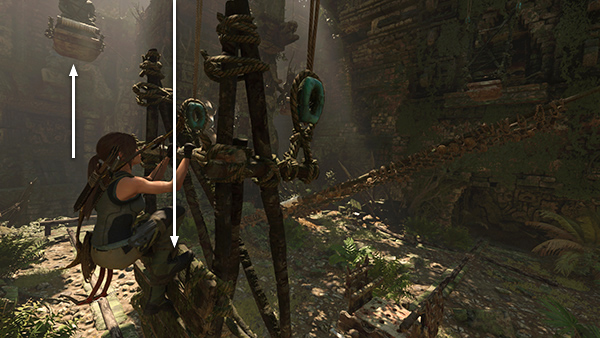
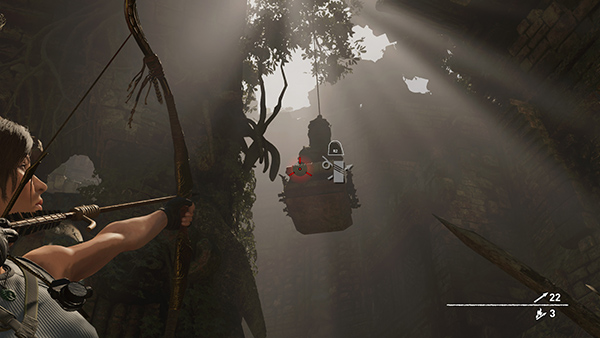
Stand near the rope coil on the left side of the ladder and shoot a rope arrow into the coil on the left statue...
...tethering statue to ladder.
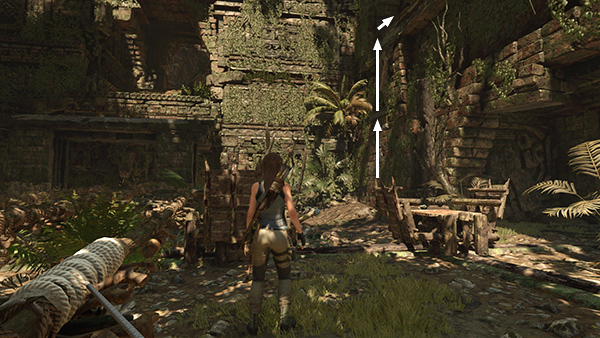
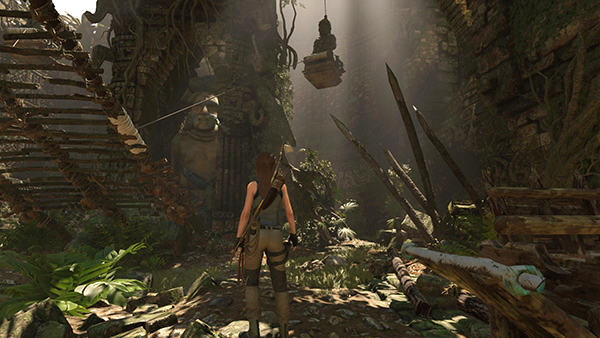
Turn around and head for the northwest corner, beyond the carts. Climb the right wall to reach the upper floor of the building.
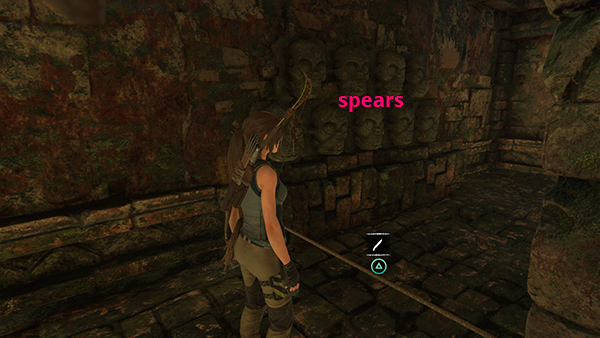
Go forward, then right, taking care not to trigger the spear trap by accident. As usual, cut the tripwire or just scramble carefully under the spears.
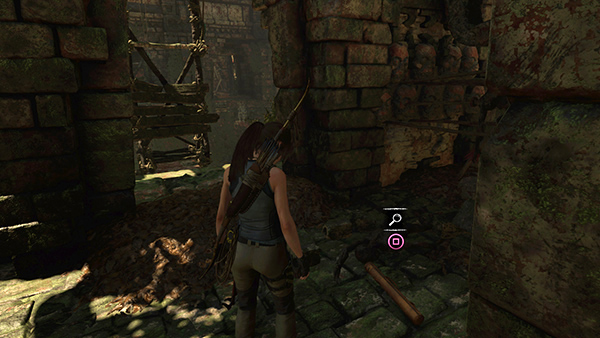
Just around the next corner, lying on the floor on the right, is a document (10/13), Jack's Journal, from the Expedition Unknown 2 Story.
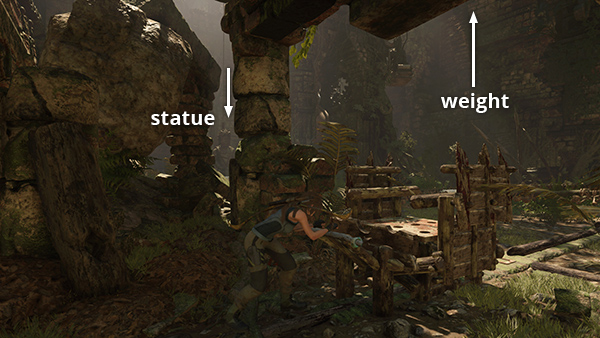
Move to the opening overlooking the ladder and jump onto the left counterweight.
Lara's weight pulls it down, raising the left statue. If you positioned the second cart directly below, it will clamp onto the weight and hold it in place. Let go and drop to the ground.
Now the puzzle is half done.
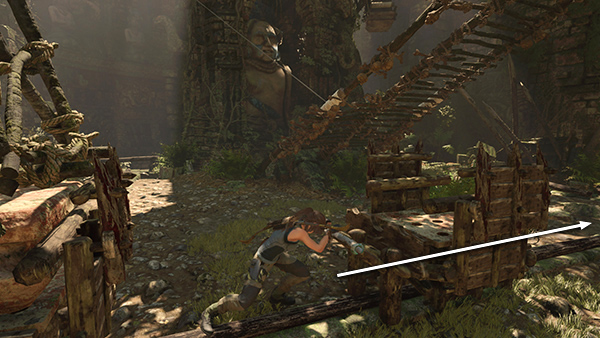
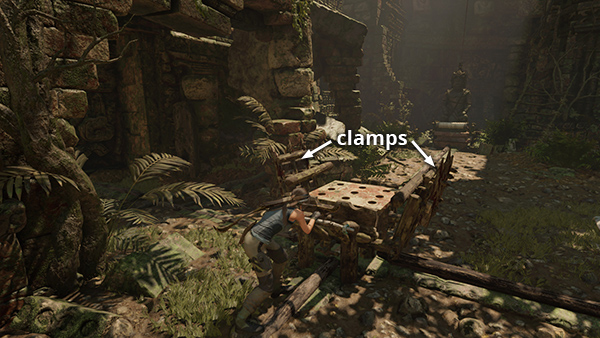
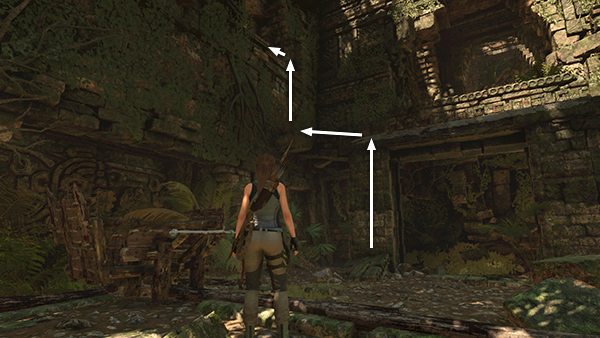
With the ladder slightly raised, you can now push the first cart underneath it to the right side of the court.
Position the cart at the intersection so the clamps open up.
Stand under the rope coil on the right side of the ladder and shoot a rope arrow into the right statue...
...tethering the statue to the ladder.
Climb back up to the ledge near the entrance and from there to the upper level on the left side (i.e., right side if you were facing the ladder).
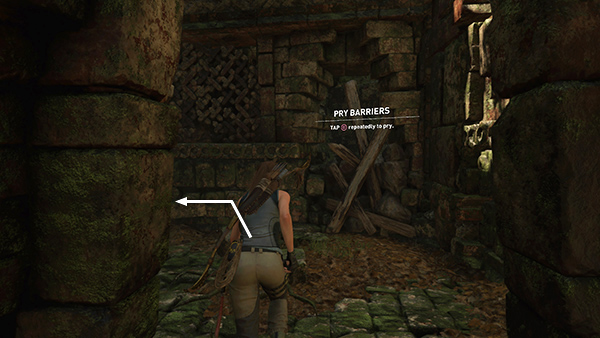
Ignore the pry barrier for now and follow the passageway to the left.
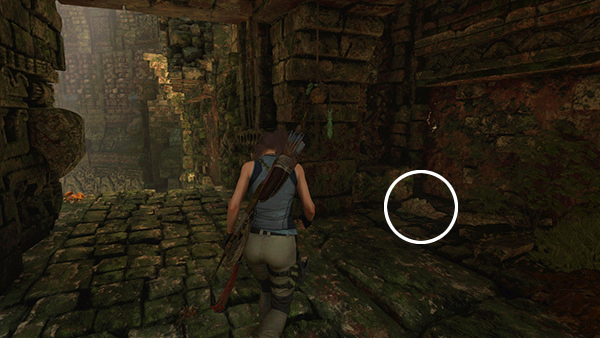
Just before the end, lying on the floor to the right, you'll find another document (11/13) called Surprise Witness (Mam Dialect/Metamorphosis Story).
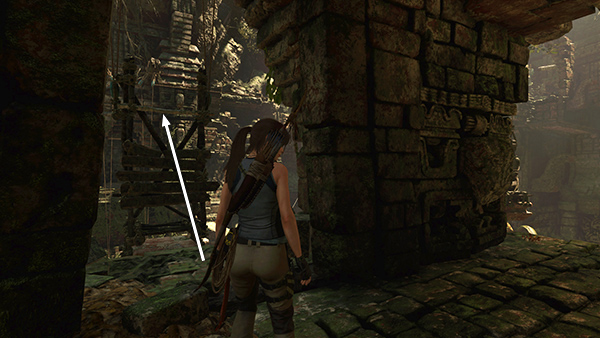
Move to the opening overlooking the ladder and jump onto the right counterweight.
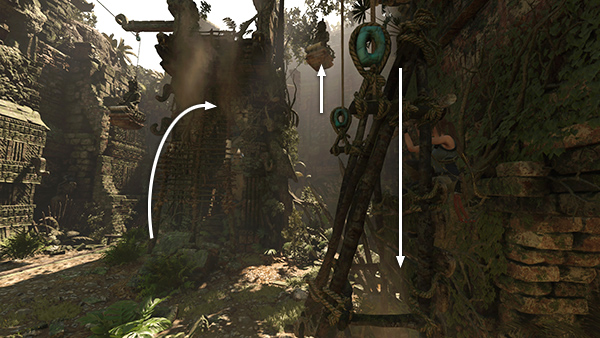
Lara's weight pulls it down, raising the right statue. As long as you tied the statue to the ladder with a rope arrow, this should raise the ladder completely.
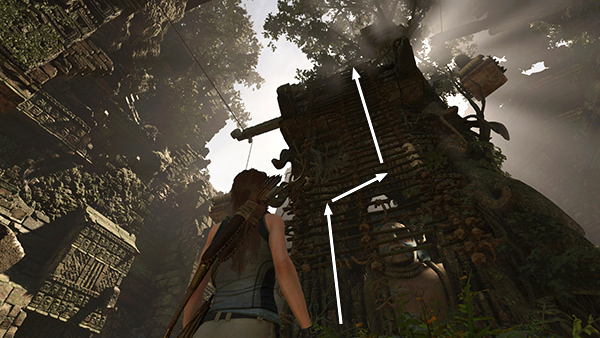
Climb the ladder to the top.
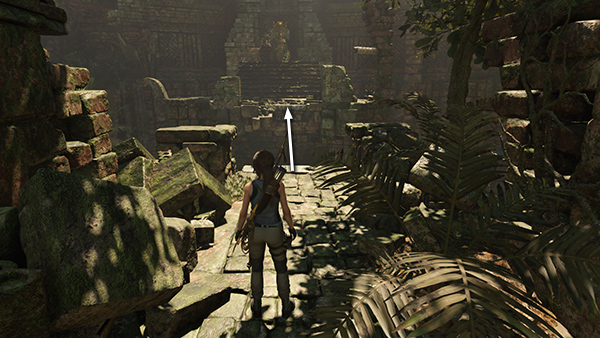
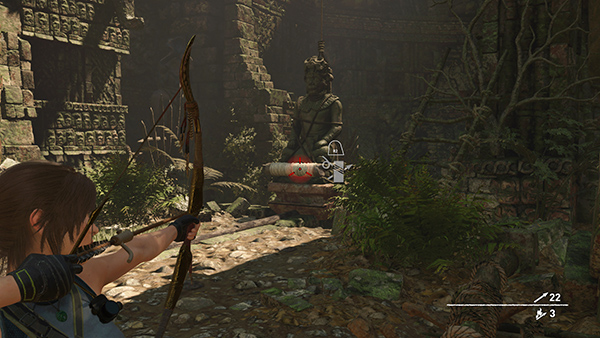
Jump across the gap to the tomb stele and examine it to unlock Caiman's Heart, a Scavenger Skill that makes Lara's health regenerate more quickly.
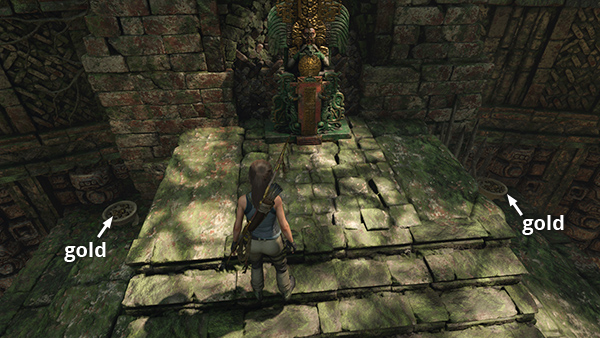
There are also offering bowls on either side of the stele containing bits of gold ore.
[Previous | Next | Challenge Tomb Walkthrough]
Copyright © - Stellalune ( ). All rights reserved. Feel free to copy or print this walkthrough for personal use. By all means, share it with friends, but please include this credit line so people can send me their feedback. No part of this walkthrough may be reproduced on another site without permission. Follow this link for details about this site's advertising and privacy policy.