The Hidden City – Crypt of Ollanta, the Potter (part 2)
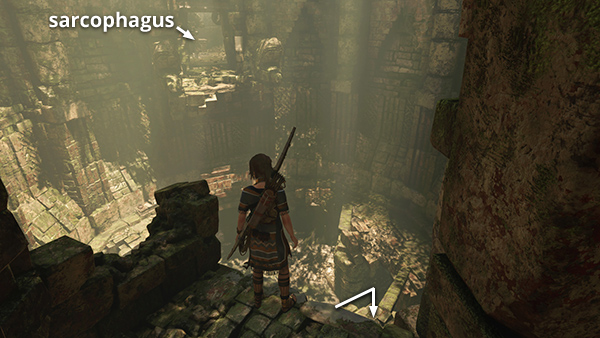
Follow the passageway past another resource container (not shown) to a doorway overlooking a large, cylindrical room. Lara spots the sarcophagus on the other side. You can't reach the other high doorway from here, so drop down onto the ledge below.
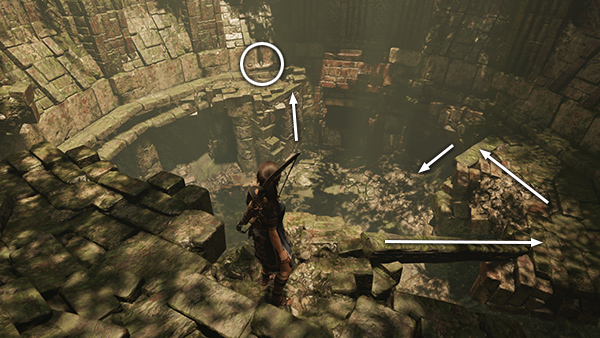
Drop or climb down to the floor, then scramble up the wall onto the south ledge to find another document (41/42), Merchant Sacrifice (Mam/Metamorphosis).
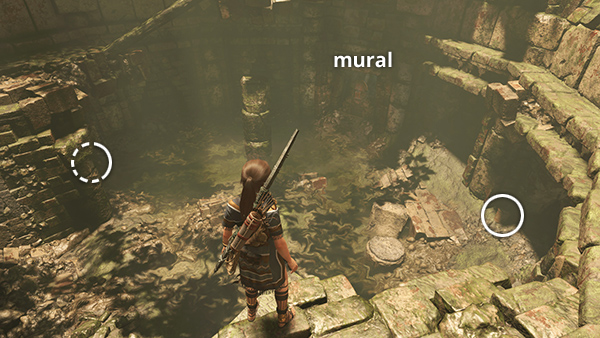
At ground level, against the east wall, is a mural (21/23), Ollanta, The Potter (Quechua/Resting Places). There are also a couple more resource containers here.
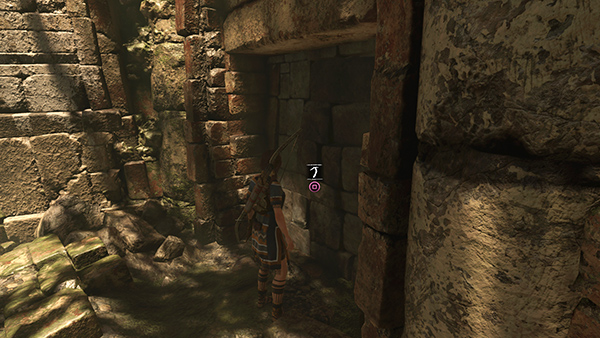
Break down the crumbling wall opposite the mural and go through...
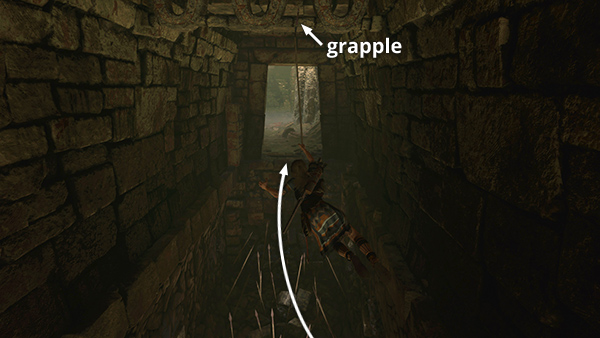
...into a passageway with a wide spike pit. Grapple-swing to the other side.
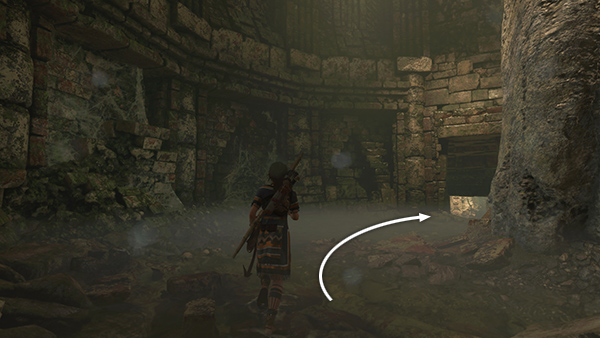
In the tall, misty room ahead, go around to the right into a slightly lower side room.
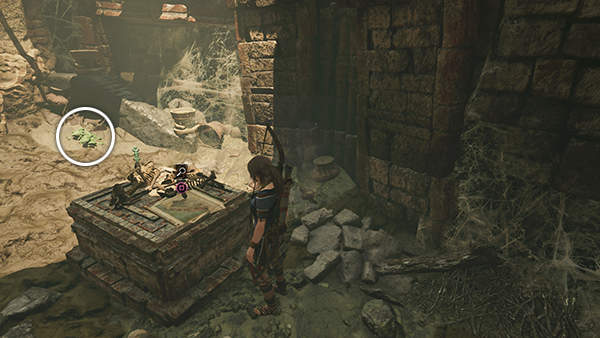
Here you'll find some jade ore and an archivist map (7/7), which may not be very useful at this point. If you've been following this walkthrough, you will have already found the collectibles it would reveal.
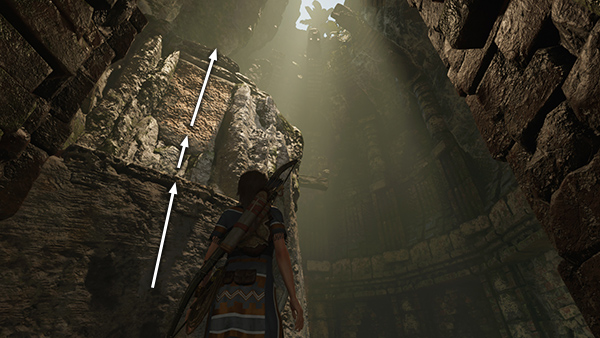
Return up the steps to the previous room, climb the ledge on the left, and scale the climbable wall above it.
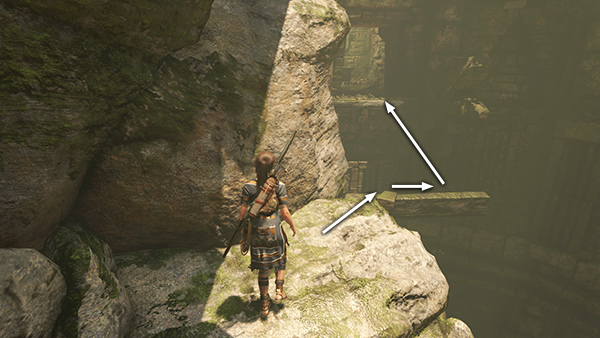
Walk out onto the jutting beam and jump from there to the doorway of the sarcophagus room.
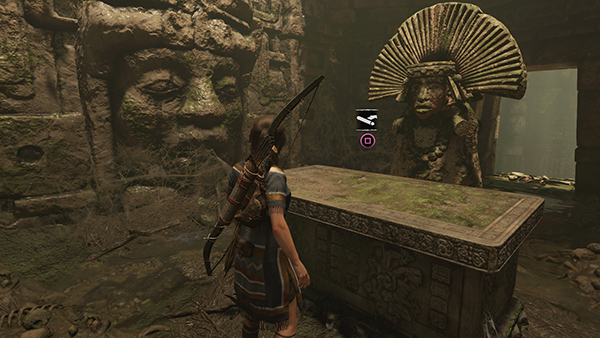
Open the sarcophagus to find 750 gold pieces and a Vestige: Greaves of Six Sky, which provide faster health regeneration. If you've completed the other Hidden City Crypts (not including Manko's Crypt, the one from the Savior's Amulet Side Mission), you will now complete the Speak of the Dead Challenge.
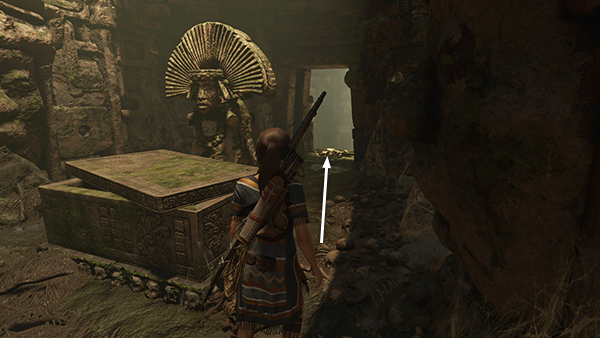
Getting back to the main area is fairly straightforward. Start by moving into the northeast doorway of the sarcophagus room.
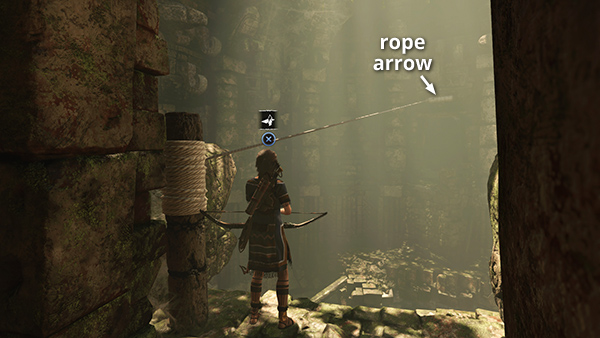
Stand near the post and hoot a rope arrow into the rope-wrapped beam above the doorway on the far side of the large, cylindrical room. Climb across.
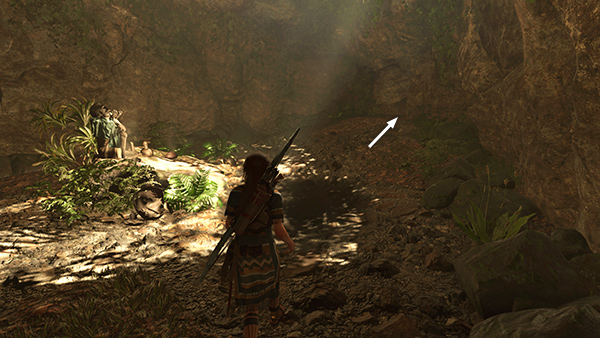
Follow the passageway back the way you came. When you come to the room with the ecstatic corpse, where you found document #40, continue through the narrow opening to the north.
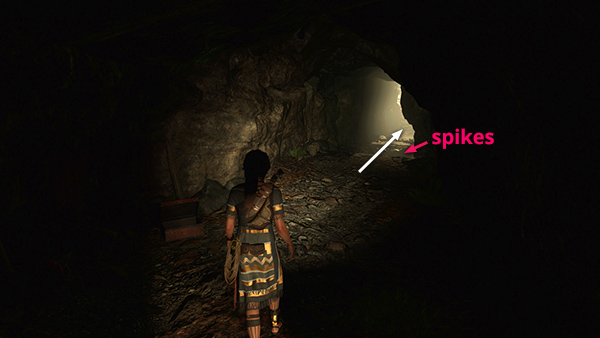
Just beyond the dark area where you found relic #28, follow the passageway toward the light, but watch out for the spike pit.
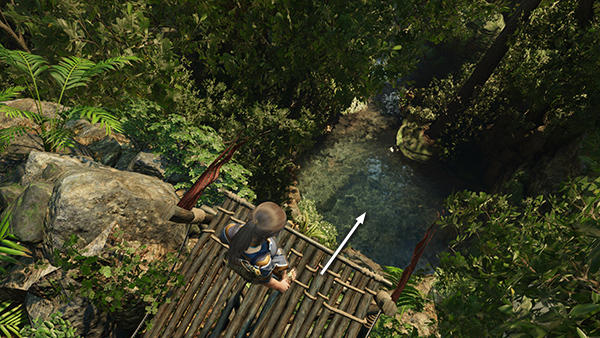
Outside, dive off the wooden platform into the pool below the waterfall. If you haven't already completed the High Diving Challenge, this will count toward your total.
[Previous | Crypt Walkthrough | Main Walkthrough]
Copyright © - Stellalune ( ). All rights reserved. Feel free to copy or print this walkthrough for personal use. By all means, share it with friends, but please include this credit line so people can send me their feedback. No part of this walkthrough may be reproduced on another site without permission. Follow this link for details about this site's advertising and privacy policy.