The Hidden City – Side Mission: Hearts and Minds
Retrieve the Champion's Bow (part 1)
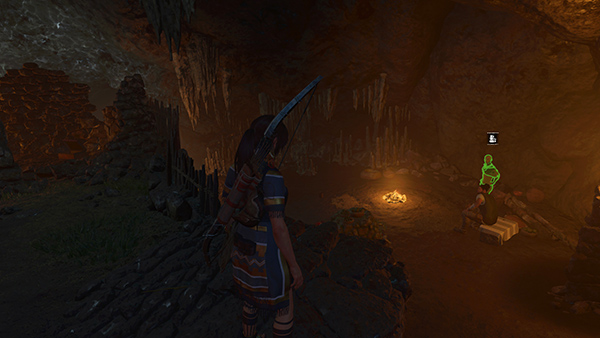
After returning from the MISSION OF SAN JUAN, speak to Uchu, who's standing near the Skull Cave Base Camp. If you have completed his previous missions (Retrieve the King's Horn and Retrieve the Savior's Amulet), he now asks Lara to Retrieve the Champion's Bow, the final heirloom needed for Etzli's coronation. Uchu says the bow was taken from Etzli's father by the Nahual, a mystical being with the power to transform from human to animal. The first goal is to Enter the Wilderness.
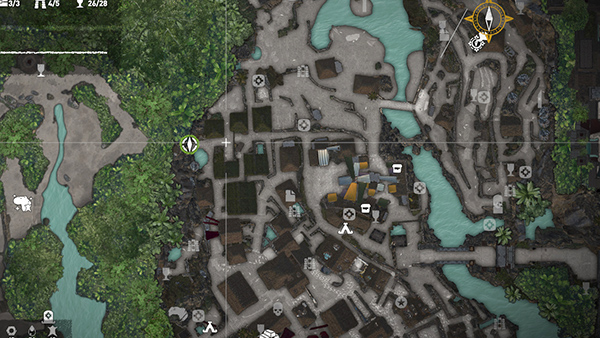
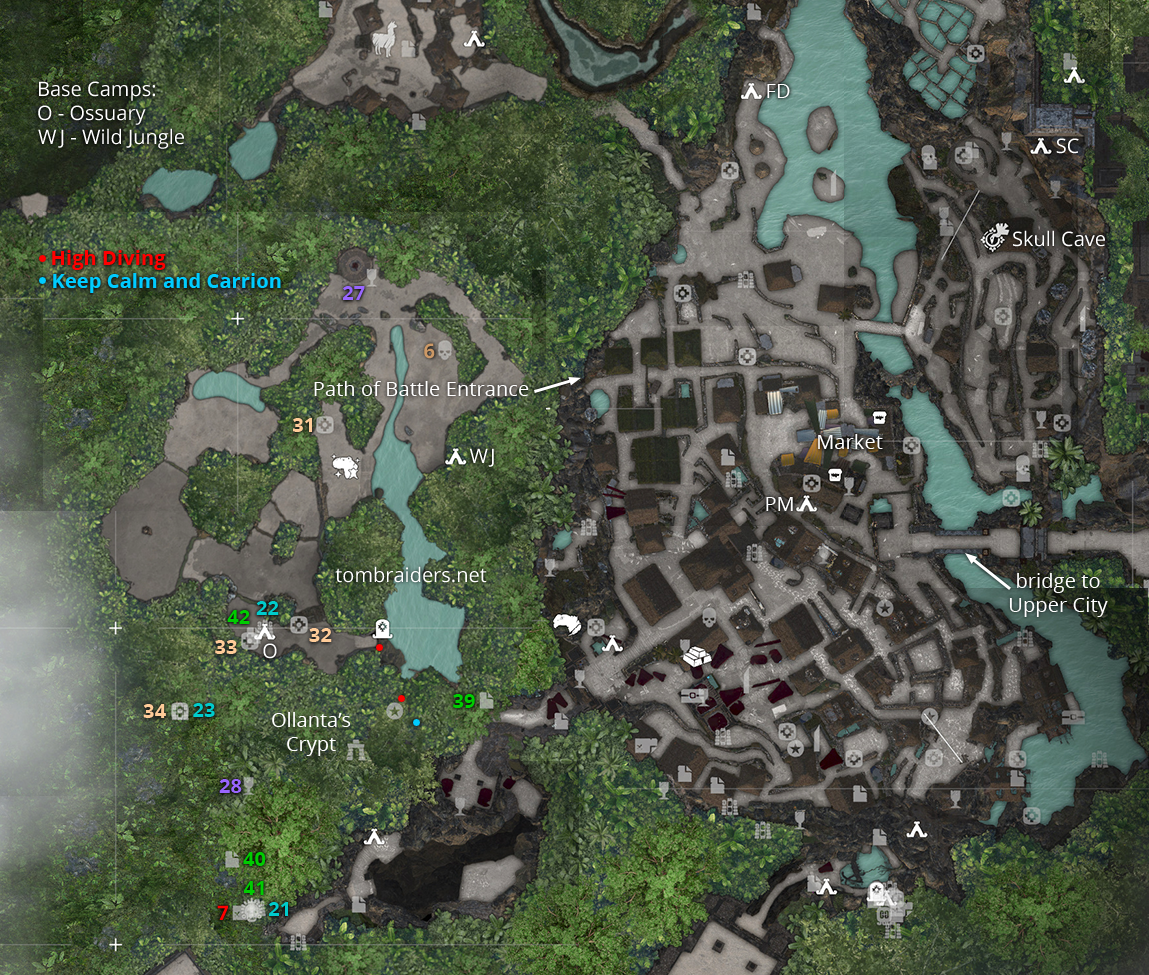
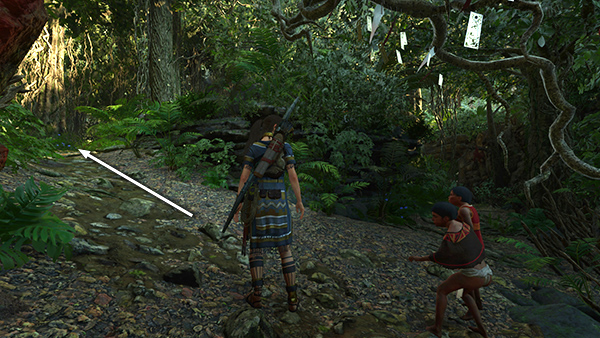
Uchu describes where to go and the location is marked on your map. (It's also labeled "Path of Battle Entrance" on the annotated level map.)
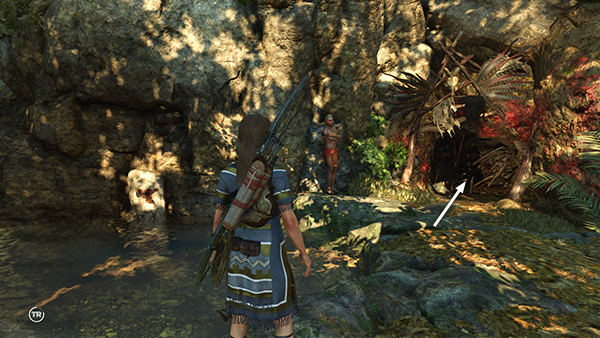
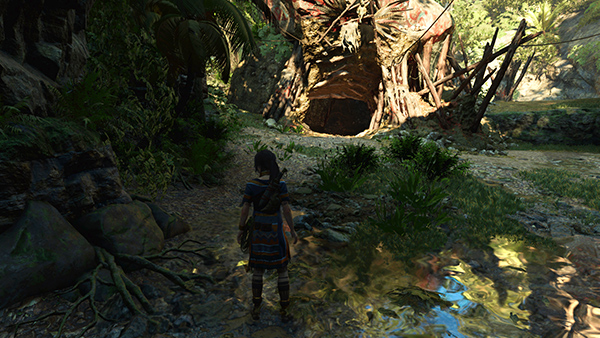
The "Path of Battle" entrance is through the tunnel decorated with red paint, feathers, and bones, just to the right of the small pool where you found one of the murals for the Ancient Studies Side Mission. There's a warrior guarding the entrance who will tell you more about the challenges ahead, assuming you haven't spoken to him earlier.
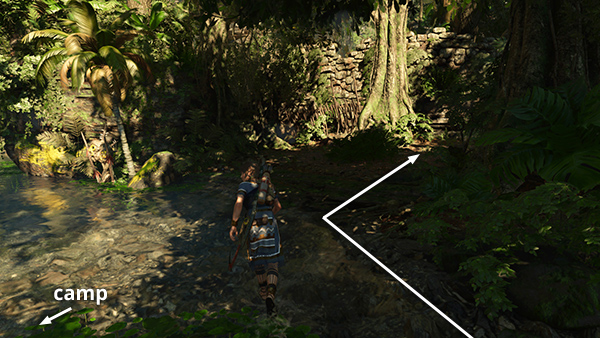
The tunnel leads to a path running through the dense jungle. As you emerge, you meet two children who are debating whether to enter the forbidden area. Your goal is updated: Investigate the Wilderness, and a specific location is marked on your map. Follow the path to the left for now.
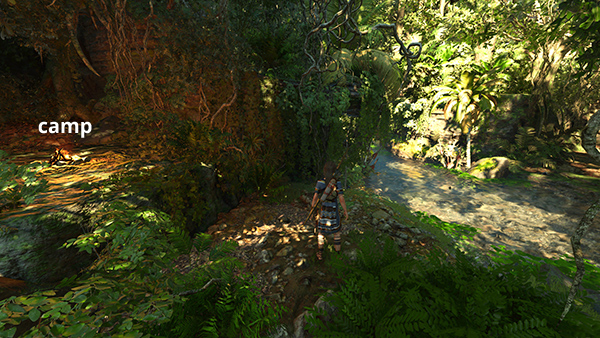
At the top of the hill, on the left, just before the stream, is the Wild Jungle Base Camp. If you "discover" it now, you'll be able to use it for Fast Travel later. There's a Challenge Tomb entrance upstream to the south, but we're on a Mission, literally, so ignore it for now.
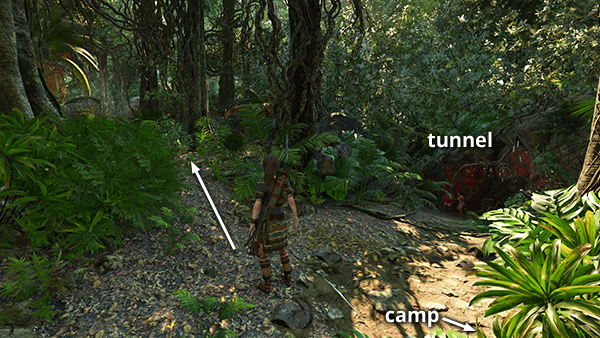
Follow the path through the trees to the south.
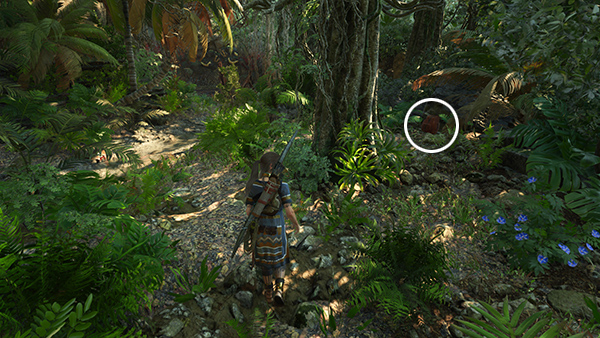
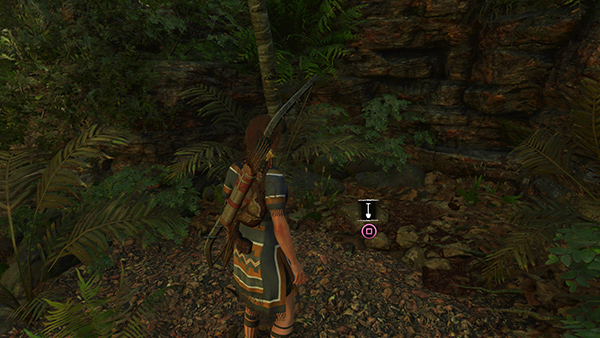
In the bushes on the right is an explorer backpack (6/6). Examine it to reveal the locations of a few nearby survival caches.
If you like, you can collect one of those caches now. Backtrack along the streambed to the south. Then turn right into the little clearing with the big tree and man-made stone wall, just across the stream from the campfire.
The survival cache (31/34) is buried near the wall at the right (north) end of the clearing. (Check the map if necessary. This is the cache near the albino capybara icon.)

Return along the streambed to the north. Where the stream starts to dry up, examine the capybara carcass lying on the ground. Just ahead the path comes to a T. Turn left...
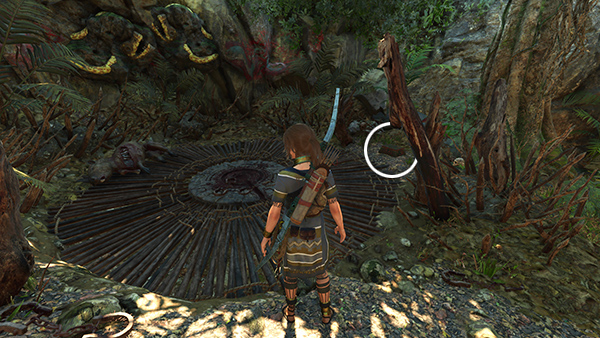
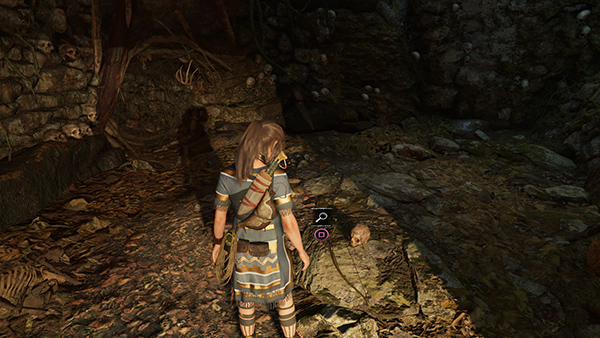
...to find a circular platform set into the ground. If you examine the manacles and dark stains at the center of the circle, Lara says this looks like a sacrificial altar. There's also a box containing a relic (27/28), Beast Effigy (Yucatec/Secrets and Lies), off to one side, and another dead capybara you can loot for hides and fat.
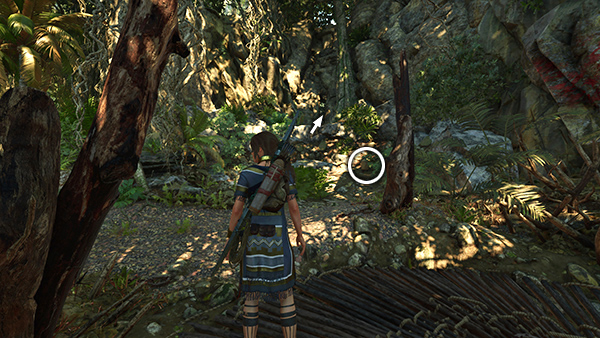
Leave the circle and climb the stone ledges to the southwest. There's a resource container on the right side of the lower ledge and a narrow opening at the top that Lara can just fit through. (The dappled lighting makes it hard to see what's what in these screenshots. Once you're on location, it should be pretty obvious. The green Mission beacon marks the doorway if you have Survival Instinct enabled.)
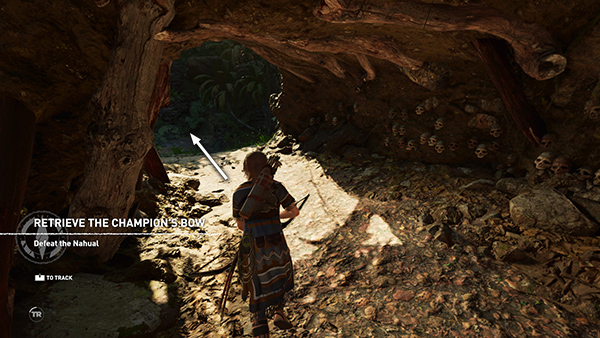
Beyond the opening is a clearing with a shallow pool, a ledge off to one side, and lumpy dwelling decorated with feathers and bones, similar to the cave entrance you saw earlier. Your new goal is to Find the Champion's Bow, which Lara believes is inside.
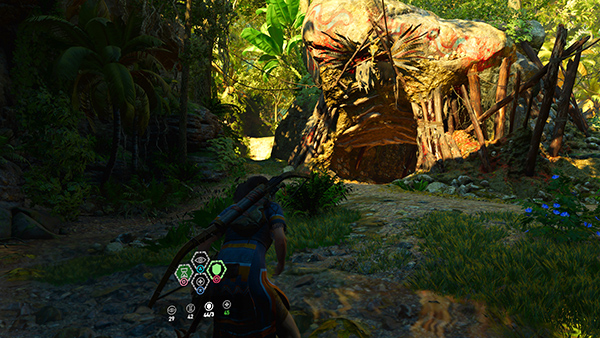
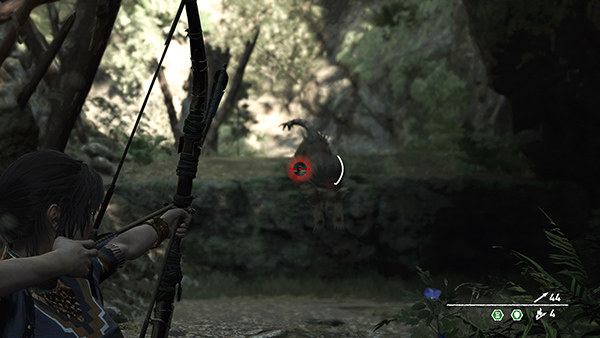
Before entering the lair, you can scout out the exterior if you like. There's an open arena in back, and a path leading all the way around the dwelling, and a few resources scattered about. Make sure you've crafted a good supply of arrows, since you'll need them. When you're ready, enter the lair and examine the Champion's Bow, which is lying on the ground in the center.
Soon the Nahual approaches. When it lunges, a QTE kicks in. First you're prompted to wiggle the left stick back and forth or alternate pressing A/D on the keyboard to hold it off with your axe.
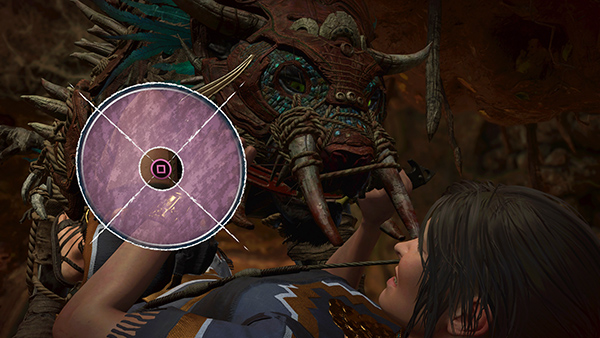
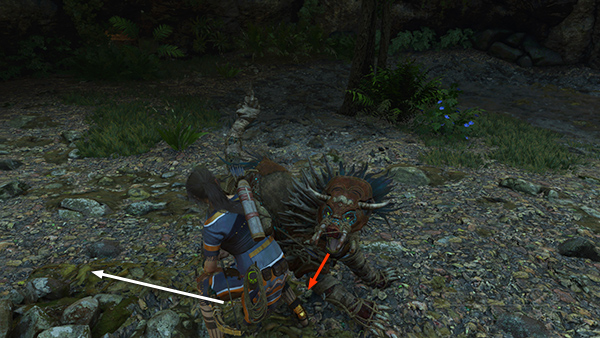
Then a circular icon appears with a symbol for one of the controls. As the outer ring contracts, you need to press the button indicated (it may be Interact or Melee so pay attention) before the ring reaches the center in order to shove the Nahual away and scramble to your feet.
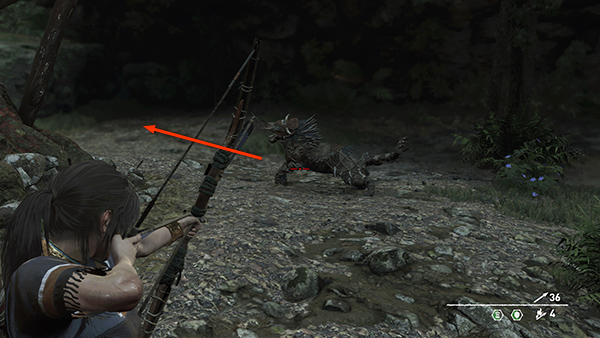
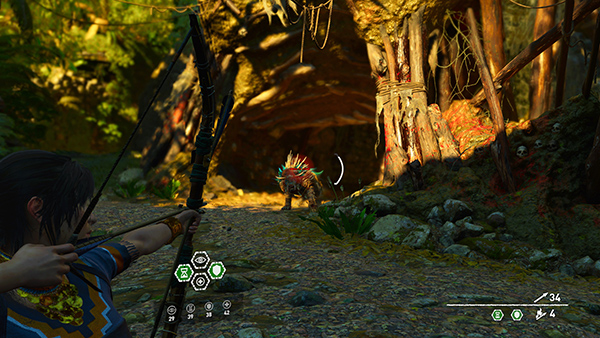
You must now Defeat the Nahual. This is not much more difficult than fighting a typical jaguar, but it's pretty cramped inside the den, so either run out the way you came in or climb the ledge opposite the entrance to get to the arena behind the den.
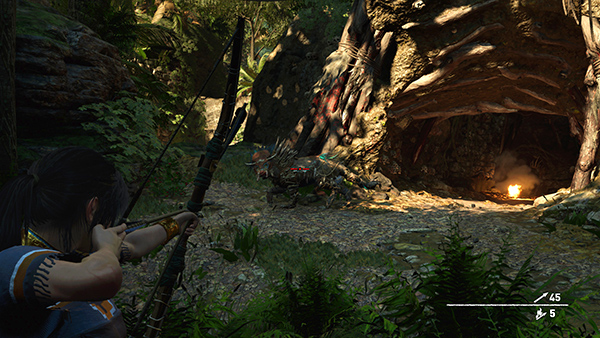
Put a little distance between Lara and the beast and shoot it with a few regular or fire arrows. After several good hits, the Nahual will retreat behind its lair for a little while. If you're feeling confident, you can follow it, either around either the side of the lair or through the interior and up the ledge in the back.
Or, you can remain in the smaller open area in front of the lair and take a moment to use some Focus and Endurance herbs.
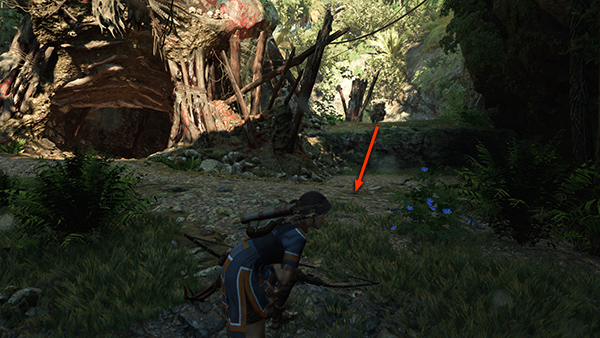
The Nahual soon returns for another go. It may come from either side or through the den, so stay alert.
Shoot it as it approaches. If you've got Focus active, you should be able to get in several good shots thanks to the time-slowing effect of the herbs.
When it lunges, tap tap Drop/Roll (C/Circle/B) to evade.
Then shoot again, evade, shoot. You may be able to defeat it this round. If not, it will run away again but only briefly.
Top up those herbs if necessary and get ready for one more round. Now that it's taken some hits, the Nahual is slower to approach. With Focus active, you should be able to take it down with just a few more shots before it gets too close.
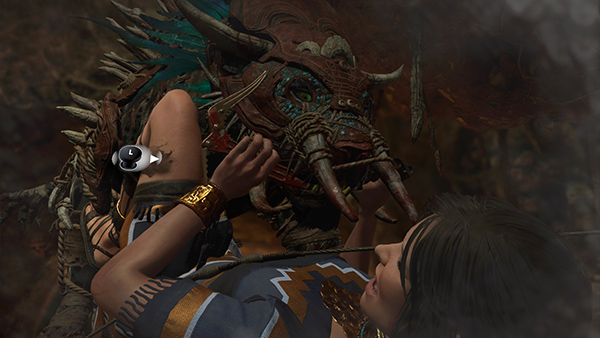
When you've defeated the beast, it slinks off, and you're prompted to Approach the Nahual. In a short cutscene, Lara removes its mask and it dies. She is then able to take the bow. You also receive an Artifact, the Mask of the Nahual, which appears under the Myth, Magic & Monsters Story. The final goal is Return the Champion's Bow to Uchu. You can do this right away or continue exploring this side area first.
When you do eventually return to Uchu in SKULL CAVE, he presents Lara with a Vestige: Manko's Tunic, which will make Lara harder for animal prey to detect, plus an XP award and 350 gold pieces. You'll also get to attend Etzli's coronation.
Copyright © - Stellalune ( ). All rights reserved. Feel free to copy or print this walkthrough for personal use. By all means, share it with friends, but please include this credit line so people can send me their feedback. No part of this walkthrough may be reproduced on another site without permission. Follow this link for details about this site's advertising and privacy policy.