Cenote – Return to Paititi (Part 1)
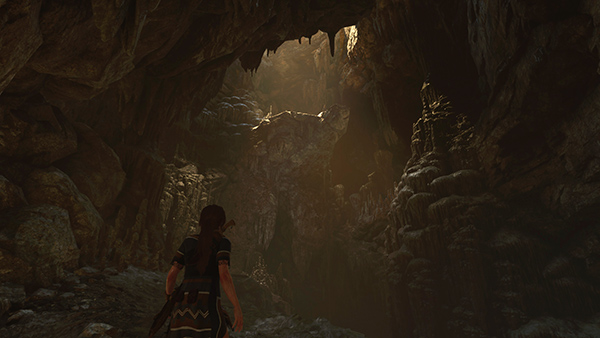
After escaping the Yaaxil pursuit and swimming through a flooded tunnel, Lara ends up in this large cavern. As you climb the path to the south, Lara spots a ledge high above. That's where you're headed.
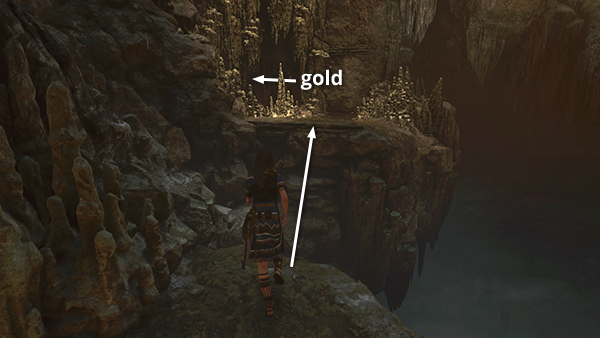
Follow the ledge along the left side of the cavern, jumping across the gap. Before climbing higher, go into the little side cave on the left to find a resource container and mine some gold ore.
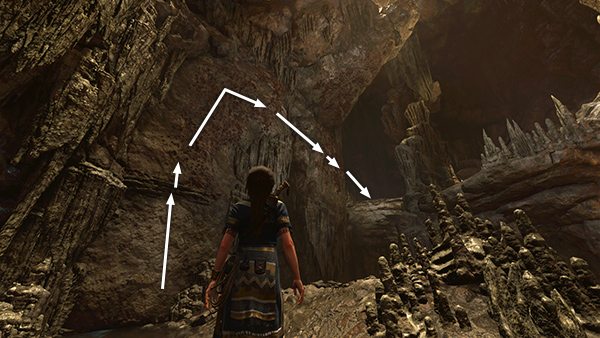
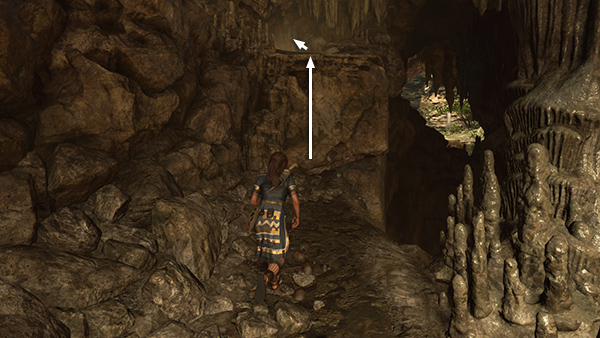
Exit the side cave, scramble up the wall on the left, then jump up to latch onto the climbable wall. Climb upward and to the right. Jump across to the next climbable area to the right. Climb to the right as far as you can. Then jump to the ledge beyond.

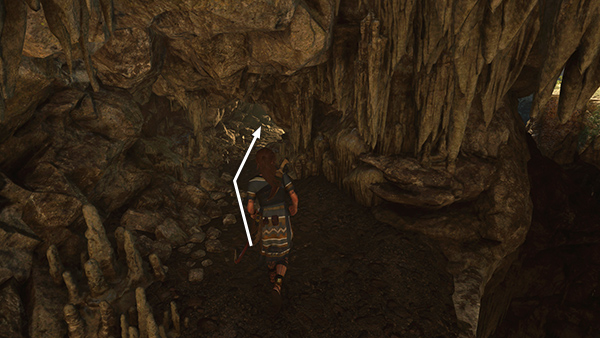
Move through the gap in the stalagmites...
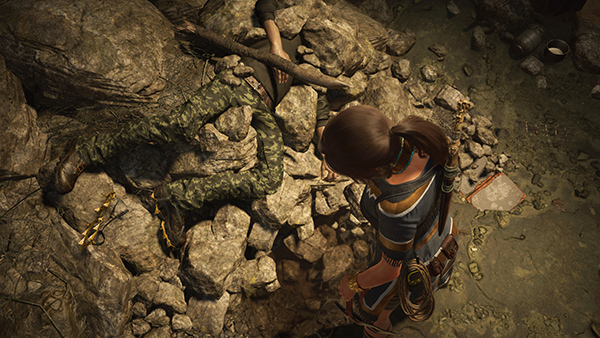
...and approach the body to trigger a short cutscene, in which Lara retrieves the OVERHANG CLIMBING GEAR from its unfortunate previous owner.
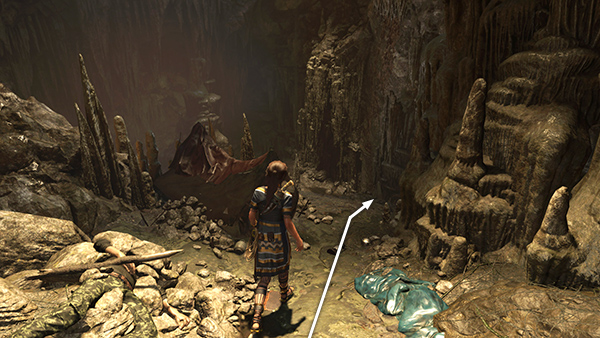
Head down the slope past the dead climber's tent. Bear right here...
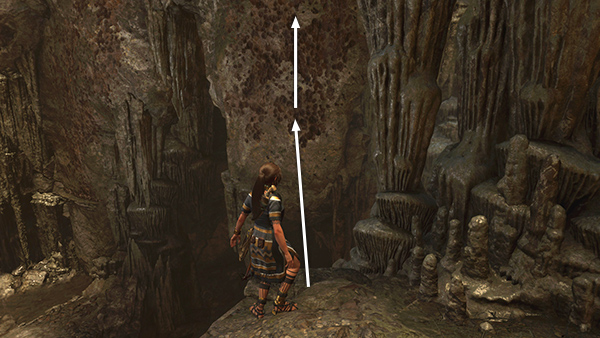
...and jump across the gap to the climbable wall.
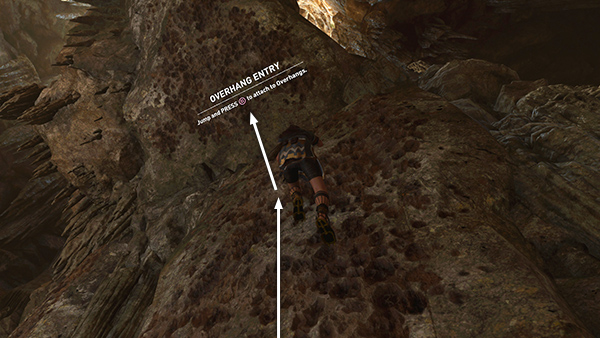
Climb up as far as you can. The game will then explain how to Overhang Climb: jump up then quickly press Interact to latch onto the climbable ceiling.
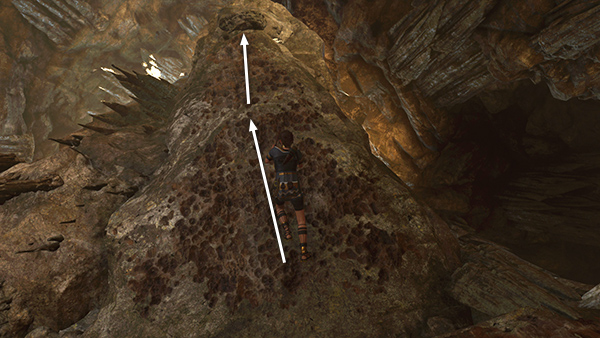
Climb along the underside of the rock ledge until you reach the top of the climbable area.
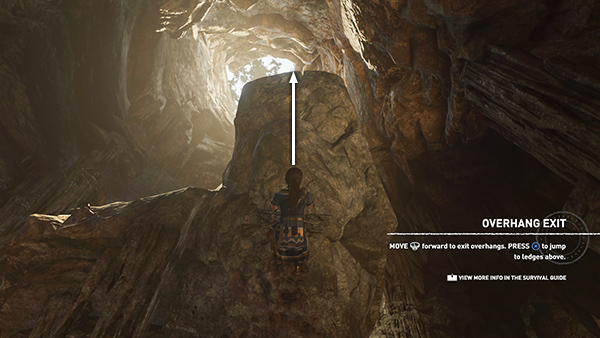
Again, follow the tutorial text that explains how to Exit an Overhang Climb: jump straight up to grab the ledge above then pull up.
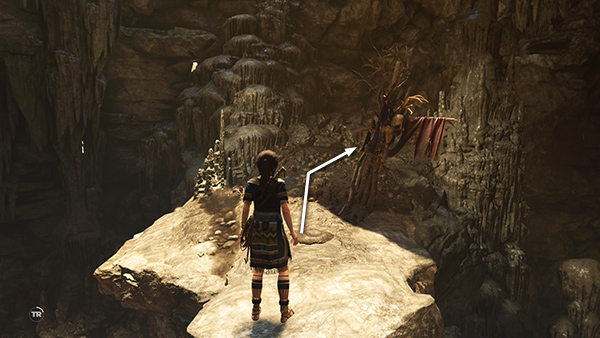
Continue forward and to the right, past the cloth-draped totem.
Scramble up onto the ledge ahead.
Then move through the low tunnel.
Copyright © - Stellalune ( ). All rights reserved. Feel free to copy or print this walkthrough for personal use. By all means, share it with friends, but please include this credit line so people can send me their feedback. No part of this walkthrough may be reproduced on another site without permission. Follow this link for details about this site's advertising and privacy policy.