Tomb of the Torturer - Skull Tiles with Concealed Spikes and Red Skull #3
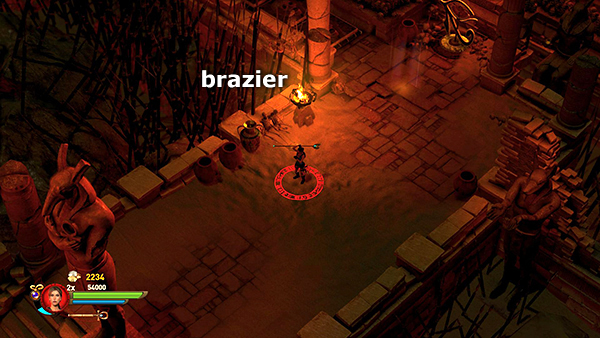
At the top of the stairs beyond the statue of Set there's another brazier (23/32). Light it for the brazier challenge. Then smash the vases and blow up the cracked floor for gems.
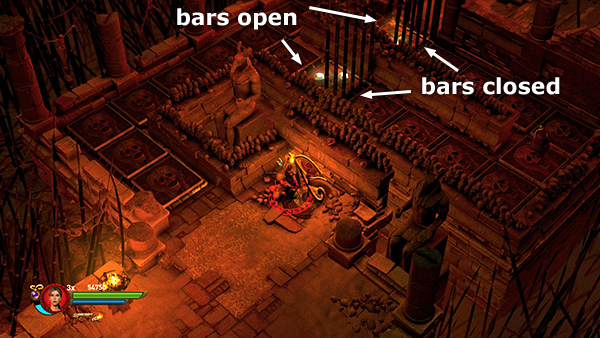
If your bomb flipped the Eye of Horus switch, shoot it so the red side faces you. This toggles the bars in the middle of the trap ahead. You want the bars on the left side of the first pressure pad open.
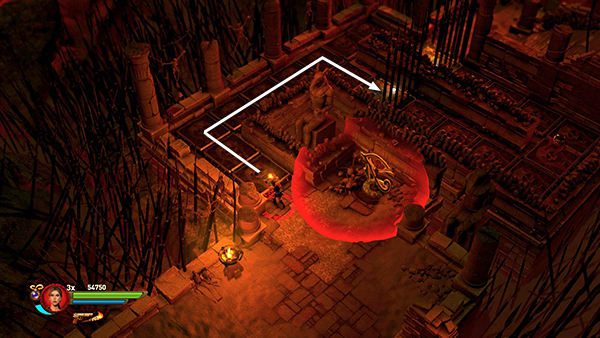
In the single-player game, plant a remote bomb near the switch and then run over the skull tiles onto the first pressure pad. As you pass over each tile, spikes pop out of the floor, so don't reverse direction or you'll get skewered.
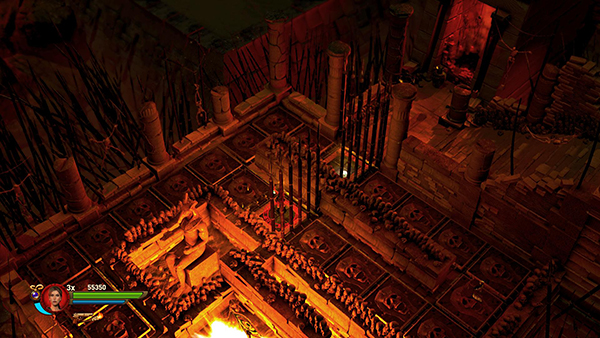
Pause on the pressure pad and detonate the bomb to flip the switch.
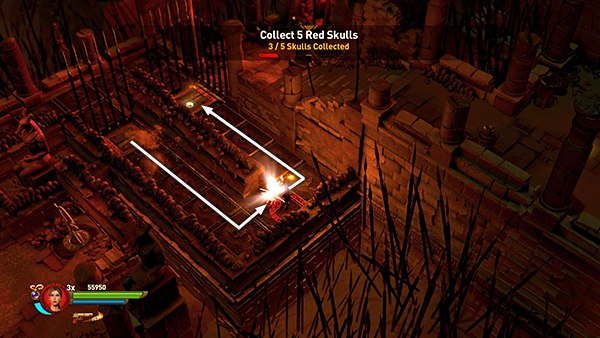
This closes the bars behind you and opens the ones ahead. Run around to the second pressure pad, snagging the red skull (3/5) on the way.
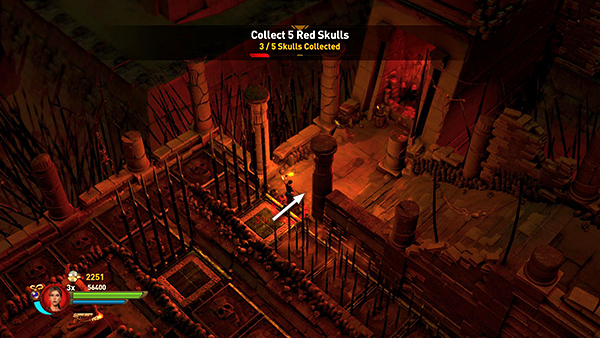
Depressing the second pad opens the last set of bars so you can exit.
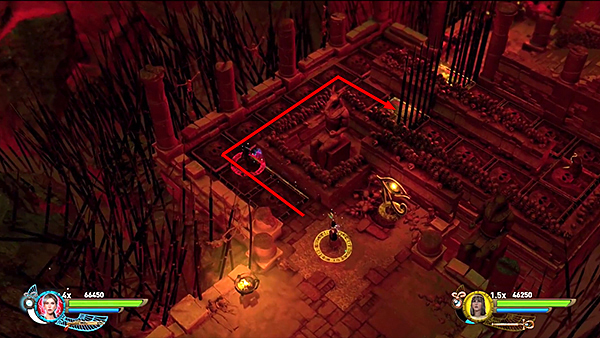
The trap in the 2-player game is slightly different. First make sure the switch is positioned so the red side faces out. That way the bars on the left side of the first pressure pad are open. Have one character run across skull tiles onto the pad. As he or she passes over each tile, spikes pop out of the floor, so don't reverse direction.
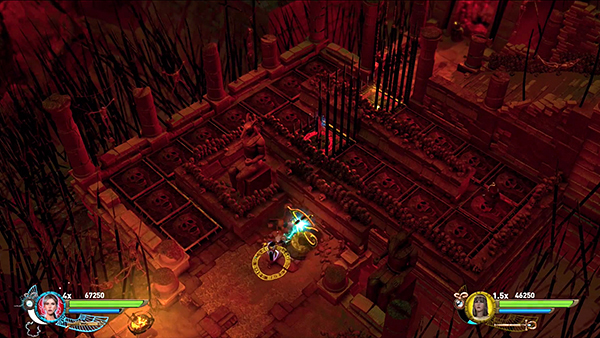
Once the first character is safely on the pad, the other character should shoot the switch to toggle the gates.
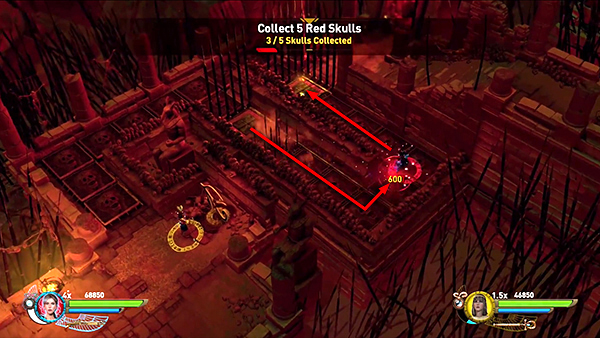
Now the first character can run around to the second pressure pad, snagging the red skull (3/5) on the way.
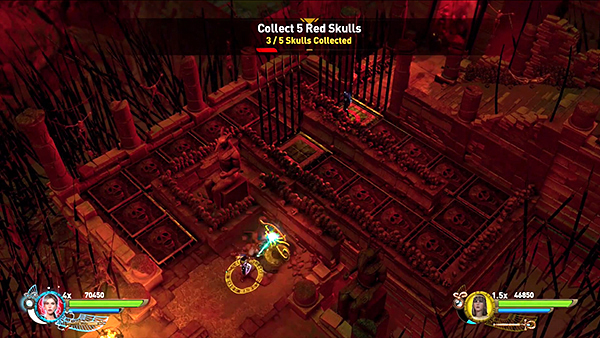
While the first character stands on the second pressure pad, the other character should now shoot the switch again to toggle the bars.
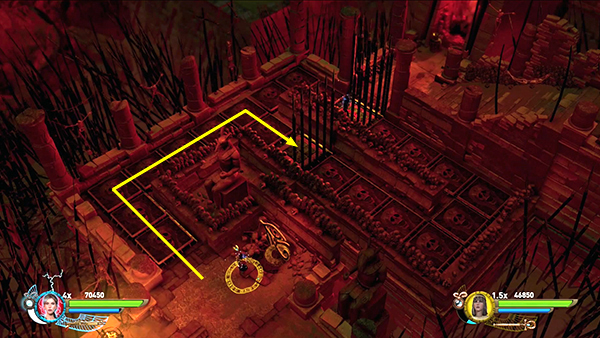
Then run across the skull tiles onto the first pressure pad.
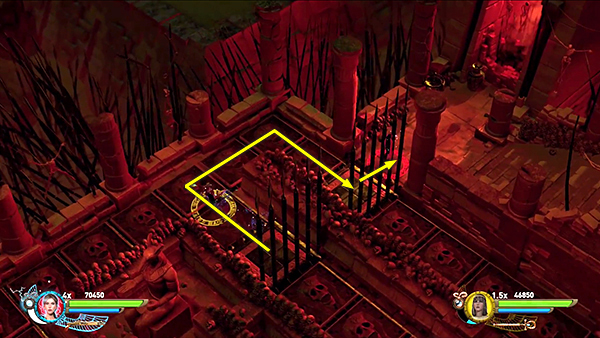
Depressing both pads opens the exit. The second character should then wait for the spikes to retract before running around to the left to the second pad and then exiting.
The 3- and 4-player trap is the same as the 2-player version. Get the first two characters through as shown above. Then wait for the spikes to retract so the other(s) can run around the left side of the skull tiles to the exit.
Copyright © - Stellalune (
). All rights reserved. The screenshots and videos included here were made using Fraps. Feel free to copy or print this walkthrough for personal use. By all means, share it with friends, but please include this credit line so people can send me their feedback. No part of this walkthrough may be reproduced on another site without permission. Follow this link for details about this site's advertising and privacy policy.