Tomb of Hoarfrost - Collapsing Bridge and Race to the Exit (part 1)
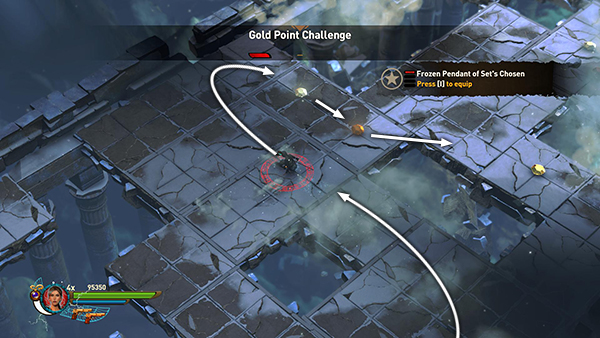
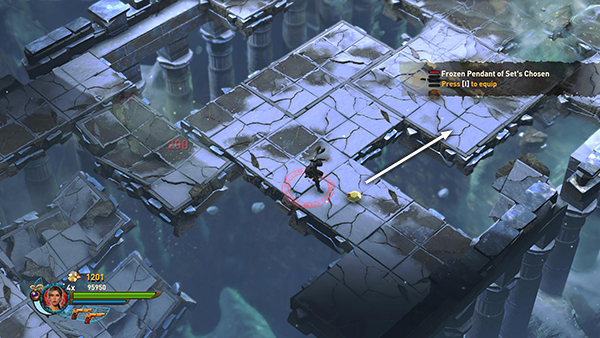
The main goal of this final section is simply to survive as you make a frantic run across the collapsing tiles to the exit, but there's also a Challenge: Grab All of the Gems on the Collapsing Bridge. This can be tricky, but the series of screenshots below includes a few tips. You may also want to check out this short video walkthrough made by my friend Treeble.
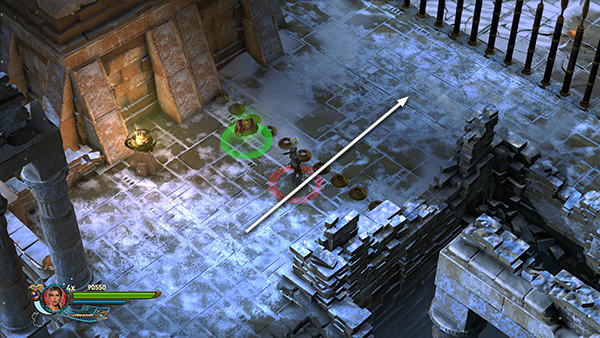
Before you begin, use the health pack if necessary and equip items that increase your character's speed. Then step through the open gate.
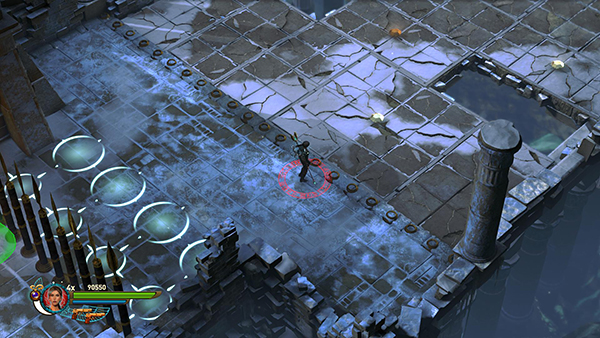
When you approach the bars, they open as the ones behind close. Then the floor starts to collapse, forcing you to run forward.
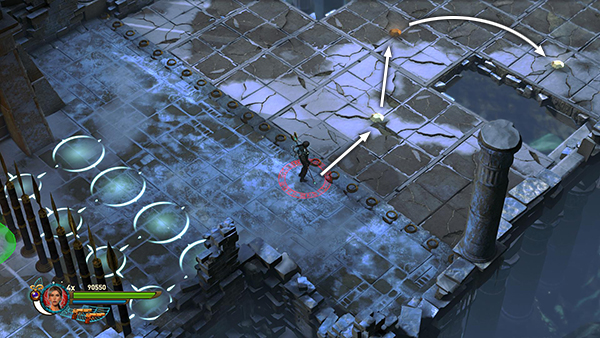
Try to weave back and forth while also moving forward. This helps you avoid running over tiles you've already touched.
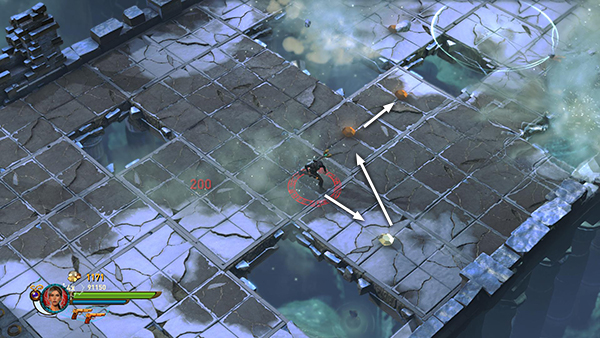
...
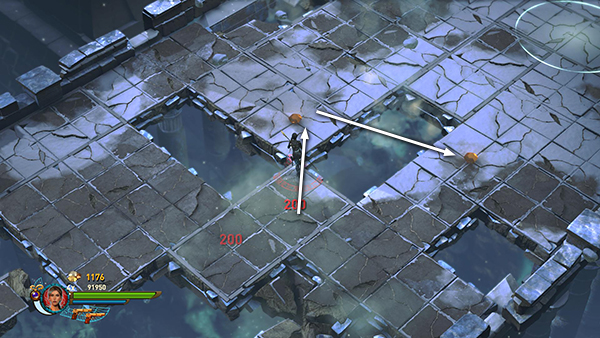
Also watch out for the white circles that occasionally appear in front of you. Like the lightning and meteor hazards in other levels, these circles indicate tiles that are about to be struck by falling rocks.
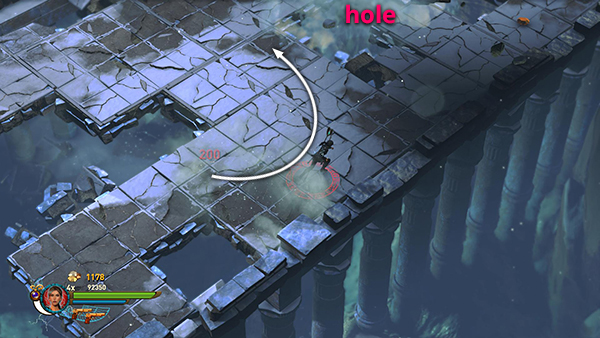
Here you can see the falling rocks have created a large hole in the floor, which you'll need to avoid.
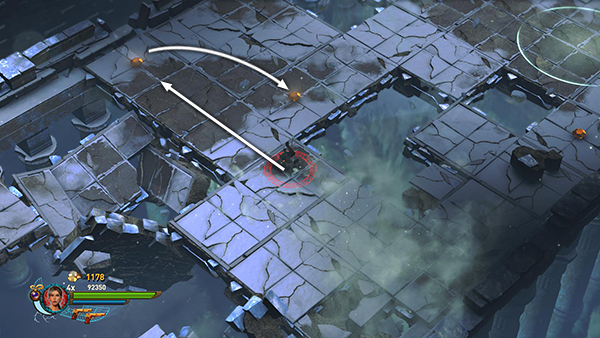
Continue weaving back and forth, picking up gems and jumping over holes in the floor as you work your way forward along the bridge. Again, the screenshots show where all the gems are located, but Treeble's video will better help visualize the sequence.
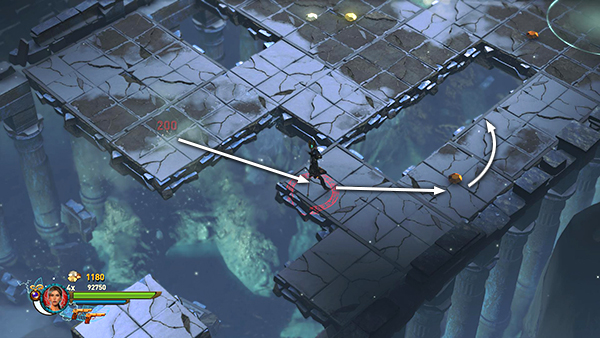
...
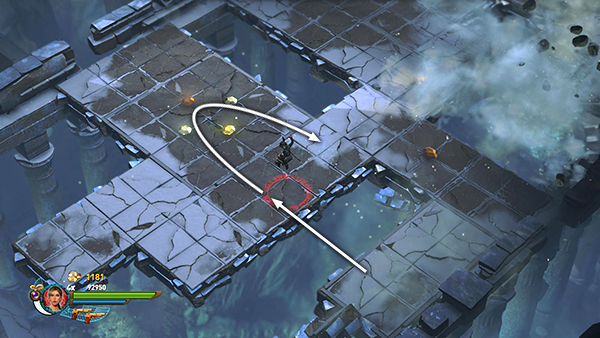
...
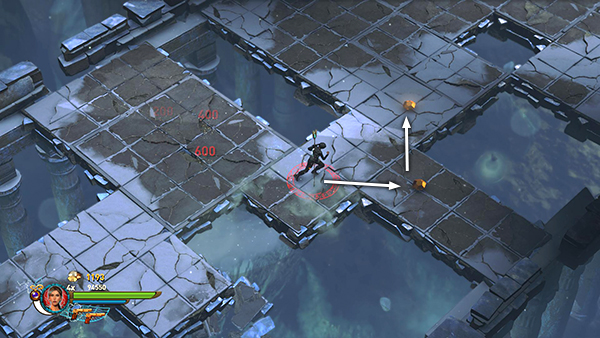
...
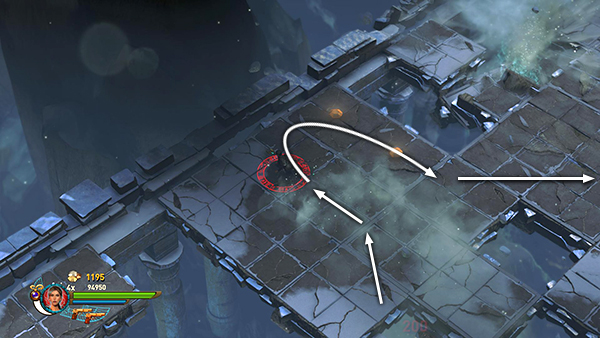
...
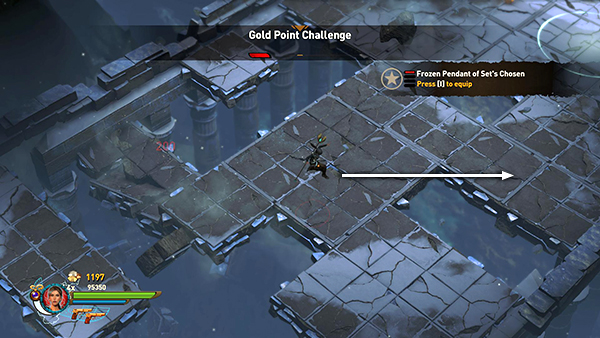
You may or may not achieve the Gold Point Challenge during the same run as the gem challenge. Don't worry if this doesn't happen. You can always replay the level.
...
...
Copyright © - Stellalune (
). All rights reserved. The screenshots and videos included here were made using Fraps. Feel free to copy or print this walkthrough for personal use. By all means, share it with friends, but please include this credit line so people can send me their feedback. No part of this walkthrough may be reproduced on another site without permission. Follow this link for details about this site's advertising and privacy policy.