LEVEL 7: NEPAL - THE GHALALI KEY | Updated: 9/28/09(†) |
Items: health packs, grenades, assault rifle, submachine gun, shotgun, grenade launcher, ammunition, Excalibur
Enemies: snow leopards, mercenaries
Rewards: 9 bronze, 6 silver, 1 gold (*)
Time Trial: 13:40 (**)
In the transitional cut scene between levels (titled "Home Again") Lara returns to Croft Manor. Winston and the boys inform her that the Ghalali key was not in her father's collection, nor mentioned in any of his notes. Lara examines the sword fragments and realizes she knows exactly what and where the Ghalali key is. Next stop: Nepal. Winston warns Lara to be careful, especially after what happened to her mother, but Lara is determined to salvage her father's reputation as well as the artifact.
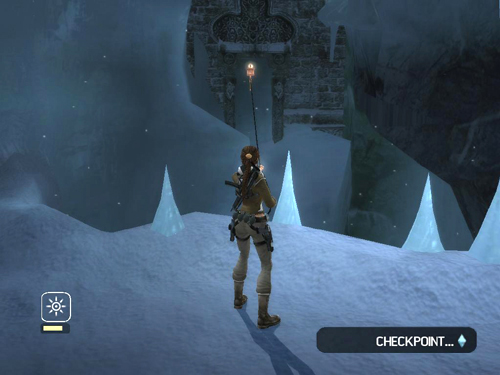
A second brief cut scene ("Return to Nepal") shows Lara's arrival near the crash site.
DEEP CHASM WITH BROKEN PILLARS: From CHECKPOINT 1 at the start, grab the ledge in front of Lara and traverse to the left above the chasm. When Alister suggests you keep moving, continue climbing and tap Interact repeatedly to get across the section of crumbling ledge before it breaks. Climb on top of the first pillar, which is just ahead. Slide down the slope on the other side and jump to grab the next pillar. Pull up and take a running jump to grab the third pillar.
Depending on how far Lara jumped, she may be hanging from the top of the pillar just below the snowy boulder or on the white stone strip partway down. If she is hanging from the top, drop down to grab the white stone strip. Traverse around the corner of the pillar and continue to the left as far as you can go. Jump back to grab the nearest pillar on the other side of the chasm. The jutting stone slab you grab onto gives way so you must move quickly: Either jump straight up to stand on top of the slab, then immediately jump forward and a little to the right to grab the top of the pillar, or, while hanging onto the slab, climb to the right quickly before it breaks. Then pull up and climb on top of the pillar. (This tricky sequence is shown in a series of screenshots.)
Once Lara is standing on top of this pillar, turn left to face back the way you came. Now you'll need to make your way along this side of the chasm. The sloping ledge ahead is also ready to crumble. So take a running jump onto it and keep running. Jump at the end to grab the horizontal pole. Swing around only once and jump again before the pole breaks off. Grab the pillar ahead and climb to the top, which is CHECKPOINT 2. The starting point is now below on Lara's left.
Before going on, carefully retrieve a reward. Drop and hang from the far edge of the pillar (i.e., the side opposite where you just climbed up). Move slowly as you step off, since the uneven edge sometimes causes Lara not to grab correctly. Once she's hanging, you should be able to see the bronze reward (1/9) in a small alcove below. Drop down twice to reach it. Step to the left or right of the alcove and climb back to the top of the pillar. (screenshots)
Take a running jump off the top of the pillar and grapple the bell high above where the sloping ledge was. Swing and jump to grab the first of 3 fat but fragile icicles dangling from the overhang ahead. Before each icicle breaks, jump forward to grab the next one, then the next, and finally the narrow horizontal shelf in the ice wall beyond. Traverse around the corner to the right. Jump straight up to grab a higher handhold. Then continue climbing to the right until you can jump up to grab the flat ledge.
There's an open area here where you could pull up and go forward, but don't do that yet. Instead keep climbing along the ledge to the right. Soon you'll come to another flat spot where you can pull up and get a silver reward (1/6). (screenshots) When you have it, drop and hang from the edge and climb back to the left. This time climb up into the flat open area.
Shoot the sheet of ice blocking the doorway and follow the tunnel past CHECKPOINT 3 to an opening high above the airplane wreckage. Zip asks Lara about the accident but she deflects the question.
SHORTCUT: If you're replaying the level or doing a time trial, there's a sweet shortcut here. With guns drawn, Lara can jump down off the ledge instead of climbing and grapple-swinging. Details are shown here. Be warned that you miss the next reward if you take this shortcut.
CRASH SITE: To get down to the wreckage from the ledge near CHECKPOINT 3 in the usual way, first turn right and jump across the gap to grab the top of the stone pillar. Pull up. (This entire sequence is shown in a series of screenshots.) Slide down the slope and jump at the very end to land on another slope perpendicular to the first. Slide almost to the end and jump once more to land on top of another pillar. This pillar is solid and safe, so you can pause here if necessary.
Turn left. The next pillar is ready to collapse. Take a running jump to land on it. Then quickly run and jump to grab the horizontal bar jutting from the wreckage ahead. From there, you can see a silver reward off to the left and a grapple point above. Swing around the bar, jump off and quickly press Jump again to grapple. Swing past the silver reward and jump onto the man-made ledge straight ahead.
To get the silver prayer wheel, turn around and shoot the ice wall ahead and to the right. (The binoculars' RAD mode reveals the weak spot.) Grapple-swinging is difficult here due to the angle; the debris behind Lara prevents her from getting a long swing. So instead take a running jump to grab the edge of the opening and pull up. Grab the silver reward (2/6) and jump back across the gap. (This reward is included in the previous set of screenshots.)
Follow the short tunnel to the next opening. A helicopter, presumably belonging to Rutland, passes overhead. Turn right and jump to grab the ruined wing. (screenshots) Drop down twice to reach the ground and CHECKPOINT 4. Lara will take a little bit of damage if you do this. Alternatively, to avoid any health loss, after dropping down once, jump back to grab one of the handholds on the ice wall and climb down there.
Duck under the dangling propeller and use the magnetic grapple to grab a bronze reward (2/9) from the pile of debris behind the airplane wing. Return past the propeller and hop down onto the small snowy ledge ahead (i.e., on the left when facing out over the ruins). There's a broken wheel and some other junk there. From this ledge, you should be able to shoot the snow leopard in the clearing below, using pistols to save ammo. When it's dead, drop down and approach the wrecked fuselage.
Before exploring inside, get another reward: Climb onto the low ice ledge to the right of the fuselage. Just ahead is a deep pit so step carefully. Use the magnetic grapple to pull the pile of junk out of the way. Then jump across the pit to find a silver reward (3/6). Grab it, jump back over the pit and return to the plane. (screenshots)
Zip warns Lara not to go inside without first weighing down the end. He's right. Entering the plane now causes it to tip and crash. To stabilize it, first use the grapple to pull the big chunk of wreckage closer to the plane. Then step inside and vault up onto the raised floor. Before moving any farther in, turn around, grapple the chunk of wreckage again and pull it toward Lara until touches the ledge on which she is standing. When you've got it in the correct position, you'll hear and see the indicators for CHECKPOINT 5. (screenshots)
Move toward the cockpit to trigger an interactive cut scene. Press the controls indicated on-screen to help Lara retrieve the Ghalali Key and escape before the wreckage crashes into the chasm below. These are:
PC: Right, Up, Down, Up
PS2: Triangle, Left stick Up, Circle, X
Xbox: Y, Left stick Up, B, A
PSP: Square, Stick (nub) Up, Circle, X
GameCube: Y, Analog stick up, B, A
Once she's safe, Lara briefly examines the key then looks toward the ruined monastery she visited all those years ago. At last she admits that all her adventures thus far have been leading to this. She tells the guys she needs to make one more stop. (This cinematic is titled "The Key Obtained".)
CHECKPOINT 6 registers after the cut scene.
ICY SLOPES: (The following is shown in a series of screenshots. It is also included in the video tutorial showing how to reach the gold reward.) From the trench where the wreck was, jump across the chasm and onto the icy slope ahead, which slants down to the left. Slide almost to the end and then jump to grab the horizontal pole. Quickly swing and jump to the next icy slope before the pole breaks off. (NOTE: If you're having trouble making Lara swing around the pole immediately after grabbing, it helps to move the camera behind her as she slides. Then she should jump and grab the pole more securely.) This slope points down to the right. Slide almost to the bottom and jump to land on another slope, which is perpendicular to the previous one and slants down to the left. Again, slide and jump across the gap ahead to land on another slope. When you touch down here, press Interact to shoot the ice wall ahead. Slide to the end of the slope where the ice wall was and jump the next gap to land on yet another slope. This one carries Lara down to the right. Near the end of the slope, jump to grab another horizontal pole. Before it breaks, quickly swing and jump to the safe, flat ledge below. (Seems like some sturdy nylon rope and crampons would be easier but, hey, it's Lara's call.)
Follow the path to the left. CHECKPOINT 7 is just ahead. When you reach it, turn left to spot a bronze reward (3/9) across the gap. Use the magnetic grapple to get it. (screenshot/video) Then turn around and continue.
ICE CAVES: Across the next deep pit you'll see several ledges and poles. The floor on this side juts out a bit on the left side. Jump across the pit there to grab the ice shelf on the other side; pull up. Alister comments briefly on the architecture. Turn right and jump to grab the horizontal pole. (Don't worry. This one doesn't break.) Swing around and jump to grab the light-colored ice shelf on the wall ahead. Climb to the left. Jump across the gap to grab the handhold on the other side. This ice shelf starts to collapse, so quickly move the camera behind Lara for better control and tap Interact as you climb to the left to go faster. Let go—or just wait for the ice to break off—and grab the solid handhold below. (screenshots/video)
Jump back to grab the next horizontal pole, which is sturdy enough to support Lara's weight. Swing around and jump to grab the long icicle ahead. This icicle is also solid, so there's no need to hurry. Ignore the second icicle. Climb up the first one and jump onto the precariously balanced pedestal to the right. Immediately take a running jump to grab the horizontal handhold on the wall ahead. Traverse to the right and pull up on a narrow ledge made of ice.
Turn around and then move to the right side of the opening and look to the far wall of the cave, beyond the big icicles and the broken pedestal, to spot a bronze reward (4/9) in a little niche. Use the grapple to retrieve it. If you can't immediately grapple the reward, try using manual aim. (The previous set of screenshots includes this reward.)
GOLD REWARD: There's another reward nearby. (The path to it is shown in these screenshots and this gameplay video.) After getting the bronze, turn around and step off the other side of the ledge. Traverse to the left and then drop to grab the narrow crevice below. Continue climbing to the left around the corner. When you near the end of this crevice, you'll be able to see the gold reward in an alcove below on the left. Drop to grab the next lower handhold, then the next. Climb a little farther to the left and pull up into the alcove with the gold reward (1/1). Return the way you came to the narrow ledge between the two caves (i.e., hang from the opening, climb to the right, jump up twice, climb to the right around the corner, jump up, traverse right and pull up in the opening).
NOTE: If Lara dies before reaching the next checkpoint, don't forget to pick up the bronze and gold rewards again. Whoever decided against putting another checkpoint on the ledge between the two rewards needs a good spanking.
When you have both rewards and are ready to move on, stand on the ledge between the two open areas, with the cave where the bronze reward was behind Lara. Jump to grab the narrow ledge on the left wall. (Check the screenshots from the gold reward series if you need a visual.) Climb to the right as far as you can. Then leap across the gap to grab a handhold on the wall to the right. (At this point you can drop down to the ledge below, but it's not necessary.) Climb all the way to the left and jump back to grab the vertical pole. Climb to the top of the pole and jump to the right. Traverse all the way to the right. Then jump to grab a break-away ledge on the wall way off to the right. Traverse quickly to the right (tap Interact to go faster) and jump straight up to grab the ledge above before your handhold collapses completely. Pull up into the opening.
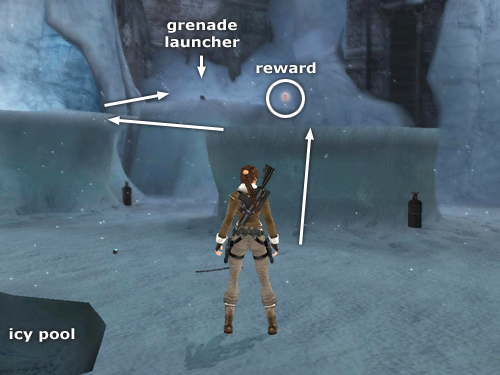
CONFRONTATION WITH RUTLAND'S MEN: Follow the tunnel past CHECKPOINT 8 to an open area. Lara sees Rutland's soldiers exiting the helicopter.
There are 6 mercenaries in all: 4 on the ground, another on top of the building to the right, and a sixth with a grenade launcher on the snowy ledge at the far end of the open area. Grenades start flying almost immediately, so don't hang back in the cave. Instead, run out into the open and kill the men on the ground first. Targeting the explosive tanks helps a lot with this. Then take care of the sniper and the grenade-launching guy. As you fight, steer clear of the icy pool on the left. Even brief exposure to the freezing water can hurt Lara badly. If she's submerged for more than a few seconds, she'll die.
When all the bad guys are dead, pick up whatever you need. The men on the ground drop SHOTGUNS, ASSAULT RIFLES or ammo for these weapons, plus grenades and possibly health packs.
Before climbing up to get the other men's stuff, locate the arched wall of ice high on the wall above and to the left of the icy pool. (The binoculars in RAD mode show where this breakable wall is in case you can't spot it.) Climb onto the little plateau of snow near it. Switch to manual aim mode and shoot the ice wall to reveal a silver reward (4/6). Jump over to get it and then drop down to the ground. Also be sure to get the bronze reward (5/9) tucked away near the icy pool. It's on the left when facing the pool. (Both rewards are shown in these screenshots.)
Then climb onto the other snow plateau and take a running jump to grab the projecting ice ledge ahead; pull up. (screenshot) Jump from the right side of this ledge to the ledge where the guy with the GRENADE LAUNCHER was. Take his weapon if you want, but you may be better off with the rifle since more ammo is available. Pick up another bronze reward (6/9).
Use the metal bell high above to then grapple-swing across to the building where the sniper was. If you have room for more supplies, you can get his RIFLE or ammo, grenade and possibly a health pack. Climb onto the higher ledge, jump to grab the angled cable and slide down to the ledge above the pool.
DARK CAVERN WITH ICY STREAM: Slide down the slope to CHECKPOINT 9. Step out onto the ice. It's safe. You'll find another bronze reward (7/9) in a short, dark tunnel to the left. (screenshot)
Continue through the cave to an opening above a freezing pool with chunks of ice floating in it. Again, don't let Lara fall into the water if you can possibly help it. Even brief exposure is harmful. Hop onto the first floating island of ice. Jump from there to the second. Over the headset, Zip warns Lara that she won't make it across the next gap. Press Interact to shoot the slab of ice hanging from the ceiling so it drops into the water. Now you can jump onto it and from there to the next chunk of ice. Finally, jump to grab the man-made opening ahead on the left and pull up onto the ledge. (screenshots)
Hop down onto a snowy ledge on the other side of the opening. It's very dark here. If the PLS doesn't shed enough light, turn up the brightness either in-game or on your TV/monitor. Just beyond the snowy ledge is a flowing stream of icy water. After a few moments, chunks of ice begin to float past. To get out of this area, you need to make your way upstream, hopping from chunk to chunk. (These screenshots show one possible sequence.) There's a ledge midway along on the right, where you can stop if necessary. The entrance to the monastery, where you're headed, is beyond this ledge also on the right. There's also a silver reward (5/6) on the left bank opposite the opening leading to the monastery. If you're collecting rewards, make your way to that ledge first. Then wait for a few closely spaced chunks of ice to float by and hop across the stream to the exit.
Some tips: You don't needn't rush, since the water isn't moving that quickly, but try not to float farther downstream than the starting ledge. If you do, Lara crashes into the low tunnel opening and dies. If you make it only partway to the exit and run out of ice to jump on, float a short distance downstream, jump off on one of the ledges and wait for more ice chunks to approach. Then try again.
NOTE: If you're having difficulty here and are playing on the PC or PSP, you're welcome to download my Nepal savegame files, which include the next checkpoint. Instructions are linked to that same page.
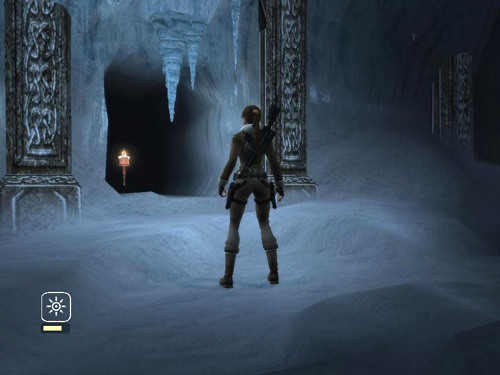
INSIDE THE MONASTERY: Once you've navigated the stream and reached the entrance to the monastery, follow the tunnel to a flight of stairs. Climb the stairs to CHECKPOINT 10. There's a snow leopard lurking at the top on the right. You may want to draw it out and then back down the stairs while shooting. When it's dead, return to the top of the stairs and step out on the balcony overlooking the ruins.
IMPORTANT: Do not shoot at the floating boulders above the big, open area. This can cause a bug which makes it impossible to reach the level exit later on. More info appears in a note at the end of the level.
There are obvious grapple points ahead but before swinging across, go down the staircase on the right. At the bottom, locate the break-away panel on the end wall to the right and shoot it to reveal the final silver reward (6/6). (screenshots) Return upstairs to the balcony.
Now grapple-swing across to the huge Buddha, using the 3 bells dangling from the ceiling. To do that, face the statue straight on, take a running jump off the balcony and quickly press Jump again to grapple the first bell. As long as you're not doing a Time Trial, there's no hurry, since all three bells are stable. Adjust Lara's angle if necessary. Swing back and forth until she's is swinging high enough for you to see the grapple icon on the second bell. Then swing forward and press Jump twice to release the cable and immediately grapple again. While hanging from the second bell, turn a bit to the right so that when you swing, you can see then grapple the third bell. Once Lara is hanging from the third bell, point her toward the ledge in front of the seated statue, work up a good long swing and jump to land there. Then you can shoot the snow leopard from above without taking any damage.
Lara comments that the doors were open the last time she was here. Before tackling the door puzzle, go after the last two rewards. There's a staircase leading up on each side of the statue. On each balcony, there's a bronze reward (8/9 and 9/9). The one on the right balcony (when facing the Buddha) is near the top of the stairs; the one to the left is at the far end of the balcony. (screenshots) When you have both, return to the statue.
BALANCE & BLOCKS PUZZLE: To open the door at the base of the statue, you need to get the golden block up onto the golden pressure pad on the ledge using the scales hanging from the Buddha's hands, along with the medium and small blocks and Lara, herself, as counterweights. (These screenshots show the sequence.)
First, face the statue and climb onto the scale platform on the right. Use the magnetic grapple to pull the small block onto the platform with Lara. Go around to the front of the ledge and climb up near the pressure pad. Then step onto the empty left platform. Lara's weight pushes it down. Grapple the golden block and pull it onto the platform. Now climb back onto the ledge and step onto the right platform again. The combined weight of Lara and the small block lowers the platform to the floor. Grapple and pull the medium block onto the platform. The medium and small blocks together are heavier than the golden block. So you can step off this platform, and the other platform with the golden block will remain level with the ledge. Climb up and pull the golden block onto the pressure pad by hand or with the grapple. This opens the door at the base of the ledge.
NOTE: Alternatively, Lara can ignore the plain blocks and just grapple the golden block up onto the ledge. This takes a little finesse, but if you practice it first, it can save precious seconds during a time trial. See this series of screenshots for details. (Thanks to Steve for this tip.)
EXCALIBUR: Enter the room below the statue. The door closes behind you as you cross CHECKPOINT 11. Go down the stairs to trigger a cut scene.
Lara reassembles Excalibur using the key she found—or, more accurately, Excalibur reassembles itself. She attempts to place it in the broken stone but it doesn't work. The ruins begin to fall apart. (This cinematic is titled "Excalibur Reforged".)
Head for the door on the lower level. Press the Fire button to slash with Excalibur, blasting the door open. If this doesn't work at first, try taking a few steps back from the door and then swing again.
ESCAPING FROM THE RUINS: CHECKPOINT 12 registers as you exit. Once outside, you need to make your way across the crumbling stone platforms back to the other side of the temple where you came in. To get across, first take a running jump from the ledge at the exit from the sword room to the square platform on the left. Turn right and take a running jump to the rectangular platform ahead. (If you jump just at the edge of the first platform, Lara can land on the second without having to grab the edge and pull up.) Turn right again (i.e., back toward the center of the room) and take a running jump to the next rectangular platform. Turn left, keep running and jump onto the square platform ahead. As it tips forward, bringing Lara closer to the ledge below the entrance, take a running jump to grab that ledge, triggering the final cut scene. (These screenshots illustrate this final sequence.)
NOTE: If you find you are unable to reach the exit this way because the final platform refuses to tilt forward, this is probably due to shooting the floating boulders earlier in the level. See the footnote below (***) for several possible solutions.
In the level's final cinematic ("Chapter Closed") Lara tells her friends there's one more stop on the journey: back to Bolivia.
†UPDATE HISTORY: 5/22/06 - Time Trial info added. 6/8/06 - Cosmetic changes including links to Controls page.
6/12/06 - Added link to savegame instructions.
6/26/06 - Rephrased a few sections to clarify. Nothing major.
10/16/06 - Added shortcut for box and balance puzzle (thanks to Steve), tip on exiting the room after obtaining Excalibur (thanks to Michael and Roger), and info on the bug at the end of the level (thanks to Adam and David).
12/19/06 - Added GameCube controls for the interactive cut scene, thanks to Treeble.
3/31/07 - Added alternate path to exit, thanks to Claire and Jean-Paul.
9/28/09 - Continuing revisions for all levels. Not too many updates on this level—a few minor strategy changes, fixed a couple of left/right mix-ups, added lots of new screenshots and a video for the gold reward section. Also added PSP save files, thanks to Dave A.
ACKNOWLEDGEMENTS: Thanks to Drew, Evelyn, Lara Man and Treeble for help with the console controls, Adam D., David C., Gandarufu, Michael M., MMAN, Roger B. and Steve for other help with this level.
*NOTE ON REWARDS: Finding rewards (formerly known as "secrets") unlocks various extras in the game. For a complete list of these bonuses and how to get them, see the Legends Rewards page.
**TIME TRIAL: After completing any level, you can replay it in Time Trial mode to unlock cheat codes. (See the Legend Rewards and Time Trial Tips pages.)
***POSSIBLE FIXES FOR BUG IN TEMPLE: Shooting the floating boulders upon entering the temple with the large Buddha statue, can result in a bug at the end of the level. One of the falling boulders lodges at the base of the final platform preventing it from tipping forward, so that Lara is unable to jump to the last ledge. If you encounter this bug, try the following:
Instead of jumping across the collapsing platforms, take an alternate route from the ledge at the exit from the sword room to the exit. Details and screenshots are provided on a separate page. (Thanks to Claire and Jean-Paul for pointing this out.)
Another method for circumventing the bug comes from Adam D., who wrote: "Once Lara re-built Excalibur and I went through the door back into the main room where Checkpoint 12 is, I jumped onto the platforms and when I got onto the final platform which should tilt forwards allowing me to jump onto the ledge, it didn't move. I realised one of the small rocks I shot was wedged between the pillars of the 2nd from last platform and the one that moves forwards.
"I worked out that I needed to open the door with the sword and immediately change to guns. Then after the cut scene I jumped left onto the first platform, then onto the second platform. Here I clicked for the aiming reticle and shot the small rock which caused it to fall. I then had to put the guns away, perform a running jump onto the third platform and finally onto the fourth platform, which moved forwards and allowed me to jump onto the ledge ending the level.
"The problems I encountered were the speed at which I had to pull out the guns with the sight up. Time only allowed for one shot to hit the rock and then jump before the ledge I was on collapsed. Then the jump had to be at an angle to the left to make the 4th ledge cleanly; otherwise I'd either be hanging from it and not have enough time to climb up and jump to the last ledge or I'd miss it completely.
"It took about 20 attempts but I wasn't going to start the whole level again!!!! An annoying bug that hopefully people will benefit knowing about before they make the mistake I did."
If you can't get through using either of these methods, then you'll have to replay the level or reload an earlier save. Or, if you're playing the PC or PSP game, you can download a savegame file from the first checkpoint in the next level. Instructions are linked to that page.
WAS THIS WALKTHROUGH HELPFUL? If not, I apologize and invite you to contact me with any questions. If you need help right away, I recommend the r/TombRaider subreddit. Other fan-run forums are listed at tombraiders.net/stella/community.html. If this site was useful, please consider supporting it financially or in other ways. For details, visit tombraiders.net/stella/support.html. As always, I welcome your corrections/suggestions. Thank you!
Copyright © 2006- - Stellalune (). All rights reserved. The screenshots and videos included here were made using Fraps. Feel free to copy or print this walkthrough for personal use. By all means, share it with friends, but please include this credit line so people can send me their feedback. No part of this walkthrough may be reproduced on another site without permission. Follow this link for details about this site's advertising and privacy policy.
Stella's Tomb Raider Site: tombraiders.net.