Furnace of the Gods - Anteroom and River of Molten Gold
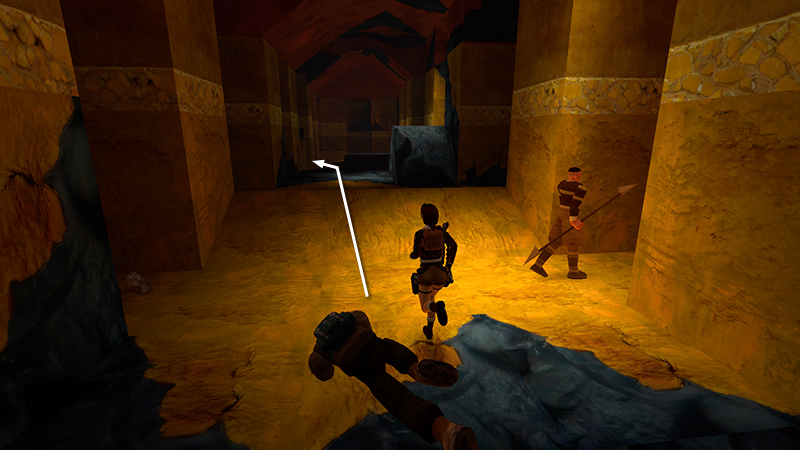
In the last section, you returned to the BLUE CAVERN and confronted a squad of mercenaries, with the help of your local allies. Enter the ORANGE-AND-GOLD ANTEROOM beyond the two sets of doors. At the far end, on the left...
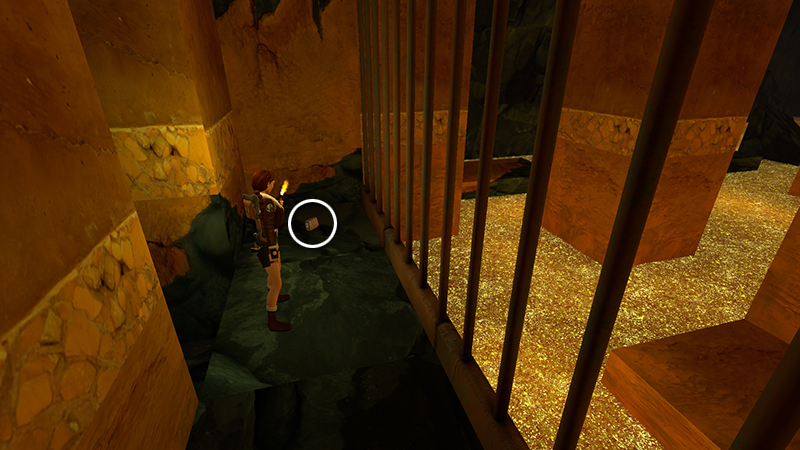
...is a barred alcove overlooking a room with a pool of molten gold. There's a large medi pack (25) here on the floor. Grab it.
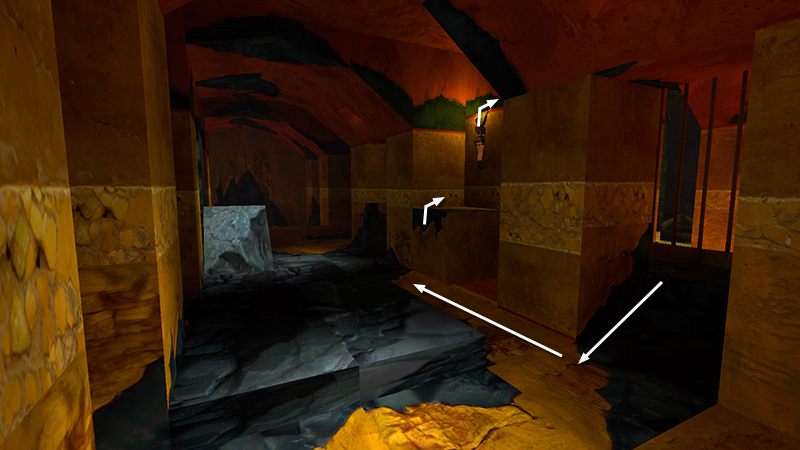
Then return to the middle of the room. Climb onto the square block roughly opposite the gray, stone ramp. Climb through the opening above...
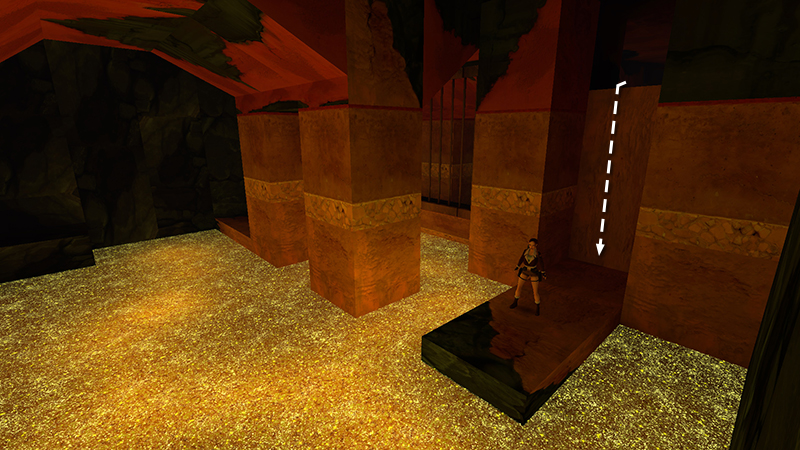
...and drop onto a ledge that extends out into the molten pool.
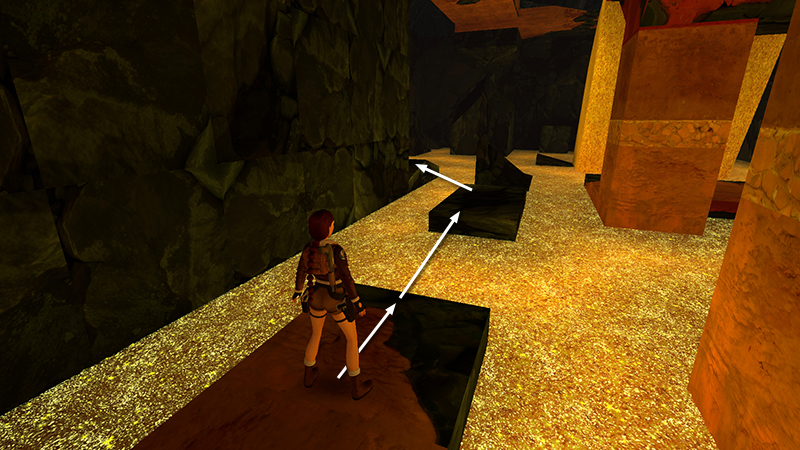
Move to the end of this ledge. Then take a running jump over the deadly molten gold to the little, rectangular island ahead. Move to the far left corner and jump over to the rocky ledge on the left.
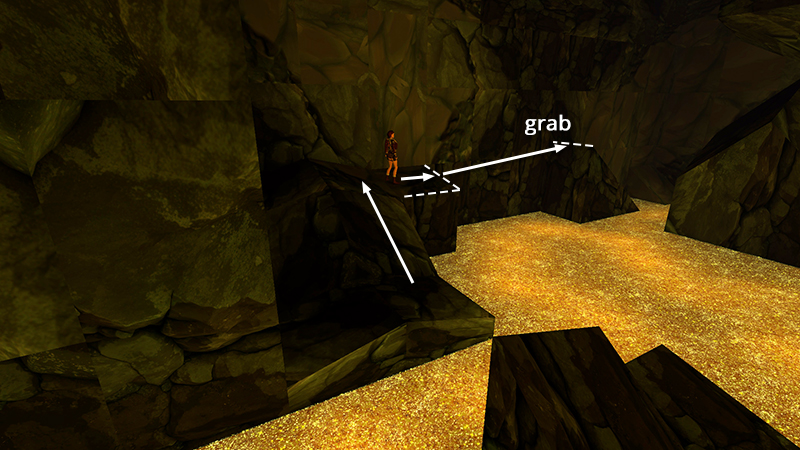
Jump up the slope and then walk out onto the block on the right. Hop back and take a running jump to grab the back side of the angled block near the wall.
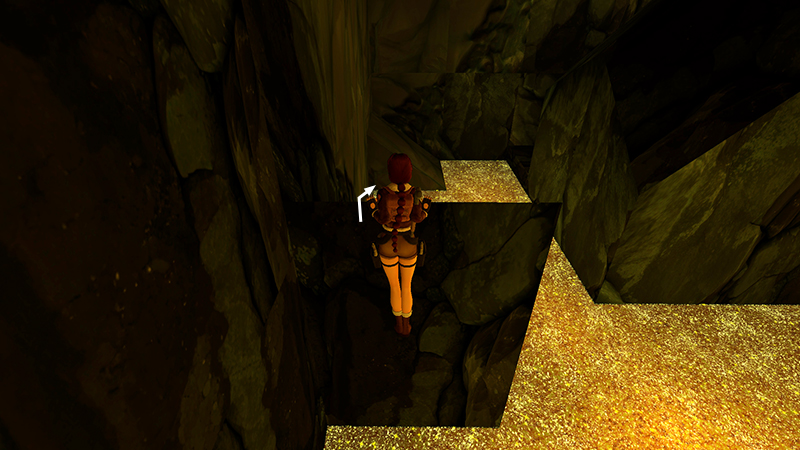
Pull up...
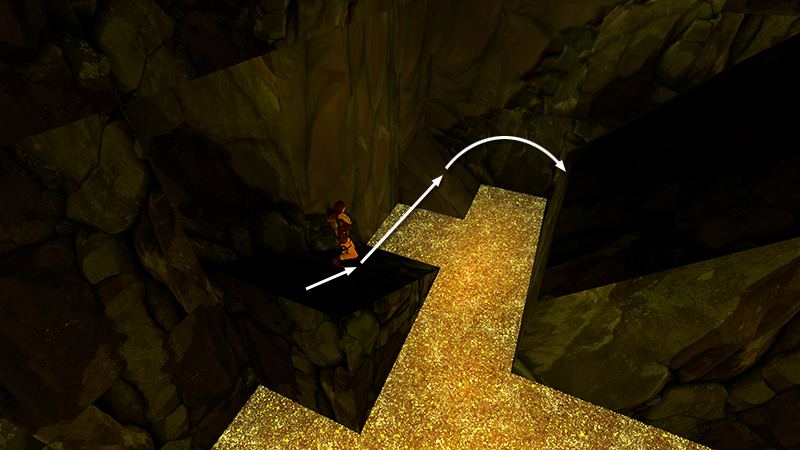
...slide down the other side nearly to the bottom, and then jump onto the angled block in the corner. Immediately jump again...
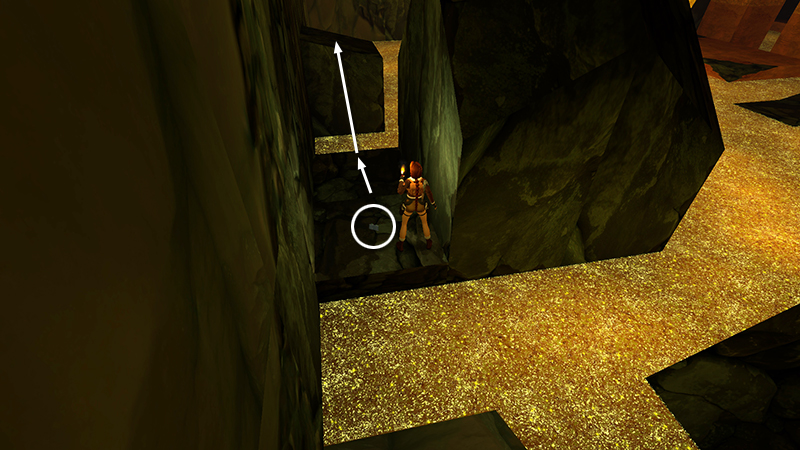
...to land on a ledge where you'll find some grenades (26). After making the pickup, take a running jump onto the slightly higher stone block ahead.
NOTE: This will be the GRENADE LAUNCHER itself if you didn't find it before.
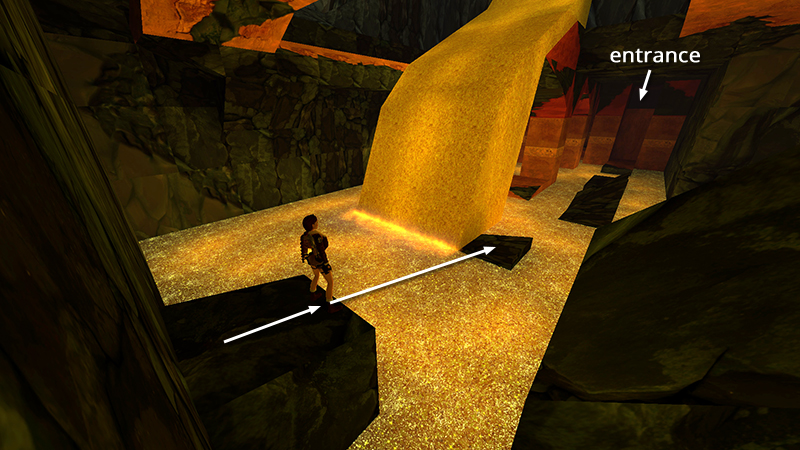
Turn right. (You're now facing the entrance.) Take another running jump onto the small, squarish block below and to the right of the molten gold "waterfall."
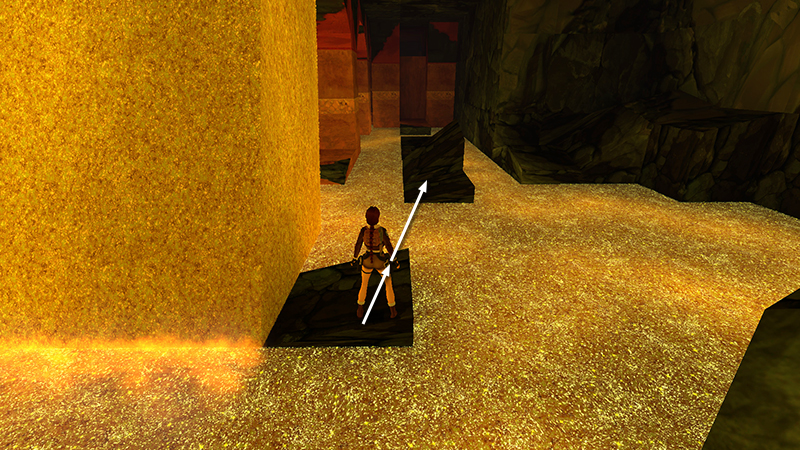
Take another running jump to the next block, which is flat in front and has an angled section at the back.
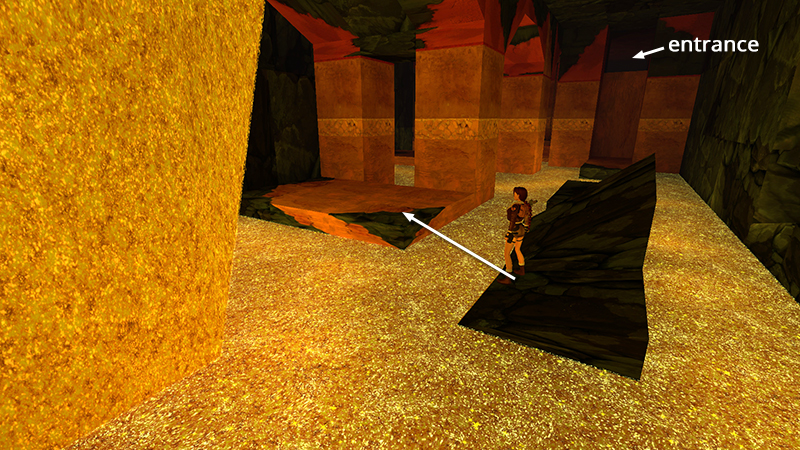
Turn left and jump over to the large, flat ledge behind the falls.
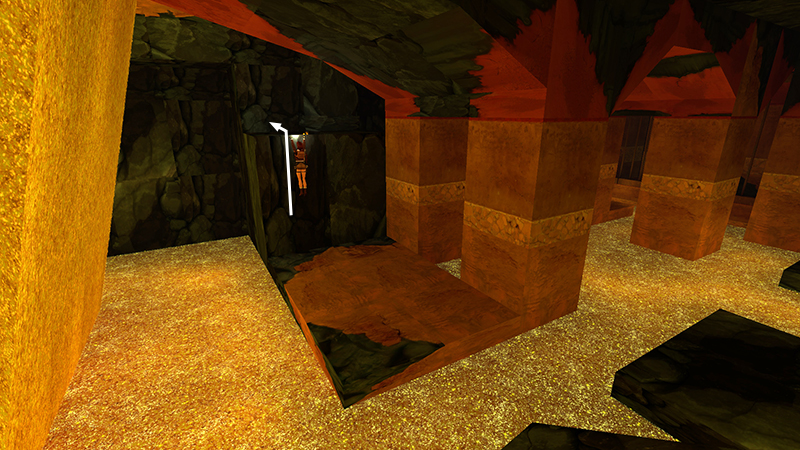
Climb onto the dark gray rock ledge.
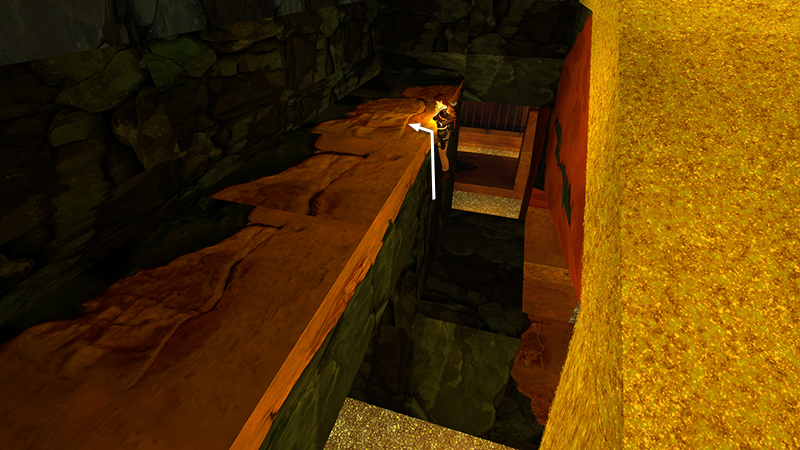
Step forward and pull up onto the elevated walkway made of gray and orange stone.
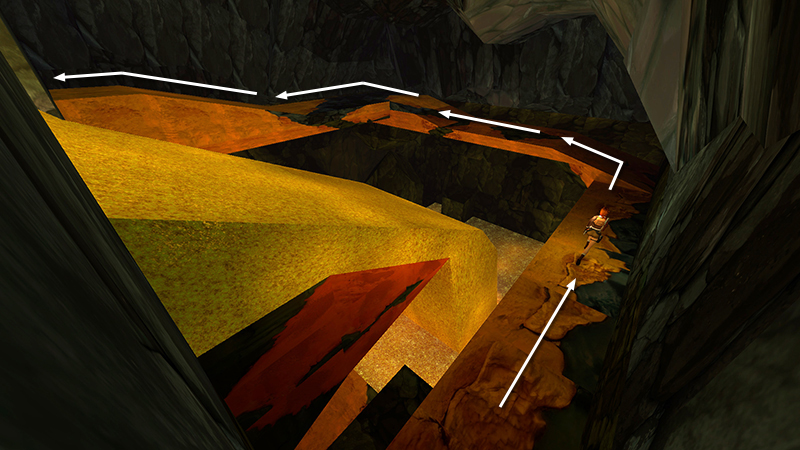
This walkway extends around the perimeter of the cave in a U shape. Follow it all the way around...
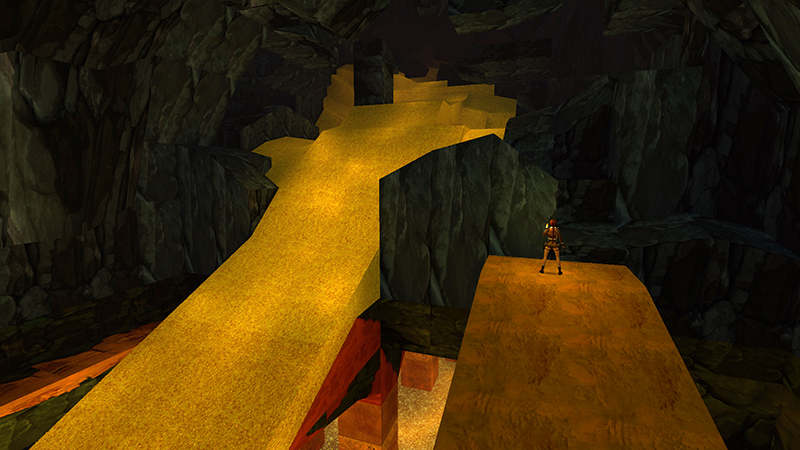
...to where it ends at a large, dark gray rock formation. The golden waterfall will now be on your left.
NOTE: If you missed the grenades/GRENADE LAUNCHER before, you can also get them by safety dropping off the bridge near the second corner. (screenshots) You must then climb back up onto the bridge as described above.
DARK MODE: I plan to add optional dark mode for these pages, but my current priority is updating the walkthroughs. Meanwhile, may I suggest a reputable dark mode browser extension, such as Dark Reader? (Download only from trusted sites, like darkreader.org or your browser's official add-on/extension site.)
Walkthrough text and diagrams copyright © Stellalune (email ). Feel free to copy or print this walkthrough for personal use. By all means, share it with friends, but please include this credit line so people can send me their feedback. No part of this walkthrough may be reproduced on another site without permission.