Furnace of the Gods - Secret #1 (Gold Coins) and
"Solve the Problem of Deficit " Achievement/Trophy
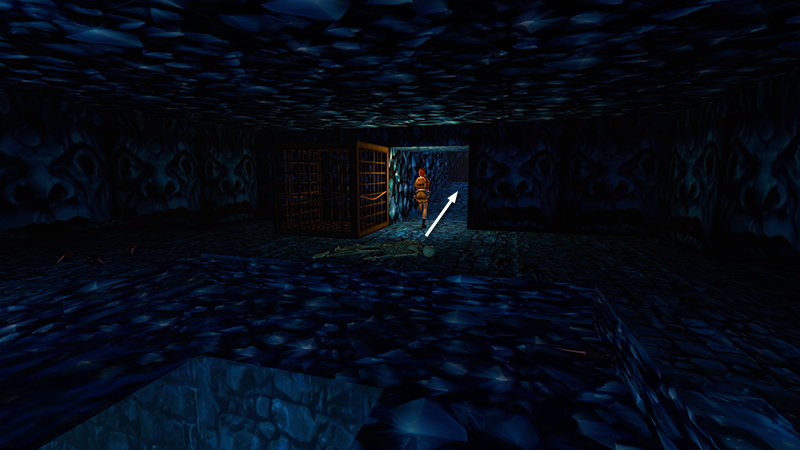
Beyond the dark room with the metal cages and bajillion rats, detailed in the last section, is a trapped hallway leading to the next secret.
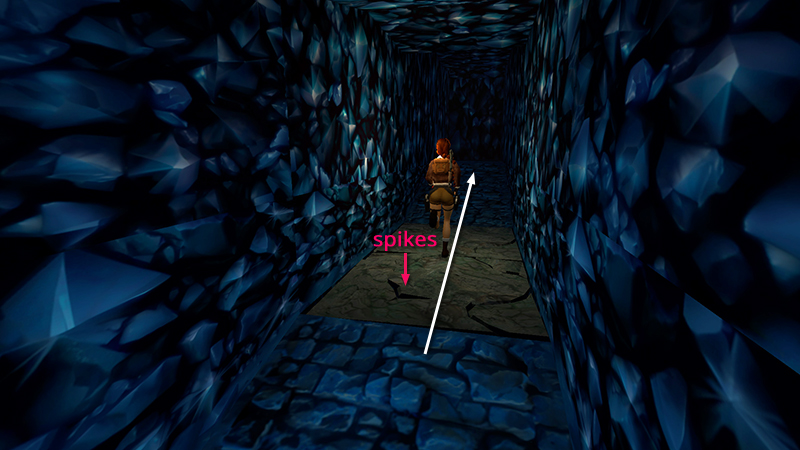
Follow the narrow passage, running quickly over the collapsing tiles with spikes below.
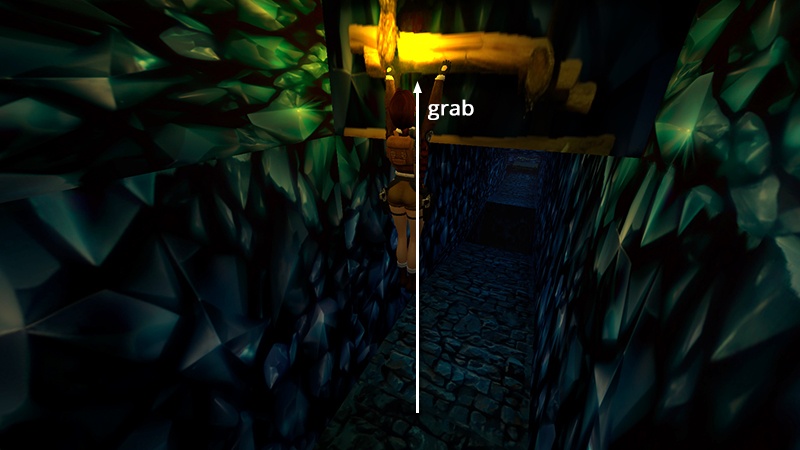
At the end of the hall, turn around and jump straight up to grab the ladder above.
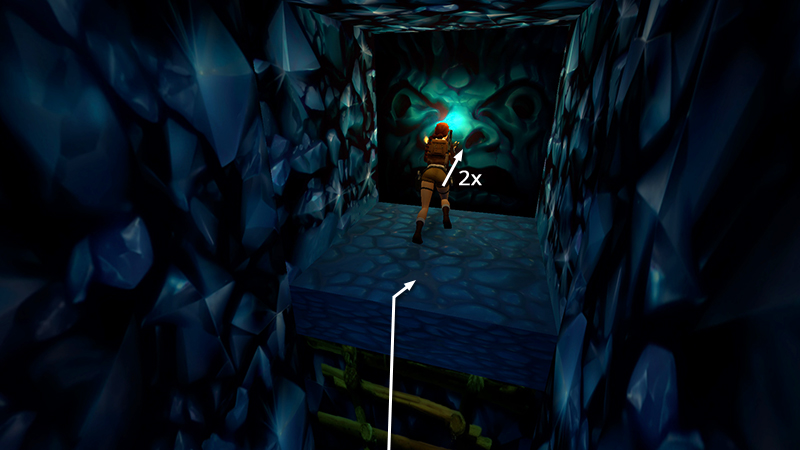
Climb to the top. Straight ahead, blocking the narrow passageway, is a blue block with a carved face. Push it twice into a small room.
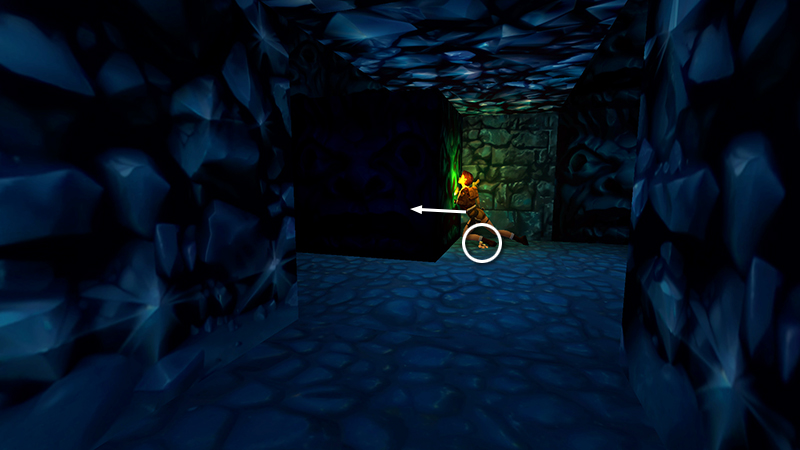
Then move it to either side to find SECRET #1, the gold coins (19), underneath.
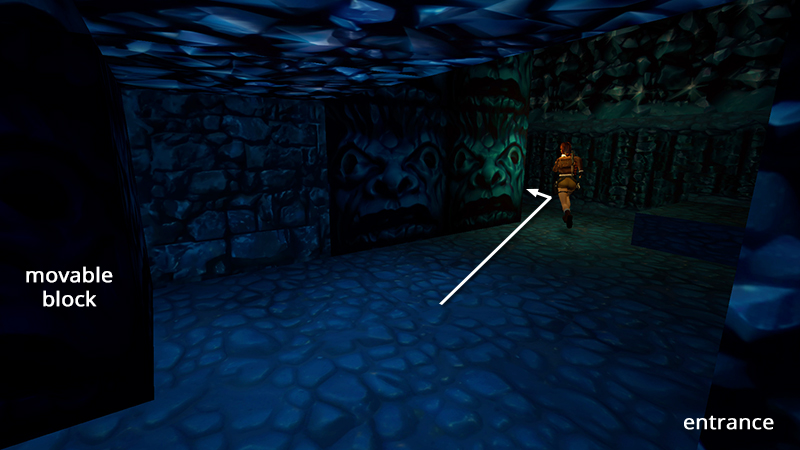
This room is laid out in the shape of a square. Go around to the side farthest from the entrance...
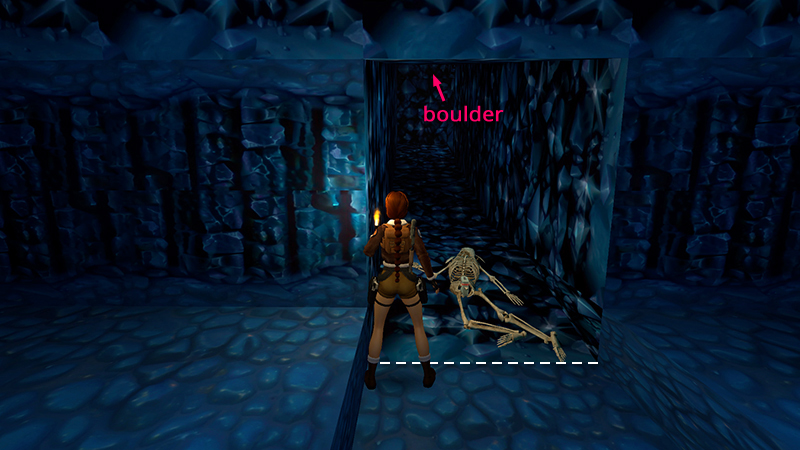
...but do not approach the skeleton with the flares (20) yet. There's a boulder trap ahead. To obtain the flares without getting pancaked—and unlock an achievement/trophy in the process—position Lara just outside the doorway, with one foot near the low step on either side.
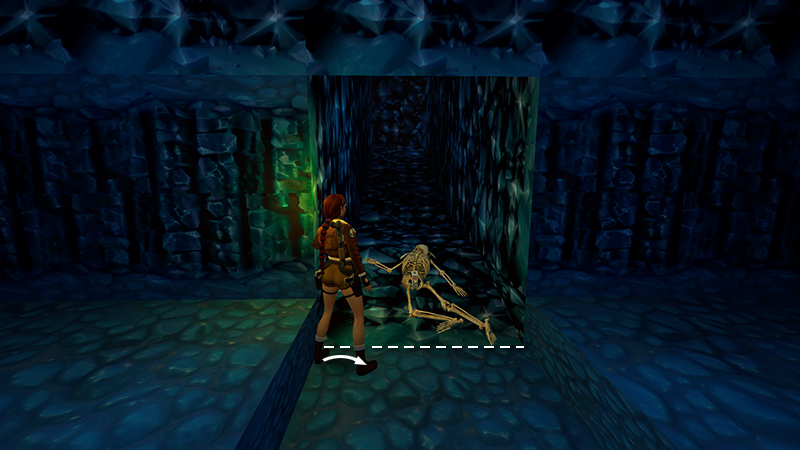
Pivot slightly to face the flares.
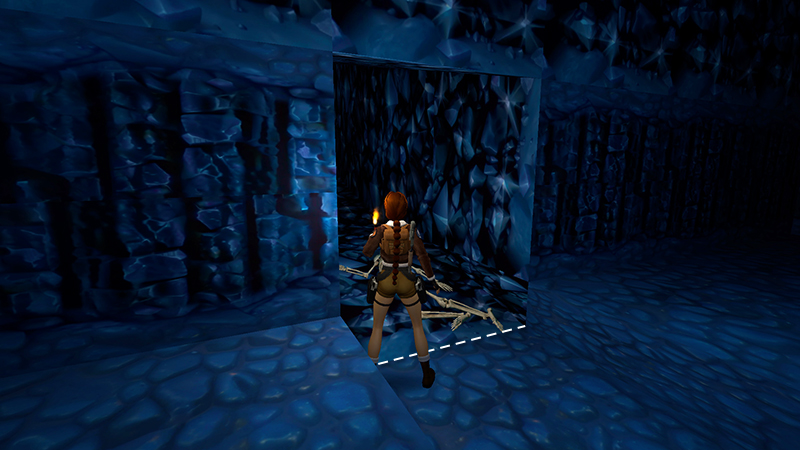
Save if you like.
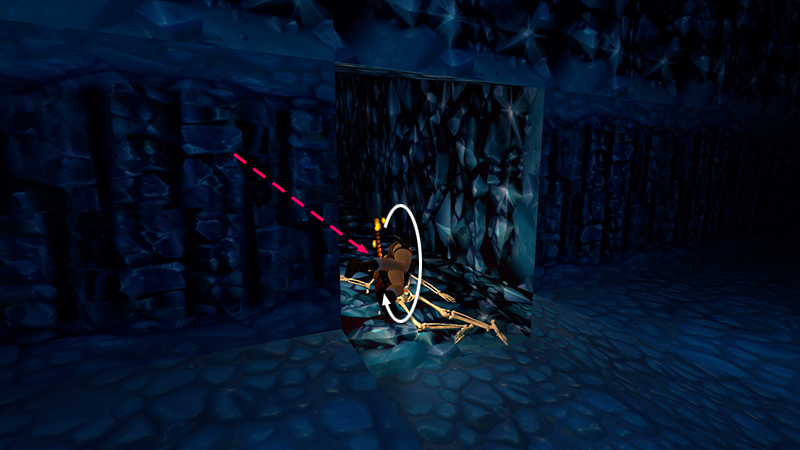
Then press Roll + Action to roll into the doorway...
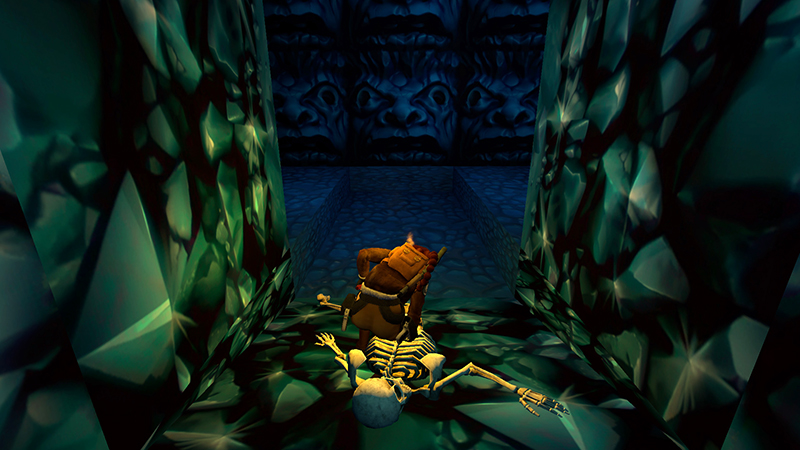
...and immediately pick up the flares.
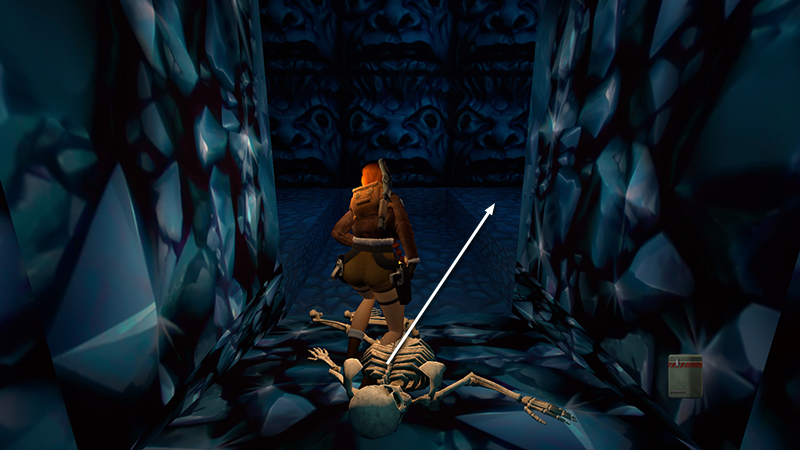
Without hesitation, jump forward to avoid the rolling boulder.
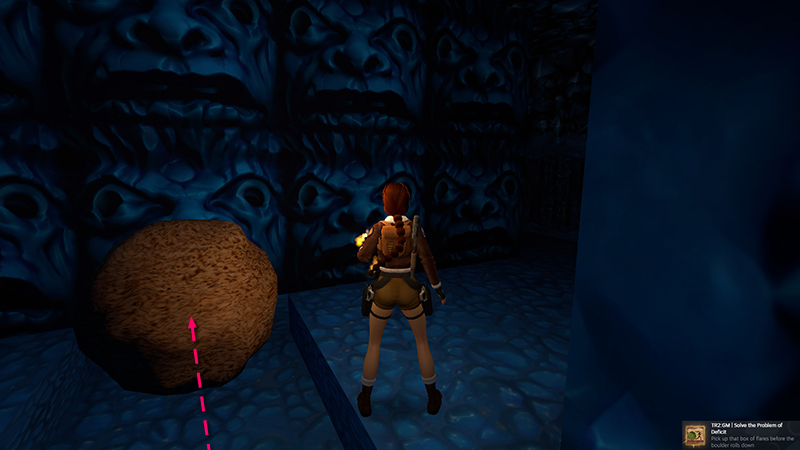
As long as you pick up the flares before the boulder lands against the far wall, the achievement/trophy "Solve the Problem of Deficit" will unlock. But if you set it up carefully and move fast, you also won't take any damage.
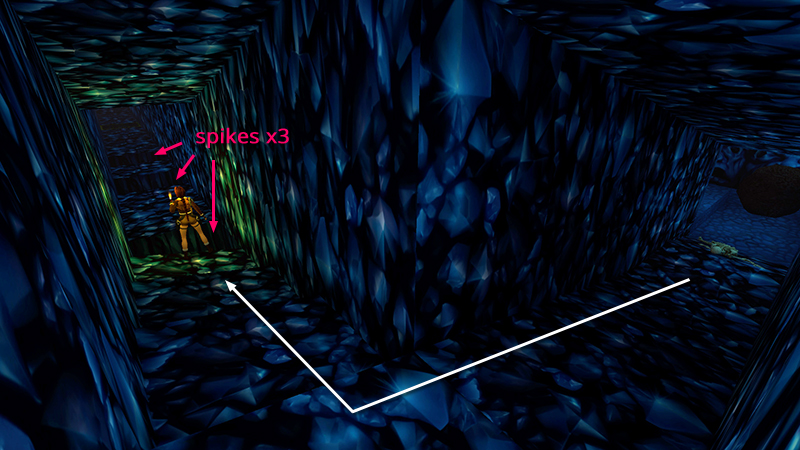
Follow the passageway where the boulder came from, jumping over 3 spike pits along the way.
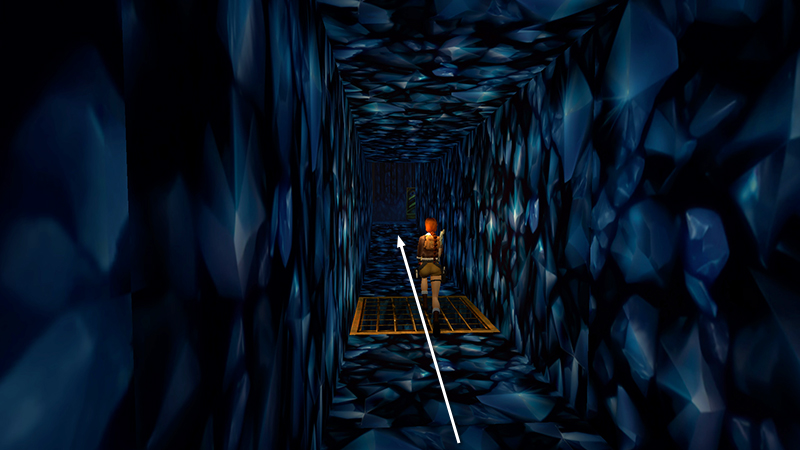
The grate in the floor doesn't open.
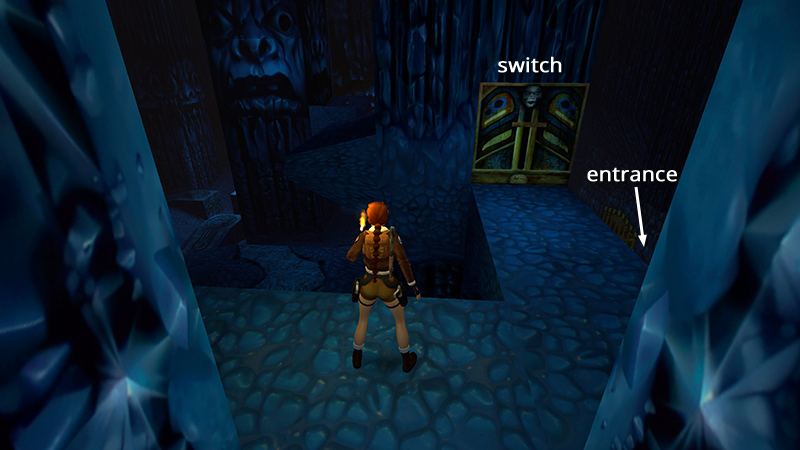
Soon you'll emerge on a high ledge overlooking the BLUE CAVERN.
DARK MODE: I plan to add optional dark mode for these pages, but my current priority is updating the walkthroughs. Meanwhile, may I suggest a reputable dark mode browser extension, such as Dark Reader? (Download only from trusted sites, like darkreader.org or your browser's official add-on/extension site.)
Walkthrough text and diagrams copyright © Stellalune (email ). Feel free to copy or print this walkthrough for personal use. By all means, share it with friends, but please include this credit line so people can send me their feedback. No part of this walkthrough may be reproduced on another site without permission.