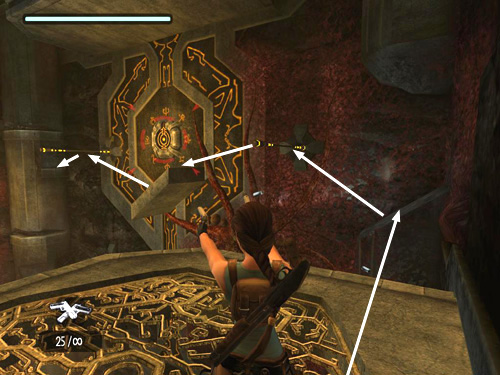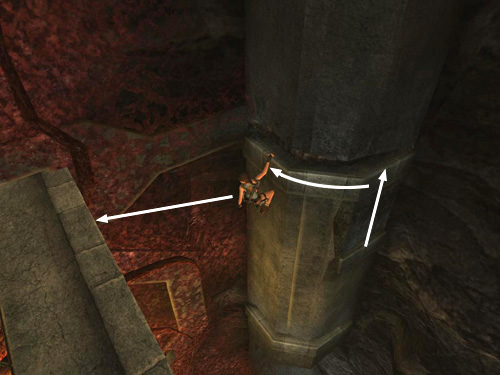
The screenshot above shows an overview of the whole sequence. Begin on the right side of the ledge, near the wall, facing the broken support column in the corner. Shoot the button again until all of the glyphs are lit. Take a running jump toward the broken column. Make sure you jump just at the edge of the ledge and hold down the Jump button to keep Lara in the air as long as possible. Then she should land near the middle of the slope.

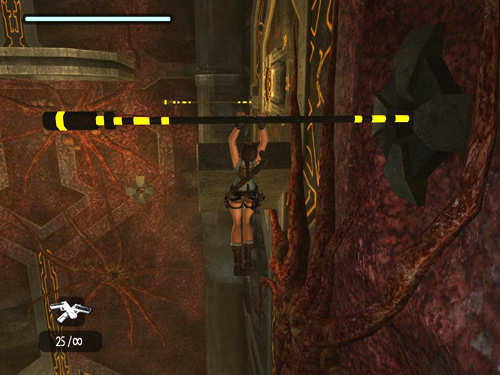
After taking a running jump to that first slope, slide just a little and immediately jump to grab the first horizontal pole. Lara should grab the pole near the middle (as shown above), rather than at the outer edge. Then she'll be in a good spot to swing around and jump onto the stone slope ahead. If she doesn't travel far enough on that initial running jump, Lara will grab the left end of the pole and be unable to swing and land on the slope.

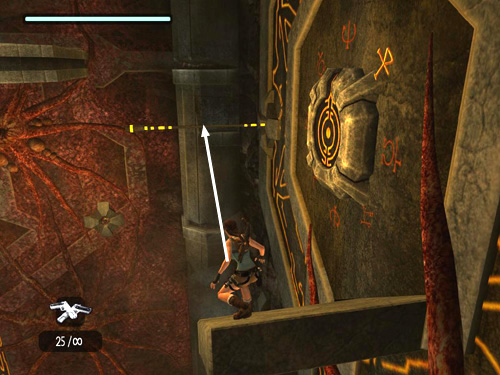
Once on that second slope, slide only very briefly before jumping forward to grab the second pole.

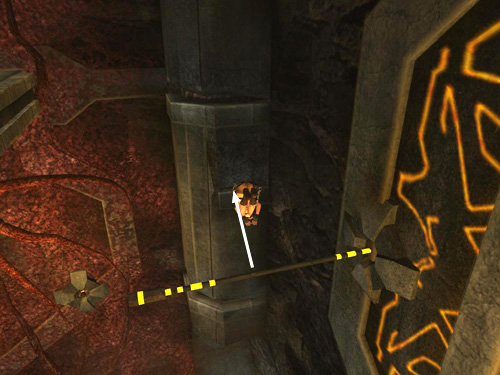
Swing around once at the most and jump to grab a handhold on the next corner column.

Now you can take your time as you climb to the handhold above and then around to the left. Finally, jump back to grab the big ledge behind you. Pull up to CHECKPOINT 7.
[Return to the Great Pyramid Walkthrough]
Copyright © 2007- Stellalune (). All rights reserved. The TRA screenshots included here were made using Fraps. Feel free to copy or print this walkthrough for personal use. By all means, share it with friends, but please include this credit line so people can send me their feedback. No part of this walkthrough may be reproduced on another site without permission. Follow this link for details about this site's advertising and privacy policy.
|
