For this sequence, you may want to set the Combat Mode to Advance Hold. Then Lara will holster her guns automatically when you stop firing, and you won't have to press an extra key to do that as you get ready to run.

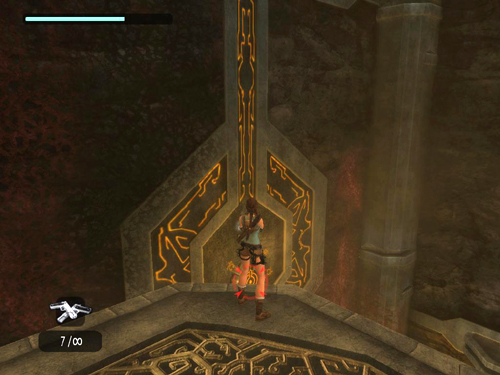
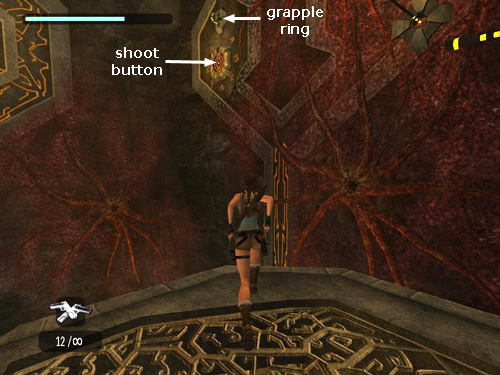
After dealing with the two flying mutants, switch back to pistols and shoot the button below on the left wall (i.e., the one you shot earlier, not the one you just used to extend the grappling rings and poles and hatch the mutants). This will cause the rings and poles to retract. It will also re-extend the ledge and lock it in place, giving you as much time as you need to set up the next jump.

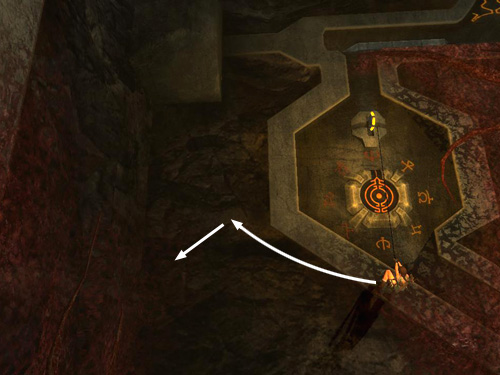
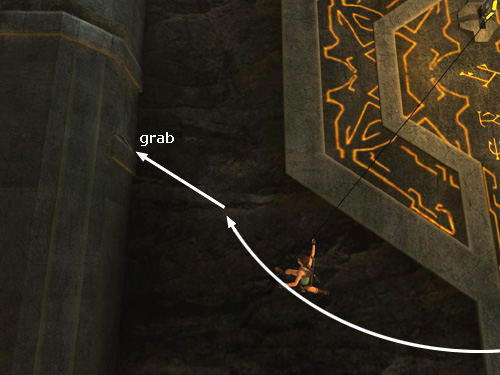
Position Lara on the retracting ledge so she's facing the button and the grappling ring above it. Shoot the button once more until all the glyphs glow to max out the timer. Then take that running jump, taking off just to the right of the outer corner and aiming a little to the left of the vertical yellow design on the wall ahead, as shown in the screenshot above. Be sure to jump just at the edge and hold down the Jump key to keep Lara in the air longer.
As she nears the wall, release the Forward and Jump keys and press Grapple to snag the ring above. This may take a number of tries, but once you succeed, you'll have much more time remaining than you would if you'd used the poles.

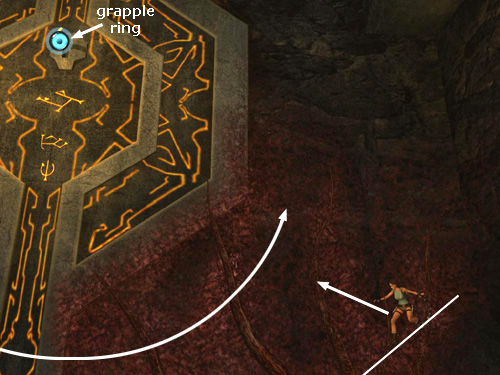
Retract the cable so Lara's feet are on the raised stone border just below the ring of glyphs. You'll probably need to reel the cable in six times to reach this height. Do it as quickly as you can. With the cable this short, you should be able to wall run to the left just once and jump to land on the broken column in the left corner.

Slide just briefly, jump and quickly grapple the second ring.

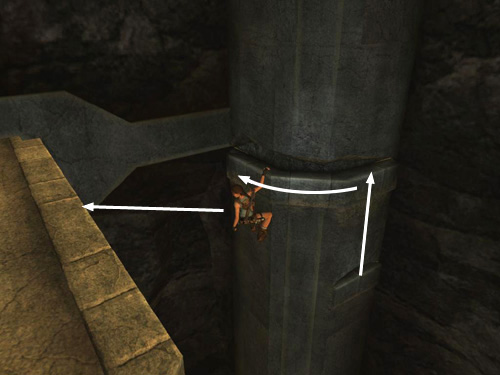
At this point, you shouldn't need to adjust the length of the cable. Wall run to the left and if you have enough height on the first swing, jump. Otherwise, run back to the right just once, then to the left again, and then jump to the left and grab the lower handhold on the corner column.

From here on, you can take your time. Jump up to grab the crevice above, which runs around the column. Climb around to the left and jump back to grab the wide ledge behind you. Pull up to CHECKPOINT 6.
NOTE: At this point I'd like to offer my sincere gratitude to Mark R., a long-time contributor to this site, who first suggested this method to me, and to XcomCaveRat, whose video of the technique is available on YouTube. Thanks also to Nightdiver for the suggestion to shoot the other button in order to keep the ledge extended. You guys are lifesavers—both Lara's and mine!
[Return to the Great Pyramid Walkthrough]
Copyright © 2007- Stellalune (). All rights reserved. The TRA screenshots included here were made using Fraps. Feel free to copy or print this walkthrough for personal use. By all means, share it with friends, but please include this credit line so people can send me their feedback. No part of this walkthrough may be reproduced on another site without permission. Follow this link for details about this site's advertising and privacy policy.
|
