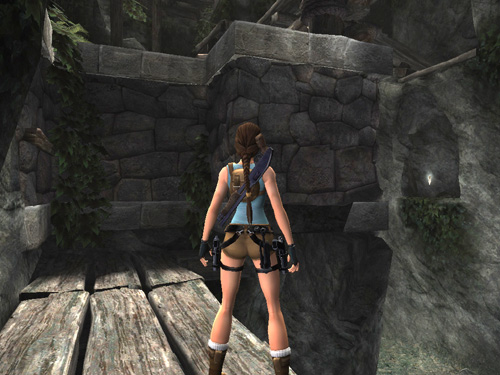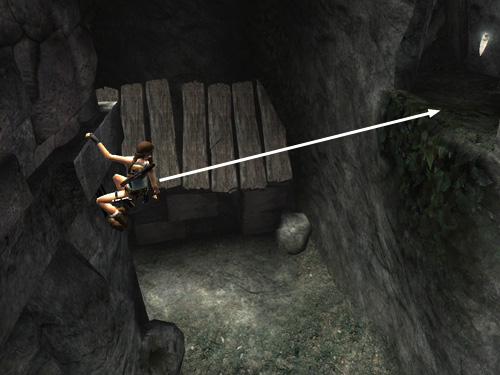
The screenshot above shows the cave with the artifact. You can't get there from here, so climb to the top of the stone and wood structure.

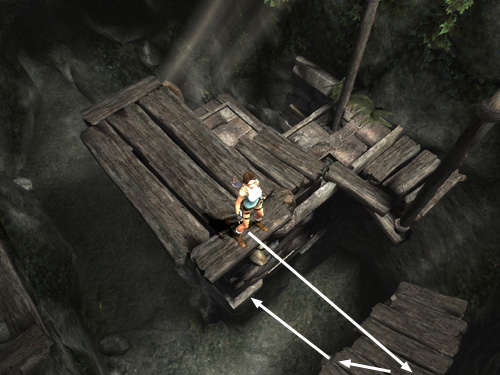
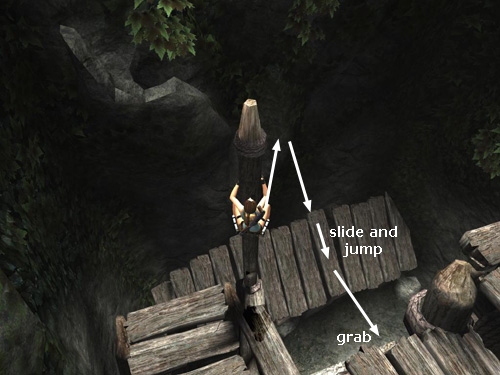
Now you need to position Lara carefully so she'll be able to make the next jump. She should be standing at the edge of the wooden ledge just above the stone handhold on the structure below. Shift the camera in front of her and point it downward to see if she's lined up with that handhold. Now jump down onto the sloping wooden roof and, just as Lara starts to slide. . .

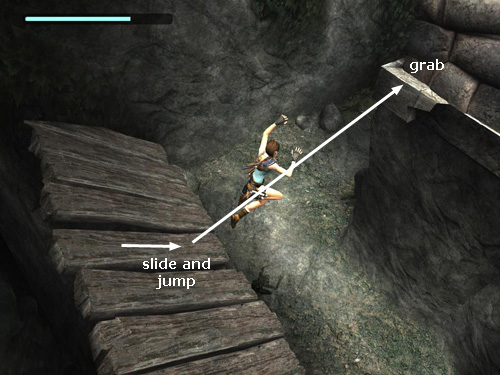
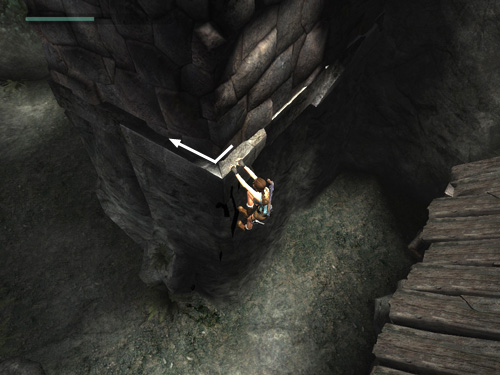
. . . immediately jump again to grab the stone handhold near the corner of the structure.

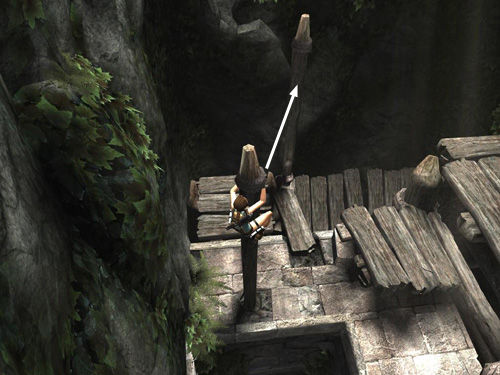
Alternatively, instead of jumping from the top ledge directly to the sloping roof, climb the first of the two vertical wooden poles (i.e., the one protruding from the stone part of the structure). Jump from there to grab the second vertical pole.

At this point, Lara should be positioned correctly to make the next jump without changing her angle or height on the pole at all. Move the camera directly behind her and then jump straight forward off the pole to land on the sloping roof. (Lara will lose a tiny bit of health when landing.) Just as she starts to slide, immediately jump again to grab the stone handhold near the corner of the structure (as shown in the third screenshot in this series, above).

Climb around the corner to the left.

Then jump back to grab the opening behind. Pull up and get the Artifact.
[Return to the Lost Valley Walkthrough]
Copyright © 2007- Stellalune (). All rights reserved. The TRA screenshots included here were made using Fraps. Feel free to copy or print this walkthrough for personal use. By all means, share it with friends, but please include this credit line so people can send me their feedback. No part of this walkthrough may be reproduced on another site without permission. Follow this link for details about this site's advertising and privacy policy.
|
