Shipwreck Beach - Beach and Tower East of the Survivor's Camp - Part 2
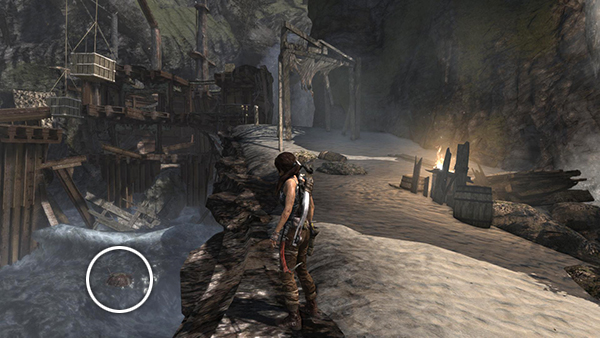
Before leaving this area, look out into the water to the northwest of the fire barrel to spot another mine (6/10). Shoot it for the Mine Sweeper Challenge.
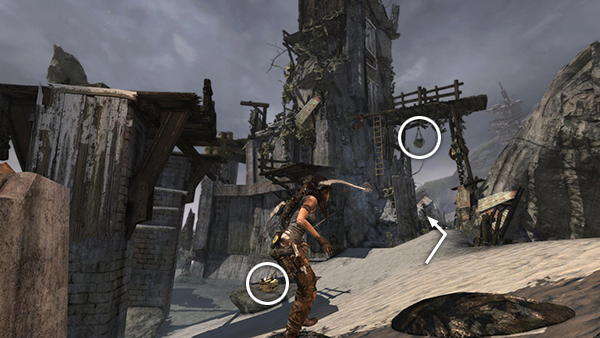
Crack open the salvage crate on the beach below the tower. Shoot down the salvage net hanging on the side of the tower. Follow the path alongside the tower...
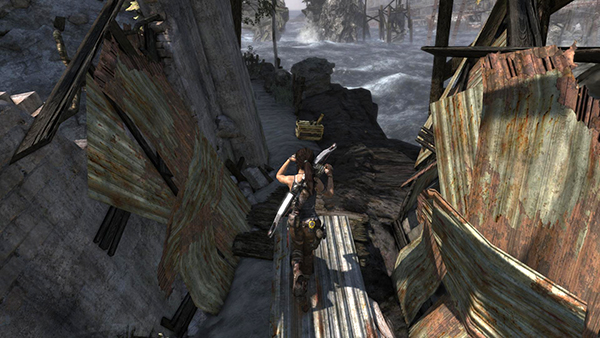
...to find the salvage crate that dropped from the net.
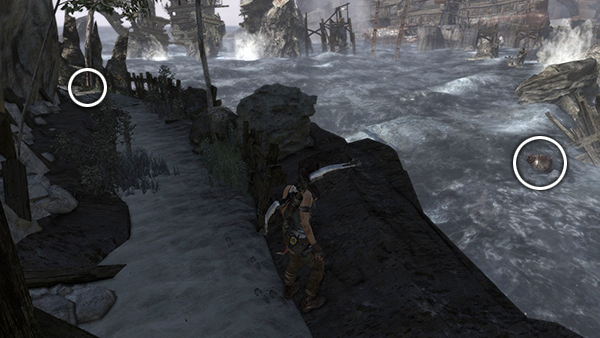
Look to the right (northwest) to spot another mine (7/10) floating in the sea. Shoot it for the Challenge as well. Then continue forward along the path. At the corner of the tower is a cairn (4/5), which you can take apart for the Cairn Raider Challenge.
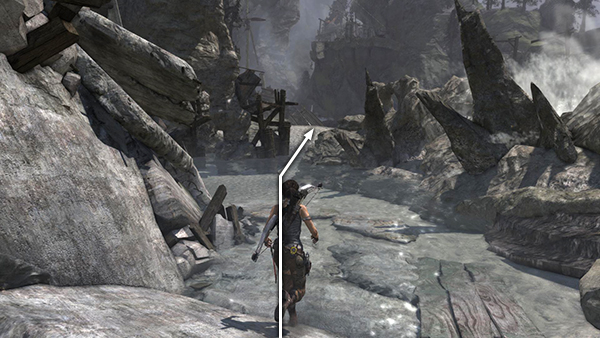
Go around behind the tower to a lovely tide pool. Have a little splash and then wade across the pool to the beach.
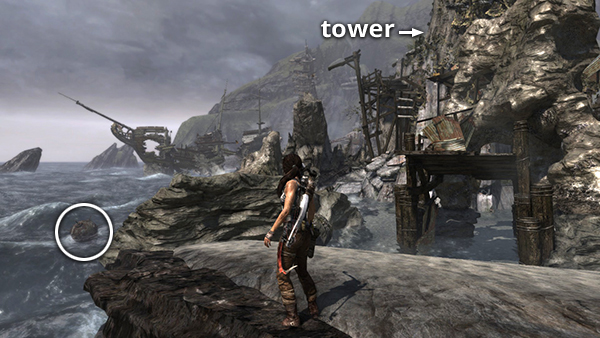
Move to the edge of the beach, taking care not to step off the edge. Lara will die if she falls into the rocky shallows here. Turn right (southwest) and look out to sea to spot the next mine (8/10). Destroy it.
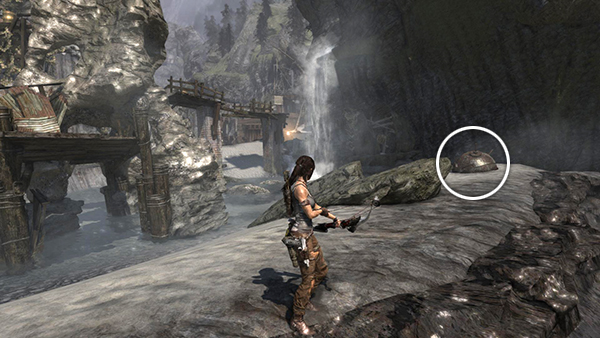
Then turn around to find another mine (9/10) partially buried in the sand. Shoot it as well.
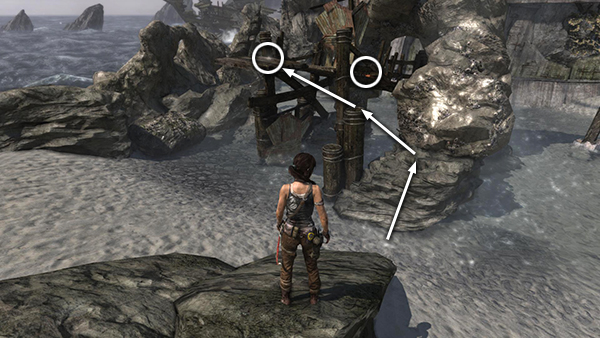
Move back down the beach toward the tide pool. There's a GPS cache (8/15) and a food cache on the broken pier. To reach them, climb onto the rock on the left side of the pier, jump onto the higher of the two sawed-off pilings, then jump from there onto the pier. Grab the goodies and drop back down to the sand.
NOTE: If you're having trouble with the tricky jump onto the pier, don't worry. You can get these goodies a different way when you return to this area later on. I'll describe that in Shipwreck Beach Part 2.
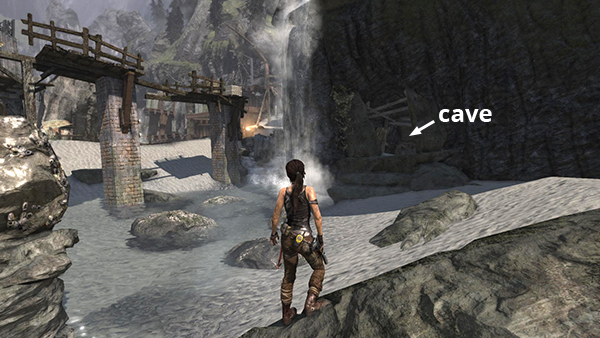
Turn to face the cliff so the tower and the brick columns leading up to it are on Lara's left. There's a little cave just to the right of the waterfall feeding the tide pool.
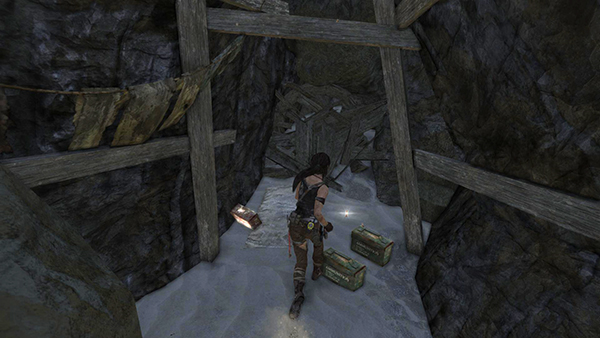
Inside you'll find another GPS cache (9/15), plus 2 boxes of shotgun shells and some rifle ammo.
[Part 1 | Part 3 | Return to the Shipwreck Beach Walkthrough]
Copyright © 2013- - Stellalune (). All rights reserved. The screenshots and videos included here were made using Fraps. Feel free to copy or print this walkthrough for personal use. By all means, share it with friends, but please include this credit line so people can send me their feedback. No part of this walkthrough may be reproduced on another site without permission. Follow this link for details about this site's advertising and privacy policy.