NOTE: If you haven't already tried it, I recommend the shorter route covered in the main walkthrough, which eliminates a lot of climbing and combat.
The sequence described below is also shown in this video walkthrough.
GROUNDWORK FOR GETTING THE RELIC: As you probably noticed during the cut scene showing the Thor statue opening its arm, the RELIC in this level is one of the statue's eyeballs. Getting it is a bit complicated but well worth the effort. First drop down to the floor and use the grapple to return the big screw to its original position.
You'll know the screw is all the way up when you see a cut scene of the Thor statue lowering its head and moving the hand holding the hammer back toward its chest.
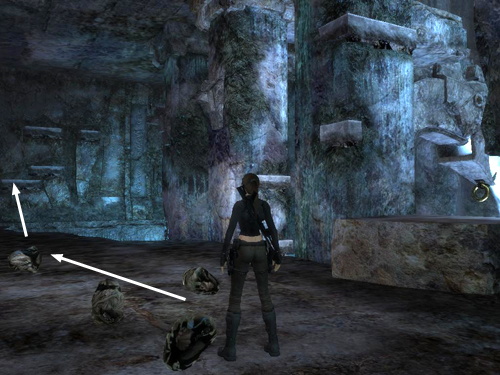
Now go to the tall, free-standing carved pillar on the other side of the screw. With Lara wearing the belt and gauntlets, it glows with blue energy. Use your Thor strength to push the huge column along the groove in the floor until it stops in the depression at the end. With the column positioned here, you'll be able to use it later to jump across to the hammer and get the relic.
CLIMBING TO THE MIDDLE LEVEL: Climb back on top of the shorter column—the one you used to jump over to the statue earlier. Turn away from the statue toward the serpent's head and grapple the ring on its chin. Jump off the column to hang from the cable. You need to move fast now, since Lara's weight on the cable opens the serpent's mouth, causing eitr to flow back into the pool. If you don't get off the cable before the rising water reaches Lara, she'll be killed.
So quickly climb the cable until Lara is hanging just below the serpent's head. Turn on the cable to face the column supporting the serpent's head. Do not swing back and forth. This will take Lara right into the cascade coming from the serpent's mouth. Instead just jump forward off the cable to grab the handhold ahead. Climb to the left and pull up onto the brownish stone ledge between the columns. (Check these screenshots if you need a visual.)
IMPORTANT: If Lara dies before reaching the next checkpoint, the game will reload, and the screw and column will still be in their original positions. Be sure to raise the screw and move the column again before going on. Otherwise, you won't be able to get the relic later. If you forget to do this, you'll still be able to get the relic, but you'll have to lower the water level again and then climb down to the central platform to rearrange the screw and column.
MIDGARD SERPENT POOL – MIDDLE LEVEL (again): When you pull up onto the brownish stone block beside the serpent's head, 2 Mayan thralls rise out of the pool at the right end of the walkway. You can avoid them by running past them to the end of the walkway and jumping across the gap in the floor to grab the lowest stone handhold on the wall (as shown in this screenshot). They can't follow Lara here, so just skip the next paragraph and keep climbing.
If you destroy the first pair of thralls, 2 more thralls may rise up to take their place. I didn't encounter them every time I played through this area, but they may appear if you linger on this walkway. When you've finished off all the enemies, go to the end of the ledge and jump across the gap in the floor to grab the nearest handhold on the wall. (The previous screenshot shows the spot.)
Climb up the handholds and along to the right. Then jump to the right to land on the rough stone ledge. (This is the same ledge you climbed earlier when you first descended from the upper level.) Jump up to grab the metal beam and pull up. Cross the beams as you did earlier, this time jumping the gap where the crumbling section was before. Drop down on the other side.
Turn so the pool is on Lara's right. Another pair of Mayan thralls rise up from the pool ahead. If you stay in this area, 2 more thralls may appear. You might want to jump out to the pillar in the middle of the pool, as described in the next paragraph, and use grenades to destroy the thralls.
OBTAINING THE RELIC: Climb onto the rough stone block that juts out over the pool. (The first of these screenshots shows the spot.) Jump from the end of the block to the top of the column you moved earlier. Turn left and jump to the top of the next column. From there, jump to grab the edge of Thor's hammer. Pull up, step up onto the highest part of the hammer and press Interact to take the RELIC that is Thor's right eye.
NOTE: If you can't get the relic because you didn't realize you needed to move the pillar and hammer, you can still do that now. Just return to the other side of the MIDDLE LEVEL and lower the water level again. Then climb down to the platform in the middle of the pool. Loosen the big screw and move the column with the blue runes (as described above). Then climb back up here to retrieve the relic.
CLIMBING BACK TO THE UPPER LEVEL: After taking the relic, step back down onto the lower part of the hammer. Grapple the metal ring beneath the first serpent's head. Then jump off the hammer to dangle from the cable. Lara's weight pulls the serpent's mouth open so the pool starts to fill again. Go quickly now before Lara drowns in toxic water.
Climb the cable until Lara is hanging just below the serpent's chin. Turn to the right just a little so Lara is facing the stone block beside the serpent's neck. Then swing forward, jump to grab the block and pull up. Now Lara is safe from the rising water and you can take your time. (These screenshots show the sequence.)
Hop down on the other side of the block. Climb the rocks on the left. Then climb along the narrow handhold around the corner and on to the left. When you can't climb any farther, jump back to land near the entrance.
Continue following the main walkthrough at the section titled MIDGARD SERPENT POOL – UPPER LEVEL (again).
Copyright © 2008- - Stellalune (). All rights reserved. The screenshots and videos included here were made using Fraps. Feel free to copy or print this walkthrough for personal use. By all means, share it with friends, but please include this credit line so people can send me their feedback. No part of this walkthrough may be reproduced on another site without permission. Follow this link for details about this site's advertising and privacy policy.