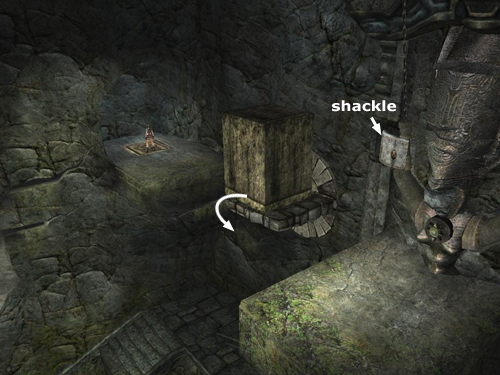
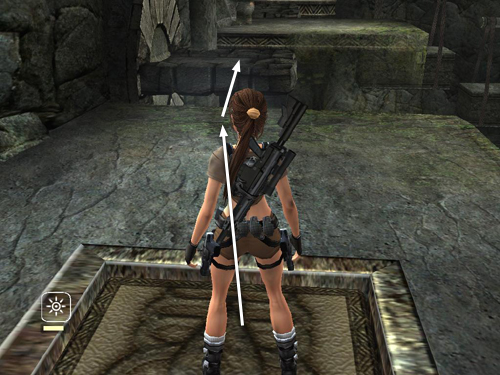
Begin by stepping on the first pressure pad, near CHECKPOINT 10. This turns the first revolving ledge, dumping the big stone block onto the ledge below. It also retracts the shackle on the mechanism's right arm, but only as long as Lara remains on the pad.
Step off it now and wait for the rotating ledge to return to its original position. Then jump across the ledges to the far corner.
Move the carved stone block onto the second pressure pad. This turns the second revolving ledge and retracts the shackle on the left arm. With the block depressing the pad, the ledge and shackle remain in place.
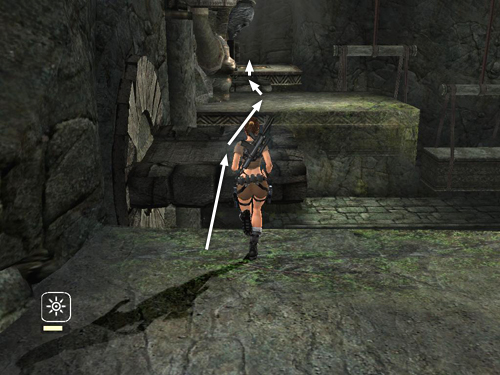
Jump back across the ledges to the other corner, where you started.
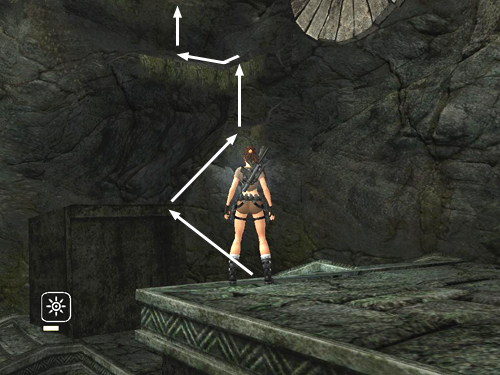
Now face the center ledge and stand on the first pressure pad again. Wait until the revolving ledge has moved as far as it will go. Then run and jump onto it as it begins to turn back.
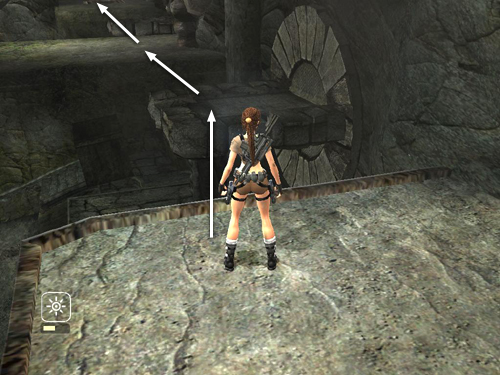
Try to land on the revolving ledge just as it moves past its vertical position. Otherwise Lara may fall. Keep going forward and jump to the center ledge.
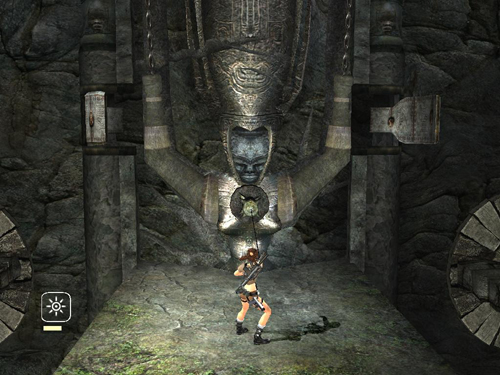
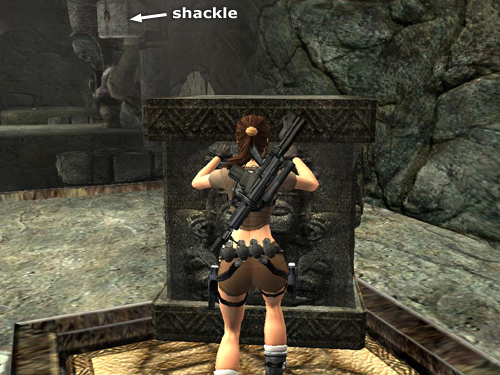
Quickly turn to face the mechanism and use the magnetic grapple to pull out the sun symbol before the shackle on the left closes. If it won't move, step back a bit and try pulling again.
A brief cut scene shows the sluice gate opening and water beginning to flow. Then CHECKPOINT 11 registers.
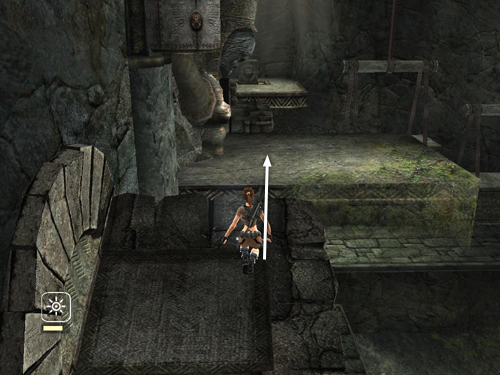
If you are too slow, just jump back to the corner ledge and try again. If Lara falls, climb onto the dark stone block below the left corner ledge (i.e., the block that had been on the revolving ledge). Jump to grab a crack in the wall, jump up to grab the handhold above, traverse around the corner to the left, then jump up twice to reach the ledge with the first pressure pad (shown below).
[Return to the Ghana Walkthrough]
Copyright © 2006- - Stellalune (). All rights reserved. The screenshots and videos included here were made using Fraps. Feel free to copy or print this walkthrough for personal use. By all means, share it with friends, but please include this credit line so people can send me their feedback. No part of this walkthrough may be reproduced on another site without permission. Follow this link for details about this site's advertising and privacy policy.
|