Louvre Storm Drains - Pool & Fuel Tanks
After using the 6 valves to shut off the rushing water, as shown in the last section, you enter a new area. Lara says, "I can smell oil. I'd better be careful." We all know "Croft" is the opposite of "careful," so let's see what we can blow up! Safety drop to the walkway below.
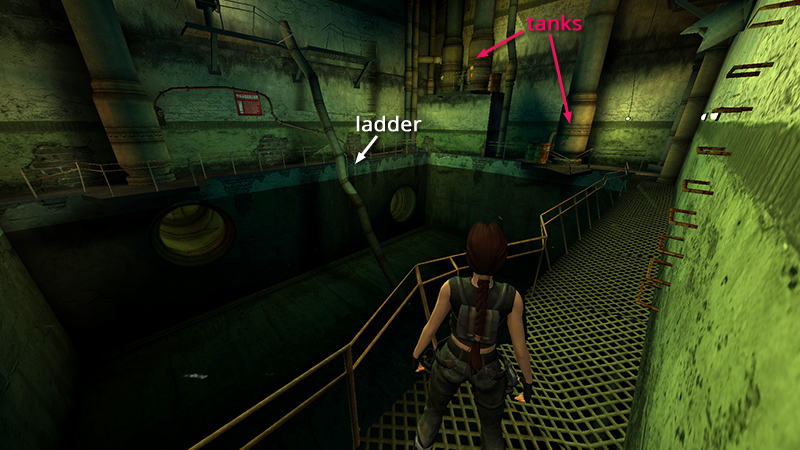
Notice the large fuel tanks at the far end of the room. Lara needs to destroy one of them to get into the Louvre. (Apparently nobody told her admission is free on the first Friday of the month.) The landscape varies slightly depending on which tanks you blow up, but you'll end up in the same place.
NOTE: If Lara falls into the pool before blowing up the tanks, there's a ladder on the left (when facing the fuel tanks) where you can climb out.

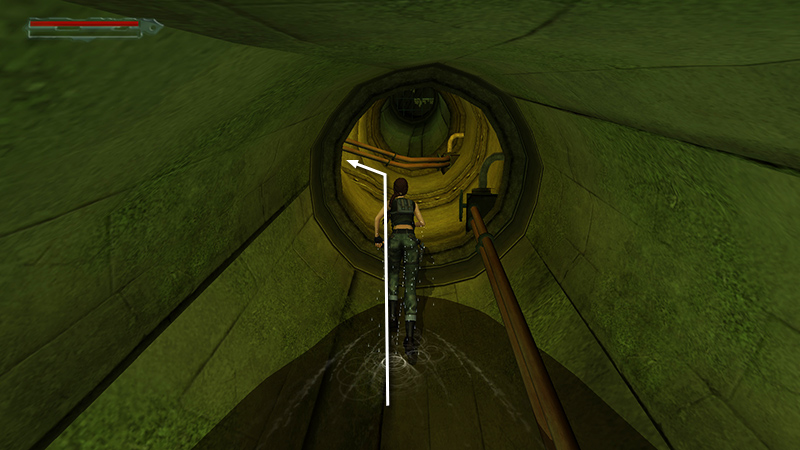
To blow up the right tank, follow the walkway along the edge of the pool and approach the large tank.
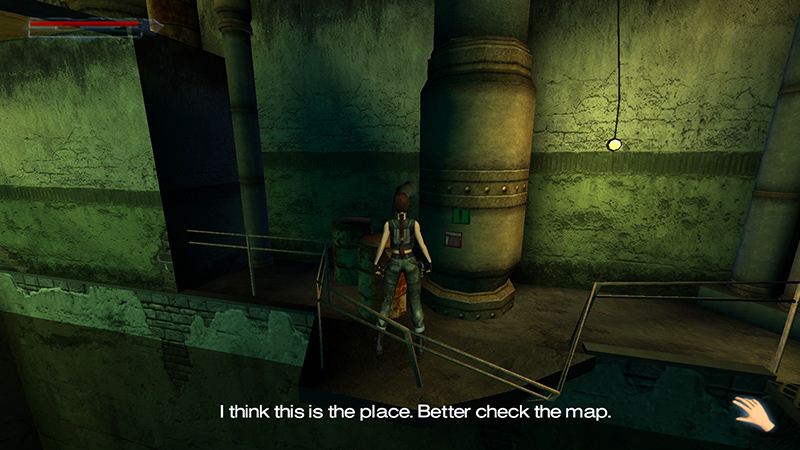
Lara says, "I think this is the place. Better check the map." You don't have to do this, but if you like, you can examine the Map of Sewers Around Louvre in your Inventory under Items. Sure enough, the X's mark the spots. Stand near the tank and press Action to automatically place the explosives you're carrying.
- OR -
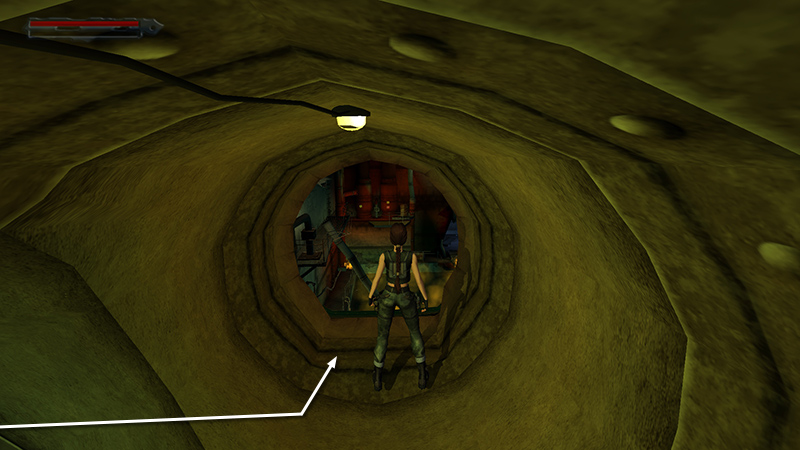
Alternatively, to blow up the left tank, swim across the pool and use the ladder to climb out. Follow the concrete walkway to the right and pull up onto the ledge in front of the two tanks.

Face the tank on the right and press Action to use the explosives.
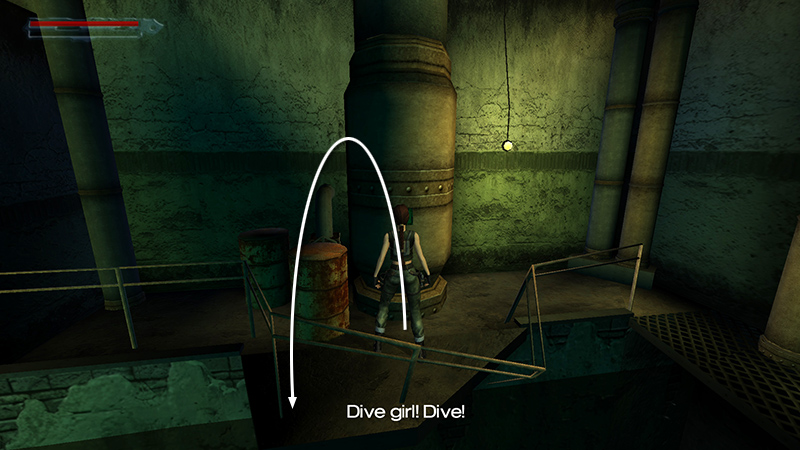
After setting the explosives, Lara says, "Dive, girl! Dive!" Immediately backflip into the water before the tank explodes.
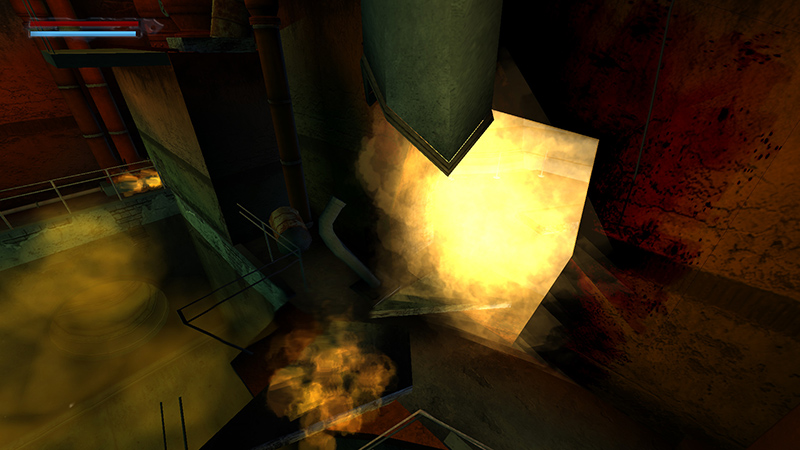
A brief cutscene shows the explosion blowing a hole in the wall. (This screenshot shows the right tank destroyed. Things will be a little different if you blew up the left tank. Details are below.)
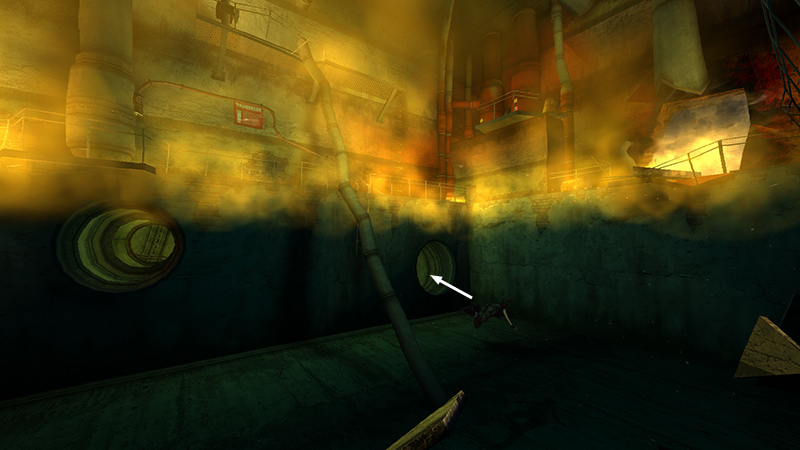
Stay underwater because there's burning fuel on the surface, and Lara will die instantly if she tries to surface. There are two openings on the left side of the pool. Swim through either one. If you go through the pipe nearer the fuel tanks...
...take the second left.
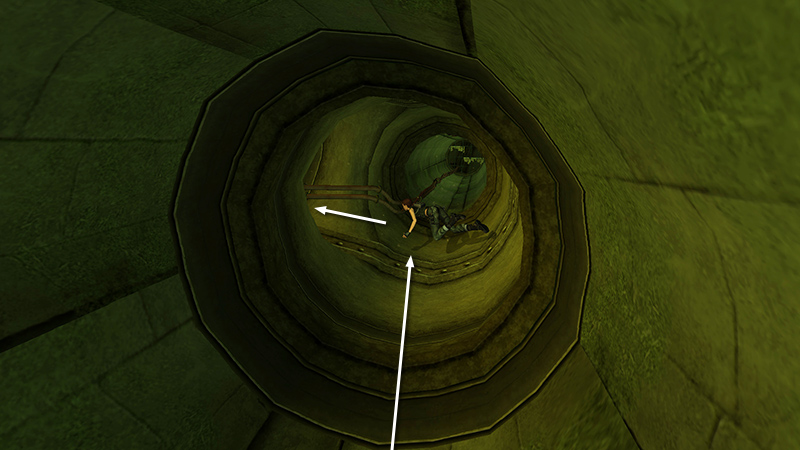
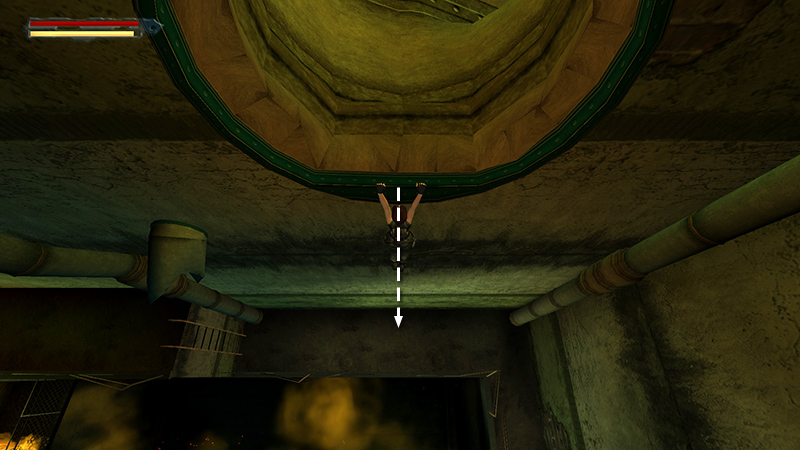
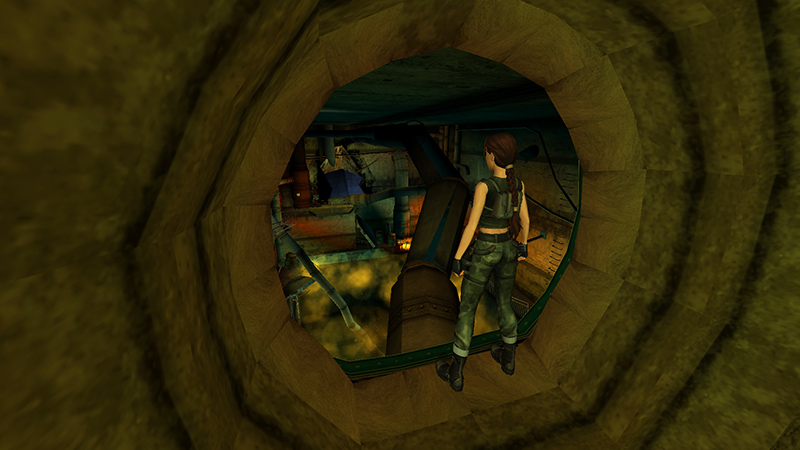
Then continue straight on as the pipe slopes upward and you can surface. (The alternative isn't shown here, but if you go through the other opening, swim straight ahead to a T-intersection, then turn left, and continue forward until you can surface in the same spot shown above.) Continue forward, left...
...then left again, to an opening overlooking the flaming pool.
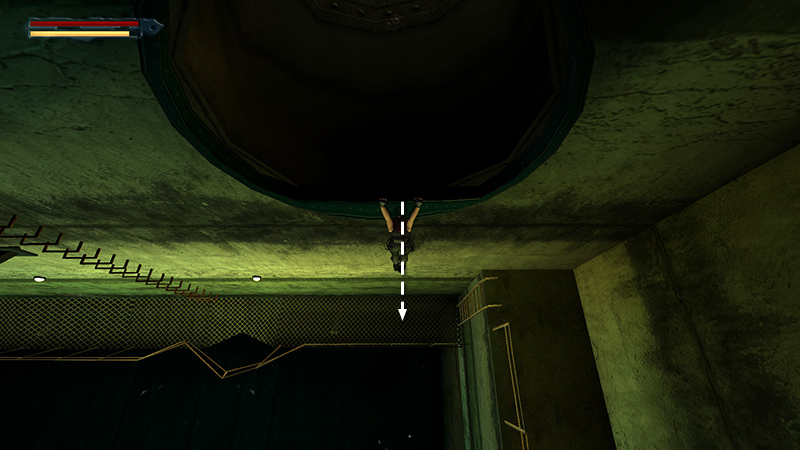
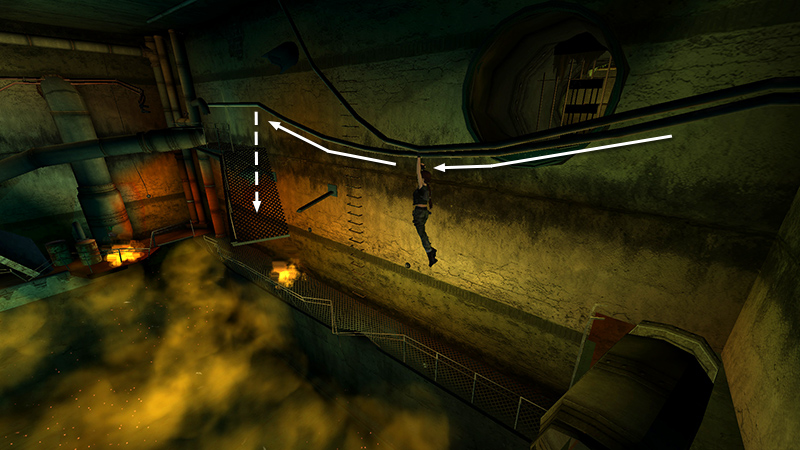
Depending on whether you blew up the right or left tank, the landscape here will be different. If the right tank exploded, the room is basically intact, though small fires burn here and there. There are a few different ways to get out. I found this path easiest: Safety drop from the opening to the walkway below.
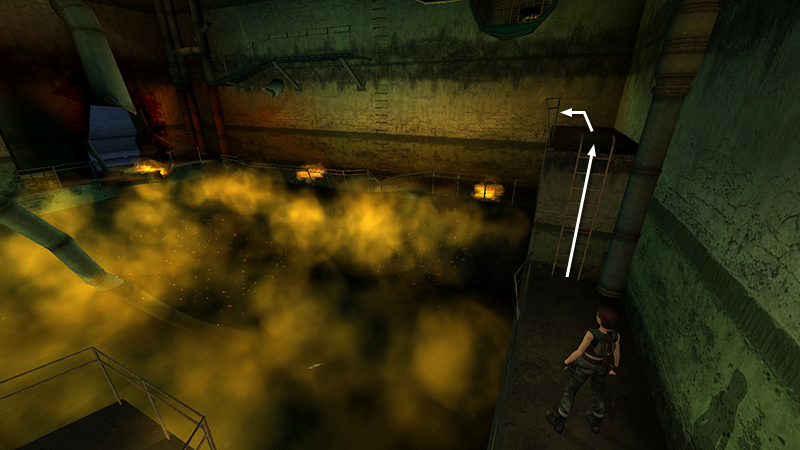
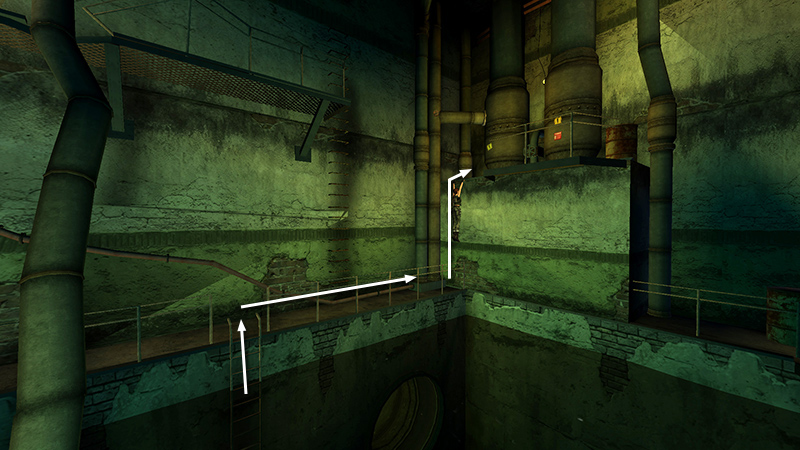
Climb the short ladder to the left (right if facing the pool) and follow the concrete ledge to the corner, but don't climb down the next ladder.

Instead jump forward over the first small fire, taking care to land near the wall to avoid the gap in the walkway ahead. Now you could take a running jump over the second small fire, but if you want to be extra safe, climb the ladder, cross the catwalk, and drop down on the other side.
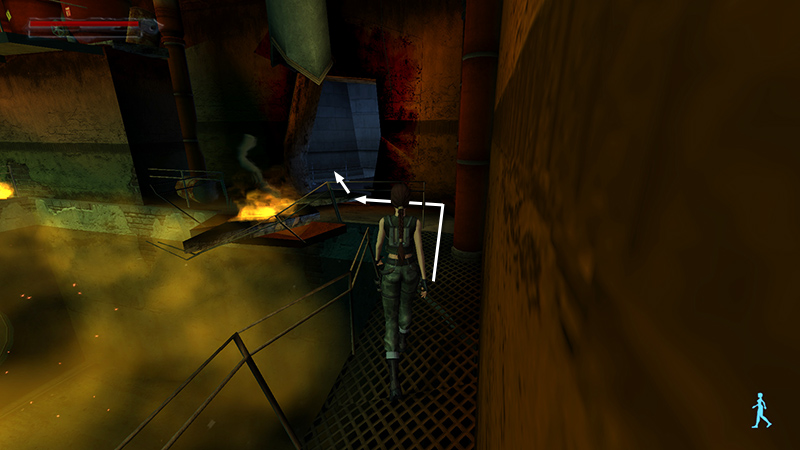
Move around the corner, carefully avoiding the third fire, and go through the gaping hole you made. (Skip down to the last screenshot.)
- OR -
Alternatively, if the left tank exploded, there will be a lot of debris in the room with the pool. You can't cross all the way over on the big pipe.
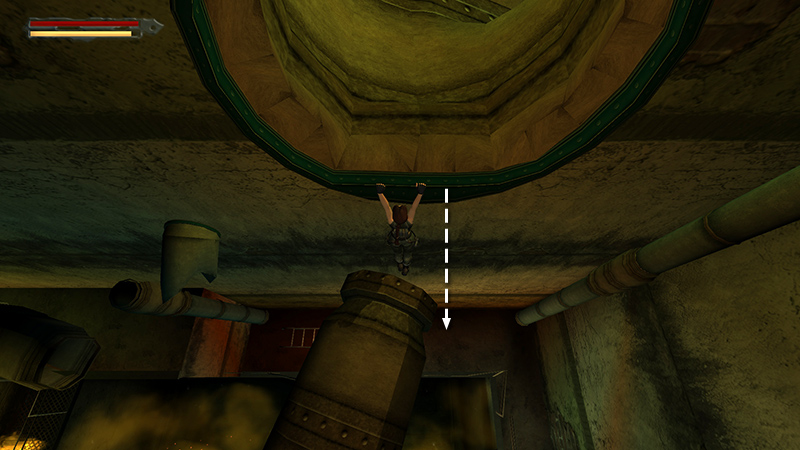
So instead safety drop from the opening to the walkway below.
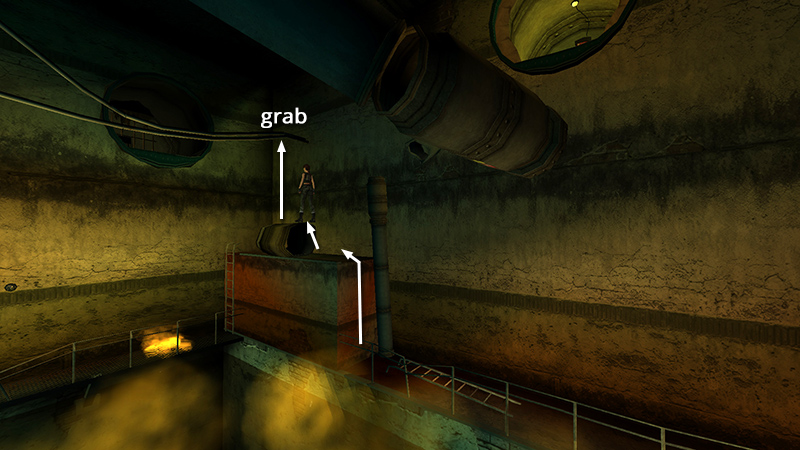
Turn left and climb onto the ledge near the broken ladder. Vault up onto the piece of broken pipe and jump straight up to grab the narrow pipe overhead.
Climb hand over hand across the flaming pool. At the end, let go to land on the mangled catwalk.
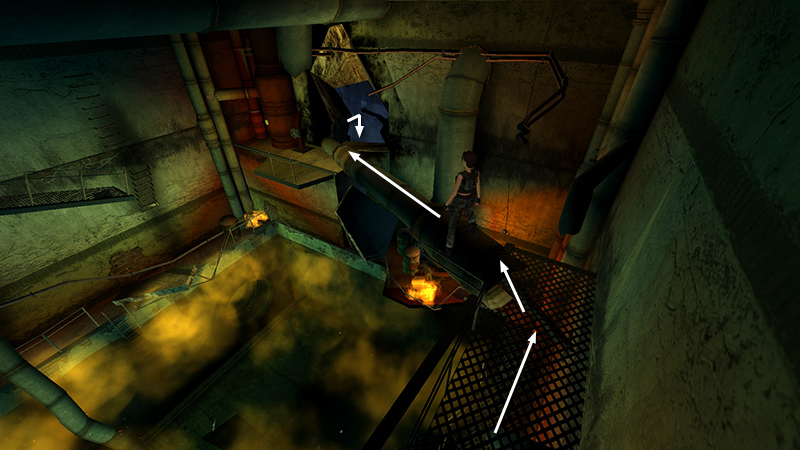
Cross the catwalk, climb onto the fat pipe, and walk across to the opening you made. Hop down into the room beyond.
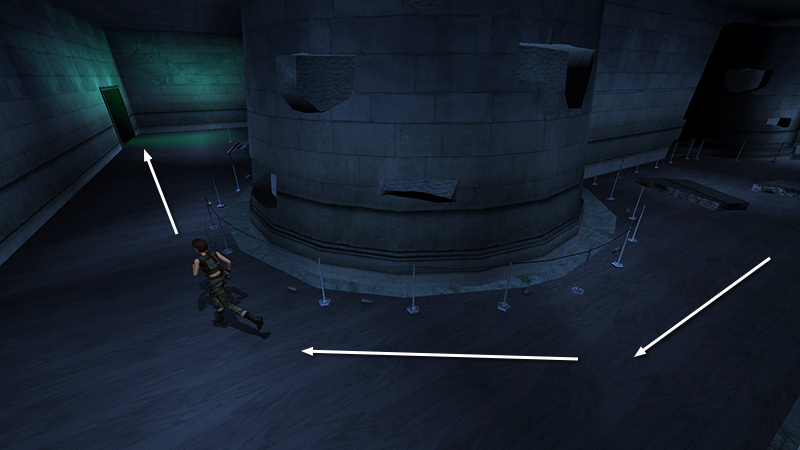
Follow the dimly lit corridor to the left. Approach the double doors to end the level.
DARK MODE: I plan to add optional dark mode for these pages, but my current priority is updating the walkthroughs. Meanwhile, may I suggest a reputable dark mode browser extension, such as Dark Reader? (Download only from trusted sites, like darkreader.org or your browser's official add-on/extension site.)
Walkthrough text and diagrams copyright © Stellalune (email ). Feel free to copy or print this walkthrough for personal use. By all means, share it with friends, but please include this credit line so people can send me their feedback. No part of this walkthrough may be reproduced on another site without permission.