Serpent Rouge - Tricky Jump from Moving Rig to Lighting Booth Door
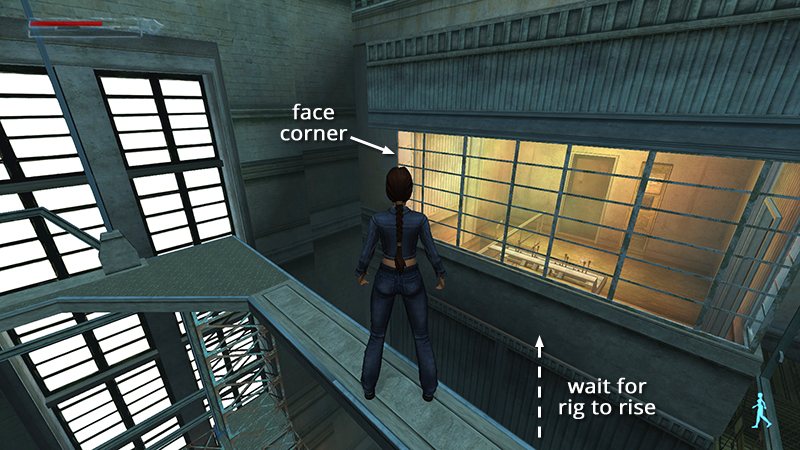
Instead of jumping across to the opposite corner of the lighting rig, position Lara about halfway along the edge of the moving rig nearest the glassed-in LIGHTING BOOTH. Turn so she faces the left corner of the lighting booth, wait until the rig moves to its highest position...
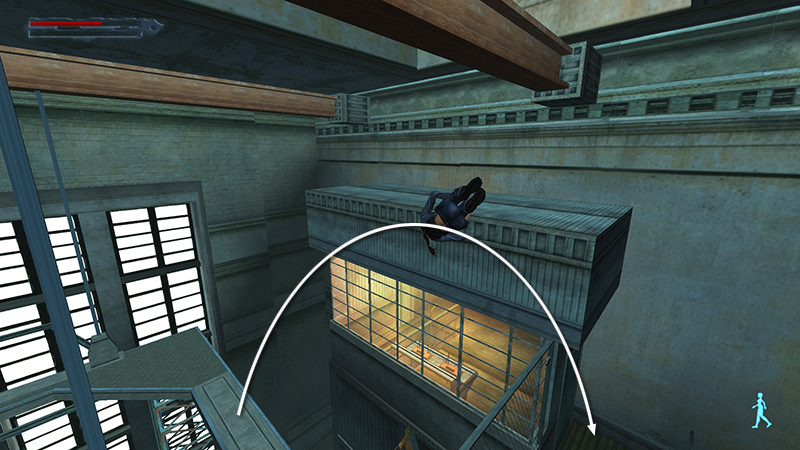
...then side flip to the right to clear the fence...
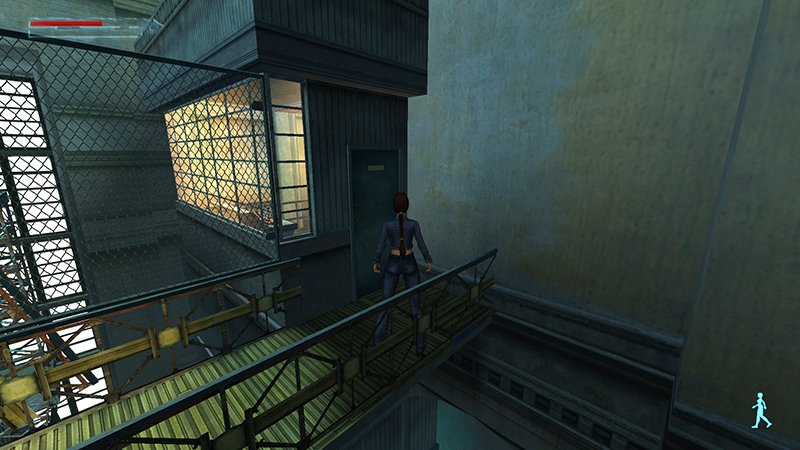
...and land just outside the LIGHTING BOOTH door.
Positioning is key here. If Lara is too far to the right before jumping, she'll overshoot the walkway. If she's too far to the left, or not angled correctly, she'll hit the fence. After making the jump, continue by kicking down the drawbridge for the strength upgrade, as described in the main walkthrough.
DARK MODE: I plan to add optional dark mode for these pages, but my current priority is updating the walkthroughs. Meanwhile, may I suggest a reputable dark mode browser extension, such as Dark Reader? (Download only from trusted sites, like darkreader.org or your browser's official add-on/extension site.)
Walkthrough text and diagrams copyright © Stellalune (email ). Feel free to copy or print this walkthrough for personal use. By all means, share it with friends, but please include this credit line so people can send me their feedback. No part of this walkthrough may be reproduced on another site without permission.