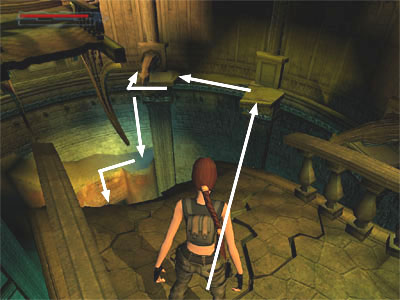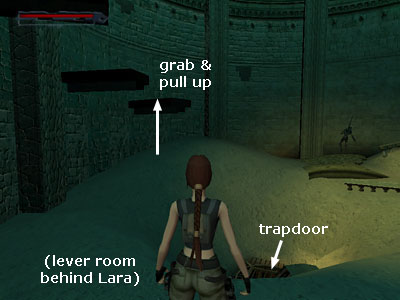
From the end of the broken bridge, take a carefully angled running jump to grab the small ledge with no gargoyle located between the two ledges that do have gargoyles. Pull up. Turn left, walk to the edge of the ledge and take a standing jump to grab the next ledge with the gargoyle. Lara won't shimmy all the way around, so pull up, drop and hang off the front of the ledge and shimmy around to the far side. Drop to the sandy ledge below.
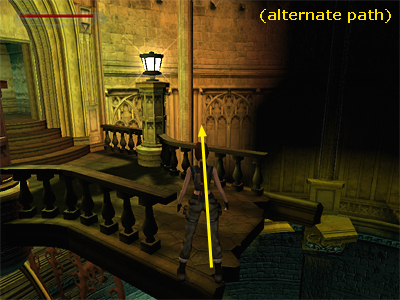
If you're having trouble making the first jump from the end of the bridge to the ledge, try the alternate path shown in the next two screenshots. Otherwise, skip down to the fourth screenshot for the next step.

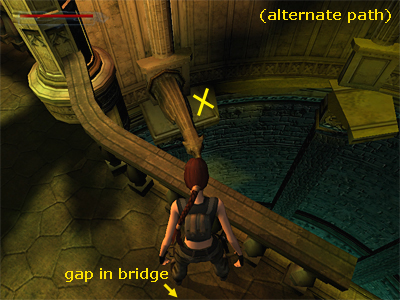
Instead of making the long diagonal jump from the end of the bridge near where you got the bandages, jump back across the gap to the other side of the bridge. Look down over the edge to spot a ledge with a gargoyle and one with no gargoyle to the right of it. Instead of aiming for the ledge with no gargoyle, you'll be jumping onto the one with the gargoyle. The spot is marked with a yellow X in the screenshot above.

To get there, position Lara at the outer corner of the broken bridge, as shown in the screenshot above. If you aim just to the right of the vertical column on the wall and then take a running jump over the railing, Lara should land on the ledge next to the gargoyle. Drop and hang off the front of the ledge and shimmy around to the far side. Then drop to the sandy ledge below, as shown in the first screenshot above.

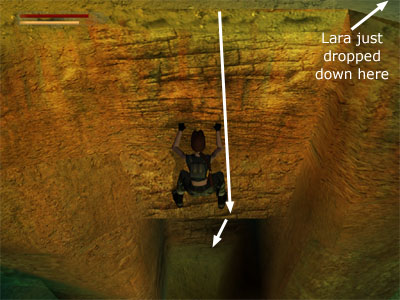
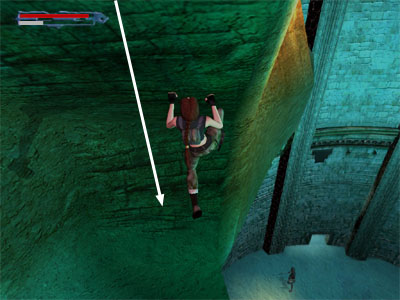
Walk to the middle of this ledge, drop and hang from the edge and climb down the rock face. (The screenshot above shows a closer view of the same spot indicated by the bent arrow in the previous screenshot.)

Lara won't have any trouble climbing down the underside of the rock face as long as you keep moving. Continue climbing to the ledge below.

When you reach the ledge below, turn left, grab the climbable wall and climb to the left, all the way around to the back of the rock wall.

Then climb down to the ledge below.
[Return to the Tomb of the Ancients walkthrough]
Copyright © 2003- - Stellalune (email ). Thanks to Peter K. for the alternate path shown in the second and third screenshots. Feel free to copy or print this walkthrough for personal use. By all means, share it with friends, but please include this credit line so people can send me their feedback. No part of this walkthrough may be reproduced on another site without permission. Follow this link for details about this site's advertising and privacy policy.
|
