Old Mill - Level Start and "Animal Instinct" Achievement/Trophy
Approach the dark gray tile just ahead on the path. You're missing an item, so you can't interact with the tile yet, but if you continue forward a cutscene ensues. You'll want to watch it at least once for the "Fail Compilation" achievement/trophy (introduced in the GALLOWS TREE level).
Cutscene: A demon horseman appears on the hillside. He tries to cut Lara down, then dismounts, grabs her, and throws her back to the beginning of the path.
So you can't pass that way yet. For now, enter the tunnel on the left and follow it through several turns...
...and a shallow pit, where you need to hop down then climb out on the other side. At the first T-intersection, turn right. (We'll explore to the left in a little while.)

Head up the ramp to emerge outdoors.
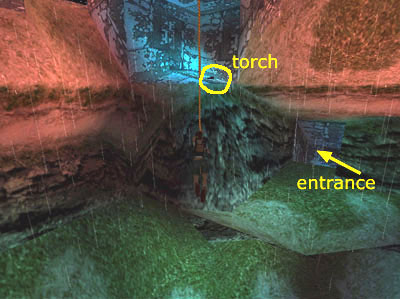
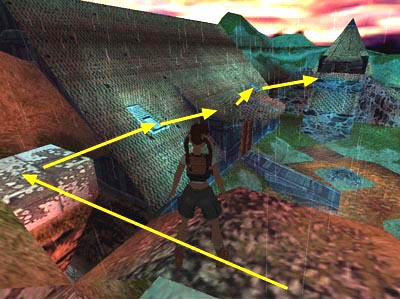
Cutscene: An overview of the area, a deep chasm with a rope dangling above and a pair of changelings frolicking on a ledge. Notice the WOODEN TORCH on the corner ledge above and to the left of the tunnel entrance.
As soon as they notice Lara, the changelings start throwing rocks at her. You'll need to find a way to distract them.
NOTE: The main walkthrough includes rope-swinging controls and tips.
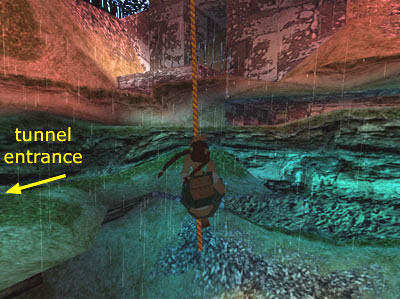
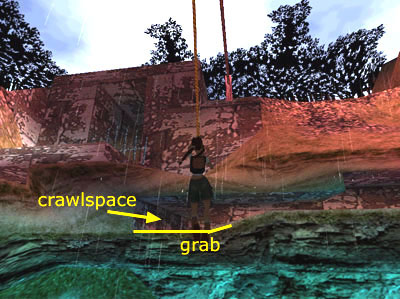
Walk to the edge of the chasm and line Lara up so she's squarely facing the dangling rope. (Use the Look button to make sure. Her head should be in line with the rope.)
Take a standing jump to grab the rope.
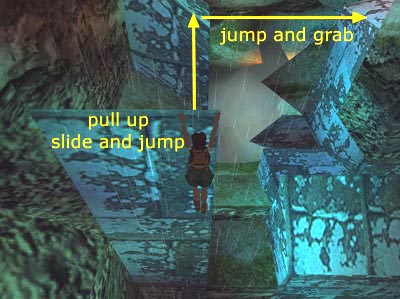
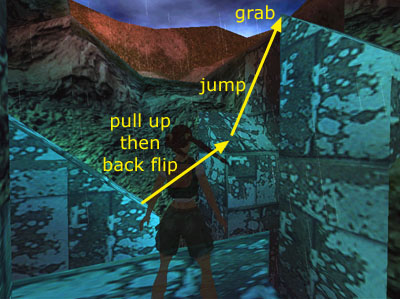
Slide down the rope as far as you can. Then rotate...
...to face the ledge with the TORCH, above and to the left of the tunnel entrance. Again, press Look to check your angle and adjust if necessary.
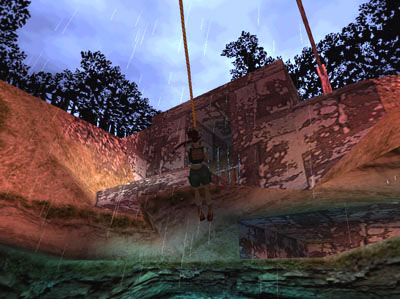
Hold Sprint/Dash, while continuing to hold Action, to build up a good, long swing.
Then, at the highest point in the forward swing, press Jump to leap off the rope and land on the ledge.

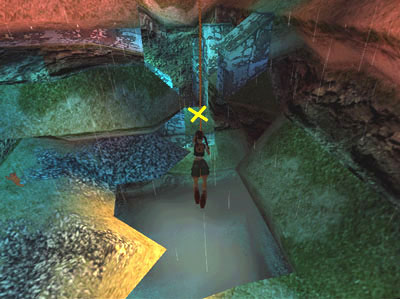
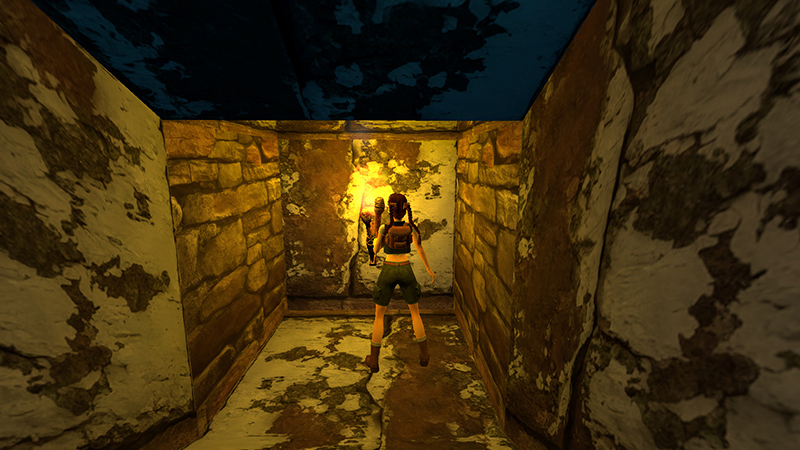
Grab the TORCH (not counted as an official pickup).
Immediately slide down to the ledge in front of the tunnel and run inside to safety.

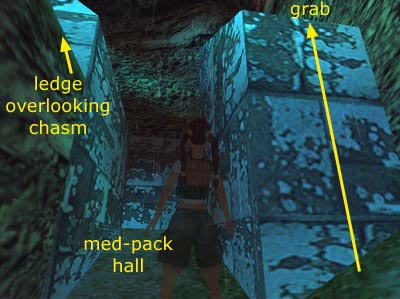
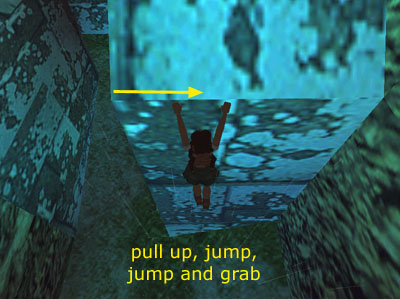
Follow the passage forward, then right.
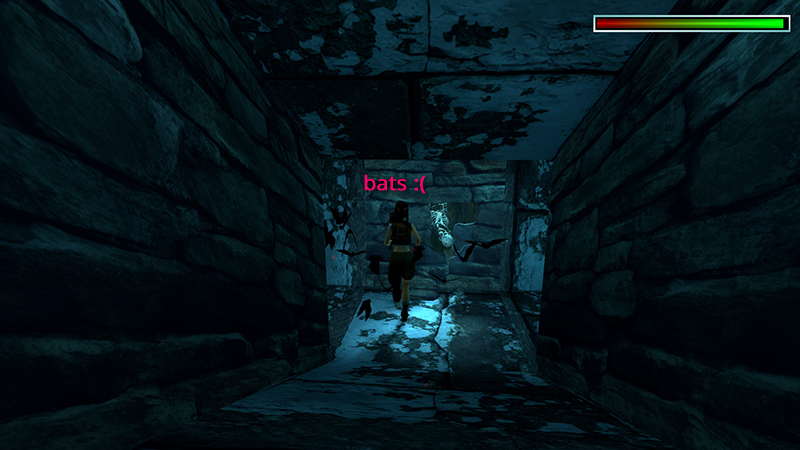
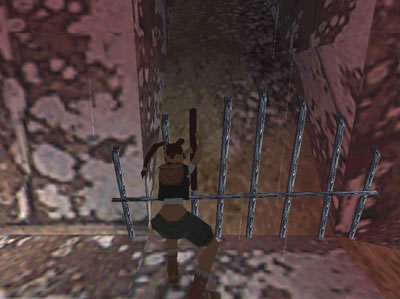
You'll meet a flock of bats at the next T-intersection, where there's a skeleton trapped in the wall. Keep moving until they disperse, or drop the torch and crawl to avoid taking too much damage.
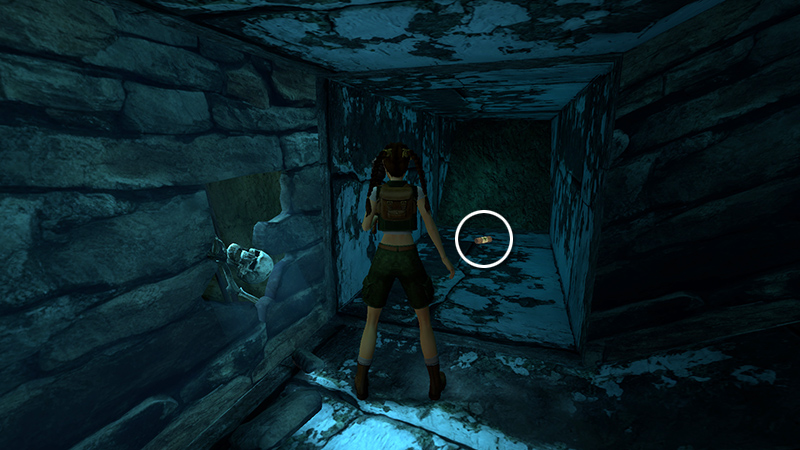
You'll have to drop it anyway to pick up the small medipack (1) (164/239) on the floor to the right of the skeleton.
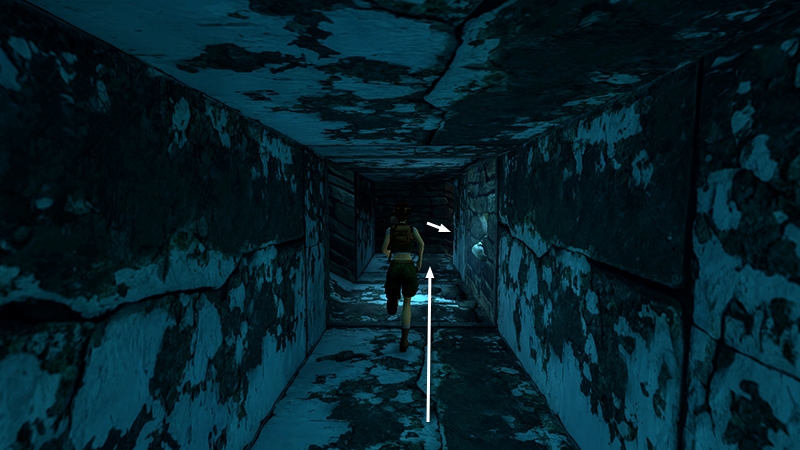
Retrieve the torch and continue along the passage to the bottom.
Here you'll find a burning torch mounted on the wall. Light your torch here and return outside.
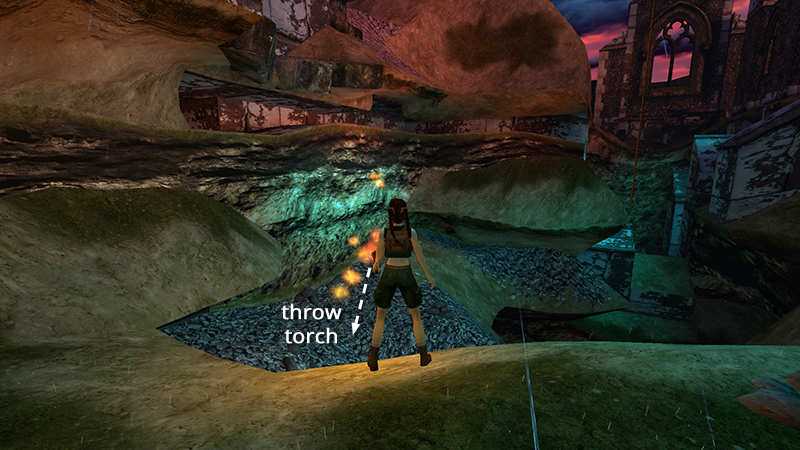
Quick-save in case you slip or accidentally toss the torch into the chasm. Walk to the edge and throw the lit torch onto the ledge with the changelings.
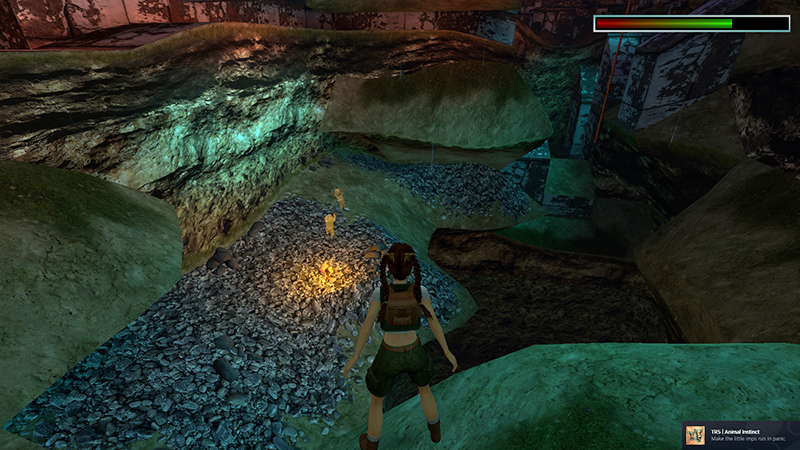
They freak out, and you get the "Animal Instinct" achievement/trophy in the process. Now you can explore in peace.
DARK MODE: I plan to add optional dark mode for these pages, but my current priority is updating the walkthroughs. Meanwhile, may I suggest a reputable dark mode browser extension, such as Dark Reader? (Download only from trusted sites, like darkreader.org or your browser's web store.)
Walkthrough text and diagrams copyright © Stellalune (email ). Feel free to copy or print this walkthrough for personal use. By all means, share it with friends, but please include this credit line so people can send me their feedback. No part of this walkthrough may be reproduced on another site without permission.