The Great Wall - Zip Line and Level Exit
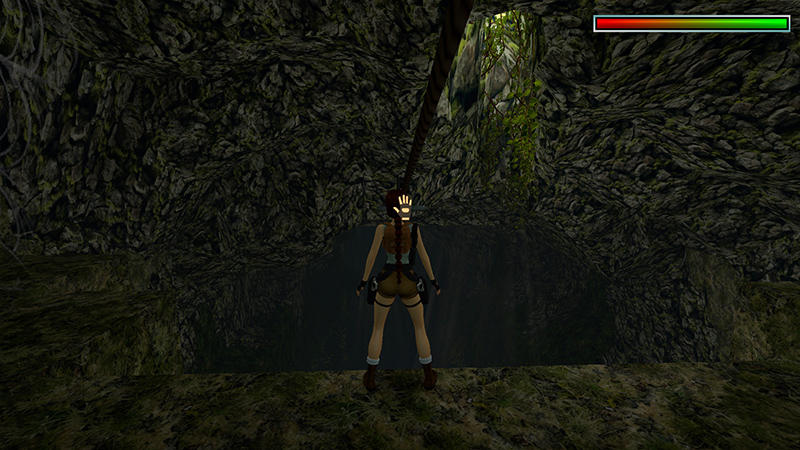
Grab the zip line handle and hold on...
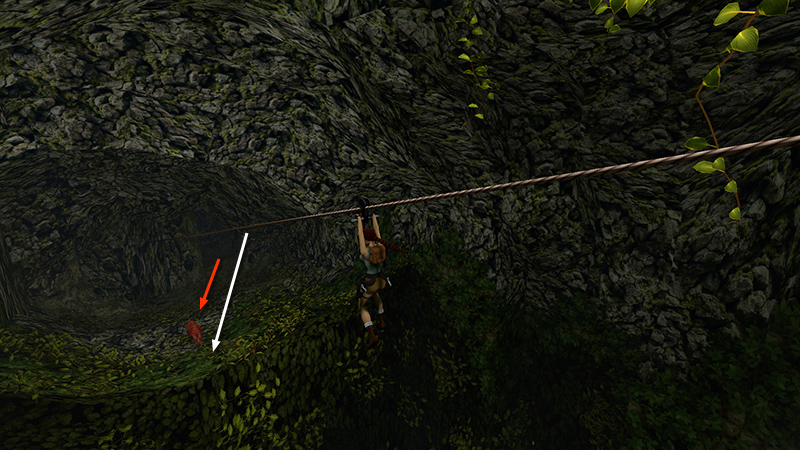
...as you slide down to the opposite side of the cavern. Two tigers (22-23) emerge from the doorway ahead.
There are several ways of dealing with these enemies. If you decide to fight them in the open, make sure you switch back to pistols (hotkey 1 on the keyboard) if you last used grenades, and watch out for the drop-off. You don't want to go extinct like you-know-who. If Lara takes a little damage here, don't fret. You're almost at the end of the level, and your health will soon be fully restored. (When both tigers are dead, skip down to the exit, below.)
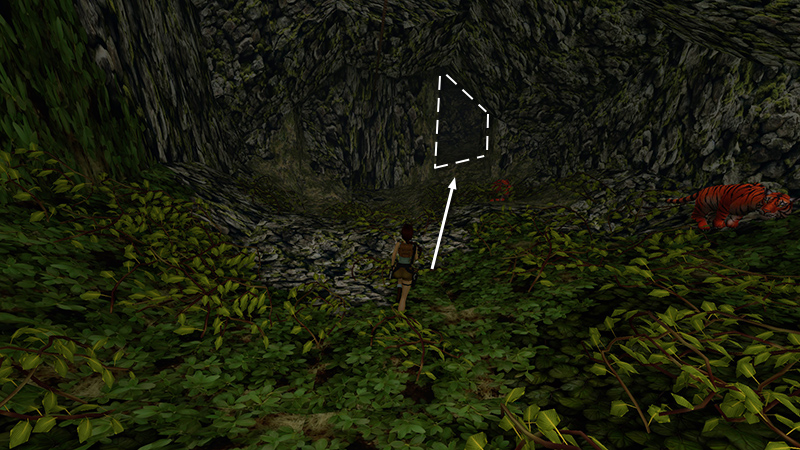
If you don't care about getting all kills (there's no achievement/trophy for it), run/jump past the tigers into the opening ahead on the right.
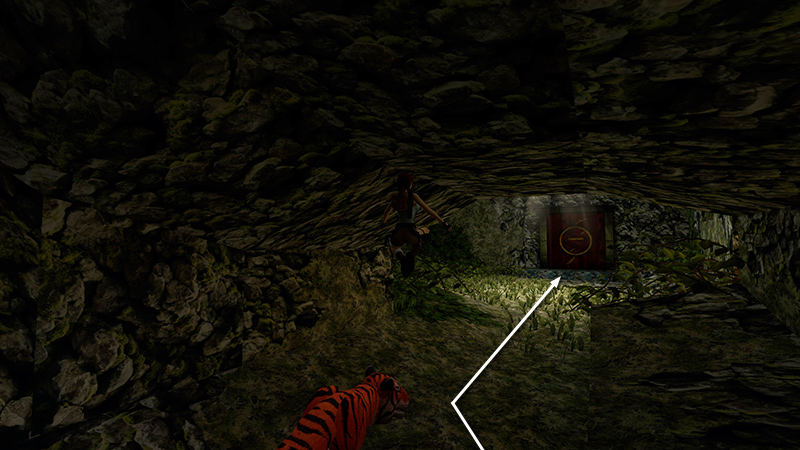
Turn right and follow the tunnel to the next room. Run/jump forward toward the ornate wooden doors to trigger the end-of-level cutscene.
- OR -
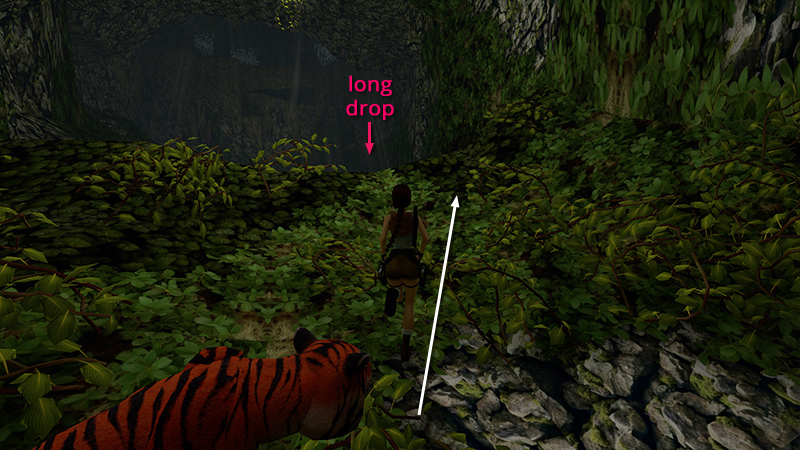
If you want a safe spot to shoot from, after letting go of the zip line, roll and run toward the right side of the drop-off.
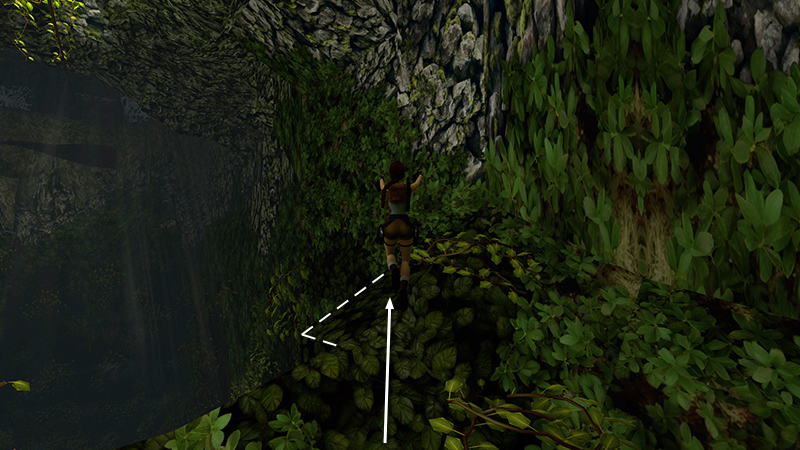
There's a small, square ledge protruding from the right wall, just beyond the edge. Jump onto it.
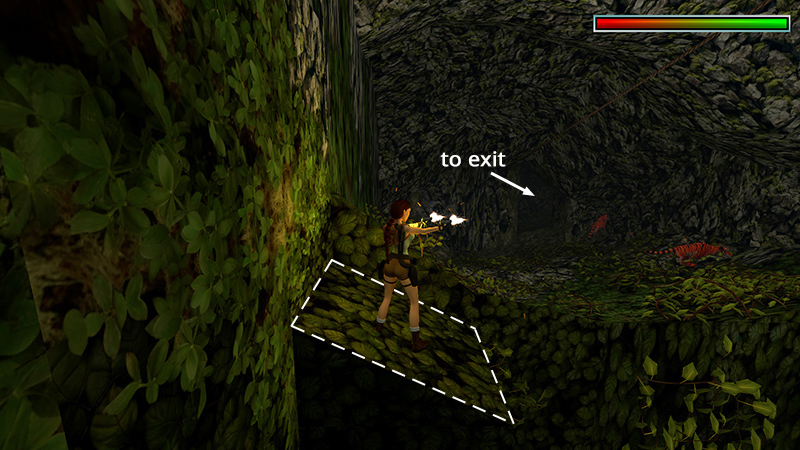
The tigers can't reach Lara there, so you can shoot them whenever they move into range. When the coast is clear, proceed through the tunnel to the next room.
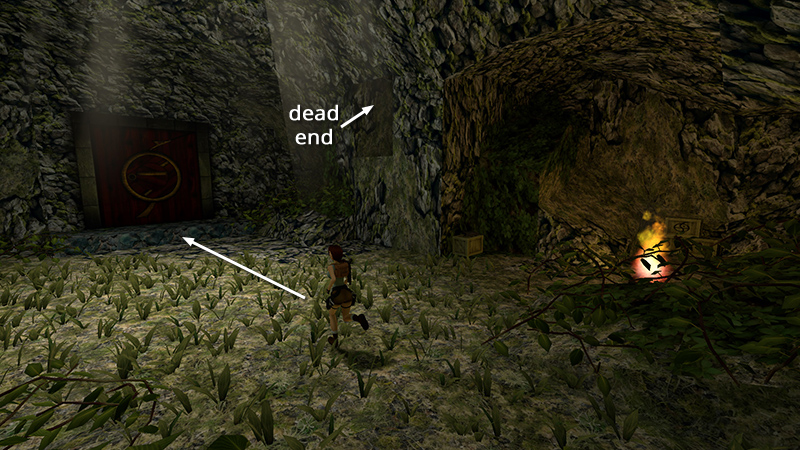
You'll emerge near a large, wooden door, which should look familiar if you watched the opening movie. There's nothing much you can do here, though the campfire will kill Lara if she gets too close. The raised opening on the right is a dead end. You can take a peek using Photo Mode but there's nothing there. It's where the enemy comes from in the next cutscene.
Approach the wooden door to finish the level. The achievement/trophy "These Doors Are Waiting" unlocks automatically.
DARK MODE: I plan to add optional dark mode for these pages, but my current priority is updating the walkthroughs. Meanwhile, may I suggest a reputable dark mode browser extension, such as Dark Reader? (Download only from trusted sites, like darkreader.org or your browser's official add-on/extension site.)
Walkthrough text and diagrams copyright © Stellalune (email ). Feel free to copy or print this walkthrough for personal use. By all means, share it with friends, but please include this credit line so people can send me their feedback. No part of this walkthrough may be reproduced on another site without permission.