Palace Midas - Room with Five Switches
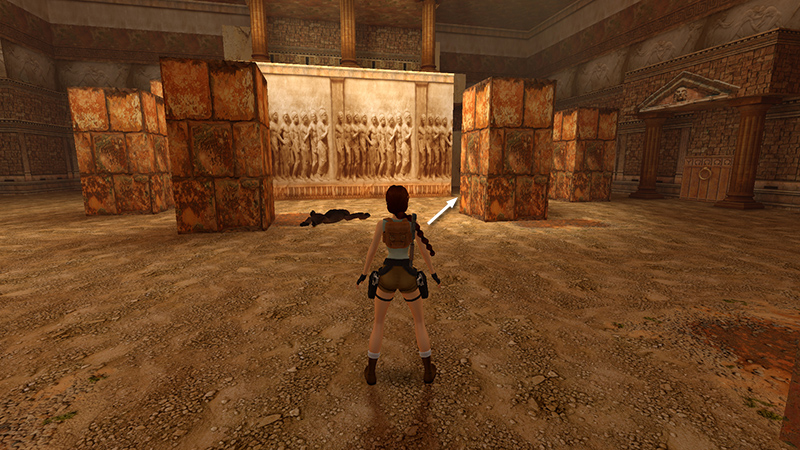
Before climbing up to the switches, pick up a few items: Cross to the far right (southeast) corner of the room.
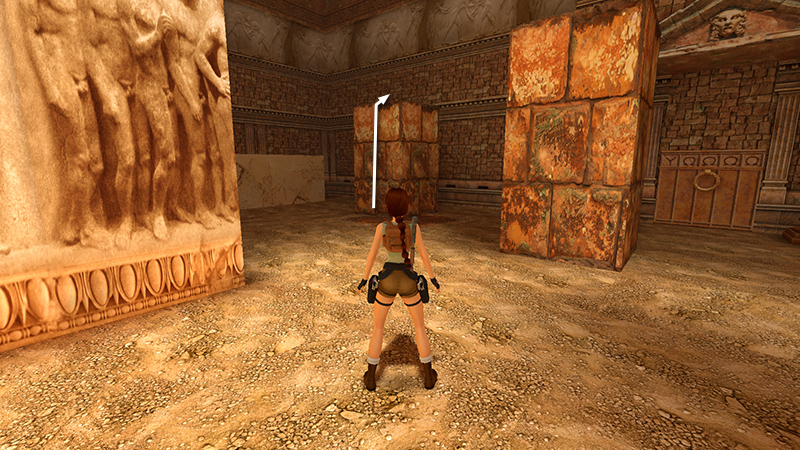
Here you'll find the lowest pillar. Climb on top.
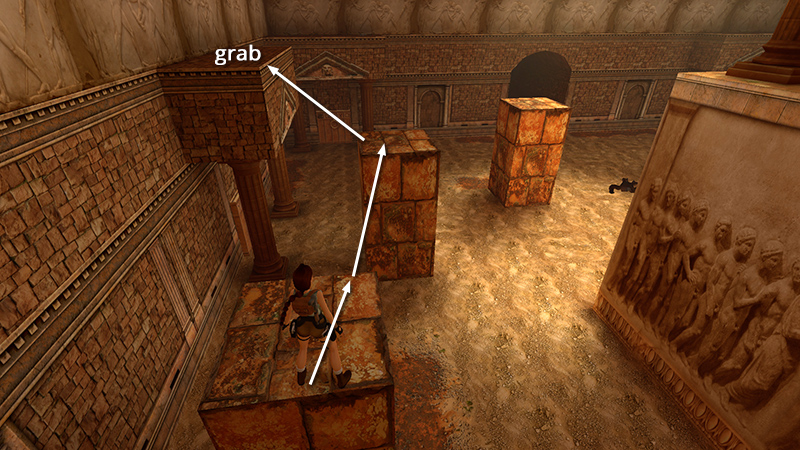
Take a running jump over to the next pillar. Then turn left, walk to the edge, and take a standing jump to grab the ledge above the door on the south wall. Pull up.
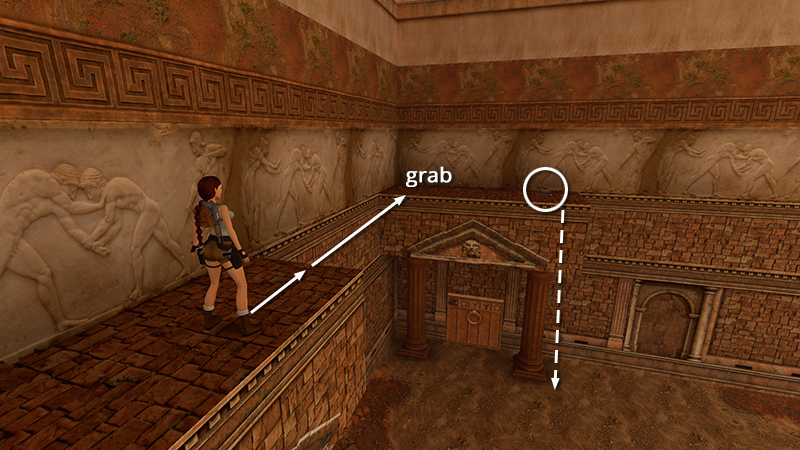
Follow this ledge to the far end and take a running jump to grab the ledge above the door in the southwest corner. Pull up and retrieve some magnum clips (4) and a small medi pack (5). Safety drop to the floor.
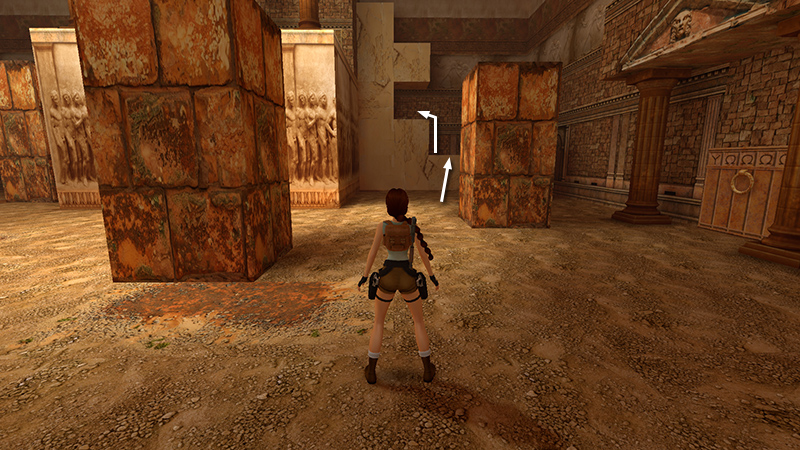
Return to the southeast corner and climb onto the blocky tan structure to the right of the switch platform. Climb up to the second level.
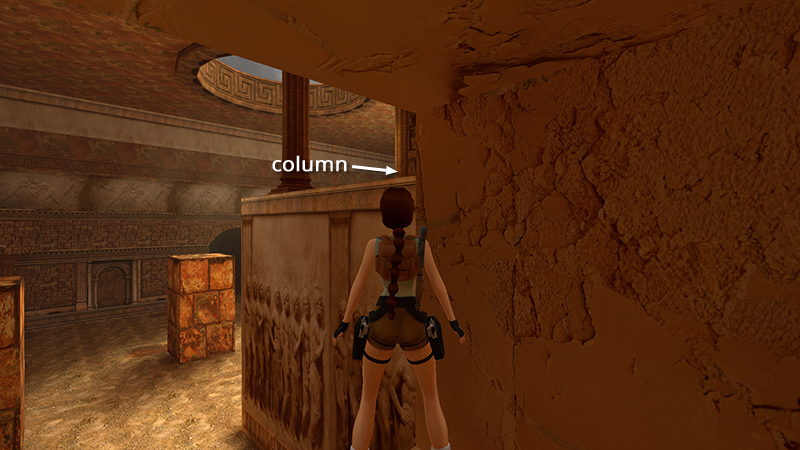
Position Lara at the corner of the ledge nearest the switch platform, facing it at about a 45-degree angle. Check the angle by using the Look button to make sure Lara's head is lined up with the second fluted golden column from the left side of the switch platform.
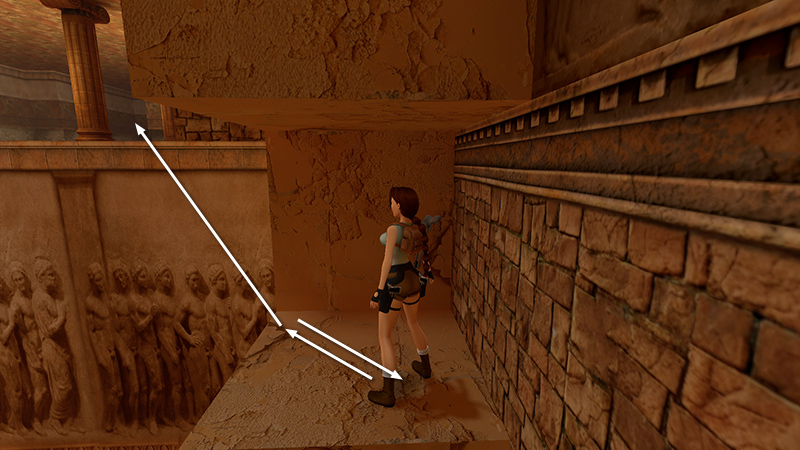
Hop back and then take a running jump (without grabbing)...
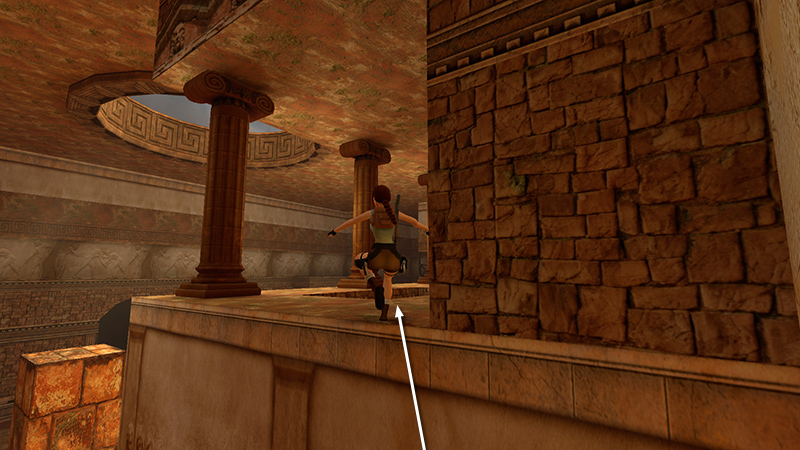
...to land on the platform.
- OR -
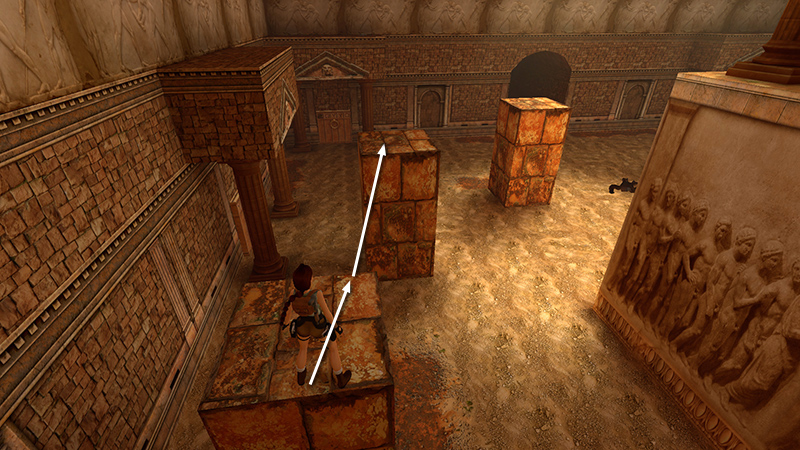
If you have trouble making the jump from the tan structure to the ledge with the switches, you can go the long way: Return to the shortest pillar, climb up, and take a running jump to the second pillar.
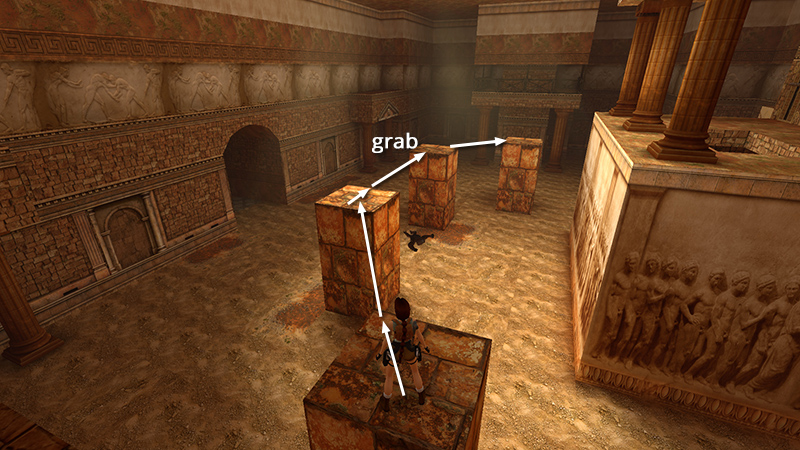
Take another running jump to the third. From there, take a running jump to grab the top of the fourth pillar. Pull up. Take a standing jump from the corner of fourth pillar to land on the fifth.
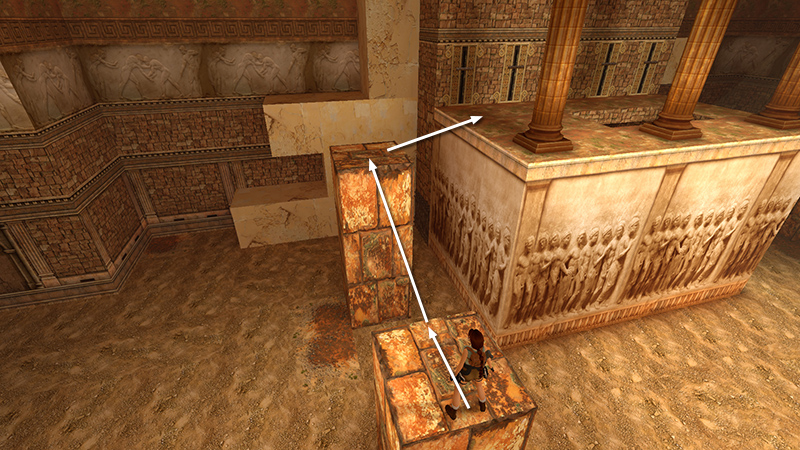
Then take a running jump (without grabbing) to land on the sixth pillar. (A running jump-and-grab also works.) Now jump over to the switch platform, which should be on your immediate right.
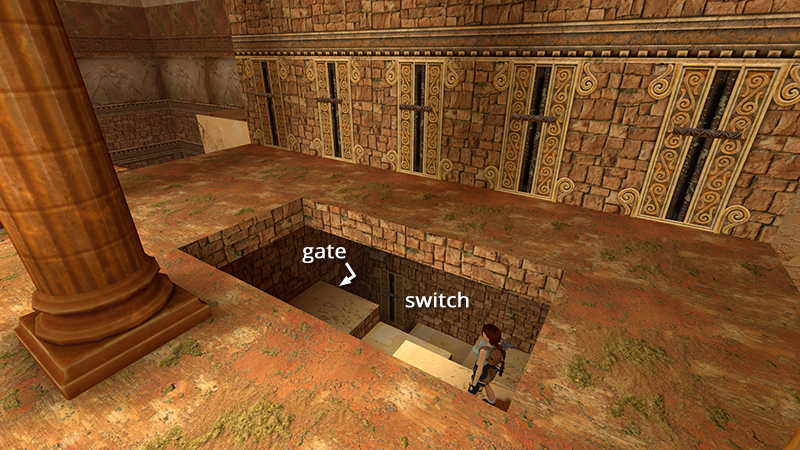
Before doing anything else, drop through the hole in the floor and use the switch below to open the nearby gate. Now you can reach the switches more easily next time.
DARK MODE: I plan to add optional dark mode for these pages, but my current priority is updating the walkthroughs. Meanwhile, may I suggest a reputable dark mode browser extension, such as Dark Reader? (Download only from trusted sites, like darkreader.org or your browser's web store.)
Walkthrough text and diagrams copyright © Stellalune (email ). Feel free to copy or print this walkthrough for personal use. By all means, share it with friends, but please include this credit line so people can send me their feedback. No part of this walkthrough may be reproduced on another site without permission.