Kuwaq Yaku – Trinity Encampment Stealth Approach (part 2)
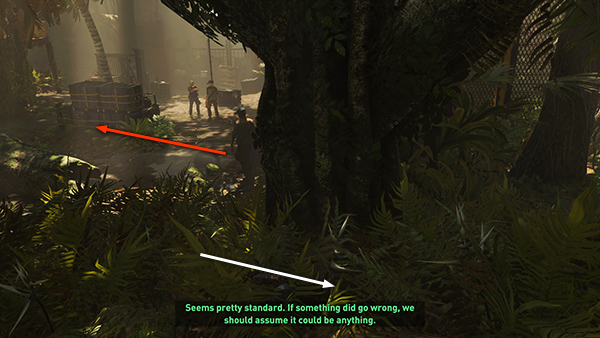
Wait in the bushes near the big tree for the first man (nearest on the right) to move behind the stack of storage boxes. When he does, step back behind the tree a bit so the others won't see Lara when she stands up to draw her bow.
When the first man crouches to look at something, you can use your bow to kill him with a silent headshot. Since his body is hidden behind the boxes, the other men shouldn't notice right away.
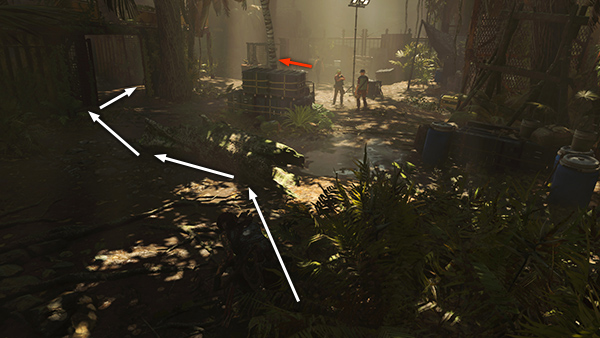
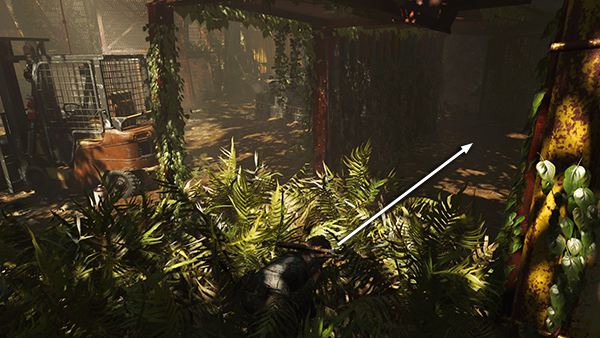
Stay in hiding and wait for the second man (farthest away) to move off to the left. As he goes, you can also move to the left, taking cover first behind the fallen tree, then moving into the metal structure on the far left.
Inside the metal structure is a vine-covered wall where Lara can hide. Creep along the wall to the left and watch that second man. When he heads back toward the others, move into the bushes in the corner farthest from where you entered this area.
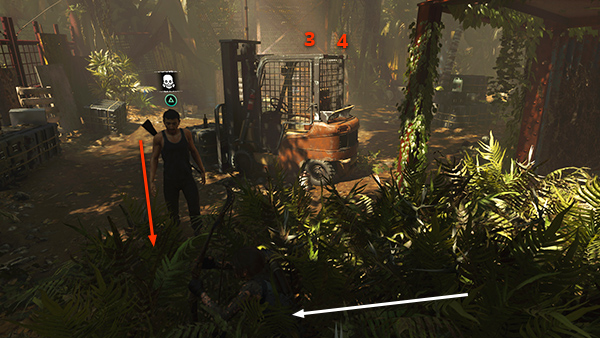
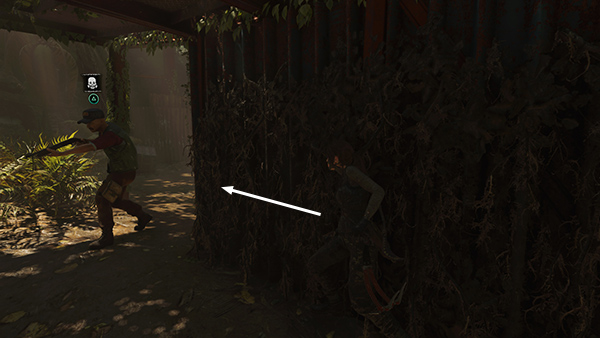
Stay hidden in the bushes but adjust Lara's position so the men on the other side of the forklift (#3 and #4) can't see her. Then wait for the second man to return this way. When you see the Melee icon, press the button...
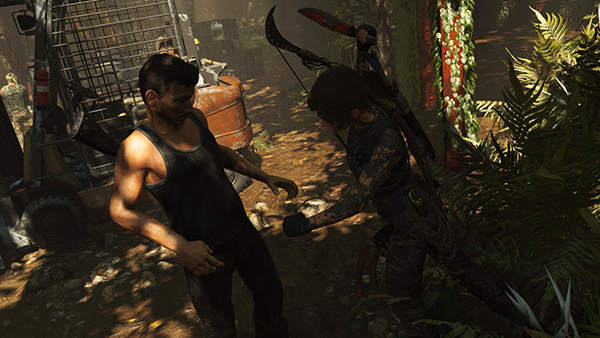
...to kill him quietly and drag his body into the bushes. And then there were two.
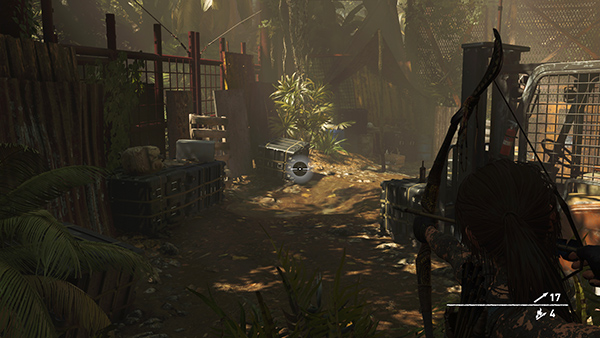
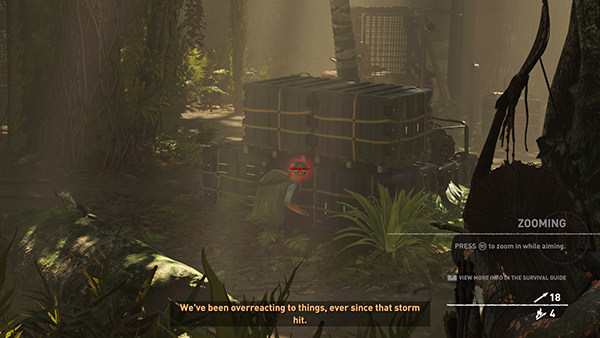
From that same position in the bushes, shoot an arrow into the junk near the fence in front of the forklift.
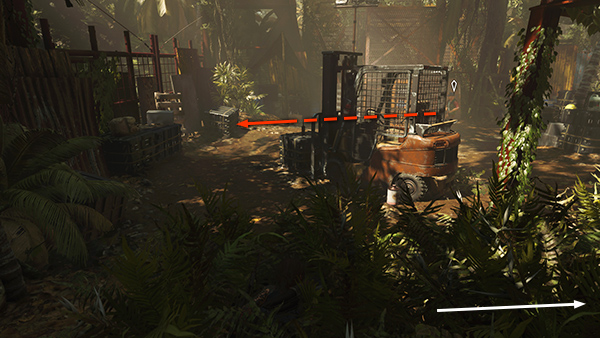
One of the 2 remaining enemies, should go to investigate, allowing you to move back to the right...
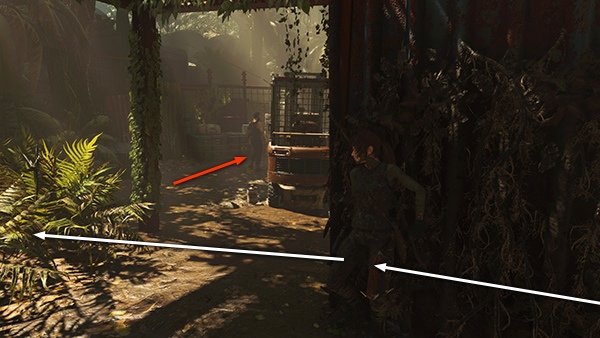
...and make your way to the other end of the vine-covered wall. You'll need to move quickly but quietly, so don't bother hiding among the vines.
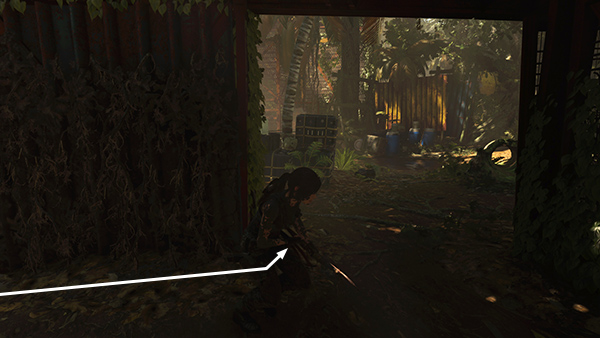
When you reach the end of the wall, turn left...
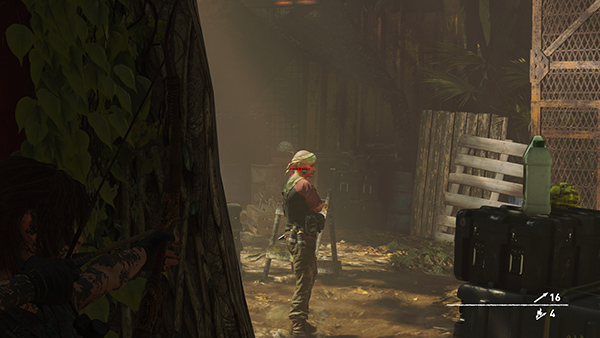
...and take out the third man (i.e. the one who stayed put) with a silent headshot.
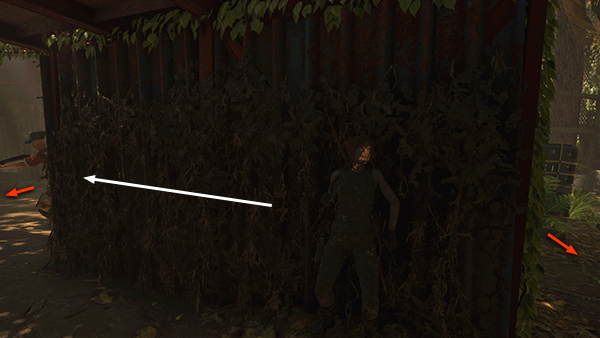
Now that all his friends are dead, the last man finally realizes something is seriously wrong. Now you should move up against the vine-covered wall so he doesn't notice you right away. He may come at you from the left or the right, so position Lara near the middle in order to see both ends of the wall. When Goofus finally moves into view, quickly sidestep in his direction...
...until you see that magic Melee prompt...
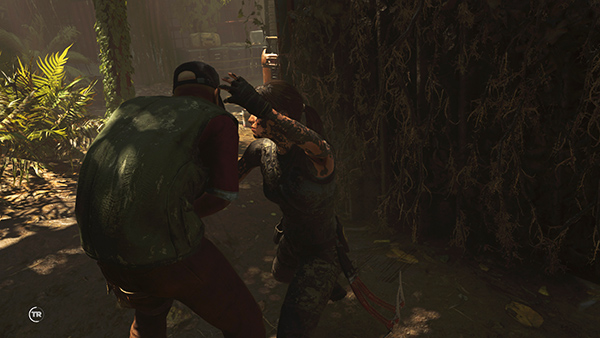
...then let him have it. Now you're in the clear.
[Previous | Kuwaq Yaku Walkthrough]
Copyright © - Stellalune ( ). All rights reserved. Feel free to copy or print this walkthrough for personal use. By all means, share it with friends, but please include this credit line so people can send me their feedback. No part of this walkthrough may be reproduced on another site without permission. Follow this link for details about this site's advertising and privacy policy.