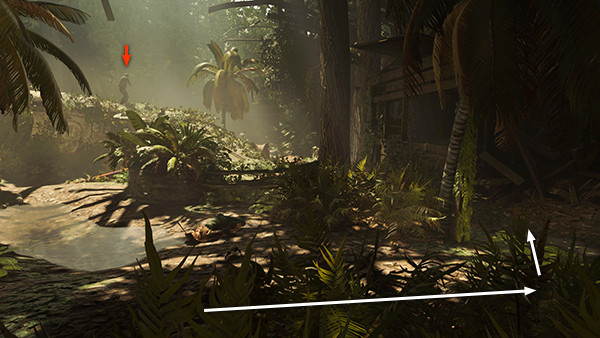
Kuwaq Yaku – Trinity Fight Near the Crashed Airplane
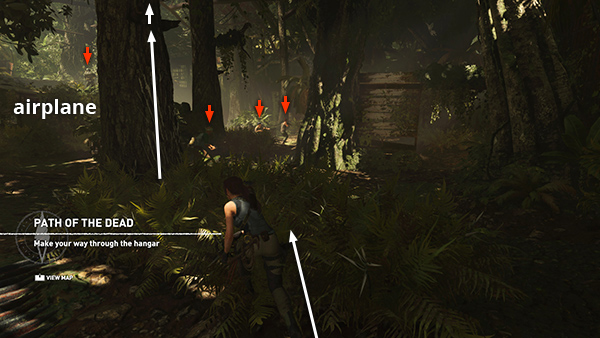
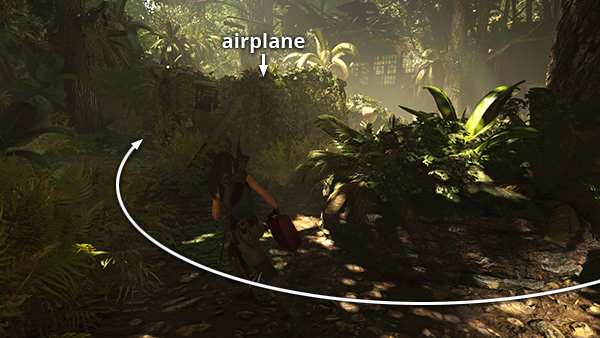
As soon as you enter this area move forward into the bushes to avoid detection. (In addition to the 4 enemies shown here, there's another man just beyond the ones shown here, plus 3 more on the far left beyond the crashed airplane.) Climb the tree on the right.
Make sure the first enemy, standing below, is not being watched (yellow in Survival Instinct) then hold Melee to use the Eagle's Talon attack.
Lara
shoots him with a rope arrow and drags him up the tree, hopefully without the others noticing.
Move into the rickety building ahead on the right and sneak forward into the next patch of greenery.
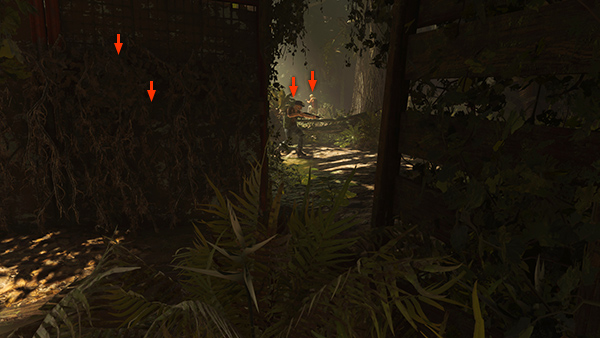
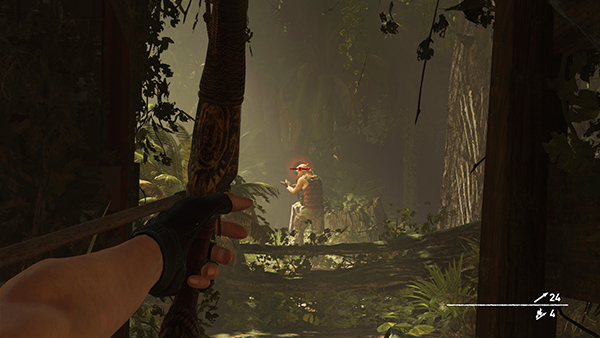
You're well hidden here and you can see 2 of the nearest enemies. (The other orange arrows indicate the unarmored man on the ground and the soldier with the helmet and body armor standing on top of the plane.)
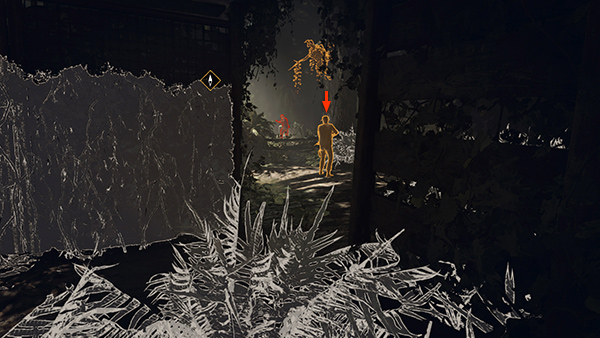
If necessary, check their status with Survival Instinct. When the nearest man faces away from you and is also yellow (meaning he's not being watched by the man to his left)...
...use your bow to kill him with headshot.
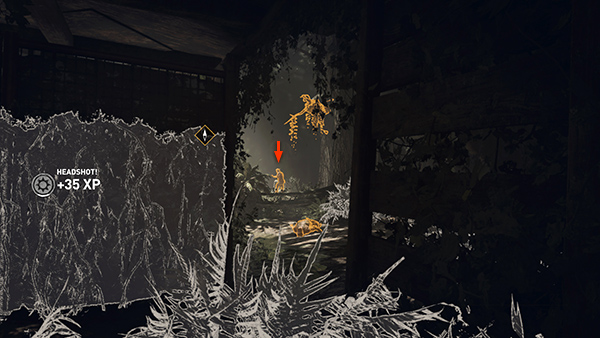
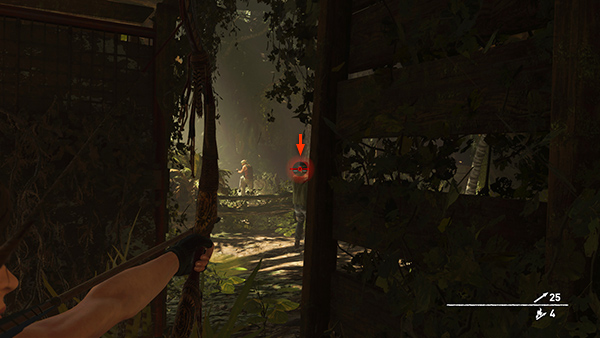
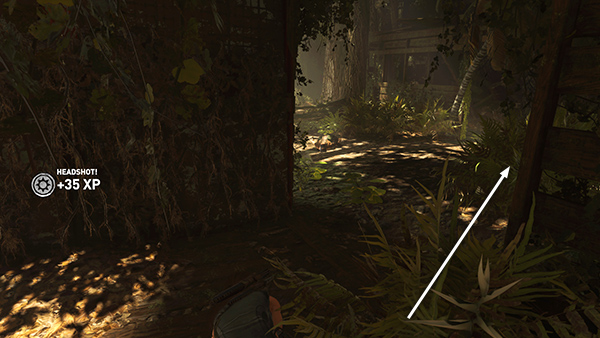
Do the same with the man standing on the other side of the fence. You can move up a little if necessary, but don't go beyond the vine-covered wall or the other men will see you.
Remember you can zoom in while aiming by pressing Z on the keyboard or clicking the right stick (R3), and if you have unlocked the Warrior Skill Raposa's Threat, you'll see an enhanced targeting reticle for headshots.
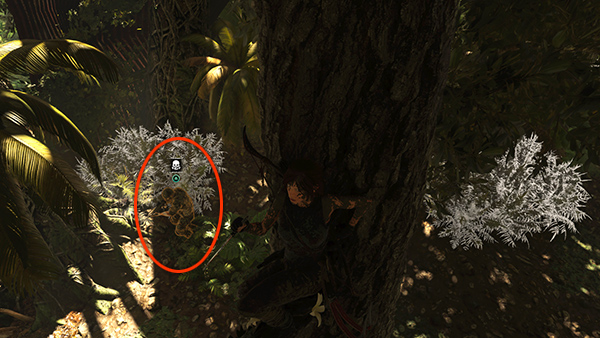
Move into the next clump of bushes ahead on the right.
Lara is still hidden here, but you can now see the low-level mercenary just ahead and the armored soldier standing on the plane. (You may also be able to glimpse the 3 men on the far side of the plane.)
The low-level guy bobs and weaves quite a bit, but if you're patient, you can kill him with a headshot as well.
Now comes the tricky part. The soldier on top of the plane is wearing a helmet, so you can't kill him with a single headshot, and it will take more than one arrow to penetrate his body armor. You'll need a different strategy. Sneak through the bushes to the right and move into the next rickety wooden structure.
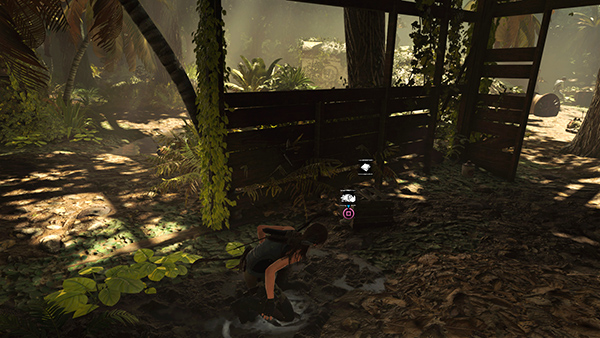
Stand in the mud puddle and press Interact to apply makeshift camouflage.
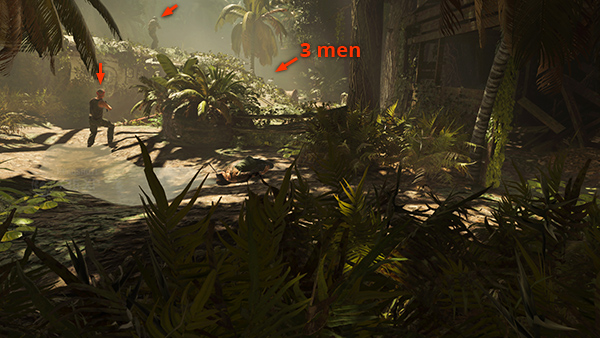
There are also some supplies here, including cloth, which you'll need shortly. You can get a glimpse of the 3 enemies beyond the plane (2 armored, one in regular clothes), but don't attack them yet.
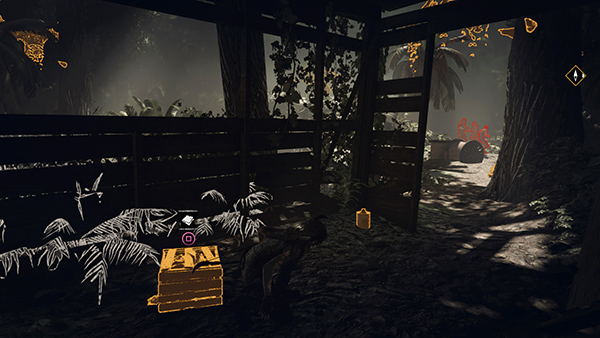
Return to your previous hiding place in the bushes between the shacks, then to the mud-and-vine-covered wall inside the enclosure. Now that Lara is covered in mud, if you move up against this wall, she'll automatically hide among the vines.

Step away from the vines for now and peer out just far enough so you can shoot an arrow into the side of the plane just below where the armored soldier is standing. Do not shoot him or he'll alert the others, and you'll have to fight.
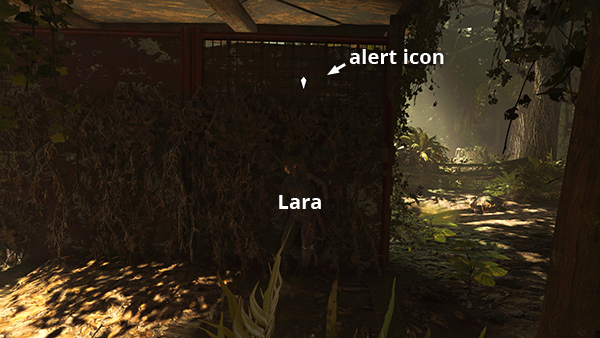
When he hears the arrow, he should go on alert (white icon above his head) and come to investigate. If it doesn't work the first time, try again. Then quickly move up against the wall to hide before he spots you.
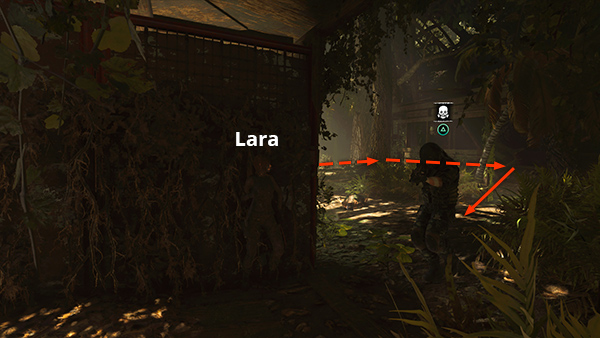
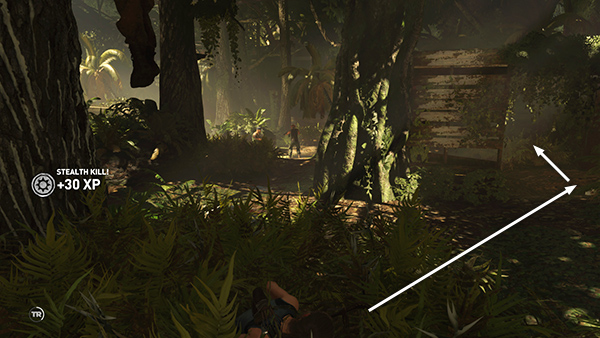
Wait for him to come to you. He'll usually make a sweep through the shack where you found the mud. Just be patient, and if he doesn't take the bait, wait for him to return to the plane and try again. Eventually he should approach from the right. When the Melee icon appears above his head...
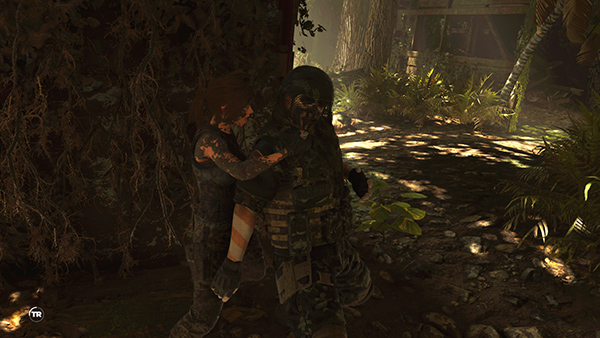
...press the button for a stealth kill.
With him out of the way, dealing with the last 3 mercenaries will be much easier. If you don't have much rifle ammo, you can loot the bodies of the men you just killed to get some, or craft some fire arrows, which work just fine on armored enemies.
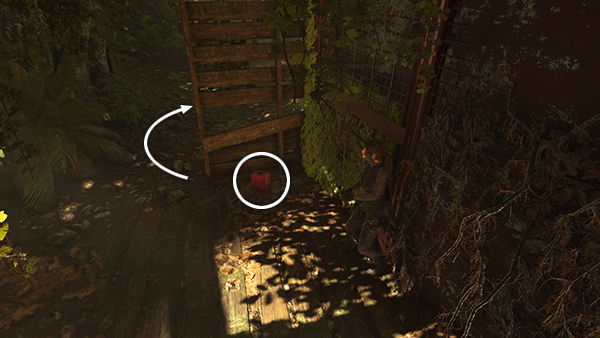
Or, if you want to continue the stealth streak, grab the red jerrycan sitting in the corner to the left of the vine-covered wall. Then exit this shack and head to the right.
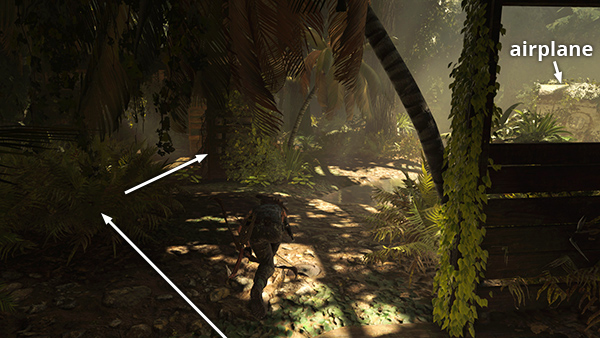
Sneak around behind the crashed airplane...
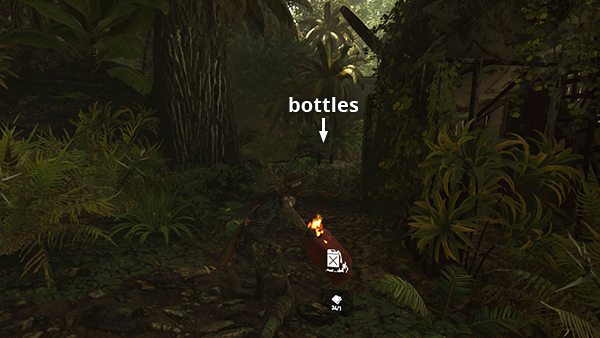
...until you come to a fallen tree with some bottles sitting on top. You could use these to make Molotovs, but the gas can will be more powerful. Hold Alternate Fire (Middle Mouse/R1/RB) to combine the gas can with cloth from your inventory to make a petrol bomb.
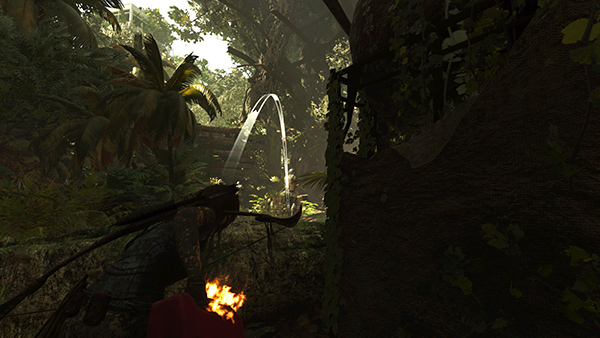
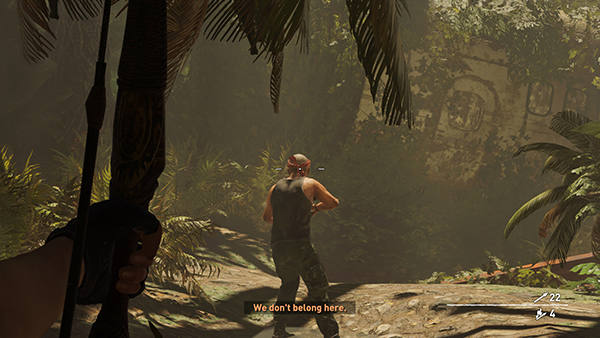
Creep forward until you can see the 3 men in the clearing ahead. Wait until they move fairly close together. Then hold Right Mouse or Left Trigger and you'll see a white arc. Use the mouse or right stick to aim at the nearest man, or somewhere between the three. Then press Left Mouse or Right Trigger to throw the can.
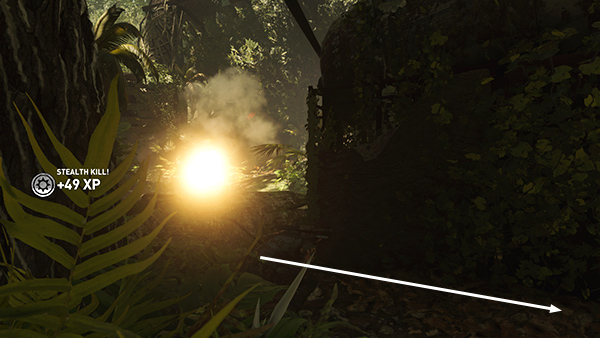
Boom! If you're lucky, you'll take out all 3 enemies, but if any survive, run back to the right and hide in the bushes.
If you like, you can climb a tree and wait for the straggler to come looking for you. Then attack from above when you see the Melee icon.
Copyright © - Stellalune ( ). All rights reserved. Feel free to copy or print this walkthrough for personal use. By all means, share it with friends, but please include this credit line so people can send me their feedback. No part of this walkthrough may be reproduced on another site without permission. Follow this link for details about this site's advertising and privacy policy.