Sanctuary of the Scion - Climb to First Switch
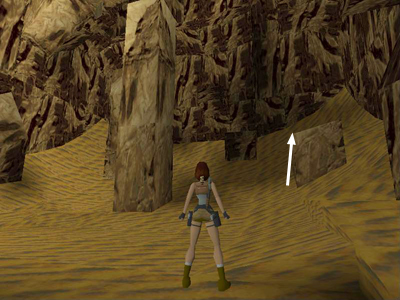
In the northwest corner of the cave you'll find a sandy area with square pillars of various heights. Climb onto the lowest one.
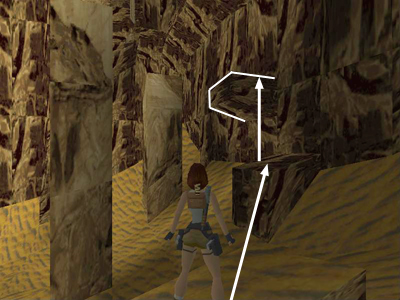
Take a running jump to the next low block up the slope near the cave wall. Pull up onto the ledge above. (It's hard to see in the screenshot above, so I have outlined it in white.)
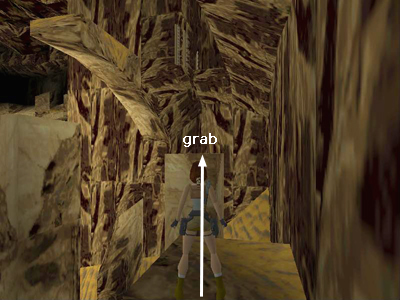
Stand so the tallest pillar is on Lara's left and take a running jump to grab the second tallest pillar and pull up.
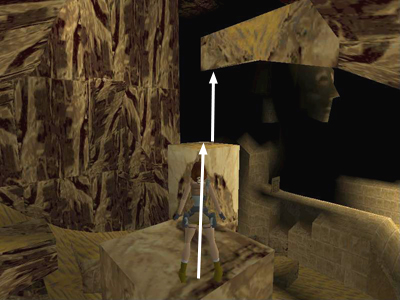
Turn and take another running jump to the tallest. Pull up onto the jutting ledge above.

Walk forward and turn right. Advance slowly as there is a metal jaw trap just around the corner. Carefully run or jump through it, pick up the small medi pack and follow the ledge around to the right toward the switch. (Or, to avoid the blade trap, take a running jump from the jutting ledge to the path. Go left to get the medi pack, then turn around and head toward the switch.)
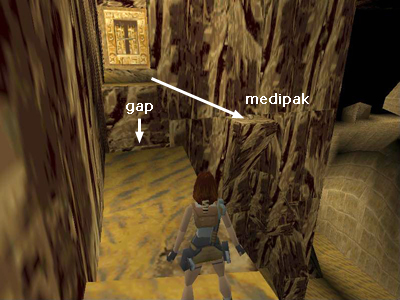
Be careful to jump the gap in the path just before the switch. Throw the switch to open a gold door on the far side of the caves. To get down, either before or after killing the flying mutant, take a standing jump from the edge of the ledge with the switch down to the one with the large medi pack.
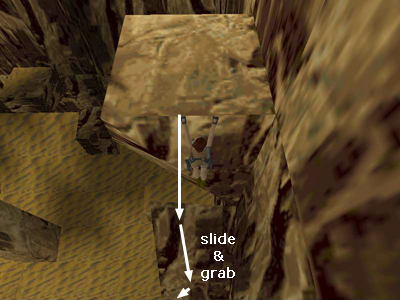
Hang from the far edge of that ledge (so Lara's back is toward the sphinx). Drop and slide down the sloping rocks to the ground, pressing and releasing Action as Lara slides to break her fall.
Walkthrough text and diagrams copyright © 1998- Stellalune (email ). All TR1 screenshots were made using Glidos and Fraps. Feel free to copy or print this walkthrough for personal use. By all means, share it with friends, but please include this credit line so people can send me their feedback. No part of this walkthrough may be reproduced on another site without permission. Follow this link for details about this site's advertising and privacy policy.