Palace Midas - Unreachable Large medi pack
This sequence is also shown in a short video waltkhrough.

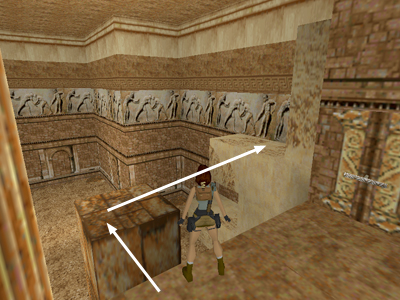
Take a standing jump from the switch platform to the tall, square pillar to the left of the switches. From there, take a running jump over to the middle ledge of the light stone structure.

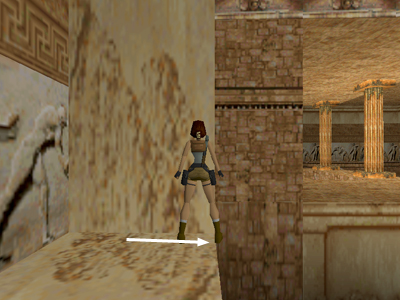
Turn so Lara is facing the light stone block and the open room is on her right. Sidestep to the right until her right foot is at the edge.

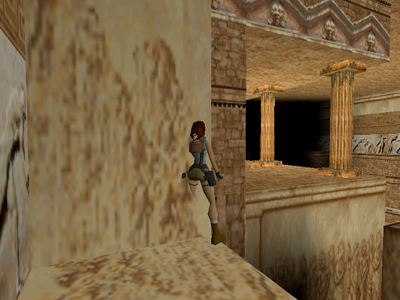
Then turn about 45 degrees to the right so Lara is facing the switch platform. Jump straight up and down in place repeatedly and Lara will creep forward toward the corner of the block.

If you've positioned her correctly, after a couple of jumps, you'll notice her left shoulder and foot start to merge into the block. Keep jumping.

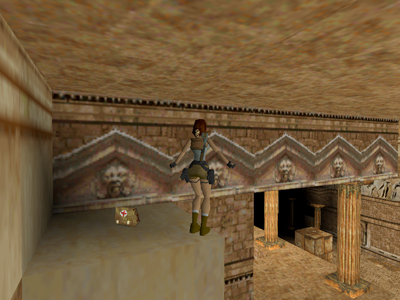
Then, at a certain critical point, she'll suddenly pop up to the top of the block above, right next to the medi pack. Why? As Lara creeps forward, the game program interprets her position as being INSIDE the block. It knows this can't be true, so it "corrects" by repositioning her on top of the block. This is obviously a bug in the game, but apparently the programmers meant it to be exploited, or they wouldn't have put goodies up there.
NOTE: If you need more help using the corner bug, check out my useful bugs page for additional tips and screenshots.)
Walkthrough text and diagrams copyright © 1998- Stellalune (email ). All TR1 screenshots were made using Glidos and Fraps. Feel free to copy or print this walkthrough for personal use. By all means, share it with friends, but please include this credit line so people can send me their feedback. No part of this walkthrough may be reproduced on another site without permission. Follow this link for details about this site's advertising and privacy policy.