The Great Pyramid - Secret #1

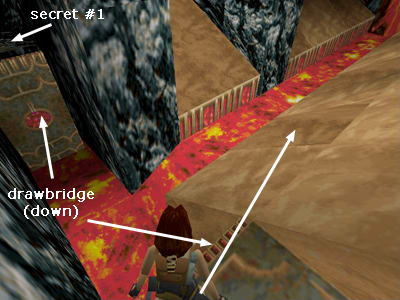
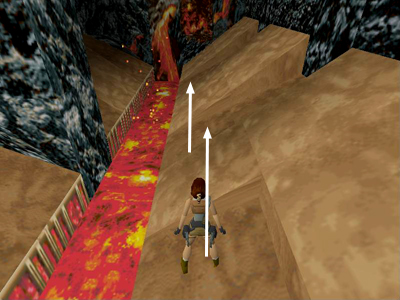
Straight ahead across the lava is a doorway you can't reach yet. There's a drawbridge spanning this gap, but it's down at the moment. For now, take a standing jump to the first flat spot on right side of the tan slope.

Take another standing jump forward to the next flat spot. Now take a running jump to the next. Be sure to set up this jump by walking forward to the little "lip" where the next floor tile juts up a bit. Then hop back before taking the running jump. Otherwise, Lara can stub her toe on that jutting floor tile and do a standing jump instead of a full running jump and end up in the lava.

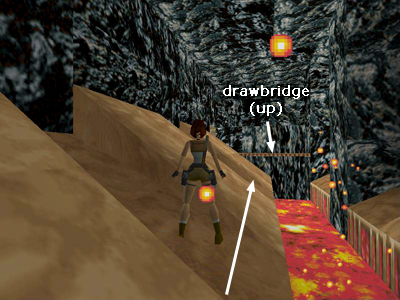
Don't jump across the lava yet. Turn around and you'll see that the drawbridge has now been raised over the lava. It is on a timer but not a particularly fast one. You have about 40 seconds to get across the bridge before it collapses again. Do the same jumps in reverse, with the last standing jump landing you on the bridge. Turn right and run through the doorway into a cave, where you'll find secret #1.
After picking up the items, use the switch twice to raise and lock one section of the bridge in place. Take a running jump across the lava stream back to the entrance. Then repeat the jumps across the flat spots on the angled ledge.

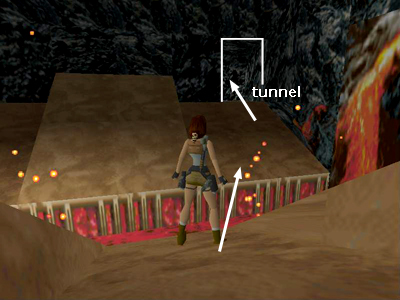
When you reach the last flat spot on the right side, jump across the lava and enter the tunnel there.
Walkthrough text and diagrams copyright © 1998- Stellalune (email ). All TR1 screenshots were made using Glidos and Fraps. Feel free to copy or print this walkthrough for personal use. By all means, share it with friends, but please include this credit line so people can send me their feedback. No part of this walkthrough may be reproduced on another site without permission. Follow this link for details about this site's advertising and privacy policy.